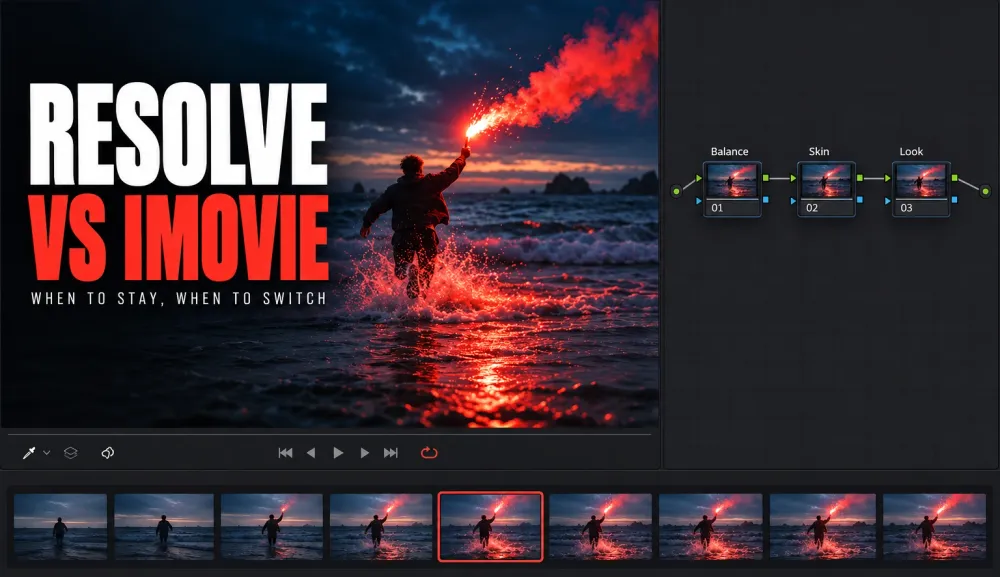
Stay with iMovie if you're cutting family videos, school projects or quick social clips on a Mac, iPhone or iPad. Move to DaVinci Resolve when a project needs a real color grade, cleaner dialogue, layered effects, more control over the export file, or a Windows or Linux machine. Both editors are free, so on an Apple silicon Mac the switch costs you learning time, not money.
Export speed shouldn't decide it. The historical timings below use different Macs, projects and presets, so they don't establish a speed winner between these editors. Two other differences matter more. iMovie for Mac imports iPhone HDR video but shares it in SDR, and it can't hand an editable project to Resolve directly. Final Cut Pro provides a bridge; its 30-day trial can cover a one-time move if the Mac meets the offered build's requirements.
My default is to keep iMovie for anything that's finished in an afternoon and to learn Resolve on the next project that needs a proper grade or a noisy interview cleaned up. A real problem is what gets you onto the Color and Fairlight pages, and those pages are where Resolve repays the extra learning time.
DaVinci Resolve vs iMovie at a glance
The iMovie column describes iMovie for Mac 10.4.5 unless a row says otherwise. The Resolve column describes the free edition of DaVinci Resolve 21.2.
| Question | iMovie | DaVinci Resolve (Free) |
|---|---|---|
| Price | Free on Mac, iPhone and iPad | Free; Studio has a regular $295 US one-time license price |
| Runs on | Mac, iPhone and iPad | Mac, Windows and Linux, plus a separate iPad app; no iPhone or Android phone version |
| Current Mac version | 10.4.5, macOS 26.6 or later | 21.2, macOS 15 Sequoia or later on Apple silicon, 8 GB of memory (16 GB with Fusion) |
| Highest output | Movies up to 4K; iPhone and iPad save up to 4K at 60 fps on supported devices | Up to Ultra HD (3840 x 2160) at 60 fps; larger frames need Studio |
| Color | Color Balance (Auto, Match Color, White Balance, Skin Tone Balance) and clip-wide manual color controls | Color page, where a grade is a tree of separate corrections called nodes |
| Audio | Auto enhance, a Reduce background noise slider and equalizer presets | Fairlight page: per-channel EQ and dynamics, up to six insert effects, Noise Reduction and De-Esser; Voice Isolation is Studio |
| Effects and compositing | Green/blue screen, cutaway and picture in picture from a clip placed above another; 48 video and audio effects | Fusion page for node-based 2D and 3D compositing and motion graphics |
| Stabilization | Stabilize Shaky Video slider and Fix Rolling Shutter | Stabilization on the Edit and Color pages, with a choice of correction models |
| HDR | Mac imports HDR and shares SDR; iPhone and iPad can export HDR | Converts HDR to SDR and includes HDR grading; Dolby Vision, HDR10+ and advanced HDR finishing tools need Studio |
| Moving projects | Send Movie To Final Cut Pro; no XML export | Imports Final Cut Pro 7 and Final Cut Pro X XML, AAF and its own DRT timelines |
Price, versions and Mac requirements
iMovie for Mac 10.4.5 arrived on September 29 as a free update. The Compatibility field in its Mac App Store listing asks for macOS 26.6 or later; the listing separately gives the app size as 3.6 GB. Further down, the listing's description still quotes an older line with macOS 26.4, 4 GB of memory and 3.5 GB of disk, so when the two disagree, plan around the Compatibility field. iMovie for iPhone and iPad is version 3.0.6, also free, and needs iOS or iPadOS 27.0 or later. It saves finished movies to Photos at up to 4K and 60 fps on devices that support it.
Resolve's requirements point the other way. The DaVinci Resolve 21.2 readme lists macOS 15 Sequoia or later, an Apple silicon Mac and 8 GB of memory, or 16 GB when you use Fusion. A Mac still on Sequoia can run the current Resolve but not the current iMovie, and an Intel Mac falls outside Resolve 21's supported list. If you aren't sure which kind you have, the Resolve for Mac guide shows where About This Mac says Chip or Processor, and the system requirements page explains what to do with an Intel machine.
The same readme says the free edition has the same image processing as Studio and opens media of any resolution, but masters and outputs at Ultra HD or lower. Studio has a regular $295 US one-time license price and adds larger output, temporal and spatial noise reduction, Dolby Vision and HDR10+ tools, Voice Isolation and several AI tools; the Free vs Studio comparison goes through the full list. On an iPad, DaVinci Resolve for iPad is free too, with Studio as a separate $94.99 US in-app purchase. There's no Resolve editor for iPhone.
What iMovie does well, and where it stops
iMovie's tools aim at a clean result with few decisions. Apple's guide to adjusting a clip's color covers Color Balance, with Auto, Match Color, White Balance and Skin Tone Balance, plus Color Correction sliders for shadows, highlights, brightness, contrast, saturation and temperature. For sound, Correct and enhance audio gives you Auto enhance to raise the average volume, a Reduce background noise checkbox with a slider, and equalizer presets. Shaky footage gets a Stabilize Shaky Video checkbox with its own slider, plus Fix Rolling Shutter for the wobble a fast pan can leave.
Layered effects all start the same way. Drag a clip above another one in the timeline, then choose Green/Blue Screen, Cutaway or Picture in Picture from the video overlay pop-up. The green-screen key hides a trap: iMovie removes the dominant color in the frame under the playhead at the moment you choose the effect. Park the playhead on an evenly lit frame first, or you'll be moving it and applying the effect again. After the key come Softness, Crop and Clean-up, and the App Store listing counts 48 video and audio effects in all.
iMovie does have animation controls: Apple's picture-in-picture guide shows position keyframes. Its color adjustments apply to the entire clip, even when a range is selected. Resolve's separate color nodes become useful when a white-balance fix, a skin correction and a final look need independent controls.
What DaVinci Resolve adds
Resolve splits the work into pages, and three of them are what iMovie users usually come for.
- Color. The Node Editor on the Color page builds a grade from separate corrections, called nodes, chained into a tree. A white-balance fix, a contrast curve and a skin-tone window each stay adjustable on their own. The beginner color-grading order keeps that tree small.
- Fairlight. Every channel strip carries Track FX, up to six insert effects, Dynamics and a 6-band EQ. Noise Reduction, with De-Hiss and De-Rumble presets, and De-Esser come with the free edition; Voice Isolation needs Studio. The background noise guide walks through a dialogue cleanup.
- Fusion. Node-based effects and motion graphics with 2D and 3D compositing. A green screen here runs through a keyer such as the Delta Keyer, with control over the matte, spill and edges that iMovie's Softness, Crop and Clean-up can't reach.
- Edit and Deliver. Titles, transforms and stabilization with a choice of models, covered in the stabilization guide, plus an export page described further down.
The free edition also runs on Windows and Linux, which matters if your next computer might not be a Mac. I'd start on the Edit page with a short project and leave Fusion for later, because the 30 to 60 second build in the beginner tutorial already forces every decision a first edit needs.
iPhone HDR footage in iMovie and Resolve
If your iPhone records HDR video, this is where the two editors behave most differently. On an iPhone or iPad, iMovie asks at share time: tap Options, then turn HDR on for an HDR file or off for SDR. iMovie for Mac, from version 10.2 on, imports HDR clips but shares them in SDR, according to Apple's HDR support article. To get an HDR file out of a Mac project, Apple sends you to Final Cut Pro or its trial: send the movie over, use a Wide Gamut HDR library and a Rec. 2020 HLG project, then share an HLG master or an HEVC 10-bit file.
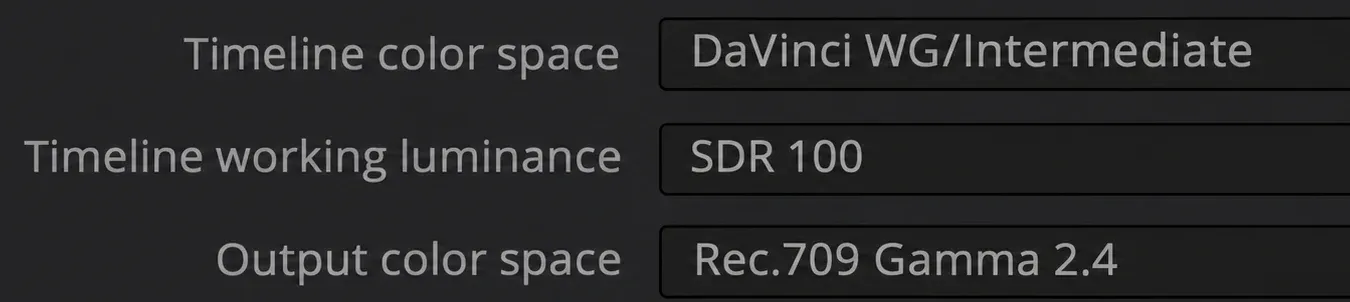
iPhone HDR clips need color management that matches the intended output. Blackmagic's HDR setup chapter explains why an HDR signal viewed as SDR can look flat and desaturated. For an SDR upload, set the input correctly and convert to an SDR output; the iPhone HDR to SDR guide lists the settings. Changing a monitor's brightness alone doesn't perform that conversion.
HDR grading and advanced HDR delivery are different capabilities. Blackmagic's edition feature table lists HDR Grading for the free desktop edition, while Dolby Vision, HDR10+, HDR Vivid, HDR scopes and HDMI HDR metadata are Studio features. The Studio comparison makes the same distinction. For HLG or PQ delivery, check the available 10-bit codec, color tags and HDR monitoring for the actual platform and build. A blanket claim that every HDR export needs Studio is too broad.
Export settings side by side
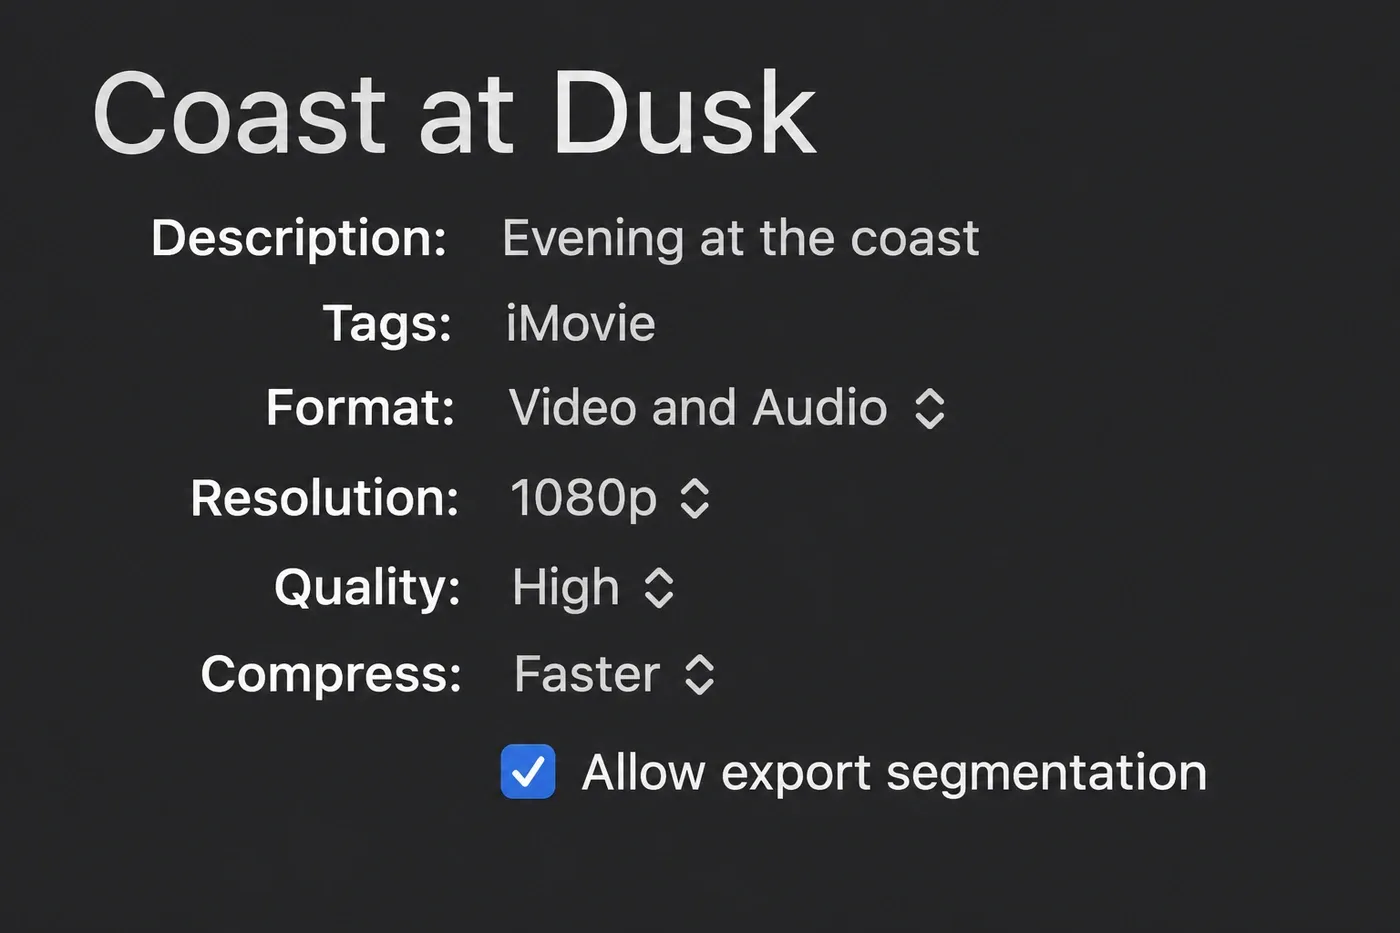
iMovie keeps export in one dialog. Choose File > Share > File, then set the name, Description and Tags, Format (video and audio, or audio only), Resolution, Quality and Compress, as Apple's export guide lays out. A 4K movie can go out at native resolution. Quality's Custom setting gives you a target bit-rate slider, and the estimated file size under the preview thumbnail updates as you drag. On a Mac with an M1 Max, M1 Ultra, M2 Max, M2 Ultra or M3 Max running macOS Sonoma or later, the Allow export segmentation checkbox speeds up HEVC and H.264 exports of projects about three minutes or longer by splitting the work across the chip's media engines.
Compress decides how long iMovie spends converting the file, and Apple's share and export article adds a YouTube & Facebook option that saves a file with optimized settings for you to upload. For a sharper upload, Vimeo's iMovie export help suggests Custom quality at 30 to 60 Mbps for 4K with Compress set to Better Quality, and Best (ProRes) if the picture still suffers.
Resolve gives you two levels. File > Quick Export works from any page, renders the whole timeline or the In-to-Out range, and has presets that upload straight to YouTube, Vimeo or Dropbox. The Deliver page is the full version: Format, Codec, Resolution (which defaults to the timeline resolution), Quality set to Automatic or restricted to a maximum data rate, Encoding Profile, and hardware acceleration where the Mac offers it. Free output stops at Ultra HD and 60 fps.
My default in Resolve is a custom Deliver preset added to Quick Export, because the next upload then reuses the same settings straight from the File menu. The full export walkthrough builds that preset step by step, and the YouTube export settings page has the values for an upload.
Moving an iMovie project into DaVinci Resolve
iMovie has no XML export, so a project can't go straight into Resolve. Final Cut Pro provides a bridge, and its 30-day trial can cover a one-time move if the Mac supports the offered build.
- If the project started on an iPhone or iPad, move it to the Mac by AirDrop or iCloud Drive and choose File > Import iMovie iOS Projects in iMovie for Mac. HDR clips display tone-mapped to SDR there, a missing theme falls back to the default, and a project from a newer iOS version may fail to import until iMovie for Mac is updated.
- If it's a trailer, convert it to a movie first. Only movie projects can be sent.
- Choose File > Send Movie To Final Cut Pro. As Apple's guide to sending projects describes, Final Cut Pro opens and creates a library named after the iMovie library, with an event that holds the movie project and its media.
- In Final Cut Pro, select the project and choose File > Export XML. From format version 1.10 on, the export is an .fcpxmld bundle, according to Apple's XML transfer guide.
- In Resolve, choose File > Import Timeline > Import AAF, XML, DRT (Shift-Command-I). Leave Automatically set project settings and Automatically import source clips into media pool selected. If Resolve can't find the media, it asks for the folder. Use color information applies to Final Cut Pro X XML only.

Blackmagic's Reference Manual recommends gathering the media under one main folder before the XML export, so do that in Final Cut Pro first. Its Final Cut Pro X import table lists what comes across: color corrections, composite modes, multiple tracks, video transitions, opacity, position, scale and rotation, speed changes, nested sequences, linked audio, mixed frame rates and text generators. Audio transitions, flips and flops, pitch and yaw, and freeze frames don't, and most unsupported effects are preserved internally for an XML or AAF round trip, without being displayed in Resolve. Check every freeze frame and audio fade on the new timeline before you start grading.
Expect a little conforming too. Creative Video Tips imported an FCPXML 1.11 export into Resolve and still had to conform three Sony FX3 clips by hand. If clips come in red, the Media Offline guide helps you work out which kind of missing media you have.
Without Final Cut Pro, export a master from iMovie at the highest quality and split it back into shots with Scene Cut Detection on Resolve's Media page. You lose separate tracks, so music and dialogue arrive mixed together. I'd take the Final Cut route when separate clips, tracks or titles still need work. A master can handle simpler finishing changes, but keep the originals for RAW adjustments or corrections that need the picture before titles and transitions were baked in.
Export speed: what the test results show
These historical tests don't compare iMovie and Resolve on the same Mac with the same project. The table keeps each run separate and divides export time by timeline length for context: 0.5x means a two-minute timeline rendered in one minute. That calculation normalizes duration only; it doesn't equalize source codecs, effects, export quality or hardware.
OWC's 2020 iMovie test used the same 2:03 4K project on two Macs, with a title, audio, stabilization and Magic Wand. Export took 191.5 seconds on the M1 MacBook Air and 261.3 seconds on the Intel Core i9 MacBook Pro, or 1.56x and 2.12x the timeline length. A separate 2023 MacRumors report gives about four minutes for a five-minute drone edit. That poster owns both an M1 Air and an M2 mini and doesn't clearly identify which rendered that example. Resolve's rows come from Creative Video Tips' 2021 M1 Max test, its 2024 M4 comparison, Simon Says' M1 Max tests and ProVideo Coalition's 2024 review. Keep their versions and workloads separate when reading the numbers.
| Editor | Publisher and Mac | Timeline and export | Export time | Time ÷ length |
|---|---|---|---|---|
| iMovie | OWC, 2020; MacBook Air M1 | 2:03 4K timeline with a title, stabilization and Magic Wand; 4K High, Better Quality | 191.5 s | 1.56x |
| iMovie | MacRumors forum, 2023; poster owns M1 Air and M2 mini, 16 GB; rendering Mac unspecified | 5-minute drone video with cuts and music | about 4 min | about 0.80x |
| Resolve | Creative Video Tips, 2021; MacBook Pro M1 Max | 1-minute mixed-codec timeline to H.264; Resolve 17.4.1 | 18 s | 0.30x |
| Resolve | Creative Video Tips, 2021; MacBook Pro M1 Max | 2-minute mixed-codec timeline to H.264; Resolve 17.4.1 | 35 s | 0.29x |
| Resolve | Creative Video Tips, 2024; Mac mini M4 | 13-minute UHD timeline, Resolve 19.1 Studio Quick Export; lower data rate than the compared Final Cut preset | 446 s | 0.57x |
| Resolve | Simon Says; MacBook Pro M1 Max, 64 GB | 3:50 4K timeline, H.264 source with transitions and color, to H.264 | 60 s | 0.26x |
| Resolve | Simon Says; MacBook Pro M1 Max, 64 GB | 1:18 4K timeline, ProRes 422 source to H.264; stabilization state unclear for this output | 23 s | 0.29x |
| Resolve | Simon Says; MacBook Pro M1 Max, 64 GB | 2:22 4K timeline, 5K RED RAW source, to H.264 | 151 s | 1.06x |
| Resolve | ProVideo Coalition, 2024; Mac mini M4 Pro, 48 GB | 2:42 1080 Canon project to H.264, Resolve Studio 19 | 18 s | 0.11x |
| Resolve | ProVideo Coalition, 2024; MacBook Pro M3 Max | Same project | 18 s | 0.11x |
| Resolve | ProVideo Coalition, 2024; Mac Studio M2 Max | Same project | 20 s | 0.12x |
| Resolve | ProVideo Coalition, 2024; Mac Studio M1 Ultra | Same project | 21 s | 0.13x |
Same-Mac comparisons also change with the task. In Creative Video Tips' Resolve 17.4.1 versus Final Cut Pro 10.6 test, the one- and two-minute H.264 exports tied at 18 and 35 seconds. The ProRes export with titles took 14 seconds in Resolve and eight in Final Cut; with titles muted, both took six. ProVideo Coalition's 2024 Canon project provides four same-project H.264 pairs across four Macs: the median Resolve-to-Final-Cut time ratio is 1.46, ranging from 0.90 to 2.33. On the M4 Pro mini alone, Resolve Studio 19 took 18 seconds and Final Cut Pro 10.8.1 took 20. That four-Mac summary comes from one publisher and one 2:42 project; it doesn't predict a different project's result.
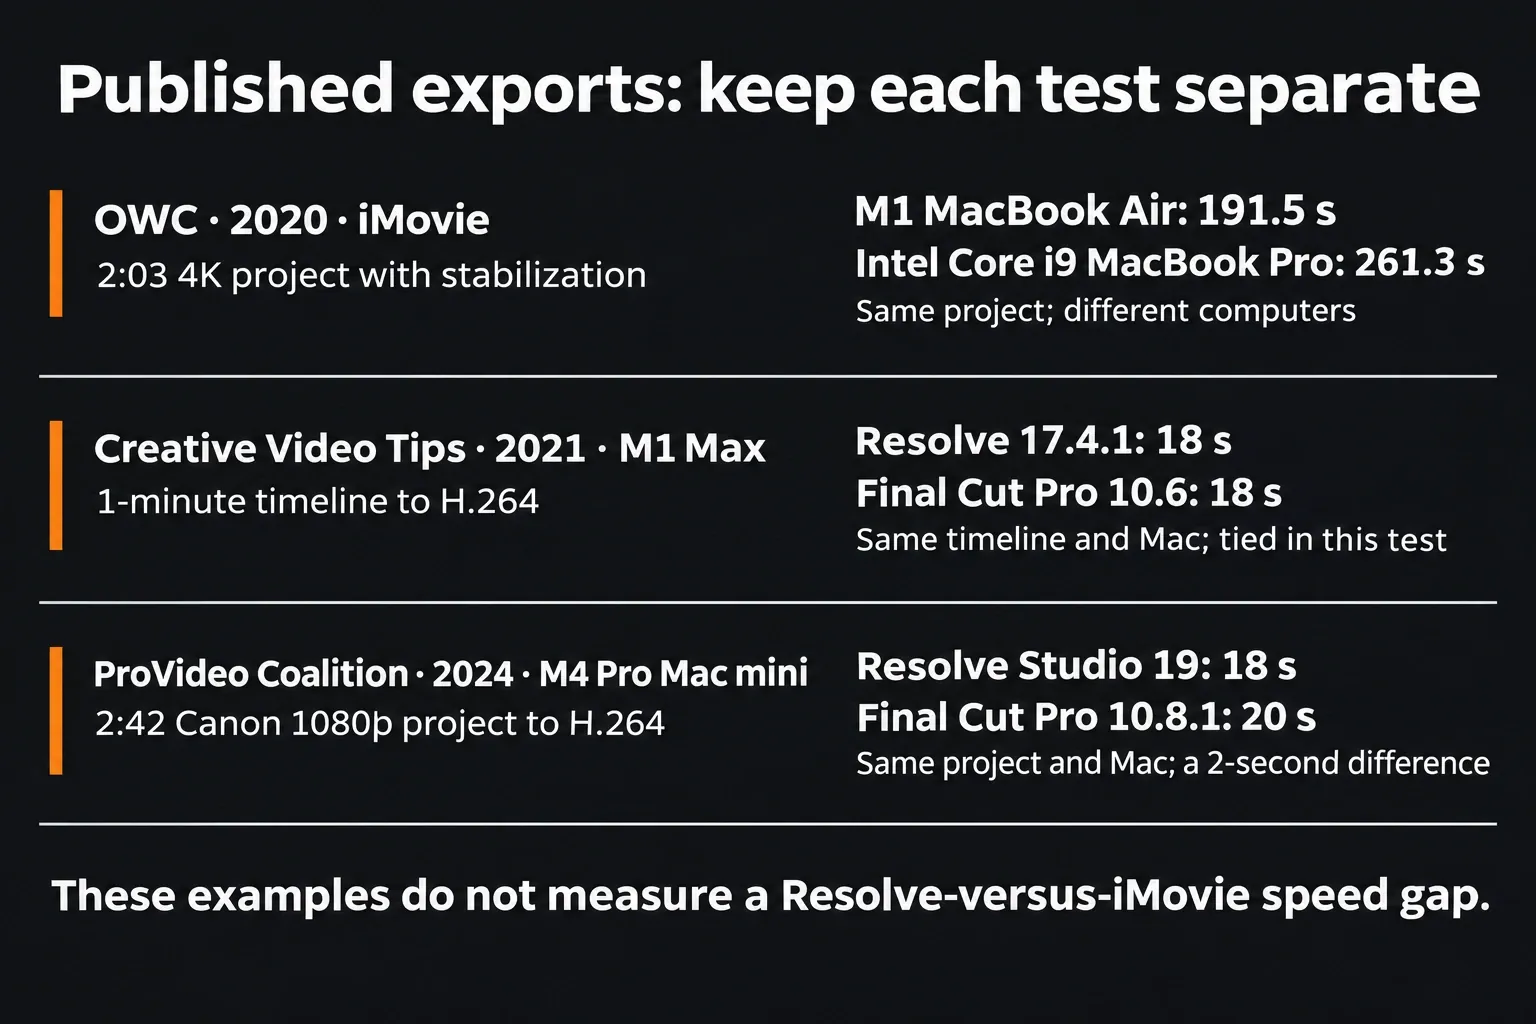
I wouldn't switch editors on these export timings, because they don't isolate a Resolve-versus-iMovie difference. For a speed decision, compare the same short section on the same Mac, with matching resolution, codec, effects and output quality, then inspect both final files.
When Final Cut Pro is the better next step
Apple's Final Cut Pro page promises to "easily import your iMovie project", and that's the same Send Movie route described above, with no XML step. It's also Apple's route to an HDR file from an iMovie project. I'd try the Final Cut Pro trial before learning Resolve whenever a large iMovie library has to keep working, because the project and media transfer without manually rebuilding the timeline.
Apple lists a 30-day Creator Studio trial for new subscribers, then US prices of $12.99 a month or $129 a year, with education rates of $2.99 a month or $29.99 a year. Final Cut Pro is also sold for $299.99 once. The general product page lists macOS 15.6 and 8 GB of memory, with 16 GB recommended, but the standalone 12.4 App Store listing requires macOS 26.6 or later. Check the exact build offered to the Mac before relying on the trial as a transfer tool. Resolve Free has the price and cross-platform advantage; the Resolve vs Final Cut Pro comparison covers the editing differences.
Which editor should you use?
Stay with iMovie if
- you start projects on an iPhone or iPad and finish them in iMovie for Mac
- your videos are family, school or social clips delivered in SDR
- a clip-wide color balance and one noise slider already fix your footage
- you want HDR out of an iPhone edit, where the switch sits in the share Options
Move to DaVinci Resolve if
- shots need to match each other, or a look has to be built from separate corrections
- dialogue needs real cleanup with EQ, dynamics and noise reduction
- a shot needs a proper green-screen key or layered titles and effects in Fusion
- you want control over the export codec, data rate and presets
- you work on Windows or Linux, or might later
Try Final Cut Pro first if
- you have a large iMovie library to keep editing
- you need HDR delivery from a Mac project
- you'd rather stay in Apple's interface and can pay for a subscription or license
Questions about DaVinci Resolve and iMovie
Is DaVinci Resolve harder to learn than iMovie?
Yes. iMovie works in one window, while Resolve spreads the job across pages for editing, color, effects, audio and export. A first project only needs the Edit page, and a 30 to 60 second video with one title and a simple mix covers the basics.
Will DaVinci Resolve run on my older Mac?
Resolve 21.2 needs an Apple silicon Mac with macOS 15 Sequoia or later and 8 GB of memory, or 16 GB for Fusion. An Intel Mac is outside that list and needs an earlier Resolve build; the requirements guide explains how to check. The current iMovie, 10.4.5, needs macOS 26.6 or later.
Can I open an iMovie project in DaVinci Resolve?
Not directly. Send the movie to Final Cut Pro, export FCPXML from there and bring it in with File > Import Timeline. Without Final Cut Pro, export a high-quality master from iMovie and split it into shots with Scene Cut Detection.
Can I edit on an iPhone with DaVinci Resolve?
No. Blackmagic doesn't make a Resolve editor for iPhone or Android phones, so iMovie is the free choice on an iPhone. On an iPad, DaVinci Resolve for iPad is free. The Resolve for Android and iPhone page covers the phone options.
Is DaVinci Resolve really free?
Yes. Free 21.2 has the same image processing as Studio and limits output to Ultra HD. Studio has a regular $295 US one-time license price and adds larger output, Dolby Vision and HDR10+ tools, Voice Isolation and advanced noise reduction, and the free version features guide lists what the free edition includes.
Why does iPhone video look washed out in DaVinci Resolve?
iPhone clips are often HDR, and a timeline without color management set up for them shows them flat. The iPhone HDR to SDR guide has the settings. If the file only looks washed out after export, the washed-out export fixes deal with that separate problem.
Verdict: which free editor to keep
iMovie is the better editor for most quick Mac and iPhone projects, and there's no prize for leaving it early. Move to Resolve the first time a video needs a matched grade, cleaned-up dialogue or a real composite, and keep both installed, since neither costs anything. For a big iMovie library or an iMovie project that must stay HDR on the Mac, try the Final Cut Pro trial first. The comparisons hub has the other head-to-heads if Resolve isn't the only editor on your list.