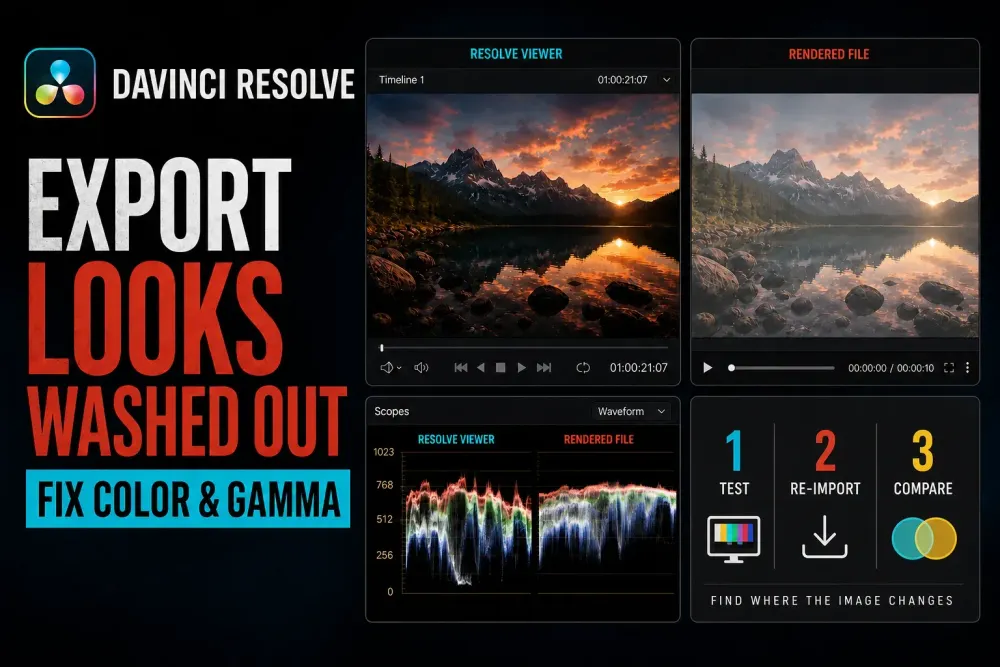
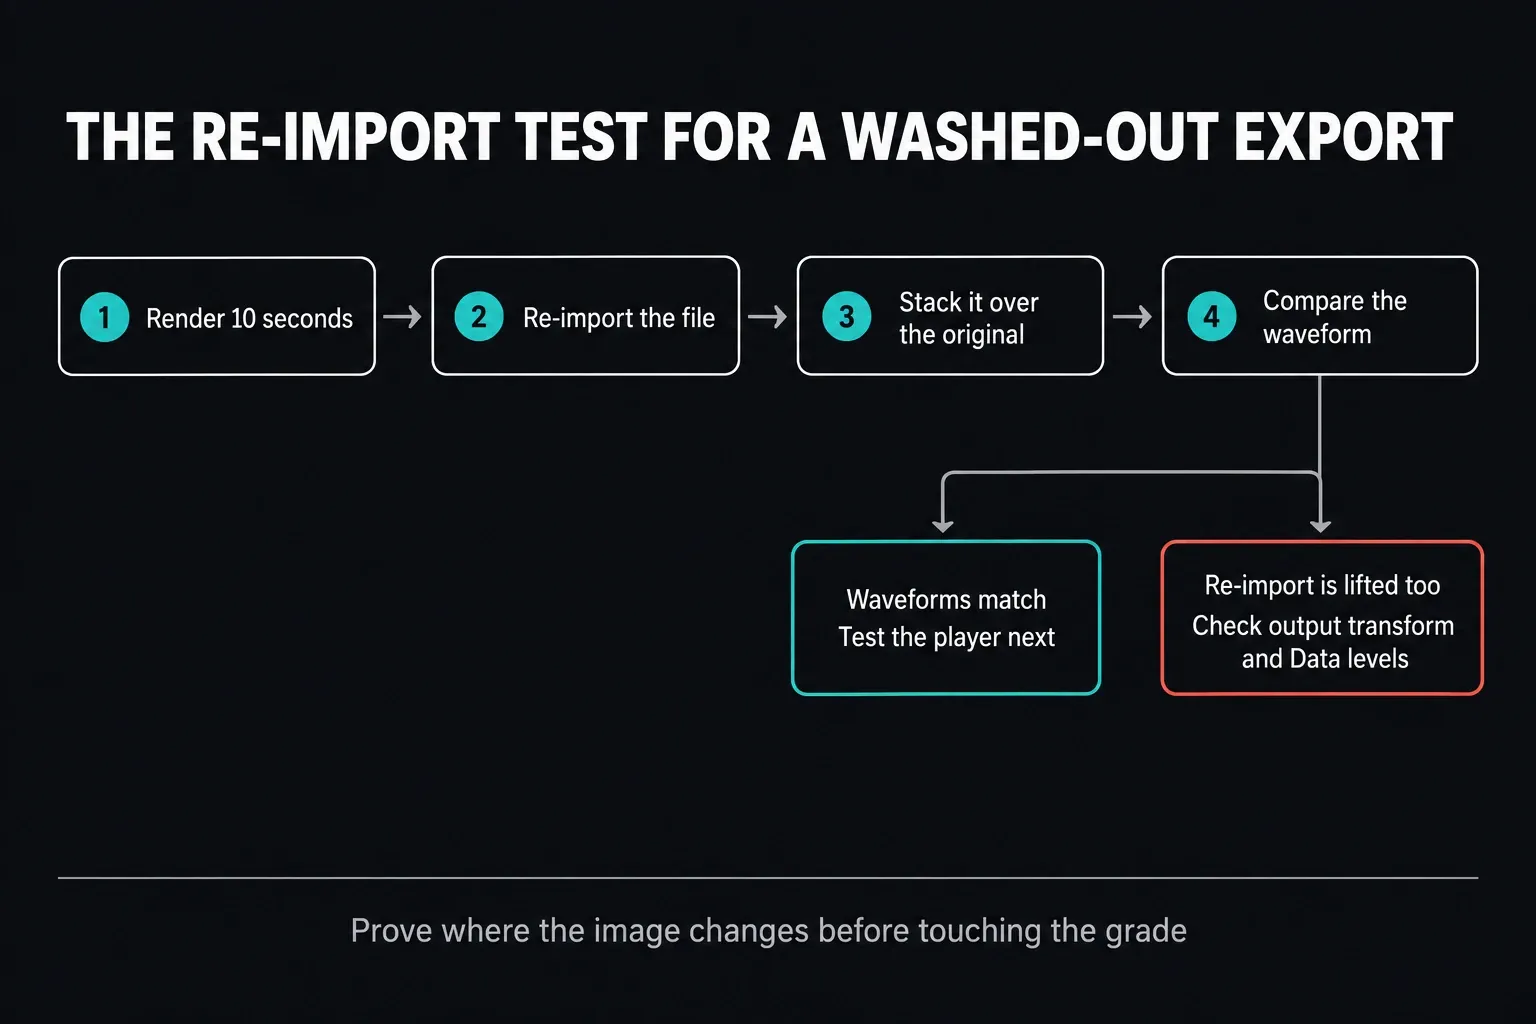
Quick answer: hold off on adding contrast or flipping every Rec.709 setting. Render ten seconds of a shot with clear blacks, midtones and highlights, re-import that file into Resolve, line it up with the original, and compare the same frame on the waveform.
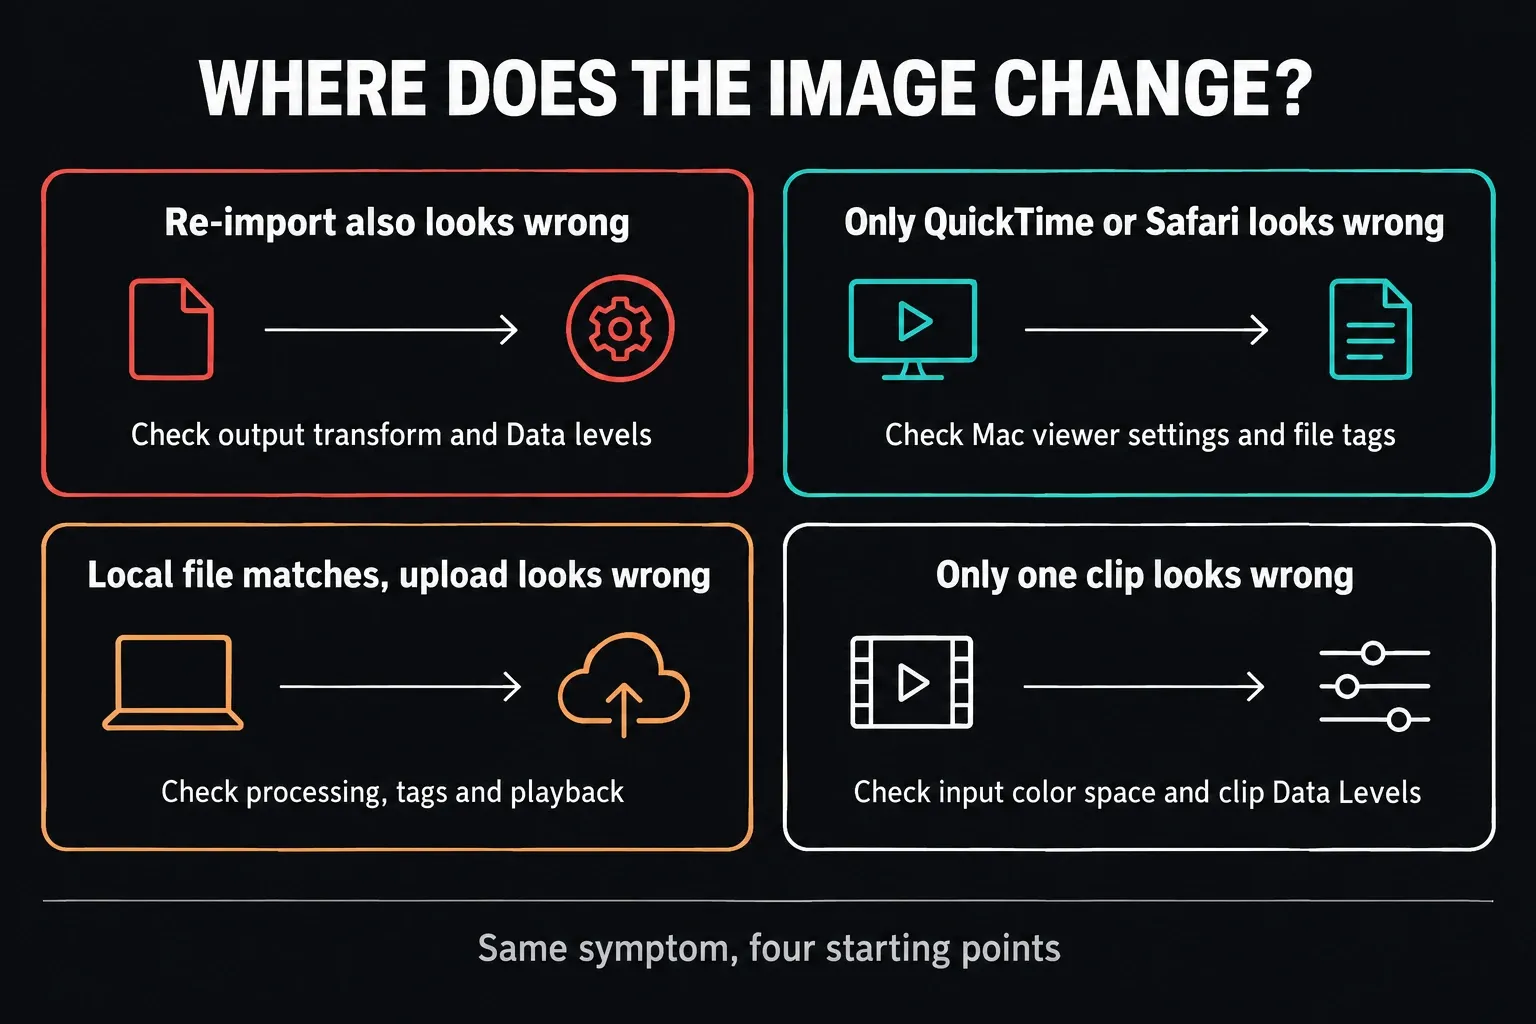
If the re-imported render is also flatter or brighter, look at the output transform and Data levels. If it matches inside Resolve but looks washed out only in QuickTime, Safari or another player, the encoded image may well be fine, and the difference can come from display color management or file tags.
That split is what saves the grade. A player mismatch, a range mismatch and a missing output transform can all look like lifted blacks and weaker saturation, but no single control fixes all three.
I rechecked the menus and behavior below on October 1, 2026 against the current DaVinci Resolve 21 Reference Manual. At that check, Blackmagic's support center listed Resolve 21.1 build 14, released September 8, 2026, as the current release. On October 5 it showed 21.1.1 build 10, posted October 2; that update's release notes don't change the export or color-management settings covered here.
Still need the whole render sequence, from format and codec to range, audio and queue? Start with the complete Resolve 21 export guide. The DaVinci Resolve export hub then points you to destination-specific settings and failure checks. This page has one narrower job: proving why the finished image no longer looks like the timeline.
The two-minute proof test
- Pick a short section with a dark area, a face or neutral object, and a controlled highlight. A title card or a fully black frame on its own won't tell you much.
- On the Deliver page, render a ten-second test with the same settings as the problem job.
- Import the rendered file into the Media Pool and place it above the original in a duplicate timeline. Line up the same frame before you judge anything.
- Toggle between the original and the re-import, and compare the waveform, not just the viewer. Compression can introduce small differences; what you're looking for is a material lift, crush or transform.
- Play that same local file in the destination where it looked wrong. Now you know whether the difference lives in the file, only in the player, or only after upload.
A Resolve viewer still next to a QuickTime screenshot is weak evidence, because each window can go through a different display path.
Re-importing the actual file pulls the comparison back into one application. It won't prove every metadata field is correct, but it separates an image that changed from an interpretation that changed.
Use the failure location, not the visual adjective
| What you observe | Most useful first check | Do not start with |
|---|---|---|
| The re-import is also brighter, flatter or crushed | Output transform, Deliver Data levels, and the re-imported clip's level interpretation | QuickTime-only preferences |
| The re-import matches, but QuickTime or Safari differs | macOS viewer color profile behavior and QuickTime-oriented file tags | Regrading the timeline |
| The local file matches, but the processed upload differs | Platform processing status, embedded tags, SDR/HDR handoff and another playback path | Raising bitrate to repair gamma |
| Only one source clip is wrong before and after export | That clip's input color space, camera transform and clip Data Levels | Changing the whole project output |
| The job stops or reports an error | The exact error and failing frame | Color or gamma settings |
If the job never completes, this color diagnostic isn't your page; go to the render-failed checklist. A stopped job and a completed file with different color are two separate problems.
If the re-imported render is also washed out
This is the encoded-file branch. Start in Project Settings > Color Management.
In a color-managed project, the Output color space sets the destination mapping. In a manual CST workflow, the final output transform has to be present exactly once. Leave it out and log footage can stay flat; apply it twice and contrast and color get pushed the other way.
I won't rebuild the project's color pipeline on this troubleshooting page. That decision belongs to the RCM, CST and LUT-order guide.
The test here is smaller: bypass nothing, change nothing, and confirm that the timeline already has one coherent input-to-output path. If the source looks wrong inside Resolve before export, the export is only preserving a problem that started earlier.
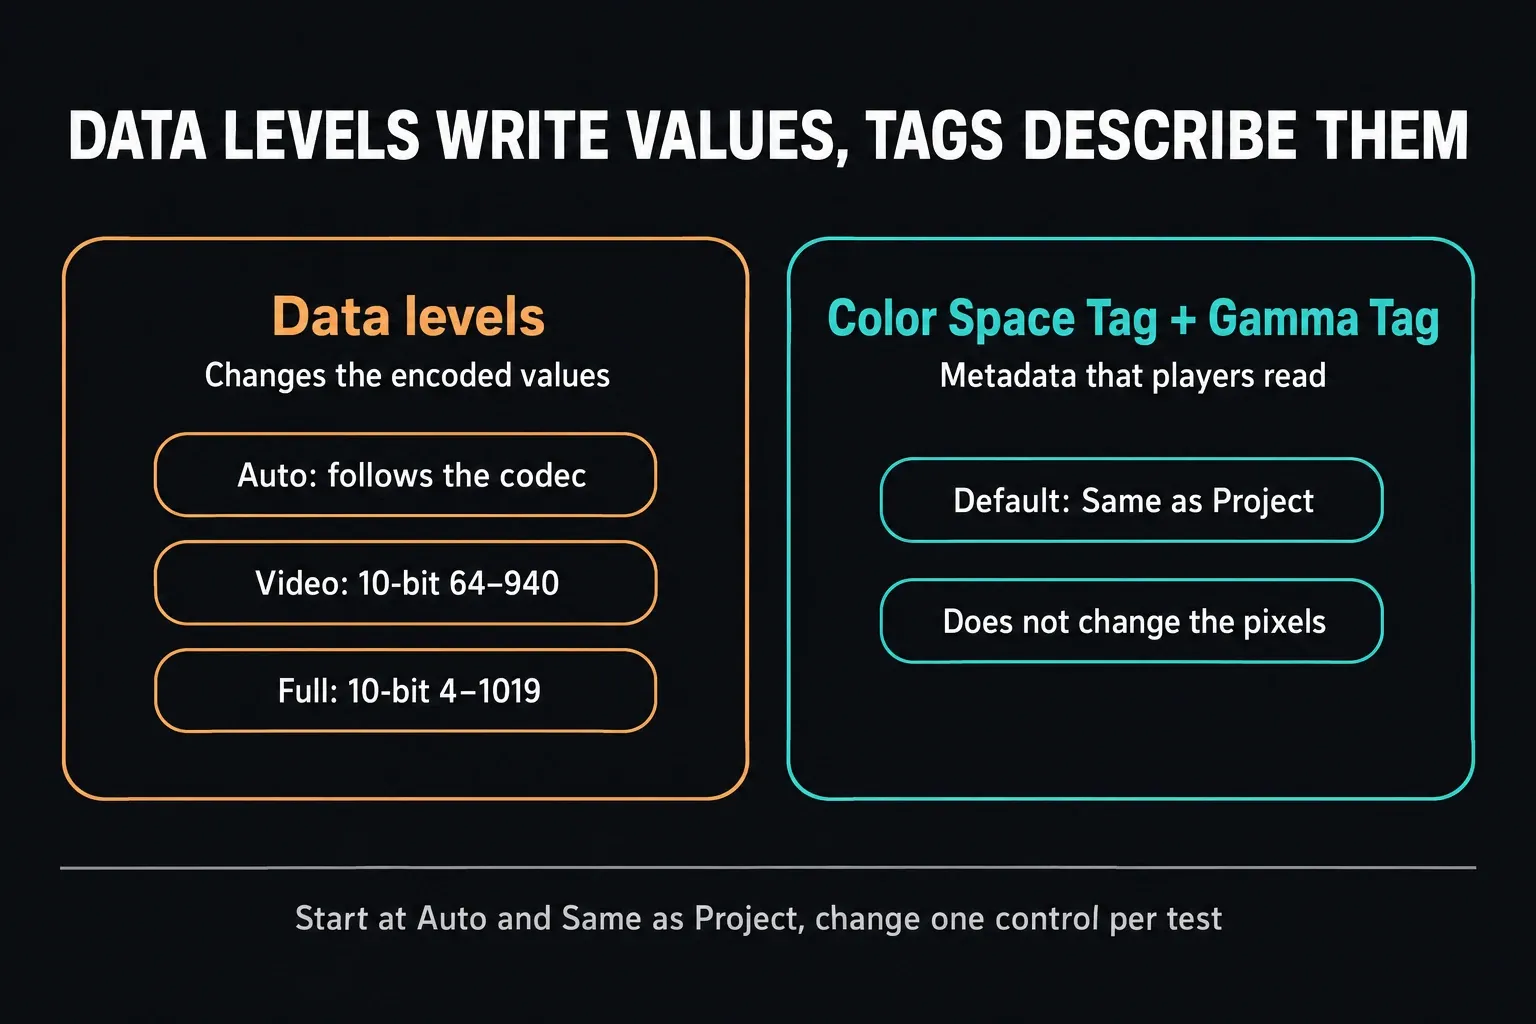
Next, open Deliver > Custom Export > Video > Advanced Settings. Resolve documents Data levels: Auto as the normal starting point, because Auto picks the range associated with the selected codec.
Video and Full are overrides, not quality levels. Full doesn't mean “more dynamic range,” and Video doesn't mean “lower quality.” Both describe how the signal is mapped into the file.
If the re-imported waveform shows lifted blacks or crushed highlights, render the same short section with Data levels set to Video, then again with Full. Change only that one control. Re-import both tests and label them clearly.
Check the re-imported clip under Clip Attributes > Video > Data Levels as well, but don't override the export and the clip interpretation at the same time, or the test can no longer tell you which side was wrong.
For Deliver-page output, Resolve gives 10-bit Video-range luma as 64–940 and Full output as 4–1019. Those numbers explain how a mismatch can lift blacks or crush the extremes. They aren't a reason to force Full for every computer file.
Data levels and color tags are not the same fix
Data levels controls how image values are written. Color Space Tag and Gamma Tag are metadata that compatible software can use to interpret the file. Changing a tag won't put back a missing creative grade or replace a CST. And changing Data levels isn't a way to tell QuickTime which display gamma you meant.
For QuickTime renders, Resolve bases the tags on the Timeline Color Space when Resolve Color Management is disabled and on the Output Color Space when it's enabled. The Deliver controls default to Same as Project, so when a file carries a tag you didn't expect, the project output setting is the first thing I'd check.
A safe comparison changes one layer at a time:
- Keep Data levels at Auto and test the tags that match the project.
- If the re-import matches but a target player differs, make a tag-only test for that destination.
- If the re-import itself differs, go back to the encoded range or output transform before you touch any display preferences.
If only QuickTime or Safari looks washed out on a Mac
On macOS, Resolve 21 has three separate controls under DaVinci Resolve > Preferences > System > General:
- Use Mac Display Color Profile for viewers lets the Resolve viewers use the display profile selected in macOS, through ColorSync.
- Viewers match QuickTime Player when using Rec.709 Scene adjusts the Resolve viewer so its gamma characteristics match QuickTime Player in that case.
- Automatically Tag Rec.709 Scene Clips as Rec.709-A changes how Rec.709 QuickTime files are tagged. Blackmagic describes it as useful when the QuickTime result doesn't match Resolve and you're exporting for the web rather than broadcast.
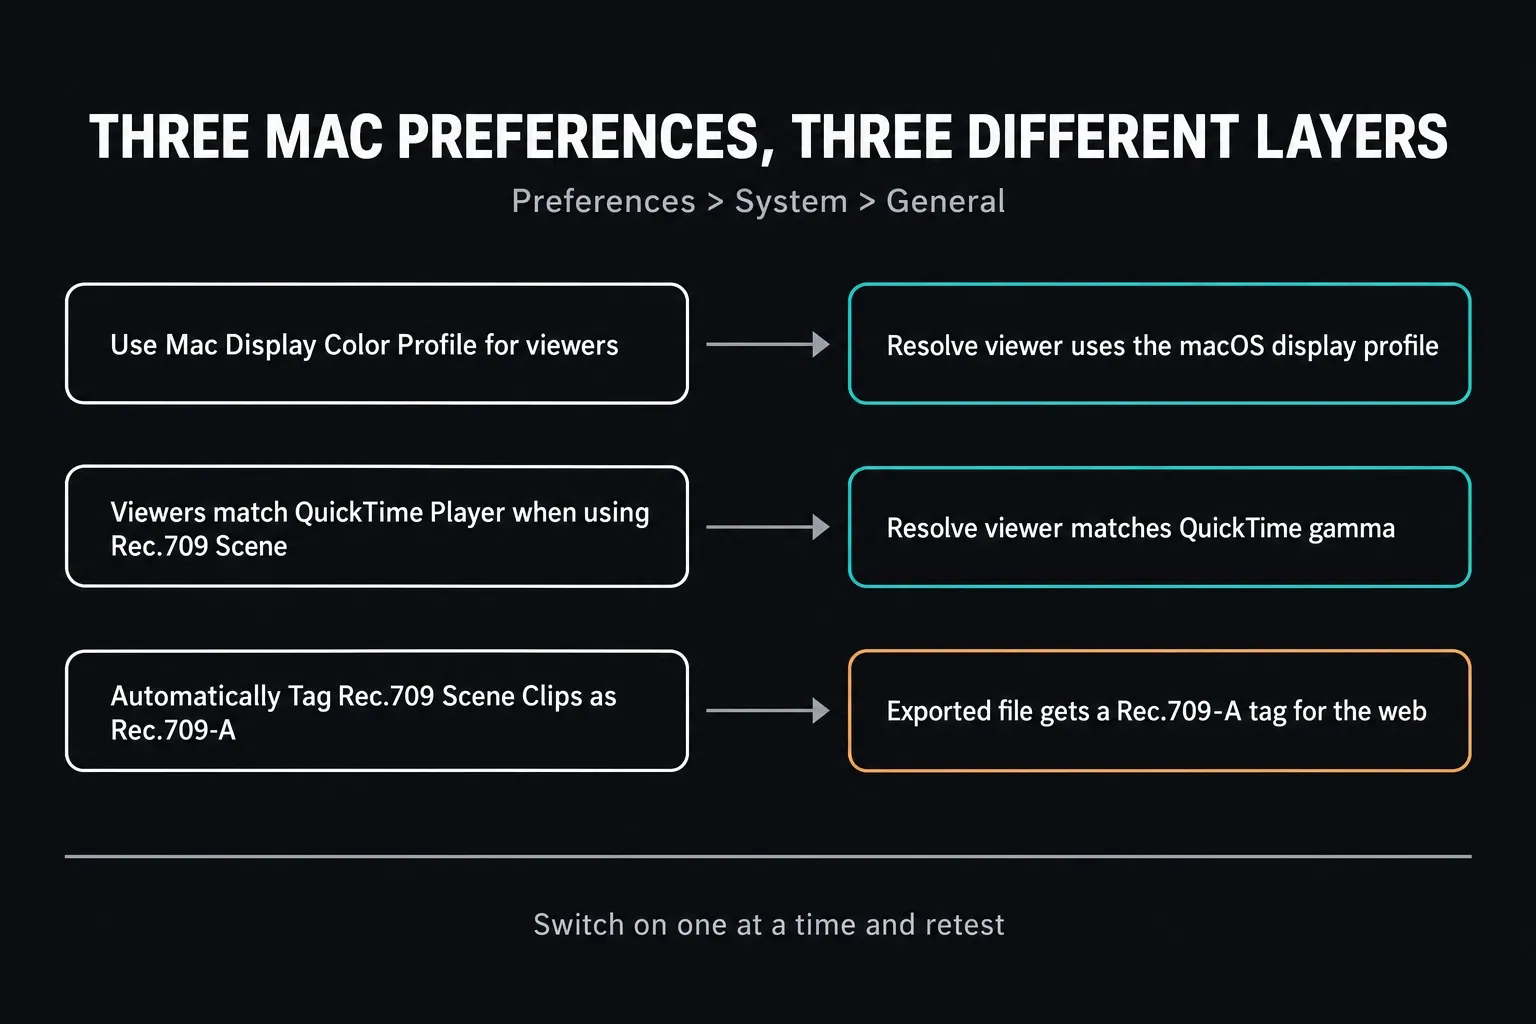
The first two change what you see in Resolve's viewer. The third changes how qualifying files get tagged. That's why switching on all three at once makes a useless test: the reference and the output interpretation move together.
Rec.709-A is a branch for one kind of destination, not another name for “correct Rec.709.”
If the master has to work on televisions, Windows systems, review platforms and macOS applications, compare the same file in those real destinations before you choose a tag. Don't bake extra contrast into the grade just to make one Mac player resemble the Resolve viewer; that contrast becomes part of the image everywhere else.
If the local file matches but YouTube looks different
First, wait until the intended resolution has finished processing. Then compare the processed upload with the local file in more than one playback path.
If the local file already differs in Resolve after re-import, YouTube isn't where it went wrong. If the local file matches and only the processed upload changes, look at the embedded primaries, transfer and matrix tags, and make sure an SDR project wasn't delivered as an ambiguous HDR file. For a deliberate PQ or HLG master, follow the HDR delivery workflow to match the file to its output target.
Bitrate can cause blocking, banding and softness, but it doesn't normally explain a gamma lift across the whole frame. The YouTube export settings guide covers the current codec, bitrate, audio and SDR/HDR upload details, so this page stays on the color handoff.
Washed-out export on Windows
The same re-import test still works. The QuickTime-specific macOS preferences aren't your first branch here, but output transforms, Data levels, file tags, HDR-to-SDR handling and player behavior all still matter.
Compare the file in Resolve and in at least one other current player. If Resolve and the waveform match while one player differs, don't force Full range or rebuild the grade until another destination shows the same shift.
If only one camera's clips or one screen recording looks flat inside Resolve, inspect that source, not the Deliver page.
Mixed SDR and HDR captures, log media without an input transform, and clips interpreted at the wrong range can all produce a “washed-out export” that was visible before the render. The waveform and RGB Parade guide shows how to compare exposure and channels without trusting two differently managed windows.
Check the SDR/HDR boundary
An HDR timeline delivered as SDR needs a deliberate output transform or tone-mapping path. An SDR timeline shouldn't pick up HDR tags by accident.
Check the project output color space, the actual target specification, the codec's bit-depth support and the rendered file metadata together. Picking a different Rec.709 gamma at random won't solve an HDR handoff.
With phone, console or screen-capture media, find out whether it's SDR, PQ or HLG before grading. A file that looks washed out on import and stays washed out after export is an input and color-management problem, not something an export-only tag fix will sort out.
Five fixes that usually destroy the diagnosis
- Adding contrast before the re-import test. You'd be changing the image to make up for a display path nobody has proven yet.
- Forcing Full because it sounds higher quality. A wrong range override can create the very lift or crush you're trying to remove.
- Setting Rec.709-A everywhere. It's a specific Mac/QuickTime/web branch, not a universal delivery standard.
- Changing project output, CST nodes, Data levels and tags in one render. Even if the result looks good, you won't know which change did it.
- Comparing screenshots from different applications. Re-import the file and compare the same frame and scopes first.
Free vs Studio
Nothing in this test depends on Studio. The manual documents the project, Deliver and macOS viewer controls used here without a Studio-only restriction, so the core test works the same in Free.
Codec and hardware-encoding choices still depend on the operating system, edition and installed hardware, so run the short test with a codec your installation actually offers. Studio doesn't remove the need to identify the output transform, the range and the playback destination.
Washed-out DaVinci Resolve export FAQ
Why does my DaVinci Resolve export look washed out?
The usual branches are a missing or doubled output transform, a Video/Full data-level mismatch, player or display color management, incorrect color/gamma tags, or an SDR/HDR handoff problem. Re-import a short render and compare the same frame and waveform to identify the branch before you change the grade.
Should I set DaVinci Resolve Data Levels to Auto, Video or Full?
Start with Auto, because Resolve normally selects the range that suits the codec. If the re-imported file shows lifted blacks or crushed highlights, test Video and Full separately on the same short range. Don't treat Full as a quality upgrade.
Does Rec.709-A fix washed-out exports on a Mac?
It can help in a Mac/QuickTime-oriented web workflow, but it isn't a universal Rec.709 fix. First prove that the re-imported image matches and that the difference only shows up in the target playback path, then test the tag across the destinations you care about.
Why does the export match in Resolve but not in QuickTime Player?
The encoded image can match while QuickTime and Resolve apply different display or gamma interpretation. Check Resolve's macOS display-profile and QuickTime-matching preferences separately from file tagging, and change only one layer per test.
Why does my local export look correct but YouTube looks washed out?
Make sure processing has finished, compare more than one playback path, and check the file's SDR or HDR tags. A correct local re-import narrows the issue to metadata, platform processing or playback, not the creative grade.
Can I fix the problem by adding contrast before export?
Only when the grade itself genuinely lacks contrast. Adding contrast to make up for one player changes the encoded image for every destination. Run the re-import test first so a display difference doesn't turn into a permanent grading error.
Why is only one clip washed out after export?
If the same clip also looks wrong inside Resolve, check its input color space, camera transform and Clip Attributes Data Levels. A one-clip problem rarely justifies changing the whole project's output color space or every render tag.
