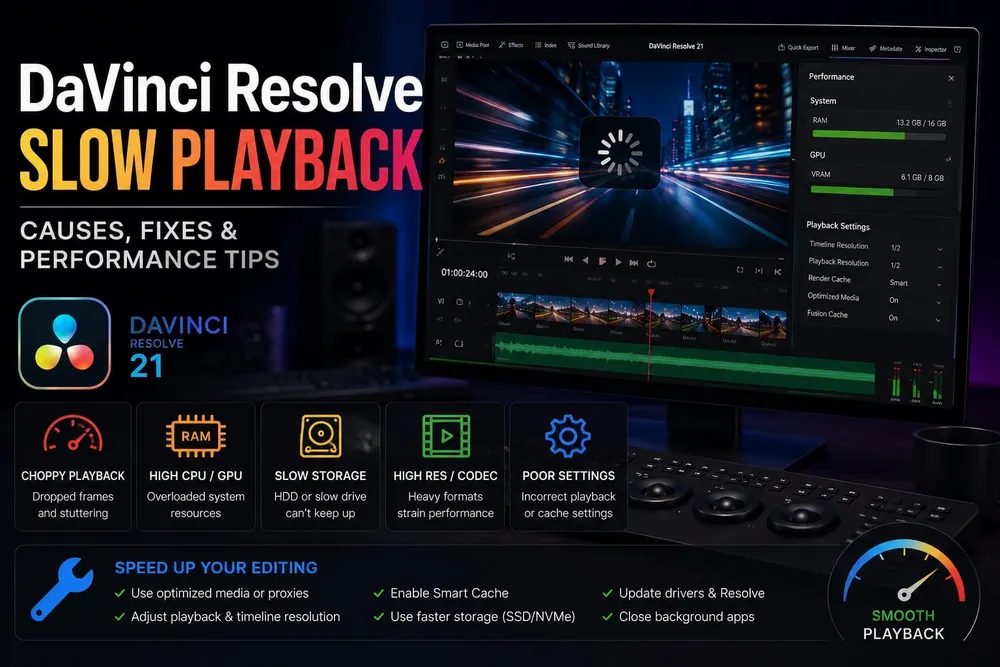
Start With One Repeatable Playback Test
Lag feels random when every test uses a different clip and a different playhead position. Before you open a single preference, make the problem repeatable: find a range that fails every time, note the timeline frame rate, and keep the Viewer open so you can watch the FPS readout. In Resolve 21, a green GPU status indicator means current playback still has processing headroom; red means it has dropped below real time. That light reports the outcome. It can't tell you why. If the real symptom is offline media, GPU memory, audio or a failed export, the DaVinci Resolve troubleshooting hub routes you to the right page; this one sticks to real-time playback you can measure.
- Loop the same 10–20 seconds. Pick a stretch that actually contains the problem. A random clean clip proves nothing.
- Write down the symptom. Does the whole range crawl, does it skip frames, or does the audio stay steady while the picture jumps?
- Record the exact source. Codec, resolution, frame rate, bit depth and whether it came from a camera or a screen recorder tell you far more than the file extension.
- Change one variable. Replay straight away and leave every other setting alone.
- Keep only proven changes. If nothing improves, put that control back where it was before the next test.
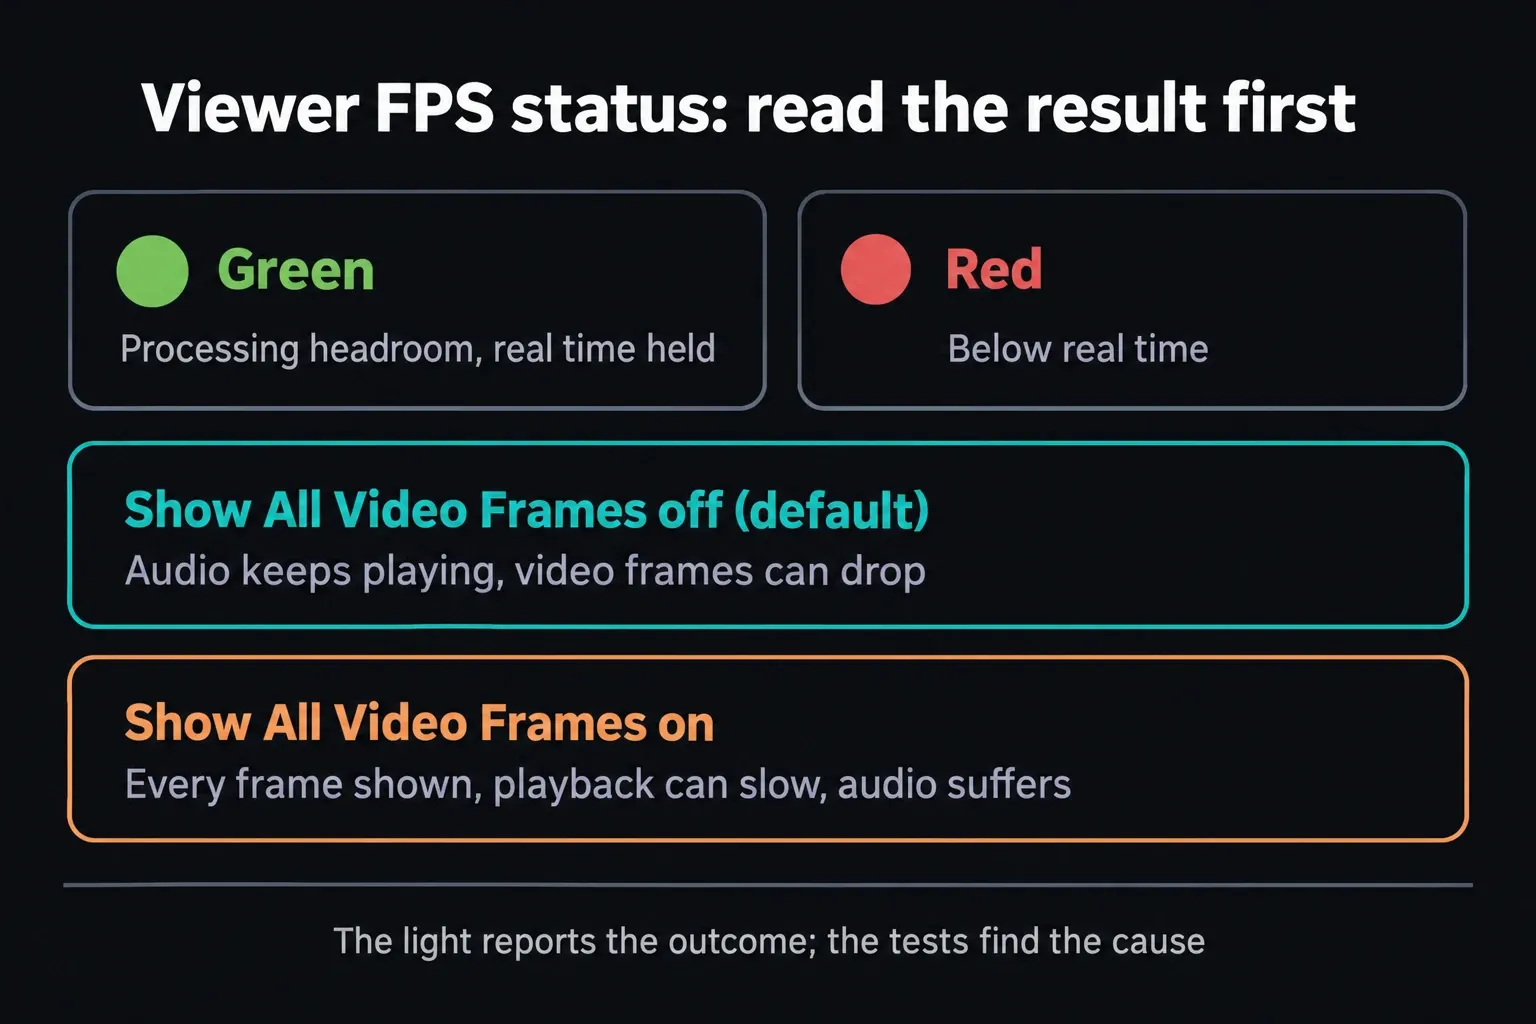
Show All Video Frames, in the option menu of the Edit page Viewer, separates two kinds of failure. It's off by default: Resolve keeps the audio playing and drops video frames when processing falls behind. Switch it on and Resolve shows every frame in order, so playback can slow below real time and the audio gets rough. Treat it as a diagnostic switch. It won't make anything faster.
Slow Playback, Dropped Frames and Scrubbing Are Not the Same
Playback that stays slow the whole way means Resolve can't finish the current workload at the timeline rate. Frames that skip now and then can simply be Resolve keeping the audio going. Choppy scrubbing is weaker evidence: scrubbing asks for frames out of order, which exposes source-decoding or storage latency that normal playback may never hit. If a clip plays cleanly until a title, grade or Fusion composition starts, suspect timeline processing. If the same camera clip stutters in an empty, clean timeline, suspect source decoding or media access.
When only the sound is missing, distorted or misrouted, go to the DaVinci Resolve no-audio guide and leave the video cache alone. A Media Offline frame in the Viewer has its own diagnostic too, because missing files, storage access and decoding failures each need different checks. An offline frame doesn't automatically mean a file needs relinking.
Sometimes the FPS readout holds the timeline rate and motion still looks uneven. Render a short sample and watch it in another player, then compare the source frame rate with the timeline frame rate and look for any retiming. Repeated or interpolated frames look choppy even when Resolve delivers every timeline frame on time, and that's a cadence problem with its own test.
Try Timeline Proxy Resolution Before Generating Files
This is the first thing I'd try, because it costs nothing. Choose Playback > Timeline Proxy Resolution > Half Resolution and replay the marked range. Still below real time? Go to Quarter Resolution. None takes you back to the full timeline working resolution. Resolve 21 lowers the working resolution on the fly here, and the manual is explicit that this has no relation to Proxy Media. Your source files stay untouched and the delivered export keeps its full quality.
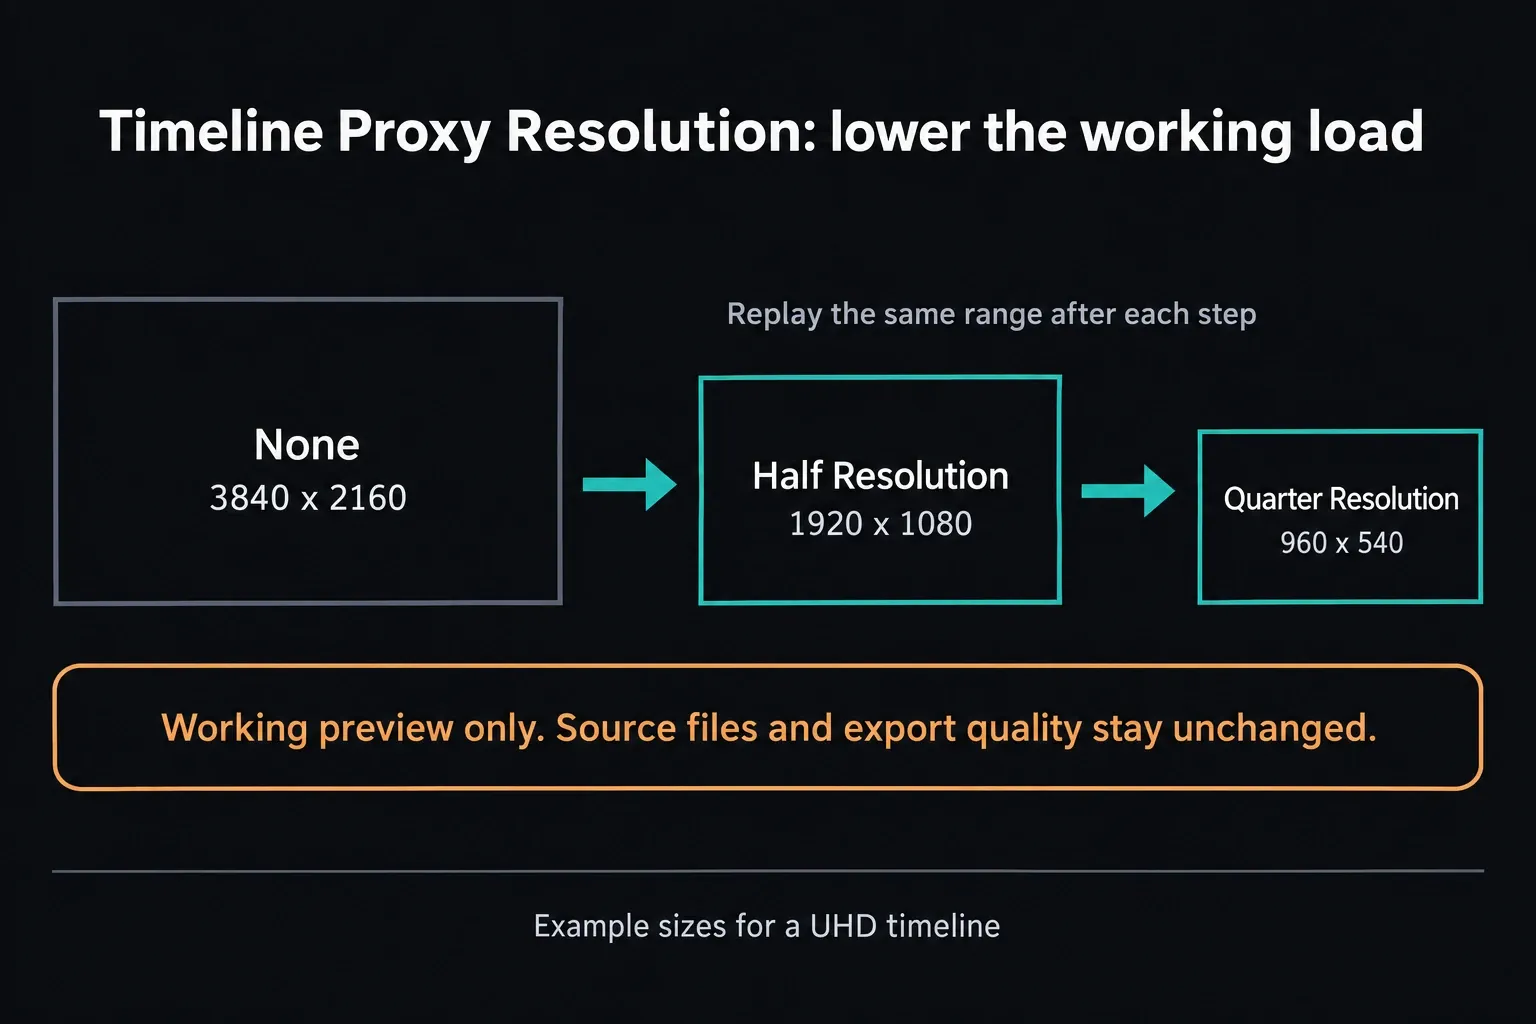
A big jump at Half or Quarter Resolution tells you image processing at the current working resolution is part of the load. It says nothing about a faulty GPU. Scaling, noise reduction, optical-flow retiming, Fusion, OFX and plenty of color operations all add to that workload. When you need to judge focus, texture or artifacts, switch back to None and check representative frames at full working resolution.
Performance Mode is the second control that never touches your output. It lives under Preferences > User > Playback Settings and defaults to Automatic, which balances sizing, decode quality and image processing for smoother interaction without reducing the quality of your video output. The preview on your computer monitor can look slightly different as a result. Leave it on Automatic. Manual only earns its place when one specific tradeoff, such as Optimized Sizing, visibly hurts the picture you're judging.
If Only Certain Source Clips Lag, Test the Codec
H.264 and H.265 get blamed first, and often fairly: many camera and phone versions use long-GOP compression, which is hard work to decode. The codec name alone still isn't a diagnosis. Profile, bit depth, chroma sampling, frame rate, operating system and the hardware decoding actually available all change the result. An H.265 file isn't automatically GPU-decoded, Quick Sync doesn't lift the load off every other component, and Studio doesn't support every combination just because it's Studio.
The test: make proxy or optimized media for two or three representative clips, attach or enable it, and replay the same timeline range. If playback turns reliable, your source-media workflow is part of the story. That alone doesn't prove a decoding problem, because the new file may also differ in resolution, bitrate or storage location. Leave effects and timeline settings alone and write those file differences down. If nothing changes, don't transcode the whole project. Turn to timeline effects or cache next.
Codec support can depend on the license, so check the current Resolve support documents for your operating system against the exact media properties. Our Free vs. Studio guide covers the wider license boundary without pretending either edition cures every slow timeline. With supported camera RAW formats, lowering the project's decode quality can make editing playback much lighter; at render time, the Force debayer res to highest quality checkbox on the Deliver page puts full quality back.
Phone clips and screen recordings deserve a look at MediaInfo’s Frame rate mode; the device name won't tell you. If the clip turns out to be variable frame rate and shows jitter or audio drift, transcode one sample to a constant frame rate and test that. In HandBrake, pick a suitable frame rate and Constant Framerate. Same as Source with VFR keeps the variable timing, and Peak Framerate is a different mode from CFR. Keep the original, and check duration, sync and color before you convert anything else. Fixing the timing tells you nothing about how easily the new codec will decode.
Proxy Media vs. Optimized Media: Choose by Job
Both workflows hand Resolve easier files to play, but they solve different jobs. Proxy Media gives you portable files you manage yourself, so they can travel between machines and be relinked. Optimized Media is managed by Resolve on the current system, which suits a project that never leaves one workstation. And neither one is Timeline Proxy Resolution, which lowers working resolution on the fly without generating any media at all.
Choosing formats, attaching existing proxies, handing media to another editor and reconnecting originals all belong in the full DaVinci Resolve Proxy Workflow. For troubleshooting, keep the move small: create one controlled batch, turn on Playback > Use Optimized Media if Available or set Playback > Proxy Handling to Prefer Proxies for attached proxies, and replay the same failing range.
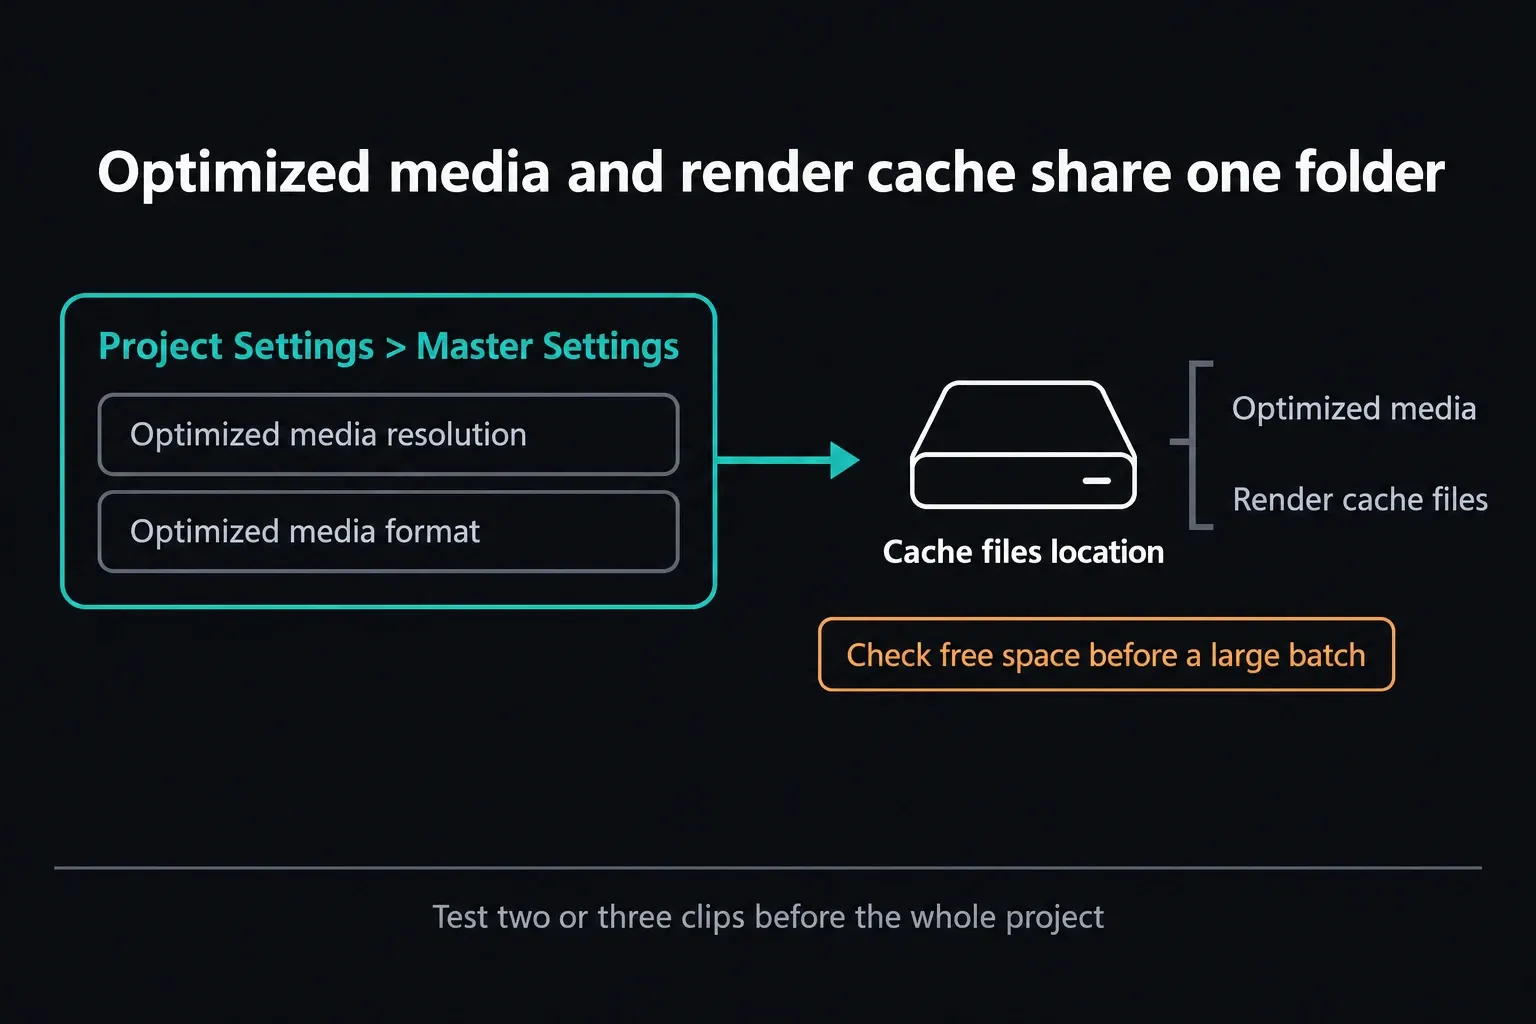
Project Settings > Master Settings sets the resolution and format of the files Resolve creates. Choose an easy-to-decode option your platform offers that still holds the quality the current task needs. Anyone telling you ProRes belongs only on macOS and DNxHR only on Windows is oversimplifying. Optimized media is written to the same directory as the render cache, so check the Cache files location and its free space before you produce hours of material. A small test batch is cheap. Finding a full or slow drive after the whole project has processed is not.
Before the final render, open Advanced Settings on the Deliver page. Use proxy media, Use optimized media and Use render cached images can all make the export pull from those working files. Switch them off whenever those files are lower quality than the master you owe, and confirm the originals are online. Timeline Proxy Resolution plays no part here; it only ever lowers the working preview.
Use Render Cache for Expensive Timeline Processing
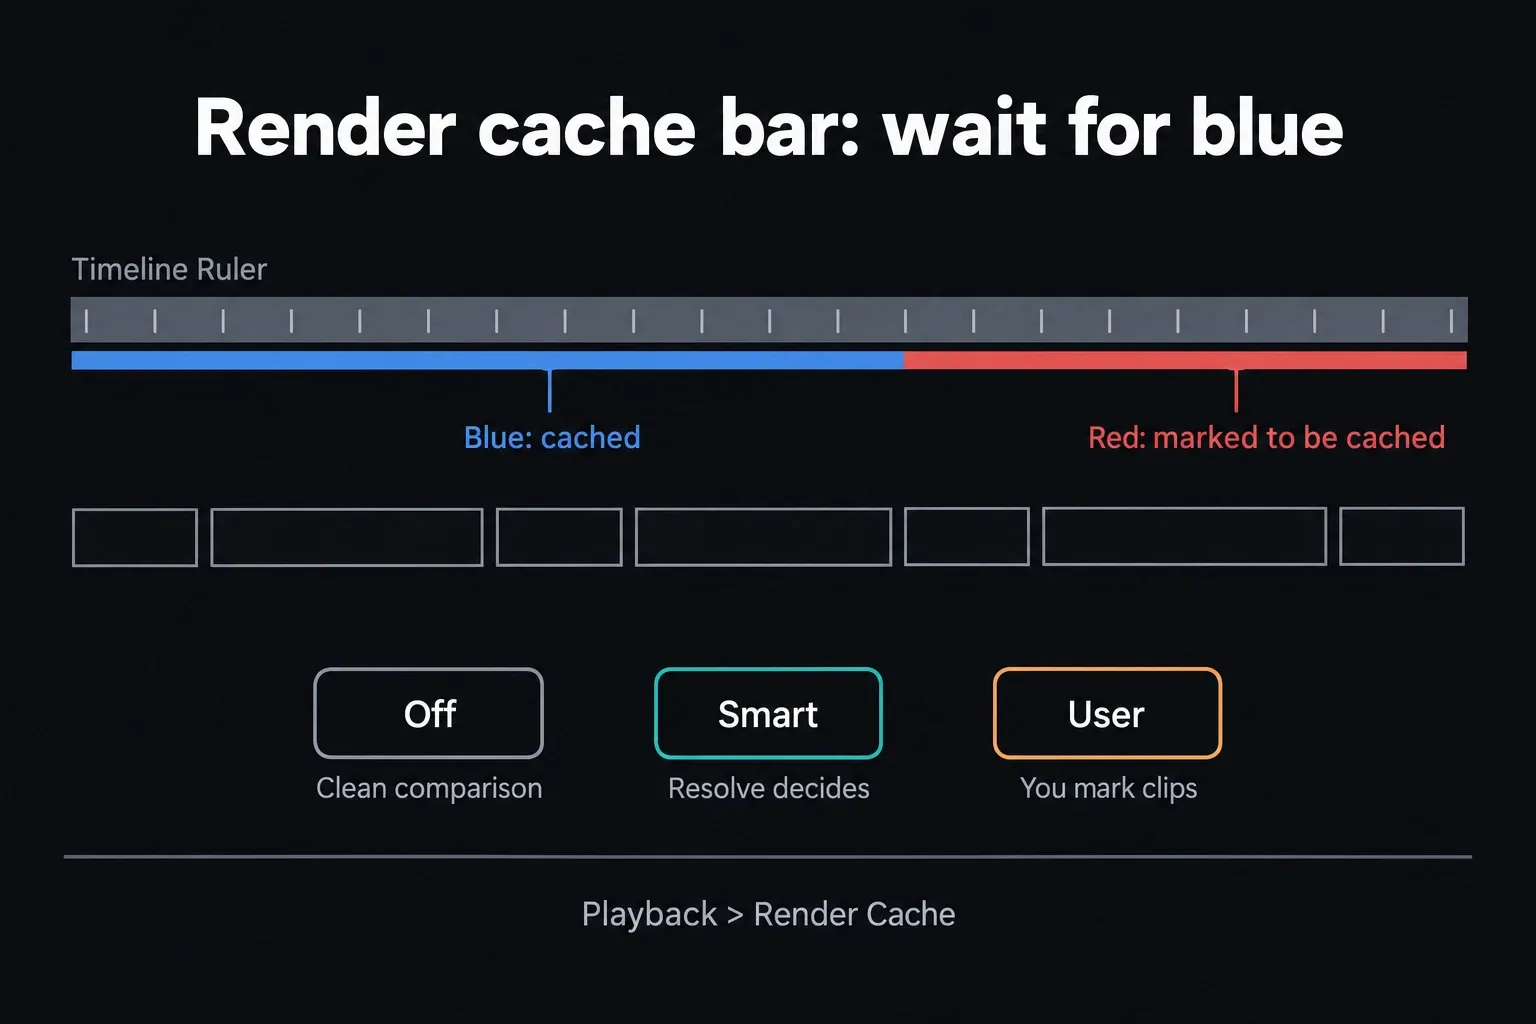
Render Cache earns its keep when the finished timeline result, with grades and effects on top of the source, is too heavy to play in real time. Choose Playback > Render Cache > Smart to let Resolve decide, User when you want to mark specific clips or outputs yourself, and Off for a clean comparison. Smart and User behave differently: User is mostly manual, though checkboxes in Project Settings can force certain effect types to cache automatically.
Caching can happen during playback or after the inactivity delay set by Enable background caching after X seconds. Watch the bar along the bottom of the Timeline Ruler: red means that range is waiting to be cached, blue means it has been cached. Wait for the problem range to turn blue, then replay exactly that range. Smooth blue playback means pre-rendering that processing works for you. Still slow on blue? Look at the cache files, where they're stored, or some other system limit.
Don't wipe the whole cache out of habit. First make sure cached playback actually behaves differently from the original. If a range that used to cache cleanly now looks wrong, Playback > Delete Render Cache removes it so Resolve can rebuild. Check free capacity and the cache format before regenerating. A format that's easy to decode can need a lot of space and sustained write speed; a highly compressed one saves storage and costs more processing.
Also check whether Resolve is busy generating proxies, transcribing or running a background render. If you switched those jobs on, let them finish or pause them, then repeat the same playback test. Preferences > System > Background Tasks has a Pause background renders on foreground activity option for exactly this. Background rendering is disabled by default, and the manual warns that it needs significant computing resources and can slow the whole system down, so turning it on won't speed up playback. These jobs are separate from the Smart and User Render Cache modes above.
Isolate Fusion, OFX and Color Work
When the clean source plays fine and the range falls apart the moment an effect starts, leave the codec preferences alone. Temporarily bypass color grades and Fusion effects and replay. If performance comes back, switch the stack back on a piece at a time. Noise reduction, optical-flow retiming, motion blur, demanding Resolve FX and complex Fusion compositions are the usual heavy hitters, and you have to measure them at the real timeline resolution. A GPU model name won't predict them.
For a slow Fusion composition, cache its output or mark that clip for caching; transcoding every source file won't help. The Fusion beginner guide covers node-level troubleshooting. Once a heavy clip is truly locked, Render in Place creates new media that replaces that timeline instance. Decompose to Original brings back the editable clip, but the rendered file stays in its folder and in the Media Pool, so plan for the storage and the cleanup.
Check GPU Preferences Without Creating a New Problem
Open Preferences > System > Memory and GPU. For most people, GPU processing mode and GPU selection belong on Auto, and the manual says as much. If you have a concrete reason to test manual mode, Resolve 21 recommends Metal on macOS, OpenCL for AMD cards on Windows or Linux, and CUDA for Nvidia cards on Windows or Linux. Correct drivers still matter. A blanket tip to force one mode or install a particular driver branch is a guess about someone else's machine.
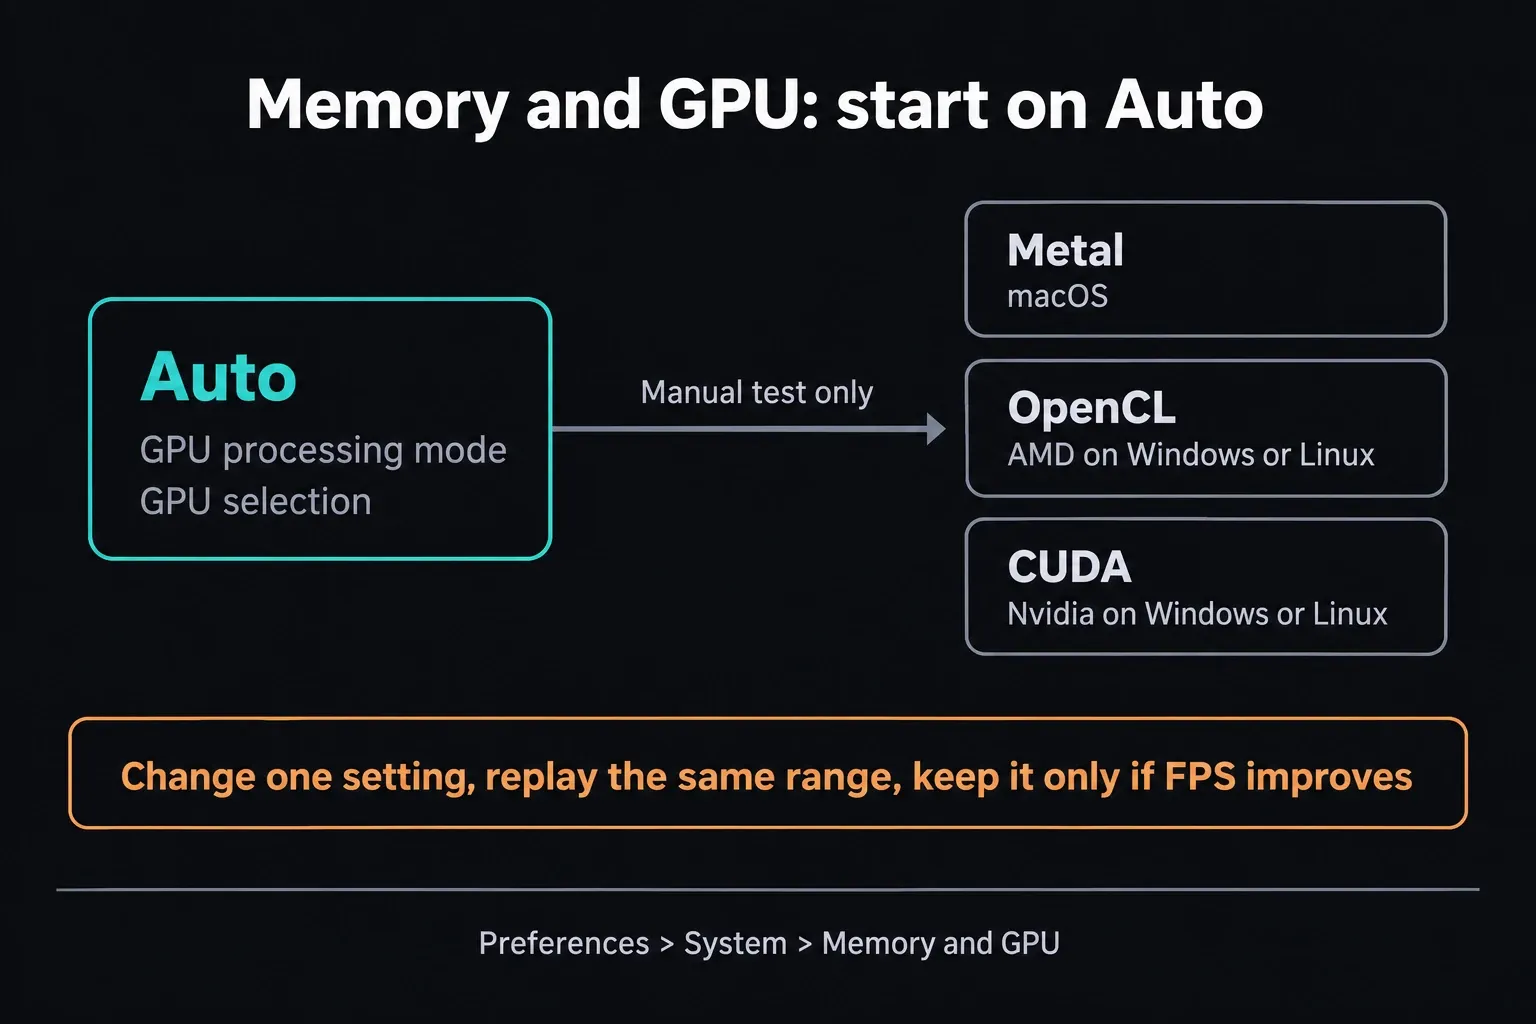
System monitors give you clues. They don't give verdicts. High CPU usage often goes with software decoding, high GPU usage with effects or image processing, and low overall percentages can still hide one saturated engine, memory pressure or a wait on storage. Change one Resolve control, replay the same range, and compare FPS and behavior. If Auto works, keep it. If a manual setting brings no measurable gain, put it back.
Storage, Power and Thermals: Test Conditions, Not Myths
Resolve may be reading source media while it writes cache, optimized media, waveforms and thumbnails. A nearly full destination, a flaky external connection or other heavy work on the same volume can all make playback uneven. No universal SATA, NVMe or megabytes-per-second figure qualifies a drive for “6K editing”; the real requirement depends on codec data rate, stream count, cache format and whatever effects run at the same time. Measure sustained behavior with your actual project before you buy anything on the strength of one headline number.
On a laptop, plug in the power source you'll actually edit with, pick a performance-oriented power mode in the operating system, and test once the machine has settled at a steady temperature. Thermal and power limits can shift over a long session while every Resolve setting stays the same. Close unrelated heavy processes for the comparison, and be skeptical of anyone selling one Windows or macOS power setting as the universal cure.
If the controlled tests still fail, set the workload against the current DaVinci Resolve system requirements. Stalls or error codes that only show up during export belong in the Render Failed guide. Media, GPU-memory, startup and audio failures each need their own diagnosis, and more playback tweaks won't reach them.
Read the Test Result Before Choosing a Permanent Fix
Let the test that worked decide the workflow. If Half or Quarter Timeline Proxy Resolution brings playback back while the source and effect stack stay the same, edit at the lower working resolution and switch to None when you need to inspect at full resolution. If only proxy or optimized media helps, build a source-media workflow for that codec. If bypassing effects helps and easier source media doesn't, cache or simplify the heavy timeline processing and leave the rest of the library alone.
A blue cache bar that plays smoothly is your evidence for caching that range. A blue range that still stutters means you're not finished. Check where the cache files live, how much space is left and what else the system is doing before you decide the cache feature is broken. If no Resolve control changes the result, rebuild the test in a new, clean timeline with one representative clip. That separates project-specific processing from system-wide decoding or hardware limits without putting the original project at risk.
Keep a short log: source properties, timeline settings, active effects, FPS before and after, cache state and the one variable you changed. That note is worth more than a screenshot of overall CPU or GPU usage. Hand it to support or another editor and they get a case they can reproduce. “Resolve is laggy” gives them nothing to work with.
The Ordered Slow-Playback Checklist
- Reproduce: loop one failing 10–20 second range and record the Viewer FPS/status.
- Working resolution: test Half, then Quarter Timeline Proxy Resolution; return to None for critical full-resolution inspection.
- Effects: bypass color and Fusion/OFX work; re-enable the stack in stages.
- Source decode: create proxy or optimized media for a few representative clips and leave the rest of the library for later.
- Cache: compare Off with Smart or a deliberately marked User-cache range; wait for blue before judging.
- Storage: verify cache location, free space, connection stability and competing reads/writes.
- GPU: start on Auto; test a manual processing API only when platform and driver support justify it.
- System state: repeat under stable power and temperature with unrelated heavy processes closed.
- Upgrade decision: change hardware or license only after the evidence identifies a persistent resource or capability limit.
Every Resolve menu path and preference on this page comes from the Resolve 21 Reference Manual, and I rechecked them against the 21.1 edition on October 4, 2026. Keep the settings that measurably help your difficult range, then check final output quality before you commit to the workflow.
DaVinci Resolve Slow Playback FAQ
Why is DaVinci Resolve playback so slow?
It usually comes down to source decoding, timeline resolution, effects, cache generation, storage, or the computer's power and thermal state. Replay one short failing range and change one variable at a time. Timeline Proxy Resolution tests the working-resolution load, proxy or optimized media tests the source-media load, and bypassing effects or waiting for a blue cache bar tests timeline processing.
What is the fastest safe setting to try for choppy playback?
Choose Playback > Timeline Proxy Resolution > Half Resolution and replay the same range. Still short of real time? Try Quarter Resolution. Only the working preview resolution changes; your source media and the delivered export stay at full quality.
What do the red and blue cache bars mean in DaVinci Resolve?
The cache indicators run along the bottom of the Timeline Ruler. Red means that section is marked to be cached; blue means the cache has been created. A blue bar doesn't guarantee every storage or system problem is gone, so judge it by replaying the same range.
Should I use Proxy Media or Optimized Media for slow playback?
Both swap difficult source media for easier working files. Proxy Media is portable and built for relinking and collaboration. Optimized Media is managed inside Resolve for the current system. Use the dedicated proxy workflow when files have to move between machines, and a short optimized-media test when you just want to know whether easier source media helps. A change in resolution or storage location can also affect that result.
Why is H.264 or H.265 footage choppy in DaVinci Resolve?
Long-GOP H.264 and H.265 footage can be hard to decode, but how hard depends on the exact profile, bit depth, chroma sampling, operating system and the hardware decoding you actually have. Make proxy or optimized media for a few representative clips and replay the same range before you blame the GPU or buy Studio.
Does Render Cache always improve playback?
No. Render Cache helps when Resolve can pre-render expensive source, color, Fusion or timeline processing, and it needs time, storage space and a sensible cache location to do it. Compare Off, Smart and a deliberately marked User-cache range one at a time; switching every cache option on at once tells you nothing.
Will DaVinci Resolve Studio automatically fix slow playback?
No. Studio changes some codec and GPU capabilities, but it can't fix a full cache drive, thermal throttling, the wrong power mode or a poorly chosen workflow. Find the bottleneck first, and check the current codec and system requirements before you treat a license upgrade as a performance fix.
When should I upgrade hardware for DaVinci Resolve?
Upgrade when your tests point to a hardware limit in work you genuinely have to do. If bypassing an effect you need restores real-time playback, that's useful evidence, and it can support an upgrade. Record the source codec, timeline resolution, required effects and FPS, then compare suitable hardware against that workload. Rule out avoidable storage, power and workflow problems before you spend money.
