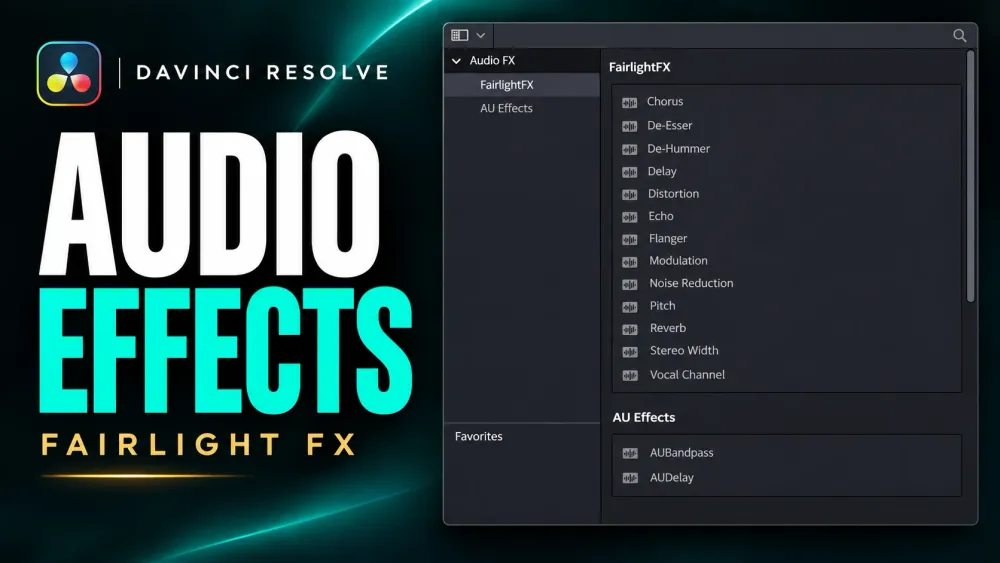
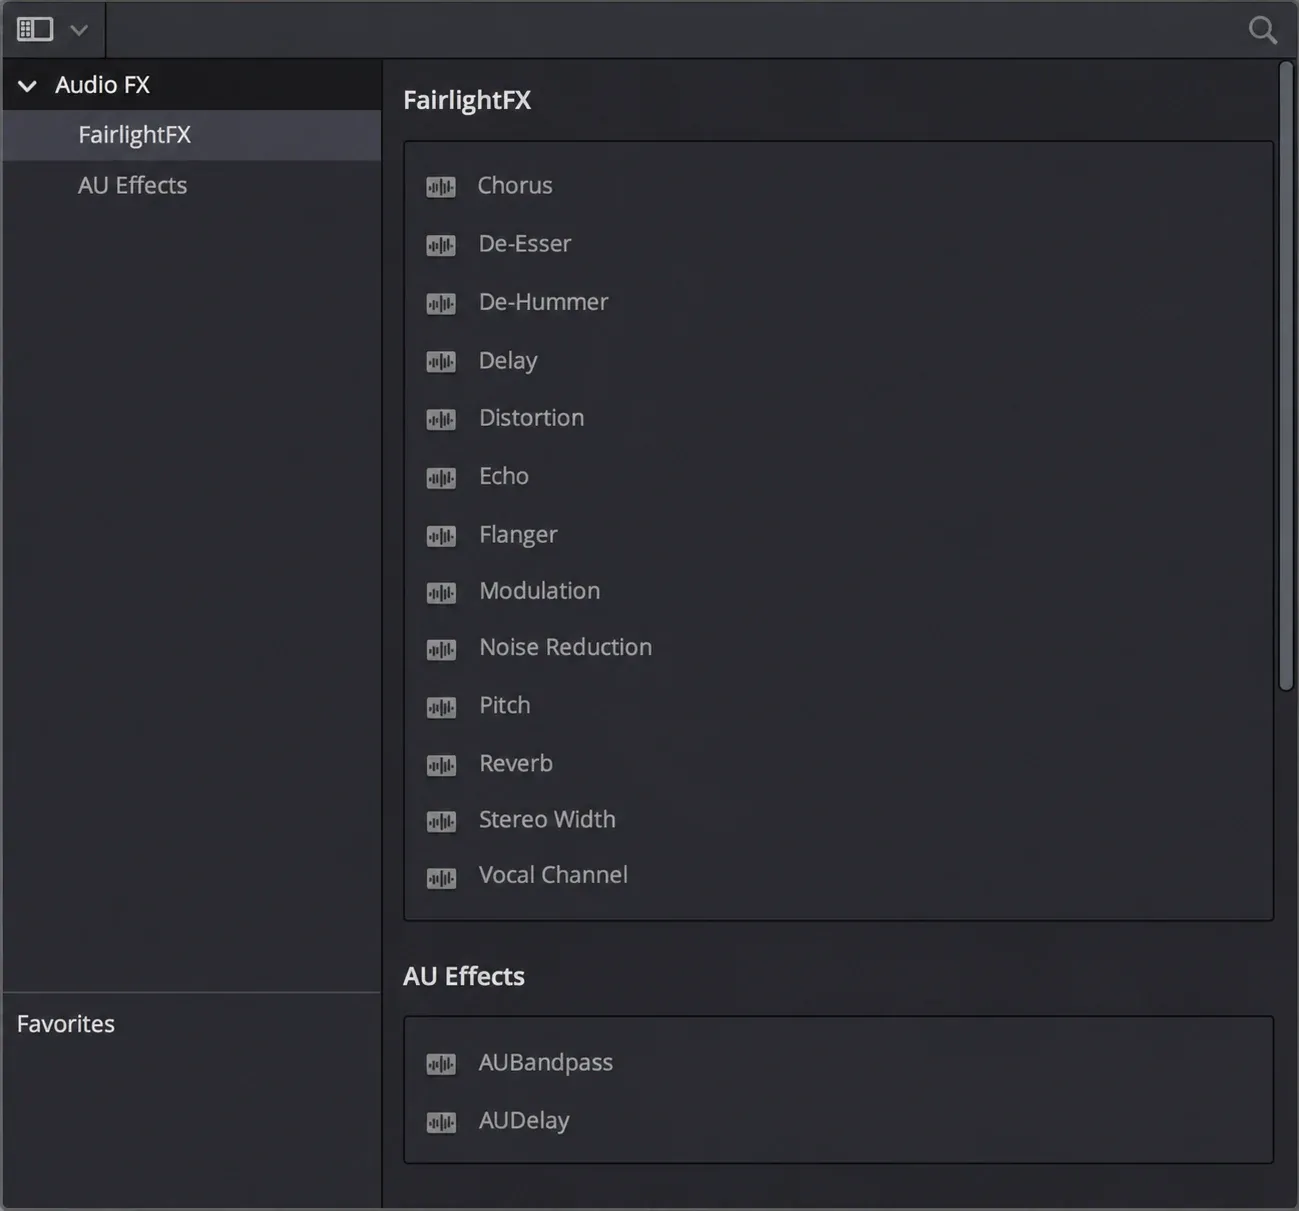
DaVinci Resolve 21.1’s built-in Fairlight FX catalog contains 33 tools: five Track FX such as Voice Isolation and Dialogue Leveler, and 28 insert effects from De-Esser to Reverb. The insert effects live under Audio FX in the Effects Library on the Edit and Fairlight pages. Drag an insert effect onto a clip to process that clip, or onto a track header or Mixer strip to process the track. Enable the five Track FX in the Mixer’s Track FX section or the Inspector instead.
Almost all of them come with the free version. Blackmagic's DaVinci Resolve Studio 21 feature list marks Fairlight effects and automation as free on desktop, and the exceptions are three AI Track FX: Voice Isolation, Music Remixer and Dialogue Separator need Studio. Plugins from other developers load as VST3 on Mac and Windows and as Audio Units on Mac.
My default is the track. One effect on a track header covers every clip on it, including clips you add later, and you can see it in the Mixer. If you came for one job, such as hum, echo or loud music under a voice, the catalog table below groups all 33 by task and links each group to its full guide.
Where DaVinci Resolve audio effects live
Open the Effects Library from the toolbar at the top of the Edit or Fairlight page and pick Audio FX in its bin list. Any VST or Audio Unit effects you've installed appear in the same panel, sorted into categories of their own, and the 21.1 Reference Manual's Fairlight FX chapter describes the built-in set as native on macOS, Windows and Linux.
Click the far right of an effect's row to star it. Starred effects land in a Favorites area at the bottom of the bin list and at the top of the Mixer's plus-button menu, which beats scrolling past 28 inserts every time you want the same De-Esser.
On the Edit page, the same drag works on clips, and the clip's effects open in the Inspector under Effects > Audio. The Edit page Inspector's Audio tab also carries Voice Isolation, Dialogue Leveler and Music Remixer as switches, and in Track mode it shows Track FX such as Ducker. The Cut page has a shortcut of its own: its voiceover tool offers Voice Isolation, Dialogue Leveler and Stereo Fixer switches for that recording workflow. These are separate from monitoring a live input through the Fairlight Track FX described below.
Clip, track or bus: where to put an effect
Where you drop an effect decides what it hears. A clip effect processes that clip and nothing else. A track effect processes everything on the track, and a bus effect processes the combined signal of every track routed to that bus.
| Placement | How to apply it | Where to adjust it | Use it for |
|---|---|---|---|
| Clip | Drag from Audio FX onto the clip. With several clips selected, drag onto any one of them. | Inspector > Effects on the Fairlight page, or Inspector > Effects > Audio on the Edit page | One take with a problem the rest don't share, such as a single shot with hum |
| Track insert | Drag onto the track header or the Mixer strip, or click the plus button in an empty insert slot and pick from the categories | Inspector with the track selected, or the custom controls button on the insert | Anything every clip on the track should get: EQ, de-essing, reverb on a voice track |
| Track FX | Switch on in the Track FX section of the strip or in the Inspector. Hidden ones come from the Mixer's three-dot menu > Visible Track FX. | Track FX section of the strip, or the Inspector | Voice Isolation and Dialogue Leveler ahead of every insert, Ducker on a music track |
| Bus | Drag onto a Main or Sub bus strip, or use the bus strip's plus button | The bus strip in the Mixer | One shared reverb, a final limiter, a meter on the full mix |
To add the same effect to several tracks in one go, select their strips and hold Option (Alt on Windows) while you add it. Command-Option (Control-Alt) adds it to every strip in the Mixer. Sending several tracks to one bus and processing them there is often cleaner still, and the Fairlight bus routing guide shows how to set that up.
I'd keep clip effects for exceptions. A track insert is one instance to adjust for the whole track and it's visible in the Mixer at a glance, while a clip effect hides in the Inspector of one clip until you go looking for it.
Working with the six insert slots
Each Mixer channel has six insert slots for Fairlight FX, Audio Units or VST effects, separate from the strip's built-in Dynamics and EQ. Hover over a filled slot and small buttons appear to enable or disable the effect, replace it, delete it or open its controls.
- Reorder: drag an insert to another slot, or to another channel to move it there. Dropping it on a slot that's already filled displaces the plugin in that slot, so check the strip afterwards.
- Copy one effect: hold Option and drag it to a slot on another channel, or use Copy and Paste in the effect's three-dot Options menu.
- Copy a whole chain: right-click the track header, choose Copy, then right-click another track header and choose Paste. The plugins come across with their settings.
- Save a strip: Fairlight > Presets Library stores channel-strip presets you can recall on another track or project.
- No track-to-bus drags: you can't drag an insert from a track to a bus or back. Add it again with the plus button.
Effects In, the button on the strip, bypasses the inserts only. Lit orange means they're on, unlit means they're bypassed. It leaves Track FX such as Voice Isolation and the strip's Dynamics and EQ running, so flipping it won't give you a true before and after.
Signal path and Effects Order
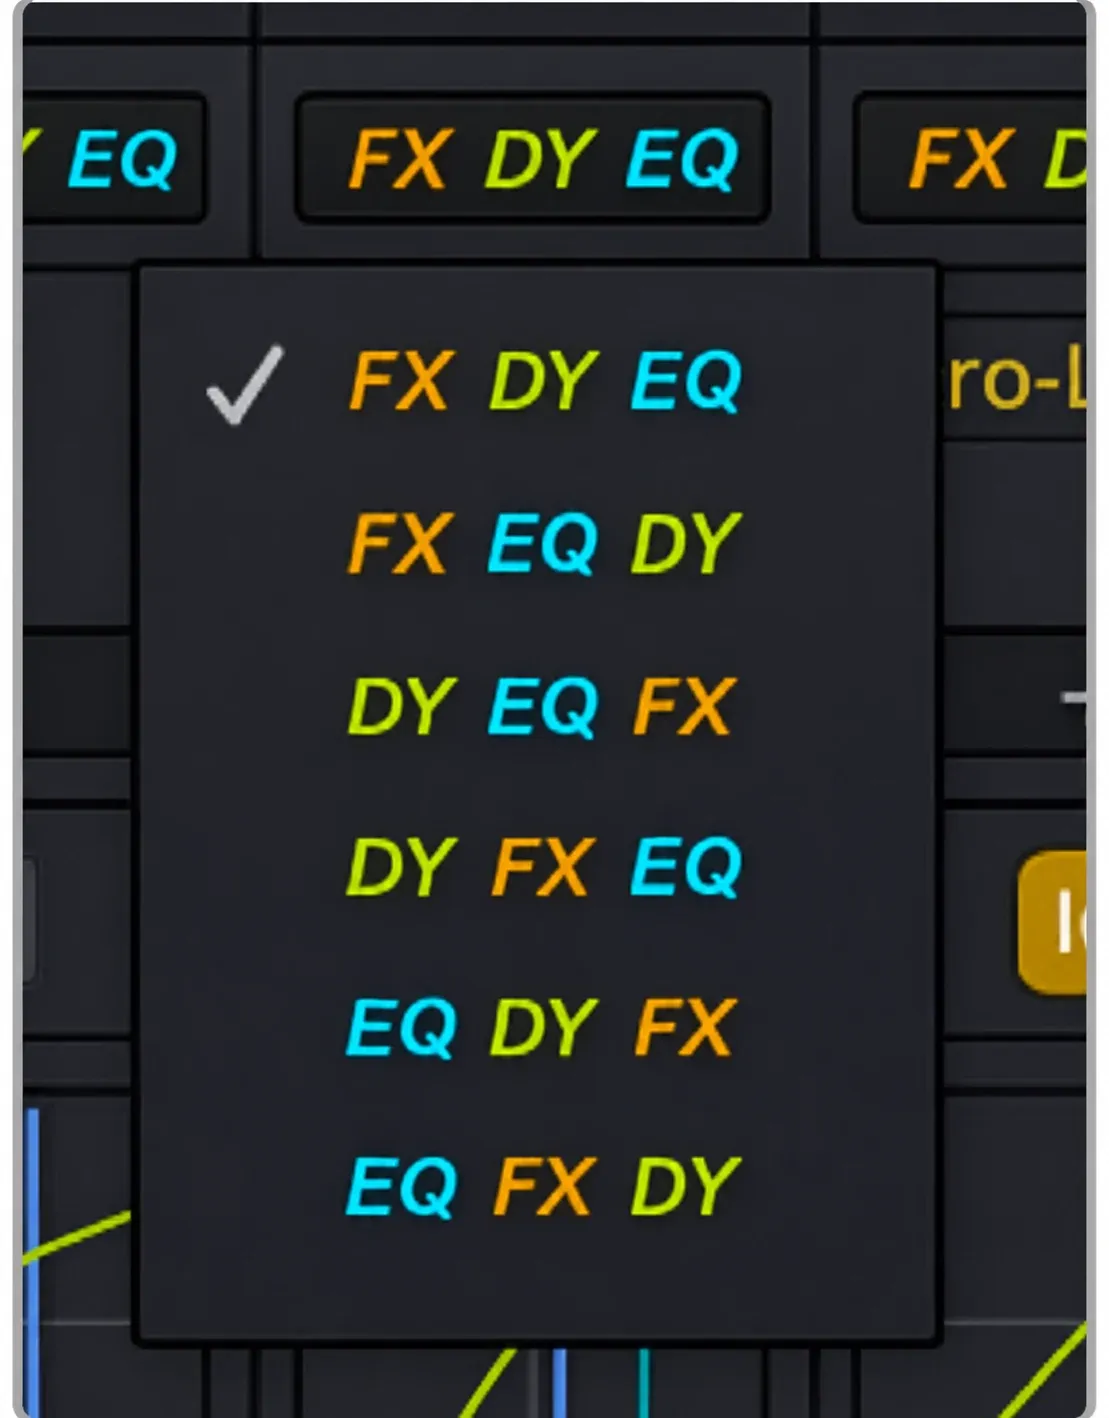
Within the Mixer channel strip, the default sequence is input, Track FX, the six inserts, Dynamics, EQ and output routing. The manual’s signal-path section identifies this as the default, and Effects Order can rearrange the insert, Dynamics and EQ blocks. Track FX have their own upstream section.
Click the Effects Order button to change the order of the last three stages; the default is FX, Dynamics, EQ. Blackmagic's manual calls putting noise reduction first "usually best practice", so later processing doesn't change the volume or quality of the noise floor the plugin is trying to remove. It also mentions running Dynamics before EQ, because changing the spectrum first may change how the compressor responds.
My default for a voice track keeps the factory order: Voice Isolation or Noise Reduction at the top, a De-Esser in the inserts if the voice is sharp, then the strip's own compressor and EQ, with a single limiter on the main bus. Cleanup sees the noise before anything raises it, and one limiter at the end is easier to judge than five. The compressor settings for dialogue and EQ settings for dialogue cover the two built-in modules in detail.
Track FX: Voice Isolation, Dialogue Leveler, Ducker and the AI tools
Track FX are the five effects that sit before the inserts, each in its own fixed slot. Voice Isolation and Dialogue Leveler show by default. The other three appear when you open the Mixer's three-dot menu and pick them under Visible Track FX, and if the whole section is missing, the same menu has a Track FX item.
- Voice Isolation (Studio): separates speech from background noise. The manual says an Amount of 50 gives a rough equal mix and 70 to 80 tends to sound natural. In the Fairlight Track FX section, it does not process live input or tracks with more than two channels.
- Dialogue Leveler (free): evens out dialogue level, with the same live-input and channel limits. The Voice Isolation vs Dialogue Leveler comparison covers when to use each.
- Ducker (free): lowers a target track while one or more source tracks play, without compressing it. You set it up in the plugin or in the Edit page Inspector's Audio tab in Track mode, and the audio ducking guide walks through both routes.
- Dialogue Separator (Studio): gives separate level control over dialogue, background sounds and room ambience. It's mono-only, so split a stereo clip to dual mono first.
- Music Remixer (Studio): splits music into Vocals, Drums, Bass, Guitar and Other so you can turn one part down under speech. The restriction on free-form and ambient music belongs to Music Editor, the separate duration tool.
Every Fairlight FX, grouped by job
The manual lists the effects alphabetically, which doesn't help much when you're staring at a hum problem. Here are all 33 grouped by the job you'd reach for them, with the guide that covers each job in depth. The strip's built-in compressor and EQ modules aren't counted in the 33.
| Job | Effects and what they do | Full guide |
|---|---|---|
| Noise, hum and sibilance (3) | Noise Reduction (De-Hiss, De-Rumble and De-Rumble and Hiss presets), De-Hummer (50 or 60 Hz hum and its harmonics), De-Esser (harsh "s" sounds) | Remove background noise, reduce room echo |
| Dialogue (5) | Voice Isolation (Track FX, Studio), Dialogue Leveler (Track FX), Dialogue Separator (Track FX, Studio), Dialogue Processor (De-Rumble, De-Pop, De-Ess, Comp, Expander and Excite in one window), Vocal Channel (high-pass filter, three-band EQ and compressor) | Voice Isolation vs Dialogue Leveler |
| EQ, dynamics and level (5) | Fairlight EQ (six-band parametric with bell, shelf and notch bands), Multiband Compressor (separate compression per frequency band), Limiter (true peak limiter with 64-sample lookahead and a sidechain input), Soft Clipper (rounds off peaks above a threshold), Gain (adds or removes an exact number of dB) | EQ for dialogue, compressor for dialogue, levels and LUFS |
| Music under speech (2) | Ducker (Track FX, lowers music when a voice plays), Music Remixer (Track FX, Studio, stem-level remix) | Audio ducking |
| Space (3) | Reverb (a virtual room, with Cathedral, Concert Hall and Studio presets), Echo (delayed reflections), Delay (doubling and early reflections) | Add echo and reverb |
| Character (5) | Chorus (layers modulated copies), Flanger (the swept sound of two tape machines drifting in and out of sync), Distortion (harmonic distortion, waveshaping and clipping), Modulation (LFO, FM, AM, sweep and gain in one), Pitch (up to 12 semitones up or down without changing speed) | Change audio pitch |
| Stereo and surround (3) | Stereo Fixer (swap, mono, left only, right only, M/S on stereo clips), Stereo Width (0 is mono, 1 is normal stereo, 2 is extra wide), LFE Filter (low-pass for the LFE channel of a surround bus) | Covered here |
| Meters (5) | Meter (sample peak with a two-second peak hold), Frequency Analyzer (Spectrum or Waterfall view), Phase Meter (in-phase and out-of-phase check, meant for a bus), Surround Analyzer (the "jellyfish" view of a surround mix), Ambisonics Meter (maps an Ambisonic sound field) | Levels and LUFS |
| Utility (2) | Chain FX (up to six Fairlight FX or compatible AU and VST plugins in one insert, saved as a preset), Foley Sampler (plays loaded sounds from a MIDI keyboard or pad onto the current track) | Covered here |
Presets, A/B, automation and sidechain
Every Fairlight FX window shares the same top bar. A preset menu has a button to save the current settings and arrows to step through the list. A and B buttons hold two versions of your settings, and an arrow copies one to the other so you can keep the better one while you experiment. Reset returns every parameter to its default, and with automation switched on an automation button appears at the top right. Hold Option or Shift while dragging a value for finer steps.
Plugin parameters can be keyframed on clips or automated on tracks, the same way as volume and pan. Keyframes live in the Inspector, and our Inspector guide covers how they behave there.
Compatible compressors and limiters can take their trigger from another track or bus. Open the plugin on the channel you want lowered, pick the source in the dropdown at the top and click On, which turns red; Listen plays the incoming source so you can confirm it. The manual suggests trying this with the Compressor section of the Channel Dynamics plugin or the Fairlight Limiter. Chain FX goes the other way and packs up to six plugins into one insert, saved as a preset, which suits a voice chain you rebuild on every project.

Heavy chains: cache, export or bounce
A clip effect runs during playback unless cached, and processor-heavy plugins can delay playback starts. In a February 2025 Noise Reduction report, a user estimated about a second before playback started with Learn mode; a reply suggested caching the clip’s effects. An April 2023 thread described re-initialization on start, stop and playhead moves. Those dated reports describe their own setups; use caching when the effects on your clip prevent smooth playback.
Right-click the clip and choose Cache Audio Effects. Resolve renders the processed sound without touching the source file, marks the clip with a cache badge and re-caches it when you change a setting. Two other options render processing into new audio media:
- Export Audio Files writes selected clips to new files. In its dialog, enable Clip EQ and FX to include the clip effects; choose whether to include clip level and fades as well. Check those options before replacing a live effect chain with the export.
- Bounce Selected Tracks, under Timeline > Audio, renders the selected tracks between your In and Out points to a new layer on top. View > Show Audio Track Layers reveals the original layer underneath.
I’d cache clip effects that prevent smooth playback and bounce once their sound is settled, because changing the wanted processing means rendering a new version. Keep the original clips available underneath the rendered layer. If playback crackles instead of stalling, the buffer fixes in the clicks and pops guide are the next stop.
Plugin latency and delay compensation
A plugin that looks ahead or analyzes audio holds it back by some number of samples. Resolve's automatic delay compensation (ADC) shifts everything else to match, it's on by default for each track, and the ADC column in Index > Tracks shows the current amount of compensation on every track.
That figure is only as good as what the plugin reports. In an October 2023 forum thread, a user reported that switching iZotope Ozone 10's Maximizer from IRC 1 to IRC IV raised its latency from 1,344 to 5,863 samples, and Resolve kept compensating for the old number. He later identified his setup as Resolve Studio 18.6.1 on an M2 Mac running Ventura. Bypassing the plugin didn't help; disabling it from its dropdown and enabling it again did. A forum regular in the same thread pointed to the ADC value in the Index as the thing to check, and said linear-phase EQs and gates with lookahead behave the same way.
Historical replies give different advice about clip-level compensation. A 2021 thread says clip-based plugin instances weren't compensated, while Blackmagic's Peter Chamberlain suggested in the 2023 thread putting de-noise on the clip, where "the compensation range is much larger". The same 2021 reply ties plugin compensation to FlexBus; older projects on the legacy fixed bus mapping can switch in Project Settings > Fairlight, but the switch can't be reversed, so duplicate the project first.
If sync changes after a plugin mode change, try disabling and re-enabling the plugin from its menu, then inspect the ADC value and check sound against picture again. For a clip instance that still drifts, try the track instance and recheck sync. A June 2021 report on Resolve 17.2.1 on Windows 10 described ERA 5 clip plugins drifting after three or four instances while the same plugins on the track stayed in sync. That is a historical workaround, not a guarantee for every current plugin.
Third-party plugins and external processing
Resolve loads VST3 effects on macOS and Windows and Audio Units on macOS; Linux runs Fairlight FX only. Blackmagic's feature list marks third-party effects and plugins as free on desktop with platform-specific limits, and unavailable on iPad. If an installed plugin is missing, open DaVinci Resolve > Preferences > System > Audio Plugins, add the folder it installed to under VST Effects and check its box in Available Plugins. Any VST plugin that crashed Resolve while loading at startup is disabled there automatically and stays off until you tick its box again. The Category column in the same list moves a VST or AU plugin to another Mixer category.
In Preferences > System > Audio Plugins > Setup External Audio Processes, add the outside application by Name and Path, choose the appropriate Type, then Save. Right-click a Fairlight clip and choose the application under External Audio Process. Resolve creates a duplicate in the project’s Save clips to folder. Process and save over that copied file in the outside application; Resolve detects the saved result and imports it as another layer above the original clip, as the external-editor procedure explains.
For an RX De-click repair that delays playback, I’d use External Audio Processes and finish the repair in the copied file. A May 2021 RX discussion reported as much as 31,931 samples, about 665 ms at 48 kHz, for one standard single-band configuration. That figure belongs to that historical report, not every current RX mode. Saving the processed audio removes that repair plugin from the live playback chain. For other tools worth installing, see the free DaVinci Resolve plugins guide.
Free vs Studio, desktop vs iPad
Blackmagic's DaVinci Resolve Studio 21 feature list splits the audio tools like this. "Studio" means the paid version on desktop, and on iPad an upgrade bought inside the app.
| Feature | Free, desktop | Studio, desktop | iPad |
|---|---|---|---|
| Fairlight effects and automation | Yes | Yes | No |
| Third-party effects and plugins | Yes, with platform limits | Yes, with platform limits | No |
| Dialogue Leveler | Yes | Yes | Yes |
| Voice Isolation | No | Yes | Studio upgrade |
| Music Remixer, Dialogue Separator | No | Yes | Studio upgrade on M-series iPads; not on A-series |
| Dialogue Matcher | No | Yes | No |
| Fairlight Audio Assistant | No | Yes | Studio upgrade |
| Timeline sample rates of 96 kHz and higher | No | Yes | Studio upgrade |
Audio Assistant is the Studio tool that does a first mix for you: from Timeline > AI Tools > Audio Assistant you pick a delivery standard and it sorts tracks, cleans dialogue, ducks music, writes automation and adds mastering plugins for the chosen loudness. On iPad, the list marks Fairlight effects and third-party plugins as unavailable, while Dialogue Leveler works and Voice Isolation comes with the Studio upgrade.
Published lookahead and plugin delay reports
Latency decides whether an effects chain stays in sync. The table separates the manual’s documented Limiter lookahead from reported plugin delays in three historical Blackmagic forum threads. Values are converted to milliseconds at 48 kHz; lookahead alone is not a measured total plugin delay.
| Published | Plugin and mode | Reported delay or lookahead (samples) | At 48 kHz | How it was reported |
|---|---|---|---|---|
| Manual 21.1 | Fairlight Limiter, lookahead | 64 | 1.3 ms | Documented lookahead, not measured total delay |
| Oct 2023 | iZotope Ozone 10 Maximizer, IRC 1 | 1,344 | 28.0 ms | Exact |
| Oct 2023 | iZotope Ozone 10 Maximizer, IRC IV | 5,863 | 122.1 ms | Exact |
| May 2021 | iZotope RX De-click, low latency mode | 4,063 | 84.6 ms | Lower bound ("in excess of") |
| May 2021 | iZotope RX De-click, standard single band | 31,931 | 665.2 ms | Upper figure ("as much as") |
| May 2021 | iZotope RX Voice De-noise | 0 | 0 ms | Exact |
| Feb 2018 | Waves Z-Noise | 35,000 | 729.2 ms | Approximate, Resolve 14 era |
The Limiter’s documented 64-sample lookahead is about 1.3 ms at 48 kHz. It does not measure the full plugin delay or establish a latency result for all Fairlight FX. The historical reports also describe different plugins and modes: Ozone 10 Maximizer is listed at 28.0 ms in IRC 1 and 122.1 ms in IRC IV, while the repair-plugin reports run much higher. Use those conditions to choose a mode, then check the ADC value for the actual chain; don’t combine lookahead and total-delay reports into one ranking.
My verdict: build the chain from Fairlight FX first and put repair and dialogue tools at the top of it. Keep lookahead mastering plugins on the main bus, cache or bounce heavy clip chains, and check the ADC column every time you change a plugin's mode. Offline-class repairs like RX De-click belong in External Audio Processes, where their latency stops mattering.
DaVinci Resolve audio effects FAQ
Are DaVinci Resolve audio effects free?
Mostly, yes. Blackmagic's feature list puts Fairlight effects and automation in the free version on desktop. Voice Isolation, Music Remixer and Dialogue Separator need DaVinci Resolve Studio.
How many audio effects does DaVinci Resolve have?
The 21.1 Reference Manual lists 33 Fairlight FX: five Track FX and 28 insert effects. Blackmagic's Fairlight product page rounds that to "over 25".
Can I use VST plugins in the free version?
Yes, on macOS and Windows. The free version loads VST3 effects there, and Audio Units on macOS. Linux has no VST support, and the iPad version has no third-party plugins.
Why can't I see Voice Isolation in the Mixer?
The Track FX section may be hidden: open the Mixer's three-dot menu and choose Track FX. Voice Isolation also needs Studio, and it won't run on live input or on a track with more than two channels.
How do I apply an effect to every clip on a track?
Put it on the track. Drag it onto the track header or the Mixer strip, or add it with the strip's plus button. To treat only some clips, select them and drag the effect onto any one of them.
How do I remove an audio effect?
For a clip effect, select the clip, open the Inspector's Effects tab and click the trash icon next to the effect. For a track effect, hover over the insert in the Mixer and click its delete button.
Final verdict: start with the track and the built-ins
Resolve's 33 Fairlight FX cover cleanup, dialogue, dynamics, space, character and metering without a paid plugin, and the free version runs nearly all of them. Put effects on tracks by default, keep the factory order with cleanup first, and save clip effects for the odd problem take. Add third-party plugins when a built-in can't do the job, and when you do, the ADC column in Index > Tracks shows the compensation amount. Check sound against picture as well; that number alone does not verify sync. For the rest of the audio workflow, the Fairlight audio hub collects every guide on this site.