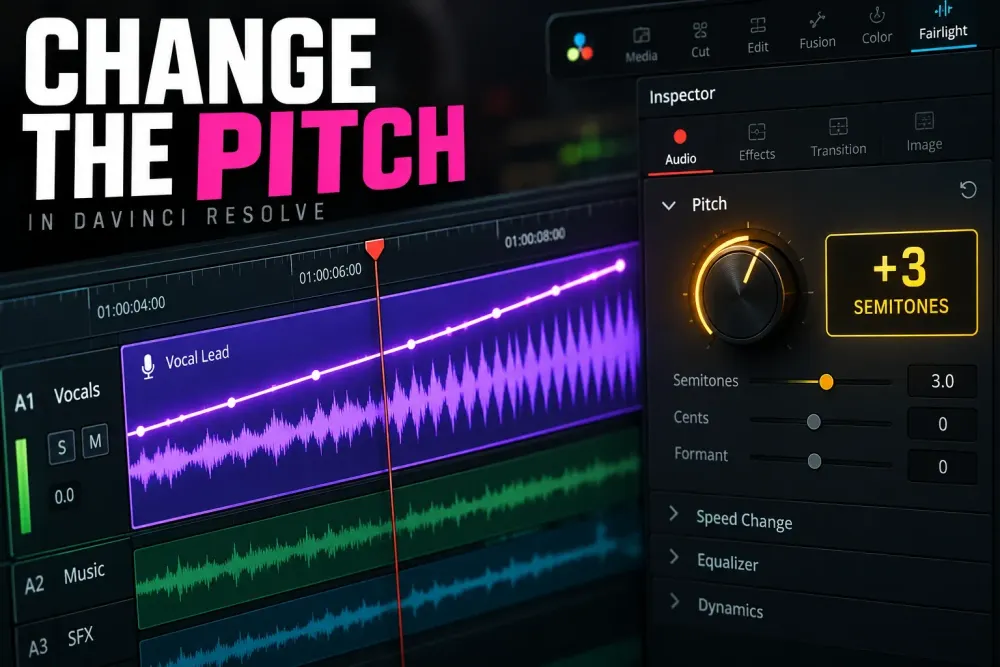
Quick answer: select the audio clip, open Inspector > Audio, find Pitch, and move the pitch by semitones or fine cents while leaving the clip at its current duration. Use the clip control when one recording needs a fixed change. Use a Fairlight pitch effect on a clip when you want a dedicated effect interface, or place the effect on a track when every clip routed through that track should receive the same treatment. Pitch changes belong with the broader workflows in the Fairlight audio hub.
Pitch and speed are different jobs. Pitch changes how high or low the audio sounds. Speed changes how quickly the clip plays and usually changes its duration. If you are making a clip faster, slower, or reversed, use the clip speed and retiming guide. This page keeps the duration fixed and changes the perceived pitch deliberately.
Choose the Right Pitch Method
| What you need | Best starting point | Processing scope |
|---|---|---|
| Make one voice or sound effect higher or lower | Audio Inspector > Pitch | Selected clip |
| Apply a designed pitch effect to one clip | Fairlight FX pitch effect | Selected clip |
| Give every clip on a dedicated track the same pitch treatment | Pitch effect in the track mixer | Whole track |
| Change pitch during the clip | Keyframes or Fairlight automation | Clip or effect parameter over time |
| Keep natural pitch while changing playback speed | Pitch Correction or Elastic Wave, depending on the task | Retimed clip |
| Correct a performance to musical notes | A pitch-correction workflow | Different task from a fixed pitch shift |
I start with scope because it prevents the most annoying repair later. If only one line should sound deeper, a track insert is too broad. If a complete creature-voice track needs the same processing, repeating the same clip setting on twenty edits is too fragile. Choose the lowest level that contains the whole job and nothing else.
Change the Pitch of One Audio Clip
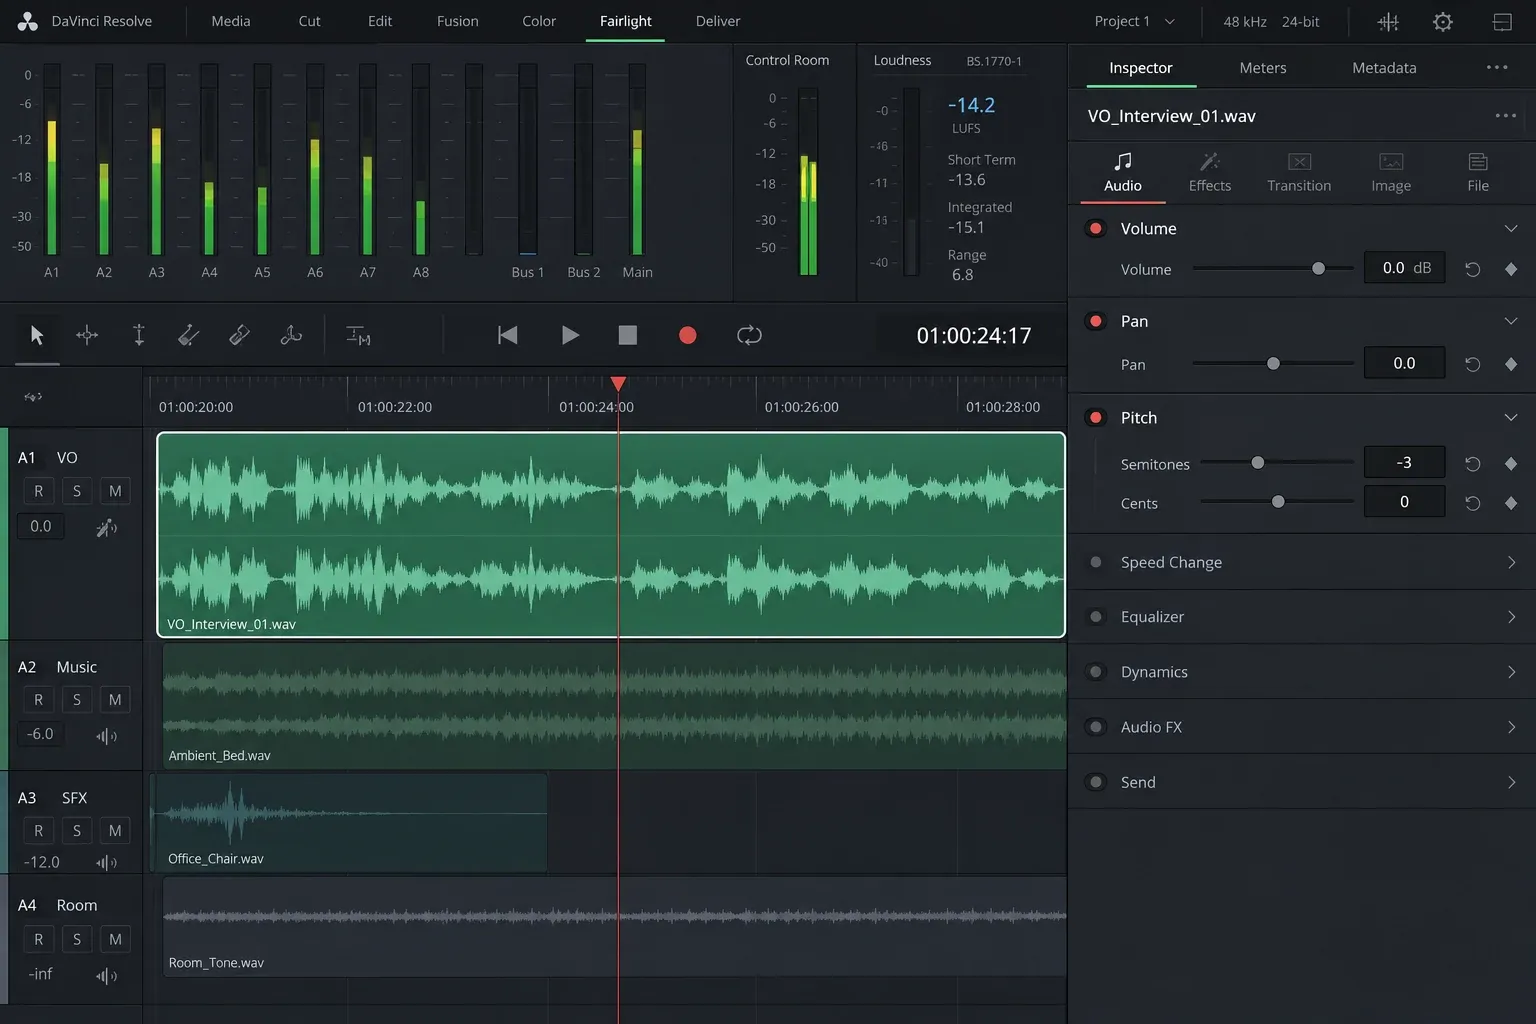
- Select the audio clip. Click the audio item in the Edit or Fairlight timeline. If picture and sound are linked, confirm that the audio side is part of the selection.
- Open the Inspector. Click Inspector at the upper right and choose the Audio tab when Resolve shows separate Video and Audio controls.
- Find Pitch. Expand the pitch section if it is collapsed.
- Set the broad interval. Move the semitone control to raise or lower the sound in musical half steps.
- Fine-tune with cents. Use the finer control only when a full semitone is too large.
- Compare at the same playback point. Bypass or reset the pitch, replay the same phrase, then restore the setting.
- Listen beyond the first second. Check consonants, sustained vowels, music tails, ambience, and transitions into neighboring clips.
A semitone is the distance between adjacent notes on a chromatic scale. Twelve semitones equal one octave. Moving up an octave doubles the perceived fundamental frequency relationship; moving down an octave halves it. Cents divide a semitone into one hundred smaller steps. You do not need music theory to use the controls: semitones choose the obvious interval, while cents make a subtle adjustment around it.
For dialogue, small changes can alter age, size, or character without making the voice unreadable. Large downward shifts often exaggerate low resonances and can make breaths or room noise sound unnatural. Large upward shifts can sharpen sibilance and expose a metallic texture. The cleanest value is the smallest one that communicates the character change.
Blackmagic Design’s Fairlight overview confirms that every timeline clip has its own pitch control and that the clip Inspector includes pitch adjustment. The same panel also contains level, pan, and EQ, so watch which section you are editing. A pitch problem will not be solved by turning the volume up or moving the sound left and right.
Pitch Does Not Mean Volume, EQ, or Speed
Four audio changes are easy to confuse because all of them can make a voice feel different:
- Pitch changes how high or low the sound is perceived.
- Volume changes level without intentionally changing musical pitch.
- EQ boosts or cuts frequency ranges but does not transpose the recording to a new note.
- Speed changes playback duration and can change pitch unless correction preserves it.
A darker EQ can make a voice feel heavier, but it is still the same performance at the same pitch. A downward pitch shift transposes the sound itself. Those approaches can be combined, yet they should be judged separately. Set pitch first, then use restrained EQ only if the new timbre needs cleanup. The Fairlight dialogue EQ guide explains clip-versus-track EQ and the reason to begin from a flat setting.
Pitch Correction in the Change Clip Speed dialog has another purpose: it tries to protect the original pitch while the clip plays at a different rate. Turning that option on is not the normal route for creating a deliberately deeper or higher voice at unchanged duration.
Use a Fairlight Pitch Effect on a Clip
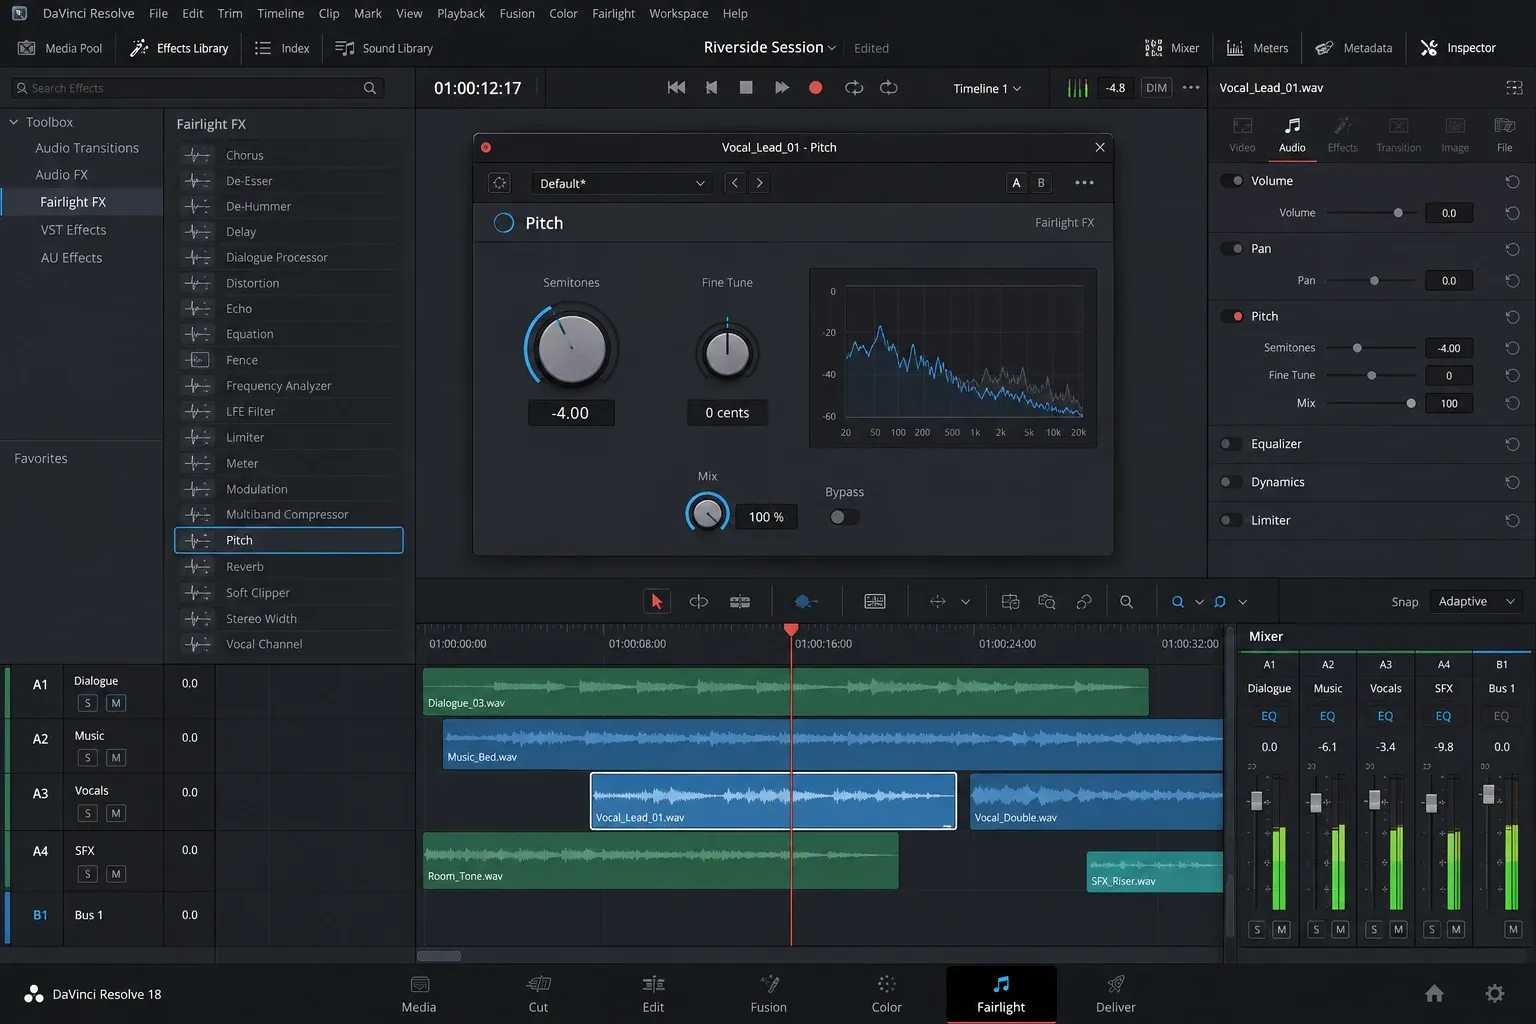
The Audio Inspector is the fastest route for a fixed clip adjustment. A Fairlight pitch effect is useful when you want its own effect window, presets or additional effect-specific controls, or when you plan to move the same processing between clips and tracks.
- Open the Fairlight page.
- Open Effects Library at the upper left.
- Find the pitch-related Fairlight FX entry available in your build.
- Drag the effect onto the audio clip, not onto an empty part of the timeline.
- Adjust the effect in its window and listen to the complete phrase.
- Close the window, then reopen or bypass the effect from the Inspector when you need to compare it.
The exact parameter set can differ between a simple clip Pitch section and a plug-in interface. Use the labels shown in your installed build rather than copying a value from a tutorial made for another release. The stable decision is where the effect lives: a clip effect follows that clip, while a mixer insert processes the signal passing through the channel.
Blackmagic’s official Fairlight page states that Fairlight FX can be dragged to a clip or to a mixer channel, and that plug-ins can be opened, reordered, copied, or removed in the Inspector. Effect order matters. A pitch shifter before a distortion or reverb creates a different result from the same shifter after those processors.
Process a Whole Track Only When the Track Has One Job
A track-level pitch effect is efficient when a track is dedicated to one treated source: a creature voice, radio character, pitched sound-design layer, or alternate vocal. Every clip on that channel reaches the same insert, including new clips added later.
- Move only the material that should share the treatment onto a dedicated audio track.
- Open the Fairlight mixer and locate that track’s channel strip.
- Add the pitch effect to an available effect slot.
- Bypass the insert and confirm that no unrelated clip changes.
- Set the effect while monitoring the loudest, quietest, shortest, and longest clips on that track.
- Label the track so another editor can see why the processing exists.
Do not place a character effect on a general dialogue track that also contains untreated interviews, room tone, or narration. Track inserts are literal: they process everything routed through that channel. Moving a clip to another track can therefore change its sound even when the clip Inspector remains untouched.
Clip and track processing can also stack. If the selected clip has its own pitch change and the track has another pitch insert, both can act on the same signal. When a result sounds far more extreme than the visible clip value suggests, inspect both levels before resetting anything.
Change Pitch Over Time
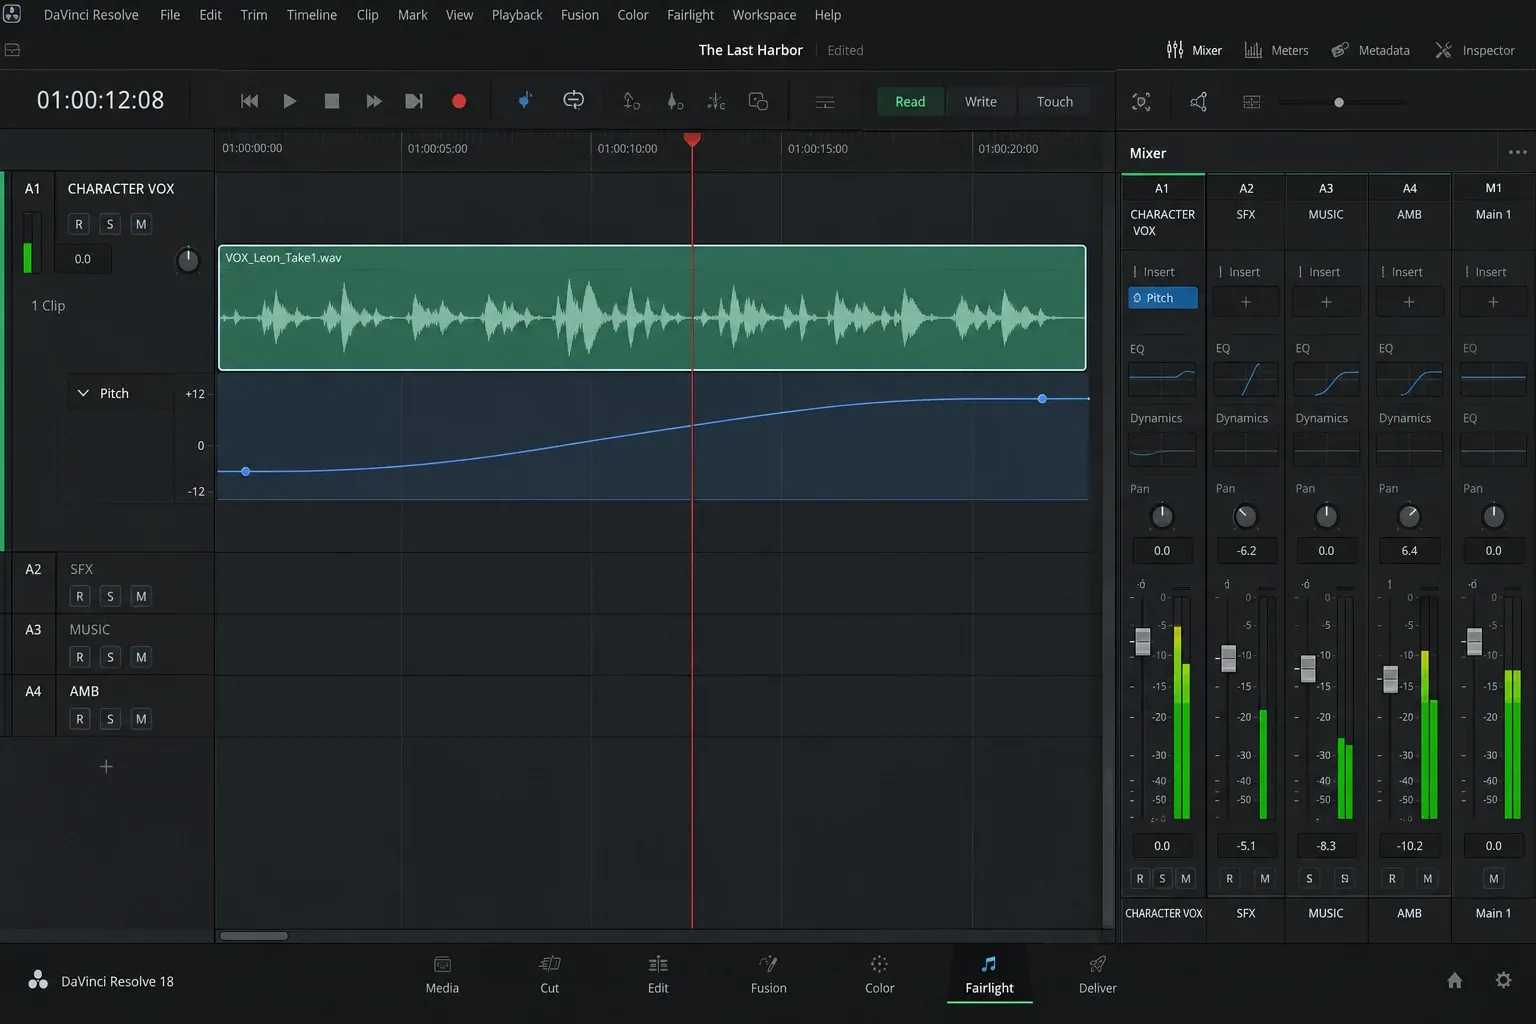
A static setting works for a complete line. A riser, falling voice, tape-stop style transition, or animated sound-design move needs at least two values at different times.
For a clip parameter with a keyframe control:
- Move the playhead to the first frame of the change.
- Set the starting pitch and enable its keyframe.
- Move to the end of the transition.
- Enter the ending pitch.
- Play through the move and adjust its duration before adding more points.
For an effect parameter exposed to Fairlight automation, enable automation, choose the parameter to write or display, and record or edit its curve. Blackmagic describes Fairlight automation as a way to record changes to control settings and effects over time, with parameter curves available in the timeline. Preview mode lets you try a move before writing it.
Keep the first pass simple. Two points define the start and end. Add a third only when the transition needs a hold or a change of direction. If the movement clicks, jumps, or sounds stepped, lengthen the transition and inspect the curve. For general keyframe timing and easing, use the DaVinci Resolve keyframes and Curve Editor guide.
Handle Linked Video and Audio Carefully
Camera clips often place linked picture and sound on the timeline. A pitch adjustment should target the audio component. Selecting the linked pair is usually harmless when you stay inside the Audio Inspector, but trimming, moving, or deleting while link selection is disabled can put sync at risk.
Before changing a long interview or performance:
- Confirm that the audio waveform you hear belongs to the selected picture.
- Keep link selection active unless you intentionally need separate edits.
- Do not alter speed as a substitute for pitch when picture duration must remain fixed.
- Check lip sync after any operation that also changes clip length.
- Use a duplicate timeline when the treatment affects many linked clips.
A pure pitch adjustment should not move the clip’s edit points. If the sound ends earlier or later after your change, look for a speed, retime, Elastic Wave, trim, or render operation elsewhere in the chain.
Reduce Metallic, Warbling, or Robotic Artifacts
Pitch shifting asks the processor to create audio information that was not captured at that new pitch. Speech, music, ambience, and isolated effects expose that process differently. A clean result on a short impact does not prove the same setting will survive a sustained vocal.
- Use a smaller shift. Extreme values reveal processing faster than moderate ones.
- Start from the cleanest source. Noise, clipping, heavy reverberation, and lossy compression can become more obvious after the shift.
- Check formants and intelligibility. A transposed voice may sound like a different-sized vocal tract even when every word remains present.
- Avoid duplicate pitch stages. Inspect clip settings, clip effects, track inserts, buses, and rendered replacement layers.
- Judge in context. A texture that sounds exposed in solo can sit acceptably under music, while a subtle artifact can remain distracting in dry dialogue.
- Compare at matched loudness. A louder processed signal can seem more convincing only because it is louder.
If the source contains hiss or room noise, clean only what is necessary before or after the pitch stage according to the result. Heavy noise reduction can leave watery artifacts that a pitch shift makes easier to hear. The order should solve the audible problem, not follow a fixed recipe.
After the character is right, recheck level. Pitch processing can change perceived loudness and peak behavior even when the fader value stays fixed. Use the audio levels and LUFS guide for the final delivery check rather than normalizing by ear alone.
Common Creative Uses
Deeper character voice
Lower one dialogue clip or a dedicated character track, then check consonants and breaths. A very large drop can make words muddy. A smaller pitch move with careful EQ often communicates size better than an octave jump.
Higher comic or creature voice
Raise pitch and listen for sharp sibilance. If the voice becomes thin, do not immediately pile on bass boost. First reduce the pitch amount and confirm that the performance remains understandable.
Layered sound design
Duplicate an effect onto another track, pitch the copy, and blend it below the original. The unshifted layer preserves the recognizable attack while the shifted layer adds size or tension. Keep the layers sample-aligned unless a deliberate delay is part of the design.
Musical transposition
Use semitones when moving a tonal sample toward another musical note. Check the result against the actual arrangement. A mathematically correct interval can still clash if the source contains chords, detuning, or a key change.
Pitch ramp
Animate from one pitch to another for a rise or fall. The transition length controls the gesture: a short move reads as a snap, while a longer move reads as a glide. Listen across the edit boundary so the ramp does not finish after the visual action.
Fix Common Pitch Problems
The Pitch section is missing
Select an audio clip rather than a video-only item, title, transition, track header, or empty timeline area. Open the Audio side of the Inspector and expand its sections. The available panel changes with the selected object.
The control changes nothing
Confirm that the selected clip is the one reaching the active bus. Bypass the setting, move it to an obvious temporary value, and replay the same phrase. Also check whether a cached or bounced version is playing in place of the live effect chain.
Every clip on the track changes
The effect is probably inserted on the mixer channel rather than on one clip. Remove or bypass the track insert and apply the treatment to the intended clip, or move the treated material to its own dedicated track.
One clip sounds much more extreme than the others
Look for stacked processing. The clip may have an Inspector pitch value, a clip effect, and a track insert at the same time. Reset one level at a time and compare after each change.
Pitch changes when clip speed changes
This is a retiming task. Review Pitch Correction in the speed controls or use the appropriate Elastic Wave workflow when duration needs to change while pitch stays stable. Do not counter a speed-induced pitch change with a second guessed pitch effect until the retime settings are clear.
The processed voice is hard to understand
Reduce the amount, shorten the effect chain, and compare the dry recording. Large shifts can move vocal resonances far enough to damage clarity. Restore intelligibility before adding EQ, distortion, reverb, or stereo effects.
Playback stutters after adding effects
Bypass other processor-heavy plug-ins and check whether the effect chain is the cause. Fairlight provides cache and bounce options for demanding processing. Keep the live version until the sound is approved, then use a reversible bounce or cached workflow rather than deleting the untreated source.
Reset and Compare Without Losing Other Work
Reset the Pitch parameter or bypass the specific effect before resetting the complete Audio Inspector. A full reset can remove deliberate volume, pan, EQ, keyframes, and other clip work. On a track, bypass the single insert before clearing the channel strip.
Use this diagnosis order when the sound seems wrong:
- Check the clip Pitch value.
- Check clip-level Fairlight FX.
- Check the destination track’s inserts.
- Check bus processing and routing.
- Check speed, Pitch Correction, and Elastic Wave state.
- Check cached, bounced, or rendered replacement audio.
This follows the signal from the clip outward. It also reveals stacked changes instead of hiding them with another compensating effect.
Pitch Check Before Export
- Confirm that clip duration and sync remain unchanged.
- Listen to the full phrase, not only the most dramatic word.
- Compare processed and bypassed audio at similar loudness.
- Check neighboring clips and every item on a track with a pitch insert.
- Inspect automation at the start and end of the clip.
- Listen for metallic tails, warbling vowels, harsh sibilance, and exaggerated room noise.
- Check peaks and final loudness after the pitch decision is finished.
- Render a short proof of the difficult section and listen outside the timeline before the final delivery.
The reliable route is simple: use clip Pitch for one fixed adjustment, use a clip effect when you need an effect workflow, and use a track insert only when the whole track has one sonic job. Keep speed correction separate, check for stacked processing, and stop at the smallest shift that sells the idea.
