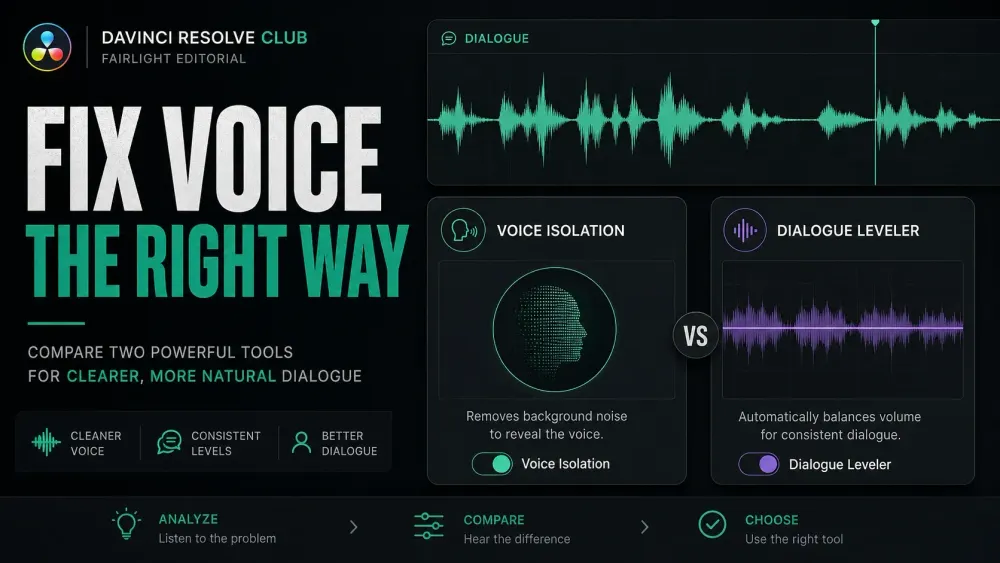
Quick answer: Voice Isolation separates a recorded human voice from competing sound; Dialogue Leveler rides loud dialogue down and soft dialogue up. Voice Isolation requires DaVinci Resolve Studio, while Dialogue Leveler is available on desktop in both Free and Studio. Match obvious clip-gain differences first, isolate only when noise masks speech, level second, then EQ or compress only if the mix still needs it.
These tools sit close together in the Audio Inspector, but they solve different problems. If the problem is an air conditioner, crowd, traffic, or room sound, test Voice Isolation and use the broader Resolve background-noise workflow when hum, broadband noise, or other repair needs a different tool.
If the speaker turns away from the microphone or two people land at different levels, test Dialogue Leveler. If only two words are wrong, manual gain is usually cleaner than either processor.
Voice Isolation vs Dialogue Leveler
| Tool | Problem it solves | Controls | Edition |
|---|---|---|---|
| Voice Isolation | Background ambience, noise, music, or competing sound around a voice | Enable and Amount 0–100% | Studio |
| Dialogue Leveler | Speech that varies too much between phrases or speakers | Preset, Reduce Loud Dialogue, Lift Soft Dialogue, Background Reduction, Output Gain 0 to +6 dB | Free and Studio |
| Clip gain / automation | A few predictable level jumps or words needing editorial judgment | Clip gain, keyframes, fader automation | Free and Studio |
| Compressor | Remaining dynamics needing threshold-, ratio-, and timing-based control | Threshold, ratio, attack, release, makeup gain | Free and Studio |
Checked on September 15, 2026 against the September 2026 DaVinci Resolve 21.1 Reference Manual, these instructions cover desktop Resolve on macOS, Windows and Linux. The manual labels Voice Isolation as Studio-only and documents Dialogue Leveler separately without that restriction.
Ordinary clip and Track FX instances process existing recordings, not a general live input. The dedicated Cut page Voiceover Tool is a separate recording path that can apply Voice Isolation and Dialog Leveler as it records. That exception does not make these effects a general live-stream noise filter.
What Voice Isolation Actually Does
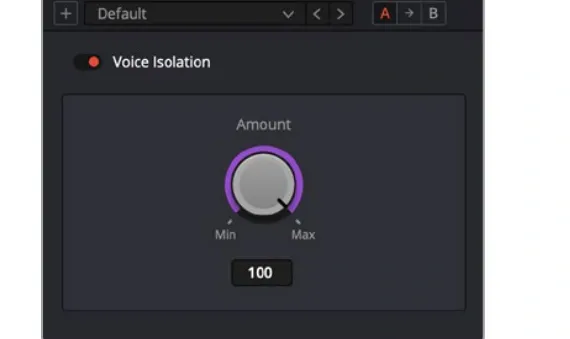
Voice Isolation uses an AI model trained for human voices to separate recorded speech from competing sound. Amount is a wet/dry blend: at 50, the original and isolated voice are roughly equal.
Blackmagic recommends 70–80 as a useful natural-sounding range while strongly isolating the source, but that's a starting range, not a target every recording should reach. Push only until the background stops masking the words.
Voice Isolation supports mono, stereo and dual-mono audio tracks, not tracks with more than two channels. Clip controls also depend on the selected source and its channel configuration; putting a multichannel source on a mono track does not by itself prove that its clip controls will be available.
Resolve 21.1 documents Voice Isolation in the Cut page Voiceover Tool during recording. For existing material, keep the original media and an unprocessed timeline copy so you can return to the recorded sound. Separation does not guarantee usable words when clipping, a siren or another voice covers the speech.
Audition the hardest recoverable line, raise Amount only until competing sound stops masking words, then compare bypass at matched loudness. Keep enough stable ambience for the cut to sound continuous. If consonants smear, room tone pumps, or the voice turns watery, split the difficult section or reduce Amount instead of treating 70–80 as a target. When Voice Isolation cannot separate the line cleanly, RX 12 Dialogue Isolate exposes separate voice, noise and reverb gains for that case.
What Dialogue Leveler Actually Does
Dialogue Leveler analyzes dialogue, rides louder areas down, lifts softer areas, and can lower background it classifies as non-dialogue. It aims for the result of detailed clip-gain or fader work without forcing you to draw every move, while preserving more of the original relative dynamics than simply crushing the track with a limiter.
The real controls matter:
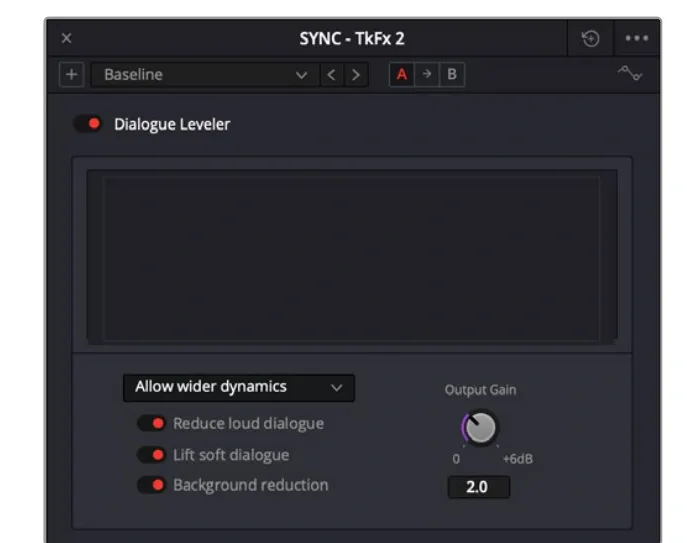
- Preset: In the Edit/Fairlight documentation, Allow wider dynamics is the default for medium-to-high material with wider loud-to-soft changes. More lift for low levels suits quiet dialogue; Lift soft whispery sources addresses whispered dialogue with background noise; Optimize moderate levels suits material at medium levels throughout. Choose by source, not as a quality ladder.
- Reduce Loud Dialogue: rides peaks in louder speech downward.
- Lift Soft Dialogue: an on/off switch that raises low-level dialogue. Background occurring at the same time as speech may rise too; listen for newly exposed breaths or mouth noise.
- Background Reduction: gently lowers non-dialogue sound according to the analysis and preset. It isn't the same separation process as Voice Isolation.
- Output Gain: adds 0 to +6 dB after leveling. It isn't a target-loudness control.
Dialogue Leveler is designed to retain relative dynamics while increasing intelligibility and average level, but the editorial goal still sets the boundary. A wide shot may need to sound more distant than a close-up, and a whisper shouldn't automatically match a shout.
Like Voice Isolation, it works on existing mono, stereo, or dual-mono material; ordinary clip and Track FX instances can't process a general live audio input, and tracks above two channels are unsupported.
The Cut page Voiceover Tool can apply Dialog Leveler during recording. Its label uses Dialog rather than Dialogue in parts of the manual. This guide does not extend desktop Inspector or Mixer instructions to the iPad interface.
Where to Find the Controls
On the Edit or Fairlight page, select the audio clip, open Inspector, then Audio, and enable the required module. Preset documentation is inconsistent: the Cut and Edit Inspector summaries on pages 743 and 928 list Optimized for most sources as the default in a three-preset menu. The detailed plugin sections on pages 775, 1116 and 4015 list four presets with Allow wider dynamics as default. The descriptions above follow those detailed sections, not a verified universal menu. Check the labels in your installed build and chosen clip or track panel.
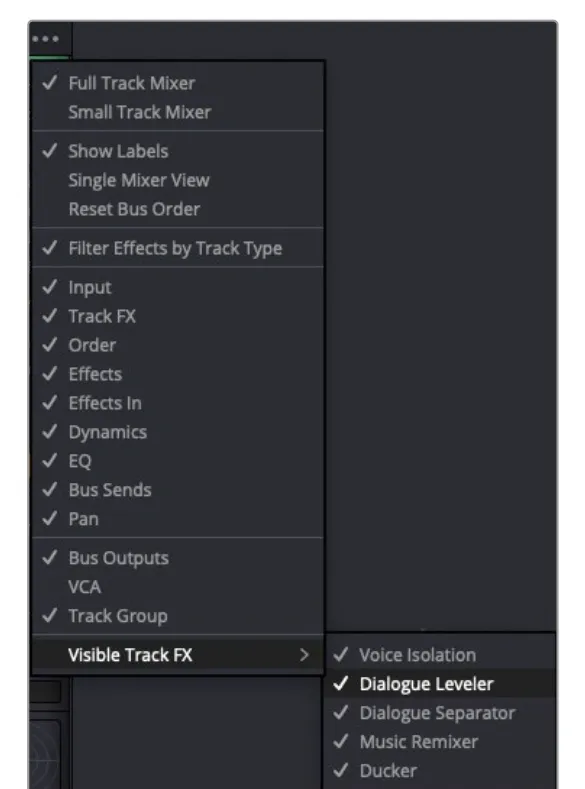
For track-wide treatment, open the Fairlight Mixer. If its Track FX section is hidden, use the Mixer's three-dot menu and select Track FX. The manual's Track FX instructions put Voice Isolation and Dialogue Leveler at fixed dedicated points, visible by default when that section is shown. Visible Track FX controls which modules appear. Dialogue Leveler's scrolling processing waveform belongs to the track plugin, not its clip Inspector version.
Clip processing is safer when only a few shots have noise or level problems. Track processing is convenient when one microphone and environment remain consistent. Don't apply a track-wide setting to a lane that mixes lavs, booms, phone recordings, and room tone unless you've auditioned every transition.
If controls are missing, check the installed edition, select one eligible audio clip and confirm its source channels and track format. Test a separate mono or stereo clip first. Do not unlink a working edit or remap channels blindly; preserve sync and channel assignments.
Best Processing Order When You Need Both
- Listen raw. Mark noise, level jumps, clipping, overlap, and unusable words across the entire scene.
- Edit first. Choose the cleaner microphone or take, remove covered words where possible, and split clips when conditions change radically.
- Match gross clip gain. Bring edit-to-edit differences into the same working neighborhood without flattening performance.
- Apply Voice Isolation only where needed. Raise Amount until the noise stops masking speech, then back off if the voice loses texture.
- Add Dialogue Leveler. Choose the preset matching your source from the labels available in your panel; the detailed manual describes Allow wider dynamics as one baseline option. Enable only the modules that solve a heard problem. Output Gain is not a target-loudness control.
- Shape tone. Use the steps in our dialogue EQ guide after restoration so you're not boosting noise the isolation stage will later remove.
- Control remaining dynamics. Add light compression or automation only if the leveler hasn't already done enough.
- Mix in context. Restore room tone, music, and effects around the cleaned voice.
- Measure the final bus. Use the LUFS and true-peak workflow after all processing.
This is a listening and adjustment sequence, not a promise that enabling effects in that order rearranges their signal path. Voice Isolation and Dialogue Leveler have fixed dedicated Track FX positions; the Mixer Order control for ordinary inserts, Dynamics and EQ does not move those Track FX slots. Keep clip and track processing distinct, and avoid unintentionally applying the same treatment twice. Track Trim is after Track FX, as manual page 3940 explains; neither track Trim nor the track fader should be treated as an input-gain control for these processors.
Clip-Level or Track-Level Processing?
| Scope | Use it when | Risk |
|---|---|---|
| Clip | Noise, mic position, or speaker changes between edits | Different settings can make room tone jump at every cut |
| Track | One consistent microphone, speaker, and environment | A single setting may overprocess exceptional clips |
| Split tracks | Boom, lav, phone, ADR, and narrator need separate treatment | More routing work, but clearer control and automation |
If you split speakers or microphones across tracks, name and color them before adding effects. Keep dialogue, room tone, music, and effects on intentional buses; our Fairlight bus-routing tutorial prevents a cleaned voice from accidentally feeding the wrong print master.
Compare Bypass at Matched Loudness
Keep the source file unchanged and render tests to a new filename. Toggle the effect's enable/bypass control on the same phrase and compensate output or monitor level so the perceived loudness is close. A louder result can seem clearer even when it has more artifacts. Listen for consonant edges, sibilance, room tails, breaths and transitions into silence.
Test four places, not one easy loop: the noisiest sentence, the softest line, a loud line, and an edit where the microphone or room changes. Then render the hardest 20–30 seconds and listen outside Resolve on headphones, speakers, and a small mono-compatible device.
If playback becomes unreliable after enabling an effect, bypass that instance and compare the same passage. Keep approved settings noted, then re-enable and check a short export before delivery. No fixed CPU percentage or render-speed gain applies to every computer, source and processing chain.
When Neither Tool Is the Right Fix
- Clipped recording: do not expect these tools to repair recording overload. Try an unclipped microphone or take before pushing isolation harder.
- Covered speech: a horn, clap, or second voice may occupy the same time-frequency region as the word.
- Very distant microphone: reducing room sound does not guarantee the natural detail of a closer recording.
- A few bad words: clip gain or automation is faster and more transparent.
- Music or effects: these dialogue tools can mistake sung or speech-like material for the target.
- Mixed program master: process dialogue stems before the final mix whenever possible.
For missing or covered words, alternate takes, lav/boom choice, ADR, captions, or an editorial rewrite may be more honest than extreme restoration. The goal is intelligibility without pretending the source contains information it does not.
Free vs Studio: The Correct Answer
On desktop, Dialogue Leveler works in Free and Studio; Voice Isolation requires Studio. The current Studio overview lists Voice Isolation among its paid audio tools. Blackmagic's Studio and iPad feature matrix marks desktop Dialogue Leveler Yes and Voice Isolation Studio on page 9. That matrix is dated July 2025 for Resolve 20, not 21.1; it corroborates the edition split in the current manual rather than proving every current interface detail.
Dialogue Separator is a different Studio tool with independent dialogue, background and ambience levels. The Resolve 21.1 manual still calls it mono-only: stereo sources need separate processing of the two mono channels. Do not confuse that limit with Voice Isolation and Dialogue Leveler's mono/stereo support.
Troubleshooting Artifacts
The voice sounds watery or robotic
Reduce Voice Isolation Amount and compare the same difficult section with bypass. Keep enough stable room tone for adjacent edits to match. If the words are still smeared or metallic, prefer a cleaner take or microphone over a stronger setting. Do not enable Dialogue Leveler's Background Reduction automatically just because isolation is on; audition whether a second background-reduction stage helps.
Breaths and mouth noise surge
Disable Lift Soft Dialogue for that clip, then correct the quiet phrase or offending breath manually. It is a switch, not an amount slider. If the added noise occurs with speech, compare a different preset and the isolation setting rather than assuming Output Gain can change the balance between voice and noise.
Noise changes at every edit
Use different clip-level settings for different microphones and locations, then bridge cuts with matching room tone and short crossfades. One track-wide value cannot make unrelated rooms identical.
Dialogue Leveler pumps
Match clip gain first, choose a gentler preset, and inspect any dialogue compressor settings or limiters later in the chain. Stacking two aggressive level-control stages can exaggerate movement.
The last word is cut or fades strangely
Check whether the original edit cuts through a word, breath or room tail. Extend handles only where source media exists, then compare with both processors bypassed. If the raw ending is intact but the processed one is not, back off the processing or use a manual edit; do not assume the problem is missing source audio.
The processed export differs from playback
Render a short WAV test from the correct bus, reimport it, and compare phase, channel layout, and level. Our audio export checklist covers bus and channel-selection mistakes.
Final Dialogue QA
- Listen to every processed edit at normal speed.
- Compare bypass at matched loudness.
- Check breaths, S sounds, plosives, and word endings.
- Listen for ambience opening and closing around speech.
- Confirm intentional distance and performance dynamics remain.
- Check downstream EQ, compression, limiter, and bus routing.
- Render and reimport the hardest passage.
- Measure final loudness and true peak only after the mix is complete.
Voice Isolation should make the background less distracting. Dialogue Leveler should make the performance easier to follow. If the tool itself becomes the first thing you hear, it is doing too much.
Use the DaVinci Resolve Fairlight audio hub to connect cleanup with routing, EQ, compression, export, and loudness checks. For licensing decisions outside this pair of tools, continue with the DaVinci Resolve Free vs Studio comparison.
Voice Isolation vs Dialogue Leveler FAQ
What is the difference between Voice Isolation and Dialogue Leveler?
Voice Isolation separates a recorded human voice from competing sound. Dialogue Leveler rides louder dialogue down, lifts softer dialogue, and can reduce some non-dialogue background for a more consistent level.
Is Dialogue Leveler available in DaVinci Resolve Free?
Yes. Dialogue Leveler is available on desktop in both Resolve Free and Studio. Voice Isolation requires Resolve Studio.
Which tool should go first?
When both are needed, match large clip-gain differences first, apply Voice Isolation conservatively, then use Dialogue Leveler. Treat that order as a starting point and compare the full chain at matched loudness.
Can Voice Isolation remove wind and crowd noise?
It can reduce them when the speech remains recoverable. It can't reliably reconstruct words covered by strong gusts, clipping, applause, or another voice.
Why does Dialogue Leveler raise breaths and room noise?
Lift Soft Dialogue raises quiet dialogue, and noise occurring with speech may rise too. Disable that switch or correct the phrase manually. Output Gain changes the level after processing; it is not a noise-reduction amount or a loudness target.
Should I still use a compressor?
Only if the dialogue needs additional controlled dynamics after clip gain and leveling. Start gently and check that the compressor isn't exaggerating pumping or breaths.
Can I apply these tools to an entire track?
Yes, on existing mono, stereo, or dual-mono tracks. Ordinary clip and Track FX instances can't process a general live audio input. The Cut page Voiceover Tool is a separate recording workflow that can apply Voice Isolation and Dialog Leveler while it records. Track processing is safest when the microphone, speaker, and room stay consistent.
