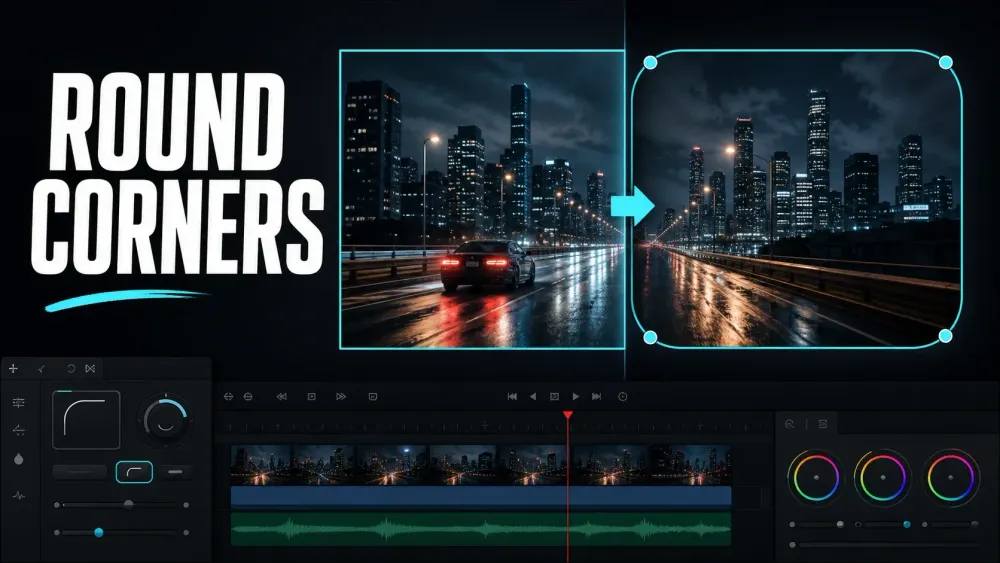
To round a video in DaVinci Resolve, open the clip in Fusion, select MediaIn1, and add a Rectangle mask. Confirm Rectangle1 feeds MediaIn1’s blue mask input, then select Rectangle1 and increase Corner Radius. Keep Soft Edge near zero for a clean card; place a background on the track below when the transparent outside area shouldn't appear black.
The click sequence is short. The part that catches editors is everything around it: the mask can land on the wrong node, non-uniform scaling can stretch the curves, and a perfectly good transparent result can look black when there's nothing underneath it. This guide covers the dependable Fusion setup first, then the faster alternatives for graphics and multi-clip sequences.
Choose the Method That Matches the Job
| What you are building | Best starting point | Why |
|---|---|---|
| Rounded video or still-image overlay | Fusion Rectangle mask | The shape, transparency and node order remain visible and editable. |
| Several cuts that should share one frame | Compound Clip, then Fusion mask | One mask controls the complete sequence instead of being copied to every shot. |
| Label, lower third or interface card | Fusion Background + Rectangle | Color, alpha, size and radius stay procedural. |
| One quick overlay | Resolve FX Transform: enable Crop, then set Edge Rounding | Fast on the Edit page; Edge Softness is optional feathering, not the rounding control. |
The native Fusion Rectangle workflow is available in Resolve Free and Studio. Resolve 21.1 was released on September 8, 2026. The control references below come from the current Resolve 21 Reference Manual retrieved September 15. This is a documentation-checked guide, not a claim of hands-on testing in 21.1.
Round a Video with a Fusion Rectangle Mask
- On the Edit page, place the clip on V2. Put the background video, color or graphic on V1.
- Select the V2 clip and open the Fusion page.
- Confirm that MediaIn1 is connected to MediaOut1.
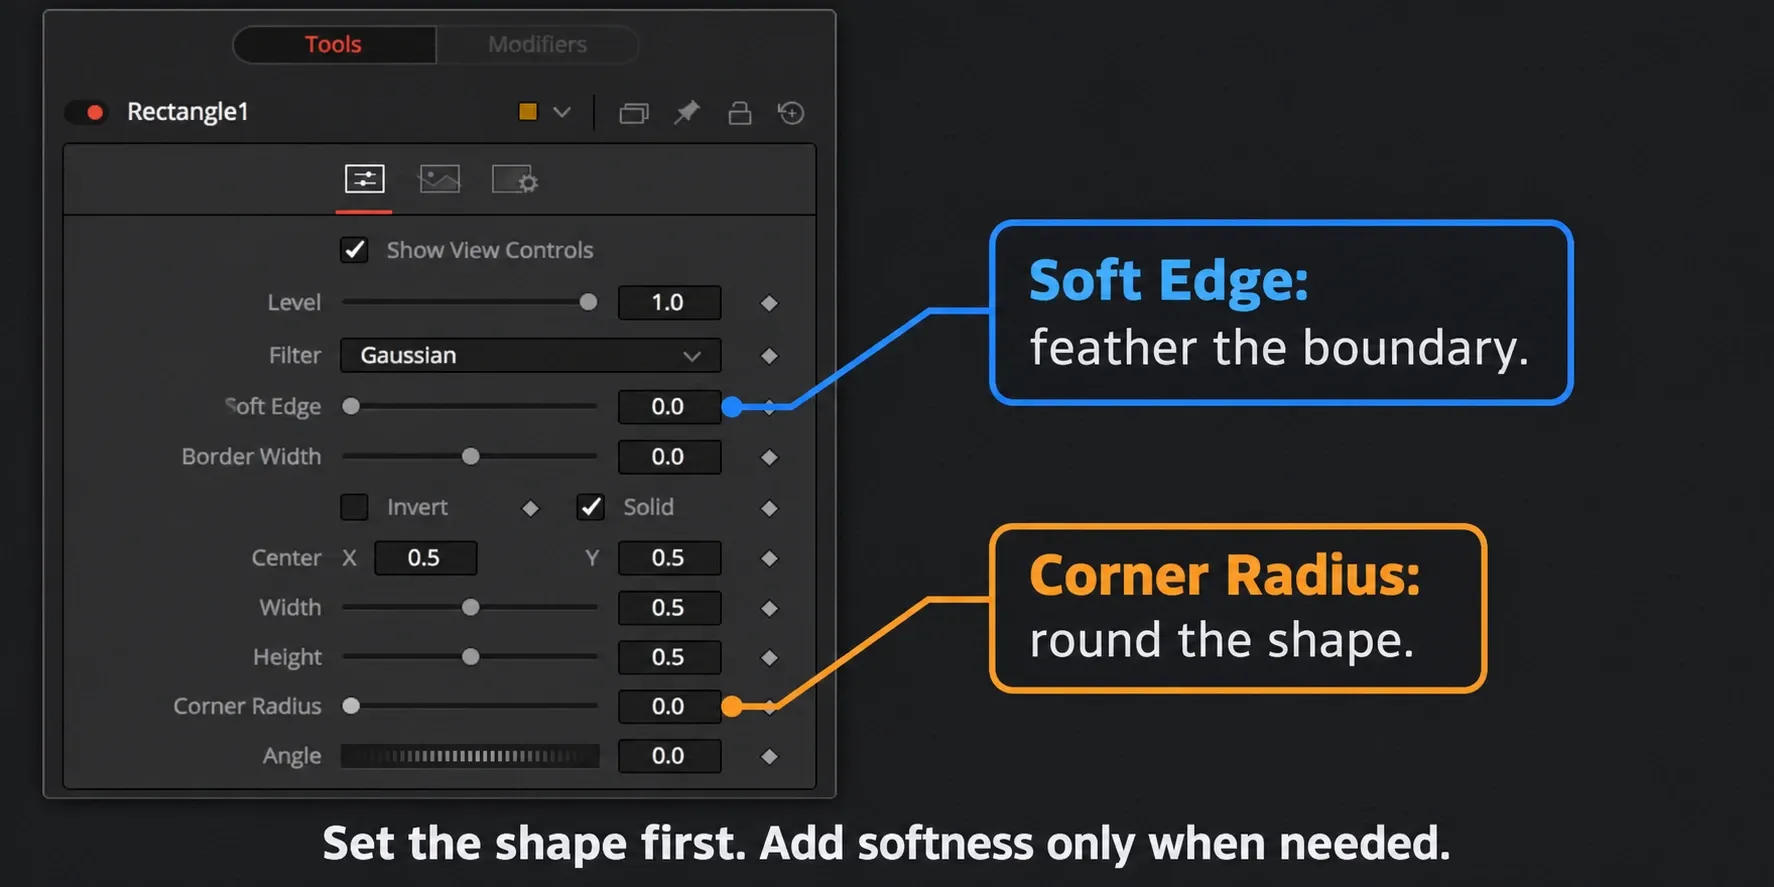
- Select MediaIn1, then click the Rectangle mask button in the Fusion toolbar. Resolve should create Rectangle1 and connect it to the blue mask input on MediaIn1.
- Select Rectangle1. Set Width and Height so the mask sits slightly inside the frame.
- Increase Corner Radius until the curve suits the card.
- Leave Soft Edge at zero or very low for crisp UI-style corners. Add feather only when the composite genuinely needs a softer edge.
- Return to the Edit page and watch the entire clip over its final background.
The checkerboard in the Fusion Viewer means transparency; it isn't a fault. On the Edit page, that area reveals the lower track. If there's no lower track, the timeline background is normally black, so the finished frame looks as though the mask added a black border.
If the Rectangle Does Nothing, Check the Connection
A blue input means an effect mask, but its result depends on the receiving tool. Masking MediaIn cuts the source image. Masking a Transform normally limits the transformation; it does not automatically make everything outside the shape transparent. On Merge, the mask controls where the foreground appears over the background.
If you drop a Rectangle into empty space, Resolve creates the tool without necessarily connecting it where you intended. Drag Rectangle1’s output square to MediaIn1’s blue triangle, or delete the loose node, select MediaIn1 and add Rectangle again. The latter is usually faster and avoids connecting the mask to MediaOut or an unrelated effect.
If the node graph still feels opaque, the site’s Fusion tutorial for beginners explains viewers, image connections, masks and Merge nodes before you build a larger composite. Use the Fusion learning hub to choose the next workflow by task. Blackmagic also provides current Resolve training books and lesson files with downloadable practice projects.
Resize the Card Without Stretching Its Corners
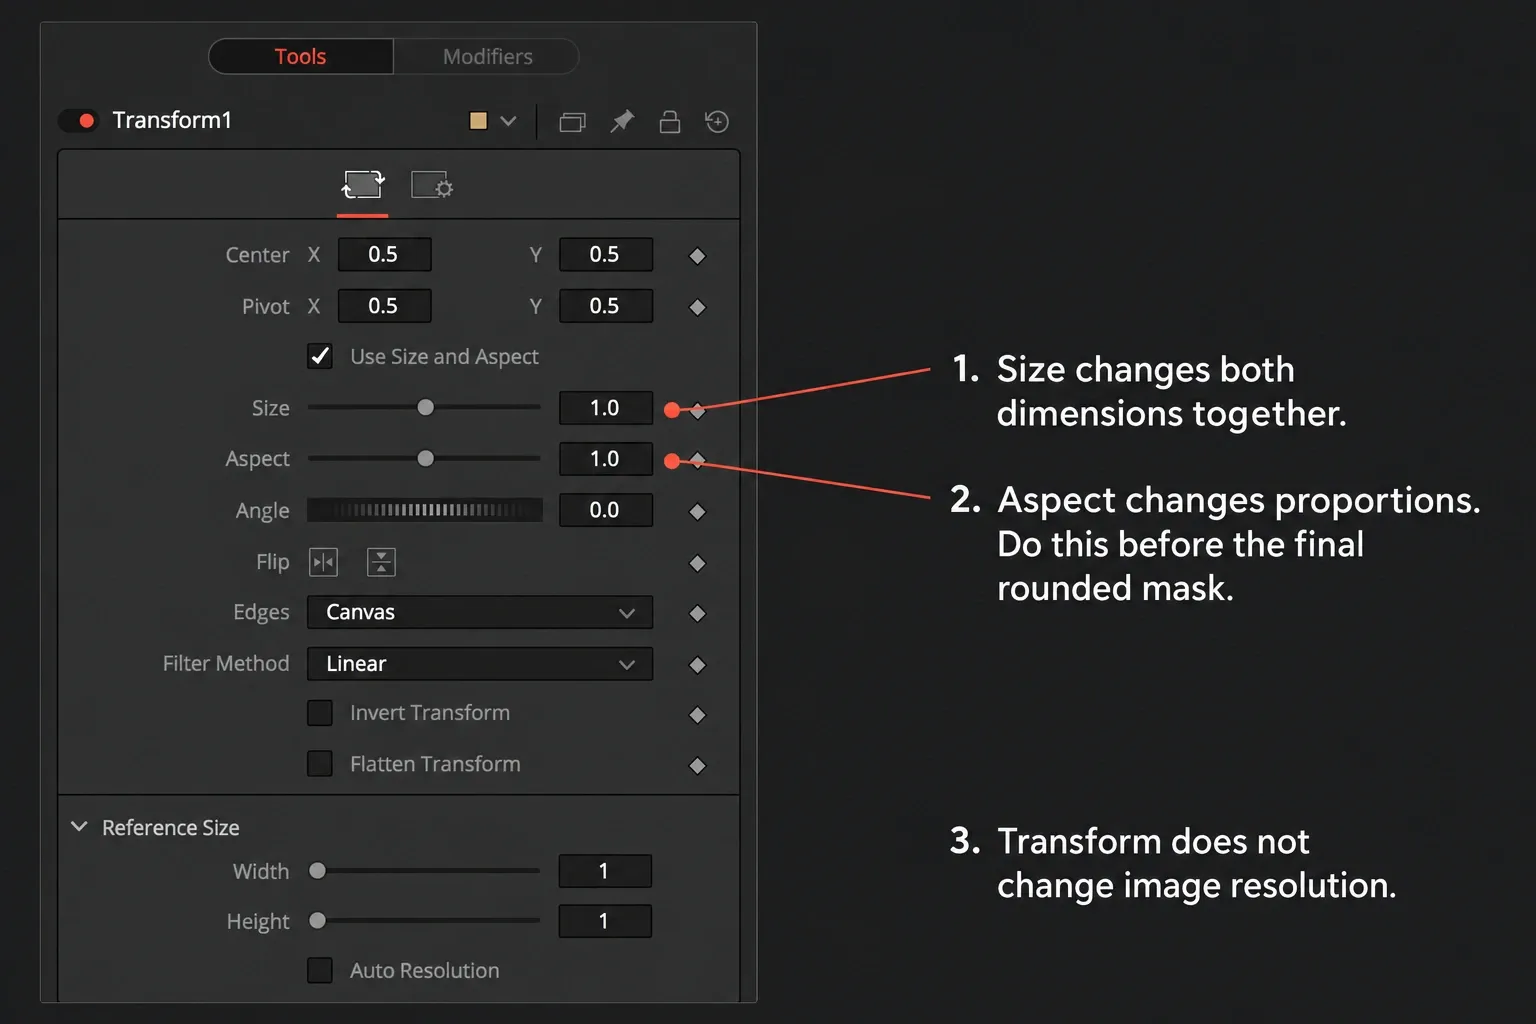
Rectangle1 defines the visible shape. A Transform node changes the position and scale of the image. Those jobs look interchangeable until X and Y are scaled by different amounts.
If you stretch the already-masked image horizontally or vertically, its corners stretch too. To move or resize the picture inside a fixed rounded window, transform the source first, then mask a Merge over a transparent Background. Do not merely move Rectangle1 onto a Transform and assume it cuts the output alpha.
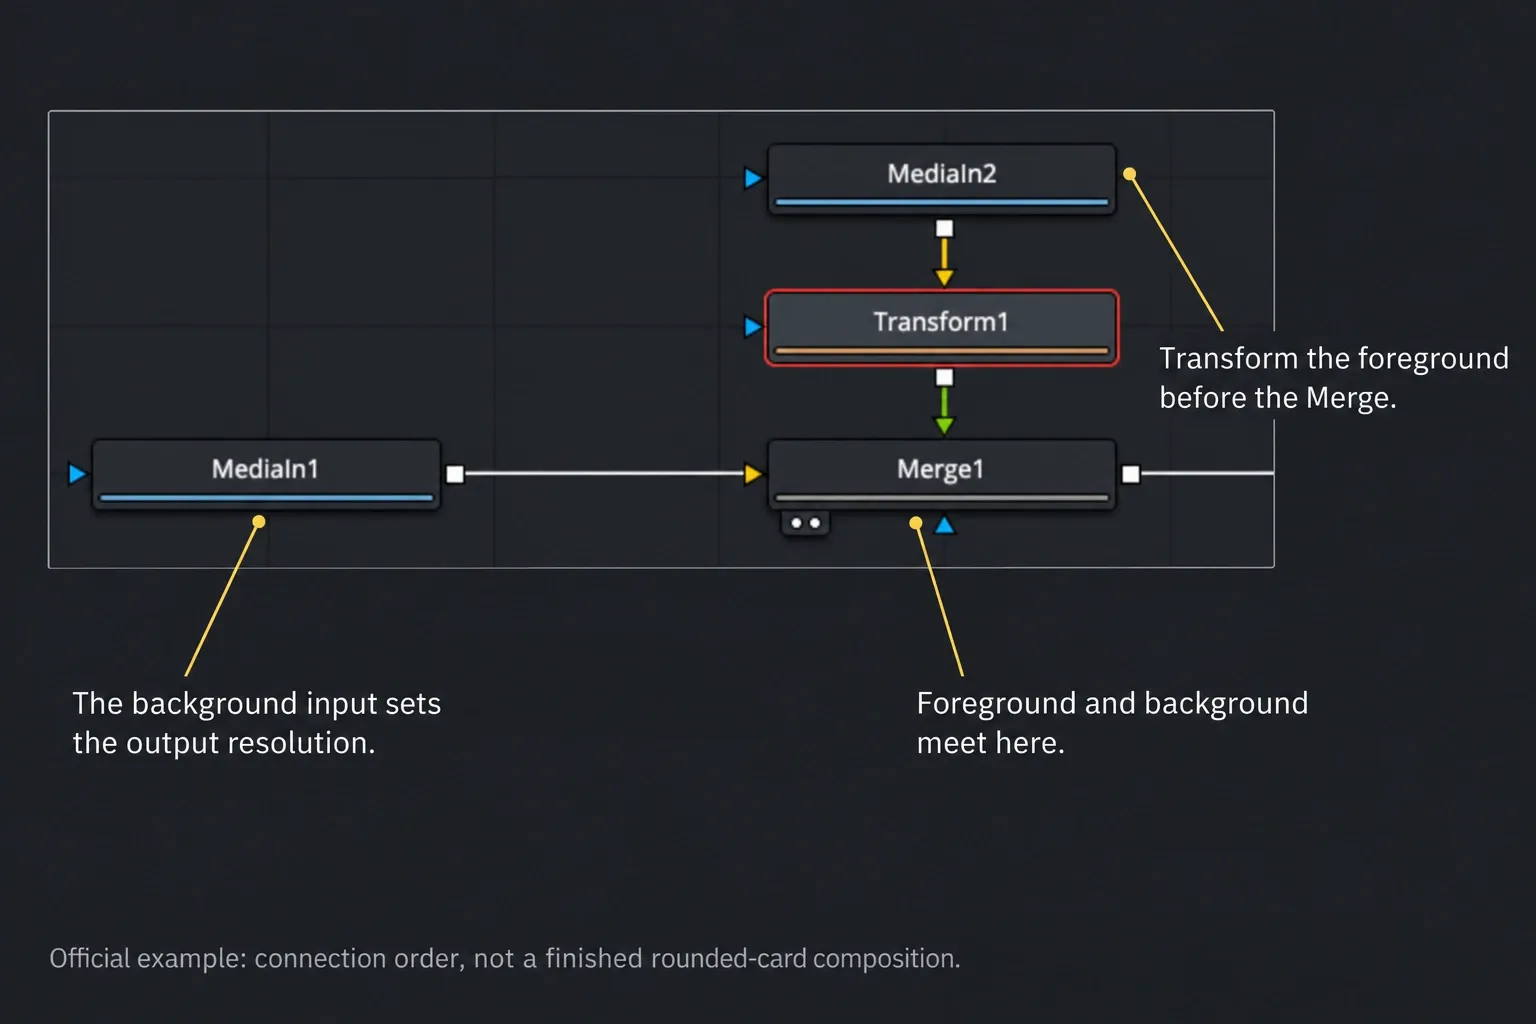
Use this explicit routing: MediaIn1 into Transform1, then Transform1 into Merge1’s green foreground input. Connect Background1 to Merge1’s yellow/orange background input and set Background1’s Alpha to 0. Connect Rectangle1 to Merge1’s blue effect-mask input, then Merge1 to MediaOut1. Leave Merge at Normal/Over. The mask reveals the transformed foreground inside the rectangle and the transparent background outside.
The Background sets the Merge output resolution. Set its image dimensions to the intended composition before adjusting the mask. The manual’s Merge and Transform chapters distinguish this canvas from Transform sizing: Transform changes the image’s placement and proportions, not its pixel resolution.
When the entire timeline needs a new shape rather than one picture-in-picture card, use the separate aspect-ratio workflow for Resolve before building the mask.
The Rectangle chapter describes Corner Radius as 0.0 for sharp corners and 1.0 for maximum rounding. It is not a pixel-radius field. Equal Width and Height values also do not guarantee a square on a non-square canvas: Rectangle starts in the composition’s aspect ratio.
A 2025 discussion about Rectangle radius during resizing illustrates the practical problem, not an official formula. Set the card’s final proportions and judge the radius at delivery resolution. If a mask fits one still image but not another, check its Image-tab output dimensions and pixel aspect against the composition. Do not copy a fixed-pixel expression without accounting for those dimensions.
Use One Rounded Frame Across Multiple Clips
Copying the same Fusion composition to ten edits works until one clip is trimmed, reframed or replaced. If the whole sequence should play inside one rounded window, select the clips on the Edit page, right-click and choose New Compound Clip. Open that Compound Clip in Fusion and apply the Rectangle mask once.
This is the clean route for a demo reel, app walkthrough or montage inside a persistent device-style frame. Keep individual clips separate when their positions or radii must change independently. A Compound Clip creates another level of timing, so name it clearly and open it when you need to adjust the cuts inside.
An Adjustment Clip is not my first choice for this job. It processes everything beneath its time range, which can unintentionally include titles, backgrounds or overlays. The dedicated Adjustment Clips guide explains that top-down scope and when a shared timeline effect is the better tool.
Build a Rounded Color Card for Text
For a label or lower-third panel, start with a Fusion Background node rather than a Solid Color generator imported from the Edit page:
- Add a Background node and choose the card color and alpha.
- Select the Background node and add Rectangle1 to its blue mask input.
- Set Width, Height and Corner Radius on Rectangle1.
- Add Text+ and Merge the text over the rounded Background.
- Connect the Merge output to MediaOut.
Connect the rounded Background to Merge’s yellow/orange background input and Text+ to its green foreground input. The text should sit above the fill, not mask the letters. For a simple standard Text title, its Inspector has a Background with Corner Radius; you do not need this node setup just to put a rounded box behind one line. The DaVinci Resolve text guide covers typography and title animation.
Add a Border and Shadow That Follow the Radius
For a simple outline, duplicate the Rectangle on a separate colored Background branch, turn off Solid on that mask and adjust Border Width. Merge the outline over the rounded video. The Rectangle mask controls distinguish a filled shape from an outline. Check the stroke at final output size rather than treating Border Width as a pixel measurement.
For a shadow, use another Background set to black with reduced Alpha, masked by a filled copy of the rounded Rectangle. Offset that mask’s Center and add Soft Edge, then merge this branch behind the card. Leave enough canvas around it so the feather is not clipped. Do not blur the completed video branch: that softens the picture too. These are combinations of Background, Rectangle and Merge controls, not a named one-click shadow preset.
When the Edit-Page Method Is Enough
For a one-off video or still-image overlay, apply the Transform effect in the Resolve FX Transform category of the Effects Library. Open its effect controls in the Inspector, enable Crop and adjust Edge Rounding. Set Advanced Options, Edge Behavior to Transparent when the area outside must reveal a lower track. Edge Softness feathers the alpha edge; it does not replace Edge Rounding. These controls are documented in the Resolve FX Transform chapter. This is a separate effect, not the built-in clip Transform controls.
Don't confuse that effect with the normal Inspector controls named Crop Left, Crop Right, Crop Top and Crop Bottom. Those controls remove straight strips; they don't create curved corners on their own. The Resolve Inspector control guide maps those clip-level transform and crop groups.
Move back to Fusion when the effect is combined with stabilization, several transforms, animation or a reusable border. The node graph makes the processing order visible instead of forcing you to guess which crop happened first.
On the Color page, a Power Window normally limits a grade. It does not make the rest of the clip transparent by itself. To use a window as an alpha matte, right-click empty space in the node graph, choose Add Alpha Output, and connect the window node’s blue key output to that blue output. A rectangular window’s Softness feathers its edge; it is not Fusion’s Corner Radius. Use a Curve window or the Window palette’s Convert to Bezier option for a custom contour. For a regular rounded card, Rectangle in Fusion or FX Transform is the simpler route. The manual explains Color-page alpha output.
Round Only the Top or Bottom Corners
The standard Rectangle mask applies the same radius to all four corners. For a panel with only the top corners rounded, make the mask taller than the frame and move it down until the bottom curves sit outside the visible area. Reverse that placement for only the bottom corners.
For four independently controlled corners, build a custom Polygon or B-Spline contour, or combine masks. The standard Rectangle does not expose four separate radius controls. This is shape construction, not subject isolation; use the site’s picture-in-picture workflow when the main task is arranging multiple clips rather than shaping their edges.
Animate the Card Without Making the Edge Wobble
Width, Height, Center and Corner Radius can be animated. For a simple entrance, position or uniformly scale the completed card rather than changing Width and Height independently. That preserves the proportions, although the radius still changes in pixels as the whole card grows. If the design requires a constant pixel radius while the card dimensions change, use a dimension-aware expression or custom shape and inspect the result; a fixed Corner Radius value alone is not a pixel lock.
Set the final radius at the final card size, then preview the complete animation at normal speed. Use the Spline editor to ease the position or scale; don't add extra Corner Radius keyframes unless the design intentionally changes from square to rounded.
Export Rounded Corners with or Without Transparency
If the rounded video is already composited over its final background, export it normally. The transparency outside the mask has already been replaced by the lower track.
If another editor needs real transparency, remove any opaque background from the output and use Deliver’s Single Clip mode for the completed composition. Choose an alpha-capable format, codec and type that your installation exposes, then enable Export Alpha. The manual’s alpha export section lists ProRes 4444, ProRes 4444 XQ and DNxHR 444, with TIFF or OpenEXR sequences as other RGBA options. Encoder availability depends on the operating system, edition and installed build; a listed codec is not a promise that every machine can encode it.
Ordinary H.264 MP4 delivery does not preserve this alpha. A .mov extension alone is not proof of transparency either. Match straight or premultiplied alpha to the receiving application, then reimport a short render over a bright color. The transparent-video export guide covers format selection and edge interpretation in more detail.
For ordinary YouTube or social delivery, composite over the intended background first and use the settings in the Resolve export settings hub.
Fix the Five Problems That Waste the Most Time
The corners are black
The outside of the mask is transparent, but there is nothing underneath it. Put the rounded clip on V2 and a background on V1, or render to an alpha-capable format when the next application needs transparency.
The entire clip disappears
Select Rectangle1 and reset Width, Height and Center. Confirm that Invert is off and that the mask feeds MediaIn1’s blue input. A tiny, inverted or off-screen Rectangle can hide the whole frame.
The curves turn into ovals
Check for a non-uniform transform after the mask, including Edit-page sizing. Reframe the source before the masked Merge described above, and check the mask canvas and pixel aspect. A mismatch in image dimensions can also make copied settings look different.
The edge looks soft
Reduce Soft Edge and check the composition at delivery resolution. A small feather can hide aliasing; a large one makes a UI card look out of focus.
The mask works in Fusion but not in the timeline
Make sure you opened the same timeline clip whose Fusion composition you edited. Confirm MediaIn1 still reaches MediaOut1 and that no later Edit-page crop or transform hides the rounded boundary.
If this is your first effect built from clip geometry, the DaVinci Resolve tutorial roadmap places it after Inspector basics and before more complex Fusion work.
Rounded Corners in DaVinci Resolve: FAQ
Can I round corners in DaVinci Resolve Free?
Yes. The native Fusion Rectangle mask, Background, Merge, Transform and basic keyframe controls used here are available in the free edition.
Why does Corner Radius change when I resize the Rectangle?
Corner Radius is a 0.0–1.0 shape control, not a fixed pixel value. Its appearance depends on the rectangle’s dimensions and the image geometry. Set final proportions first and check mask resolution and pixel aspect before using a dimension-aware expression.
Can I apply rounded corners to several clips at once?
Yes. Put the shots into a Compound Clip and apply one Fusion Rectangle mask to the compound. Keep them separate if each clip needs different framing or animation.
Can I round only two corners?
Extend the Rectangle beyond the frame so the unwanted curved corners sit outside the visible area. Use multiple masks or Shape tools when every corner needs independent control.
Why are my rounded corners uneven?
Check for non-uniform scaling after the rounded shape and mismatched mask dimensions or pixel aspect. Reframe the source before a masked Merge over a transparent Background, then judge the corners at final output size.
How do I export rounded video with transparency?
Render with a format and codec that expose alpha-channel output in Resolve, enable alpha export, and verify the file over another color. Composite over the final background first when the delivery platform doesn't accept alpha.
