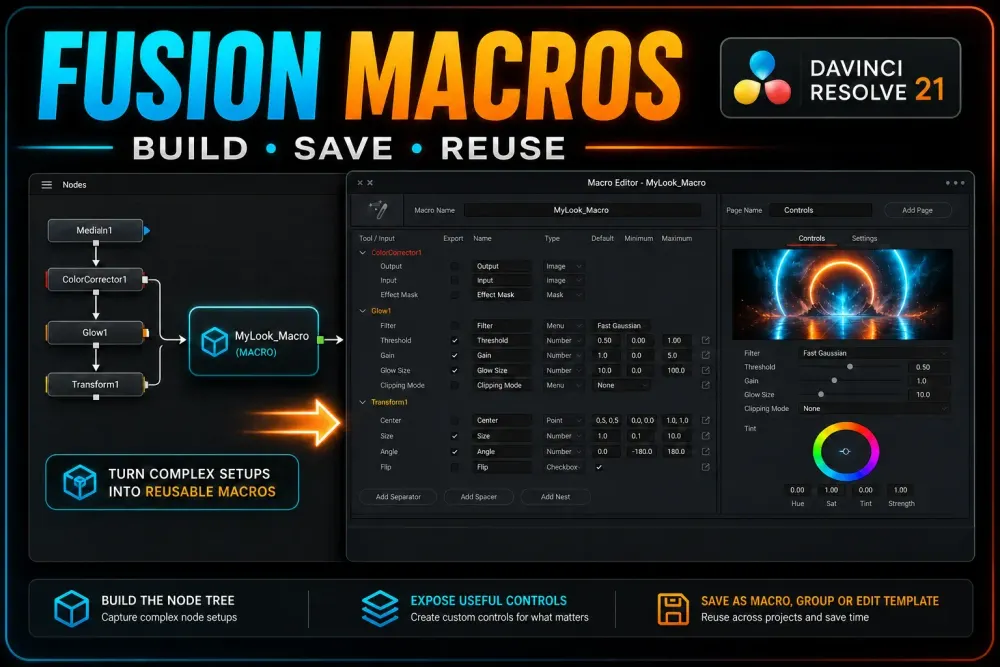
Quick answer: get the node tree working first, select only the nodes that belong in the reusable item, right-click one of them and choose Macro > Create Macro. In Resolve 21, tick the controls to expose, keep the image connections the tool needs, and arrange the live Inspector Preview. Test the work in progress with Copy Macro, then decide where it goes: a Macro, a Group or an Edit Template. The right save choice depends on whether you need one Fusion node, editable internals or an item in the Cut/Edit Effects Library. In 21.1 the template destination sits in a Save to menu next to the macro name.
A saved file and an installed template aren't the same thing. A custom Fusion macro won't show up under Edit-page titles on its own. If a valid .setting file seems to vanish, check where it landed before you rebuild the effect.
Choose Macro, Group or Edit Template before you build
| Save choice | Best use and limit |
|---|---|
| Macro | Use one custom node inside Fusion with a restricted set of controls. The internal node tree is intentionally hidden behind that tool. |
| Group | Collapse a reusable setup while keeping its individual nodes expandable. Choose this when another compositor may need to repair or redesign the internals. |
| Edit Template | Drag a reusable Title, Generator, Effect, or Transition from the Cut/Edit Effects Library. It exposes selected controls in the Inspector instead of asking the editor to work in Fusion. |
If you're still learning what each node does, start with the Fusion beginner workflow. Everything here assumes the comp already works. Packaging a broken comp just makes the failure easier to repeat.
Build a clean source comp
Build the smallest node tree that produces the finished result. Name the important nodes, delete abandoned branches, and try different clips, frame sizes, durations and aspect ratios whenever those inputs can change. I wouldn't approve a reusable lower third after testing one name at one duration. A reusable effect should survive a new source clip without leaning on a hidden mask or a fixed frame number.
Which nodes go in depends on the template category. In Blackmagic's title example you select the creative nodes but leave out MediaIn and MediaOut. Its transition example includes both MediaIn nodes and the MediaOut; its generator example includes MediaOut; its simple effect example includes MediaIn and MediaOut. So don't apply the title rule to every template. When the boundary is unclear, start from a working template of the category you need.
For an ordinary custom Fusion tool, check the image input and output before packaging. Keep the source comp as an editable reference. If the new macro has no usable image connection or renders a blank frame, compare it with that source before you change the design.
Create a Fusion macro in Resolve 21
- Open the clip or Fusion Composition on the Fusion page.
- Build the complete effect and confirm the final branch reaches MediaOut.
- Select only the nodes that belong inside the reusable item.
- Right-click one selected node.
- Choose Macro > Create Macro.
- Give the macro a short, searchable name you'll still understand in six months.

Blackmagic's Resolve 21 New Features Guide introduced the redesigned Macro Editor and its live Inspector Preview, and the 21.1 release adds multi-template DRFX load and save plus an Update from Selected Tools action. The steps below follow the 21.1 manual. The preview is more than decoration: it shows what an editor will see while you're still choosing and arranging parameters.
Expose fewer controls than the node tree contains
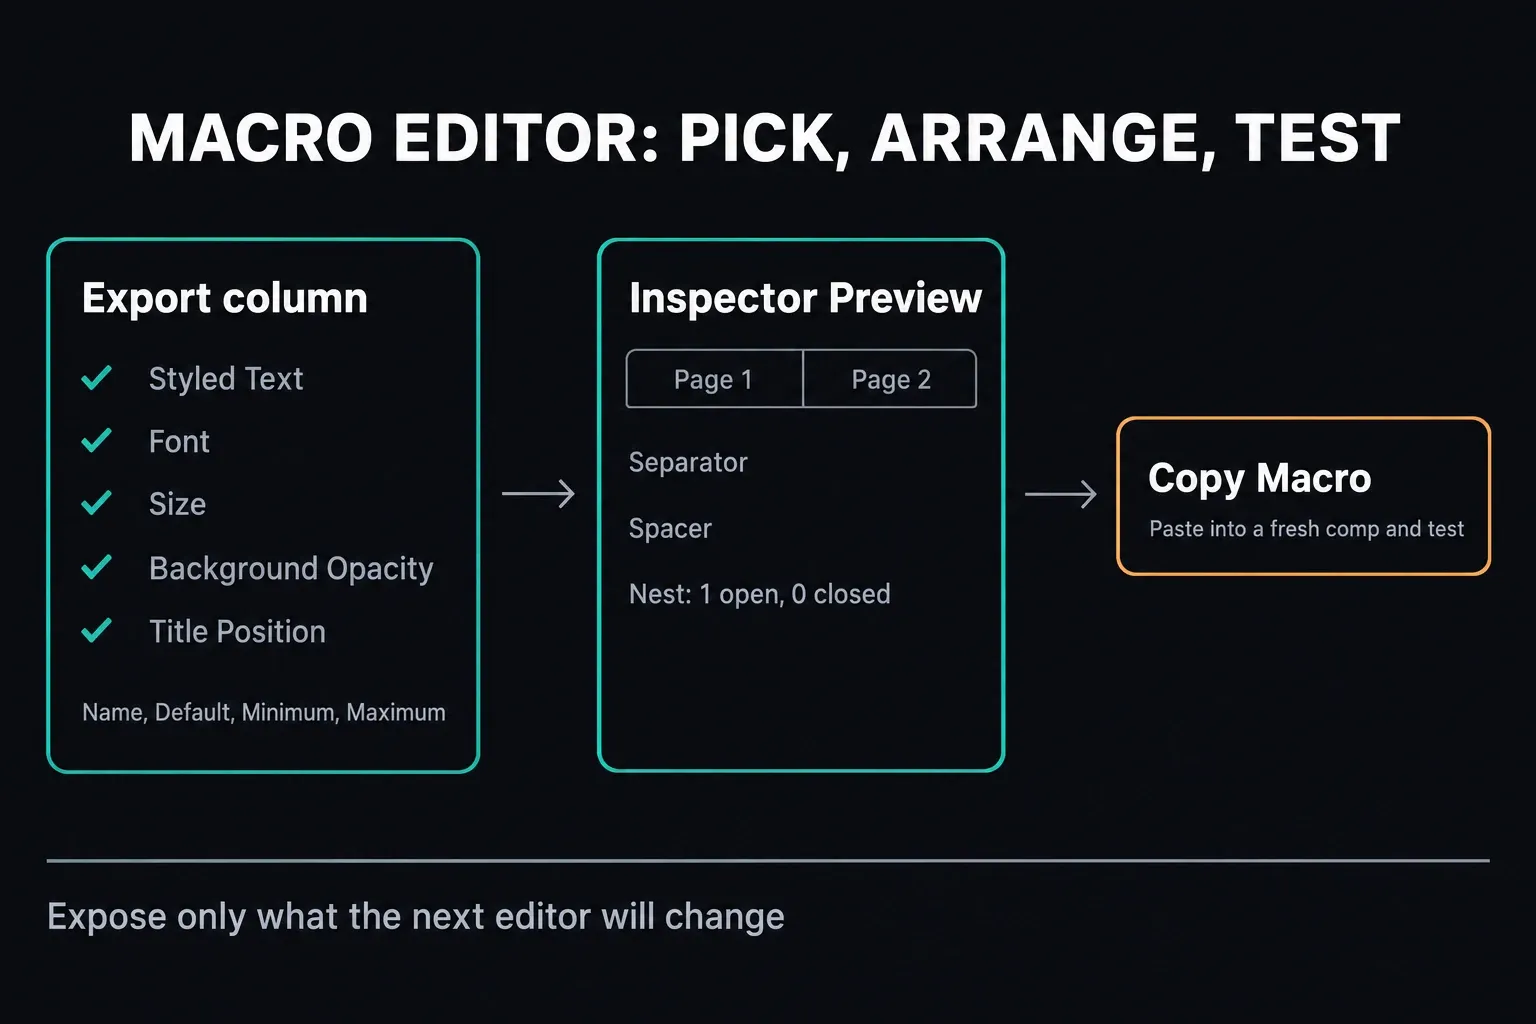
The Export column lists parameters and input connections. Don't uncheck everything in a hurry: the macro still needs the image inputs and output its job requires. Beyond those connections, expose only the controls the next editor needs. For a lower third that might be Styled Text, font, size, text color, background opacity and position. A title doesn't need every Text+ setting in its Inspector.
Rename controls for the person who'll use the template. Background Opacity reads better than an internal channel name, and Title Position separates the title transform from every other transform in the comp. Set defaults and ranges for each specific parameter. A narrow opacity range can make sense, but don't fence a position control in so tightly that the title can't reach the edge of the frame.
Organize the live Inspector Preview
In Resolve 21's preview you can drag controls into order, move them to another page, or add and rename pages. Separator, Spacer and Nest organize the Inspector without editing a settings file by hand. A Nest is a collapsible section, and its Default value sets whether it starts open (1) or closed (0); use it for settings people rarely touch.
- Keep the first page for the settings people change on almost every use.
- Put related controls together: text, layout, color, timing, or advanced repair.
- Use one separator where two groups would otherwise run together.
- Save a nest for genuinely optional detail, not for the core controls an editor needs right away.
- Add a new page for a real second task, not because the first page looks busy.
For title templates, test the same Inspector with a short name, a long name and a two-line name. If you need the full Text+ workflow before packaging it, the Resolve text and Text+ guide covers it.
Test the macro before saving it
Open the Macro Editor's three-dot menu and choose Copy Macro. Paste the work in progress into the Fusion node tree and try the exposed controls there. Blackmagic added this loop so you don't have to save and import a new file for every small change.
Check four things before you commit the file:
- The output matches the original comp at the default values.
- Every visible control does what its label promises.
- No essential input, mask, image, or text control was hidden.
- Minimum and maximum values don't trap the editor or break the design.
Paste the test into a fresh comp and connect the inputs it needs. Compare its default output with the original, then work the exposed controls. This catches problems that stay hidden while the macro sits next to the source nodes and still depends on them.
Test a shorter and a longer timeline duration too. A finished animation won't adapt just because you packaged it. Anim Curves can scale the animation with the duration; Keyframe Stretcher can keep the entrance and exit intact while stretching the hold between them. Pick the behavior your template needs, then check both ends after trimming.
Save to the destination you actually need
Resolve 21.0's three-dot menu listed the destinations as separate commands. The 21.1 manual moves the save choice into a Save to menu left of the Macro Name field, offering a plain .setting file or one of the four template categories. Each destination does a different job:
- Save As Macro: one custom node with the controls you exposed. In 21.1, pick the plain .setting option in Save to.
- Save As Group: an expandable container of the individual nodes. The 21.1 manual saves a group from the Node Editor instead: right-click the group and choose Settings > Save As.
- Save to Edit Template: places the result in the Cut/Edit Effects Library as a Title, Generator, Effect or Transition; in 21.1 those four categories sit in the Save to menu.
- Choose Thumbnail: adds a recognizable thumbnail. You'll also find it by right-clicking the magic wand icon, next to Clear Thumbnail.
- Show in Folder: opens the saved location so you don't have to guess it.
To reuse a saved custom tool in Fusion, right-click in the Node Editor, choose Add Tool > Macros and pick it. Keep its .setting file in the active Macros location your save dialog shows; Show in Folder confirms where it went. The Macros folder isn't the same as Templates/Edit/Titles. For an Edit Template, choose its category when saving, then drop a fresh instance from that category onto the timeline and check the Inspector.
For an ordinary timeline transition, go to the transitions guide for handles, duration, alignment and playback. A Fusion Transition template is a different task: you're building the reusable effect that later appears in that library.
Install .setting and .drfx templates correctly
Install a loose .setting file in its intended category. For a valid .drfx bundle, double-click the file in your operating system or drag it into the Fusion page, then confirm Resolve's installation dialog. Both get you the same result. Renaming an arbitrary download to .drfx won't turn it into a valid bundle.
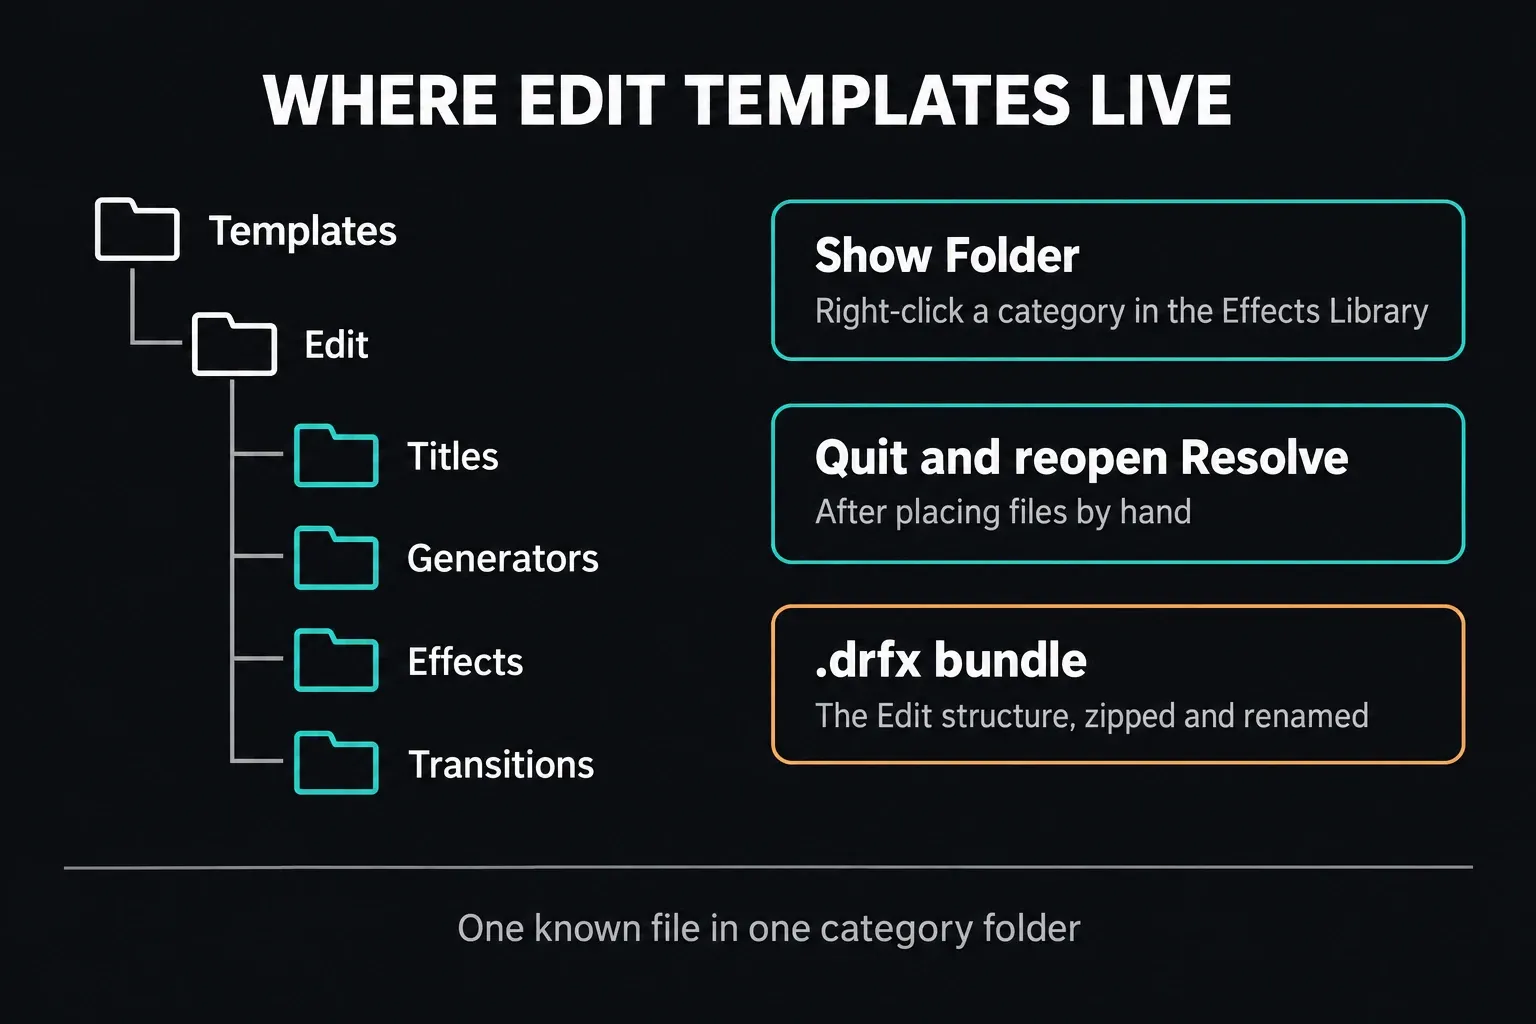
The Macro Editor's Show in Folder finds a macro you've already saved. To find a template category instead, open the Fusion page Effects Library, expand Templates > Edit, right-click the category and choose Show Folder. That beats guessing an installation-specific path. The user-level Edit template roots listed in the Resolve 21 Reference Manual are:
- macOS:
~/Library/Application Support/Blackmagic Design/DaVinci Resolve/Fusion/Templates/Edit/ - Windows:
%AppData%\Blackmagic Design\DaVinci Resolve\Support\Fusion\Templates\Edit\ - Linux:
~/.local/share/DaVinciResolve/Fusion/Templates/Edit/
Then append Titles, Generators, Effects or Transitions. Only create a missing category folder inside the verified template root. Quit and reopen Resolve after manual placement, then look in the matching Effects Library section. If your installation uses a different location, follow Show Folder and leave the application package alone, whatever an older tutorial suggests.
Package a .drfx without losing its assets
A bundle earns its keep when you're handing over several templates at once. Follow the documented structure; don't just rename a single settings file. The 21.1 Macro Editor can also open a bundle with Open Template Bundle, but the folder method below still works:
- Create an
Editfolder with the category subfolders you need, such asTitlesandTransitions. - Put each
.settingfile in its matching category, along with the icon files and associated assets it needs. - ZIP that directory structure, then change the archive extension from
.zipto.drfx. - Install the bundle on a test setup and check a fresh instance. Bundling a file won't fix a hard-coded media path or install a required third-party plugin.
Resolve keeps an installed bundle as one file and doesn't unpack it into loose templates, so removing the installed .drfx removes every template inside it. Keep your editable source files separately, and distribute fonts, plugins or other assets only when their licenses allow it.
Fix a Fusion template that is not showing
- Confirm the destination. A Fusion Macro belongs in Fusion's macro list; an Edit Template belongs in the Cut/Edit Effects Library.
- Confirm the category. A title saved in
Effectswon't appear under Fusion Titles. Move it to the folder that matches how it was built. - Confirm the extension. Make sure the file didn't turn into
.setting.txtor an invalid bundle during download or extraction. - Confirm the folder level. The file belongs inside the category folder, not next to
Editand not inside an accidental duplicateEdit/Edittree. - Restart Resolve. Manual additions are indexed when the application starts.
- Search the correct library. Look under Titles, Generators, Effects or Video Transitions, depending on what you saved.
- Test the underlying requirements. A template can load and still fail if it depends on missing fonts, media, third-party plugins or Studio-only tools.
Don't copy a missing item into several system and user folders at once. Keep one known file and change one thing per test. The correct extension is .setting, singular, not .settings. If the item appears but renders incorrectly, the installation worked; look at its image connections, fonts, assets and required tools instead.
Update a reusable template without breaking working edits
Keep a known-good copy before you replace a working template. Save a real redesign under a new name such as Lower Third v2, add a fresh instance to a test timeline and compare it with the old one. Replacing a file doesn't guarantee that every existing timeline instance will update safely. To revise an existing macro, load it with the Macro Editor's Open command or pick it from the Node Editor Macro submenu. If you changed the original nodes instead, select them and choose Update from Selected Tools, which keeps your control selection and layout.
Check the new version on a different clip and a different duration. If it uses fonts, external media, plugins or Studio-only nodes, write those requirements down wherever the template is distributed. A macro wrapper doesn't remove the licensing or installation requirements of the tools inside it.
Frequently Asked Questions
What is a Fusion macro in DaVinci Resolve?
A Fusion macro packages one or more selected nodes as a single custom node and exposes only the parameters you choose. It's handy when the internal setup should be reused without showing the whole node tree every time.
What is the difference between a Fusion macro and a group?
A macro behaves like one custom node with selected controls. A group is a container whose individual nodes can be expanded and edited later. Pick a group when someone will need the internal construction again.
How do I make a Fusion template appear on the Edit page?
In the Resolve 21.1 Macro Editor, set the Save to menu next to the macro name to Title, Generator, Effect or Transition; Resolve 21.0 called this Save to Edit Template. For manual files, place the .setting file in the matching Templates/Edit category folder, quit Resolve, reopen it and look in that Effects Library category.
Why is my Fusion template not showing in DaVinci Resolve?
Check the destination, the category folder, extra folder levels, the file extension and whether you restarted Resolve after manual placement. Use Show Folder in the Fusion Effects Library to find the category, or Show in Folder in the Macro Editor for a macro you've already saved. Test one known file instead of copying it into several locations.
Where is the Fusion Templates folder on Windows?
The current user-level Edit template root is %AppData%\Blackmagic Design\DaVinci Resolve\Support\Fusion\Templates\Edit\. Add Titles, Generators, Effects, or Transitions according to the template type.
Can I edit a Fusion macro after saving it?
Yes. The Resolve 21.1 manual says you can right-click in the Node Editor, pick the macro from the Macro submenu and re-edit it in the Macro Editor. Save a backup or a versioned copy before changing a tool that real projects use.
Do Fusion macros and templates work in DaVinci Resolve Free?
The macro and template workflow is part of Fusion, but the wrapper doesn't make every node, plugin, font or asset available everywhere. A template that depends on a Studio-only tool or a third-party plugin still carries that requirement.
When the next compositing job comes up, start from the Fusion task hub. Keep this guide for the handoff: turning a working comp into a reusable tool with controls someone else can understand.
