
A compound clip wraps selected timeline items into one object you can edit as a unit. Reach for it when a title, a background, a picture-in-picture and an audio cue have to move, trim, transform or take one parent effect together. Resolve doesn't render new media, and it doesn't flatten the layers inside. Open the compound and everything you built is still sitting there.
If compound clips are just one step in your first edit, the Resolve tutorial map keeps the trim, audio and export work around them in order.
The part that trips people up is identity. Copy and paste a compound on the timeline and you get another instance of the same Media Pool item, so an edit inside one can update every use.
So make an independent Media Pool duplicate before you change just one version. I rechecked this guide on October 1, 2026 against the current DaVinci Resolve 21 Reference Manual for creation, Open in Timeline, the path control, Decompose in Place and parent-versus-internal processing.
Choose a compound clip only when you need a container
| Task | Best tool | Why |
|---|---|---|
| Move a title, background, and picture-in-picture as one object | Compound clip | Keeps the layered construction editable inside one timeline clip |
| Apply one effect across clips below without nesting them | Adjustment clip | Processes the visible stack beneath it over its duration |
| Build node-based compositing between selected clips | Fusion clip or Fusion composition | Creates the Fusion-specific image pipeline |
| Switch synchronized cameras | Multicam clip | Preserves angle and sync behavior |
| Reuse a full scene or program section | Nested timeline | Keeps a named timeline as the reusable source |
| Create a finished intermediate file | Render in Place or export | Produces actual media rather than another editable container |
Create a compound clip from a timeline selection
- Duplicate the timeline first if the structural change would be a pain to rebuild.
- Select only the video, title, image and audio items that need to behave as one object.
- Right-click one of the selected items and choose New Compound Clip.
- Give it a name that says what it's for, plus an optional starting timecode, so you don't end up with a pile of Compound Clip 1s.
- Check that the new compound took the selection's place in the parent timeline and showed up in the currently selected Media Pool bin.
- Play across its head, its tail, the audio, the transitions and any effects.
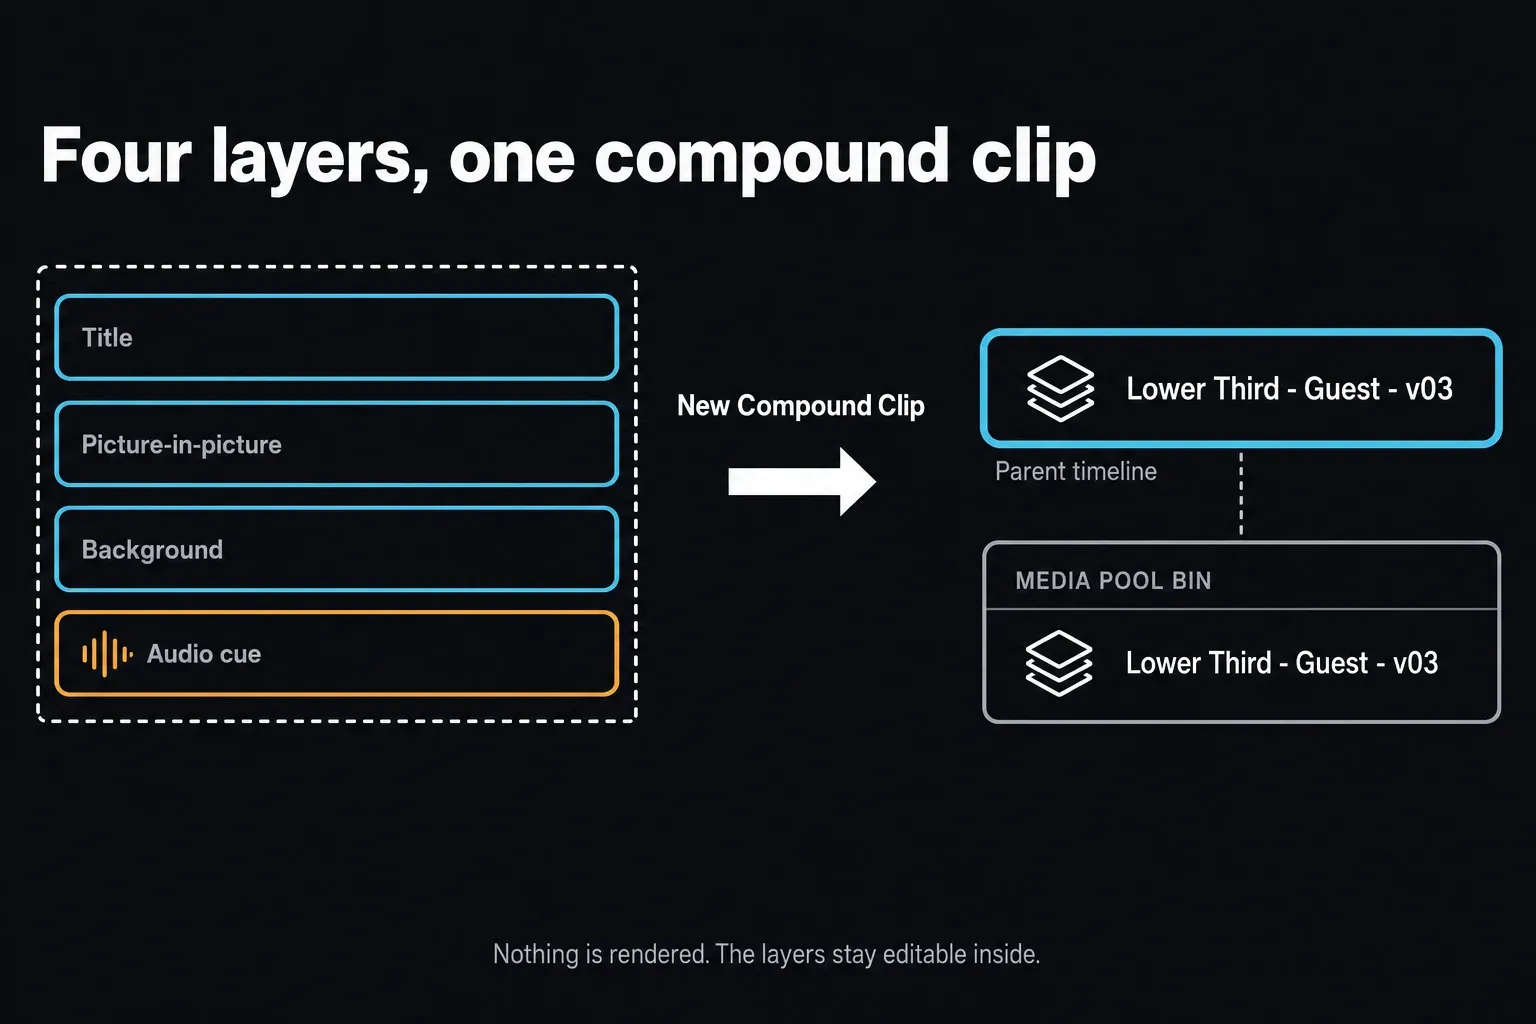
The compound covers the time spanned by the items you selected. Any gaps between them, and the way the tracks stack, become part of that nested result.
Resolve also has Convert In and Out to Compound Clip. That marked-range method picks up every track in the range, even a disabled track or one with Auto Select turned off, so look over the selection before you create it.
Open and edit the clips inside
Right-click the compound in the timeline and choose Open in Timeline. Resolve shows the nested clips as a timeline you can edit: trim, move, replace, add or remove items inside while the enclosing timeline still sees one compound result.
To get back, use the path control at the bottom-left of the timeline and double-click the enclosing timeline's name. If your tracks suddenly look far simpler than the program, read that path before you make a broad edit. You might still be inside the compound.
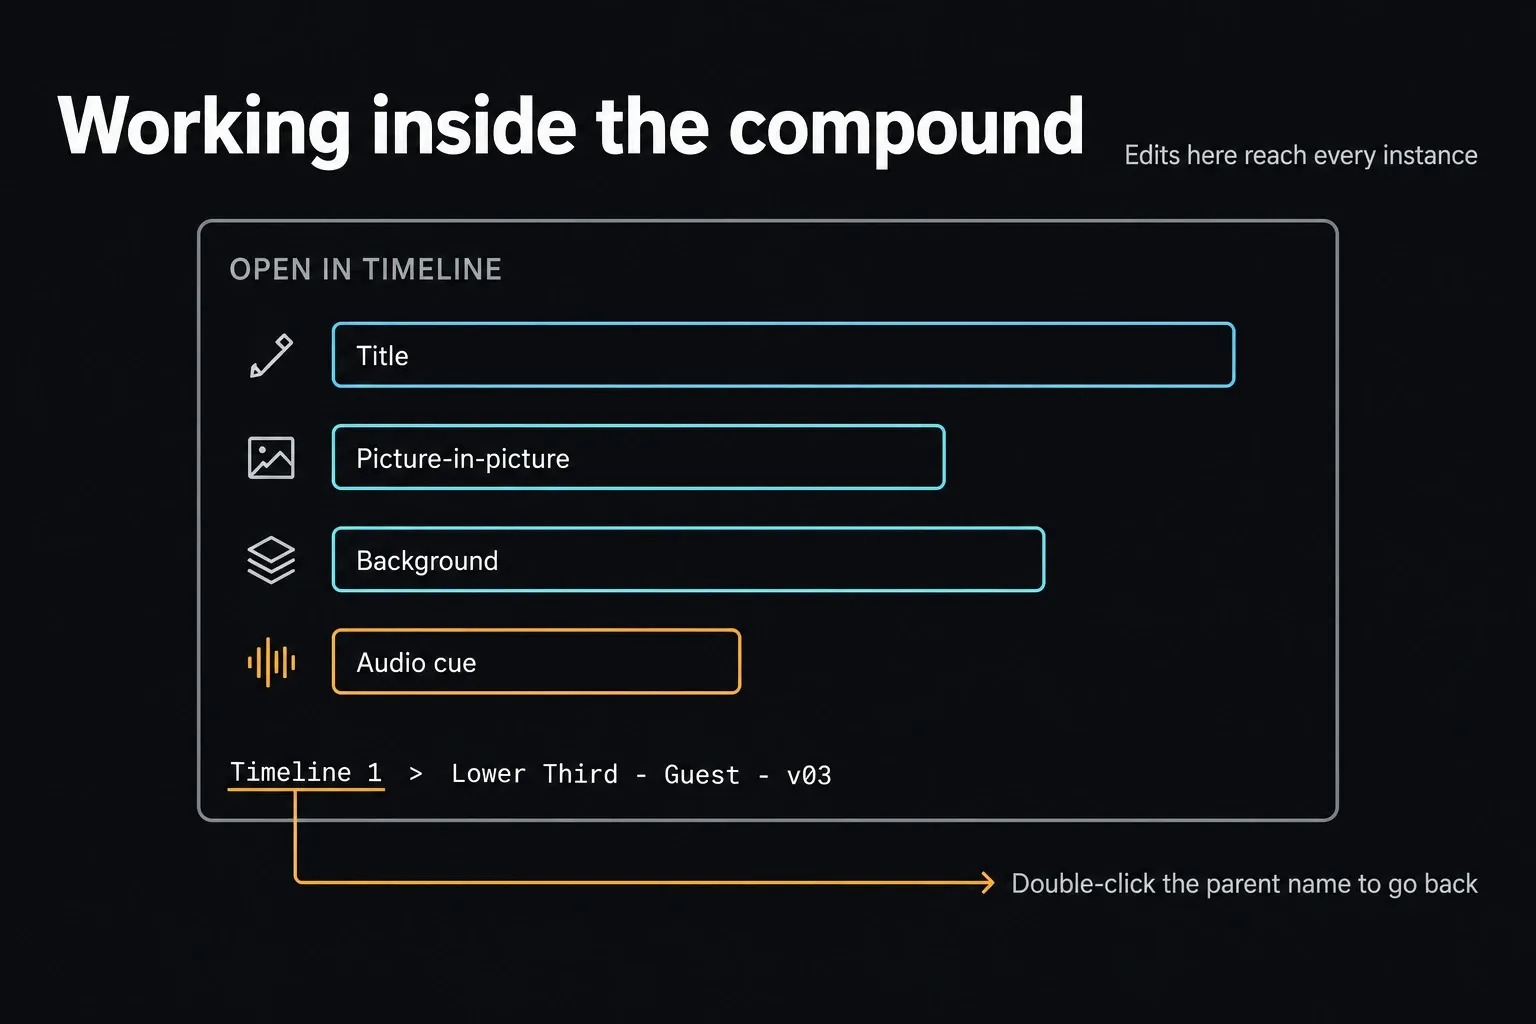
Changes inside update every timeline instance that points to the same Media Pool compound. That's great for a repeated graphics package where an approved fix should land everywhere. It's a trap when you expected two copies to turn into different versions.
Make an independent copy before changing one version
Copy and paste on the timeline gives you another reference, not a new independent compound. You can rename the timeline instance if that helps you keep track, but a display name on its own doesn't change the Media Pool identity underneath.
- Find the compound item in the Media Pool, not just its timeline instance.
- Right-click it, choose Duplicate Clip, then give the duplicate a clear versioned name.
- Replace the timeline instance that needs to diverge with the new Media Pool duplicate.
- Open that duplicate in its timeline and make the version-specific change.
- Reopen the original instance and confirm its contents didn't change.
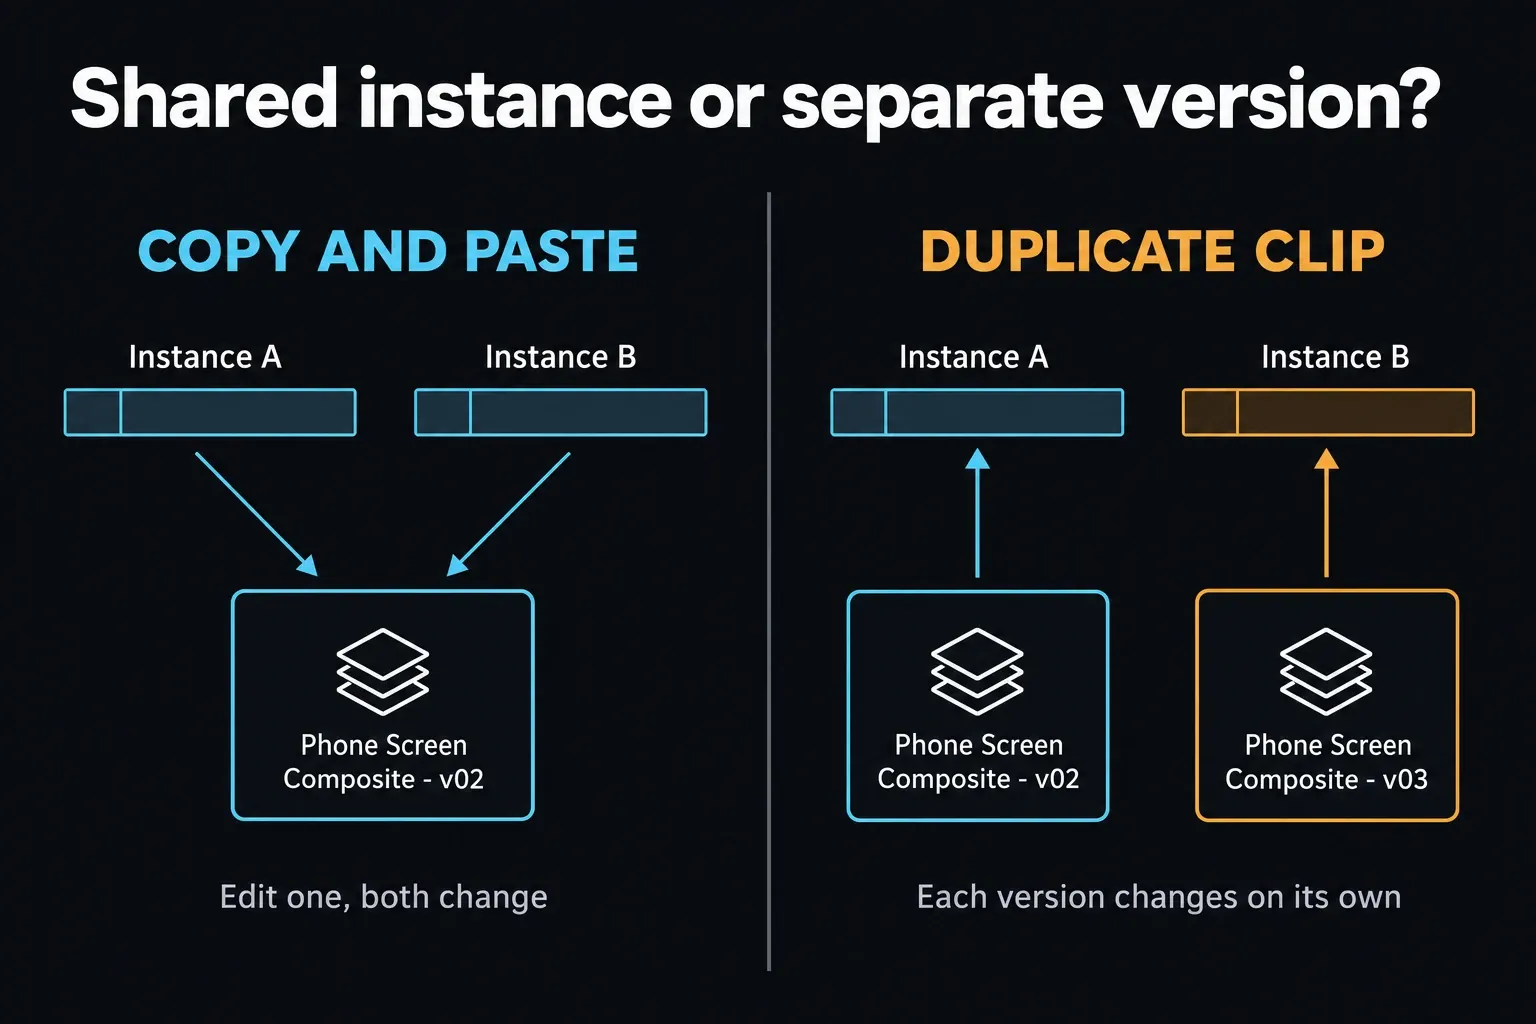
If Duplicate Clip isn't available in your layout, or the result looks ambiguous, decompose the copied timeline instance and build a new compound from the restored clips. Either way, you need a separate Media Pool item at the end. The full Resolve duplication guide covers ordinary source and timeline copies without lumping these object types together.
Extend a compound clip by adding duration inside
In the parent timeline, a compound acts like a source clip whose available head and tail are set by the nested duration. You can't drag an edge outward when there's no more internal time to reveal. To add duration:
- Open the compound in its timeline.
- Extend the video, title, generator, still or audio layers that need it, or add new material.
- Add deliberate empty duration only when transparency or silence is what you actually want.
- Come back through the bottom-left path control.
- Trim the parent instance outward and check every internal layer at the new edge.
Slowing the whole compound down does make it longer, but it gets there by retiming the combined result. Internal motion, transitions, keyframes and audio all get retimed too, so it's not the same as holding a title longer or adding clean source duration.
Undo a compound with Decompose in Place
If you've only just created the compound, normal Undo is the cleanest way back. Later on, duplicate the parent timeline, right-click the compound instance and choose Decompose in Place. Resolve replaces that instance with its internal clips at the same spot.
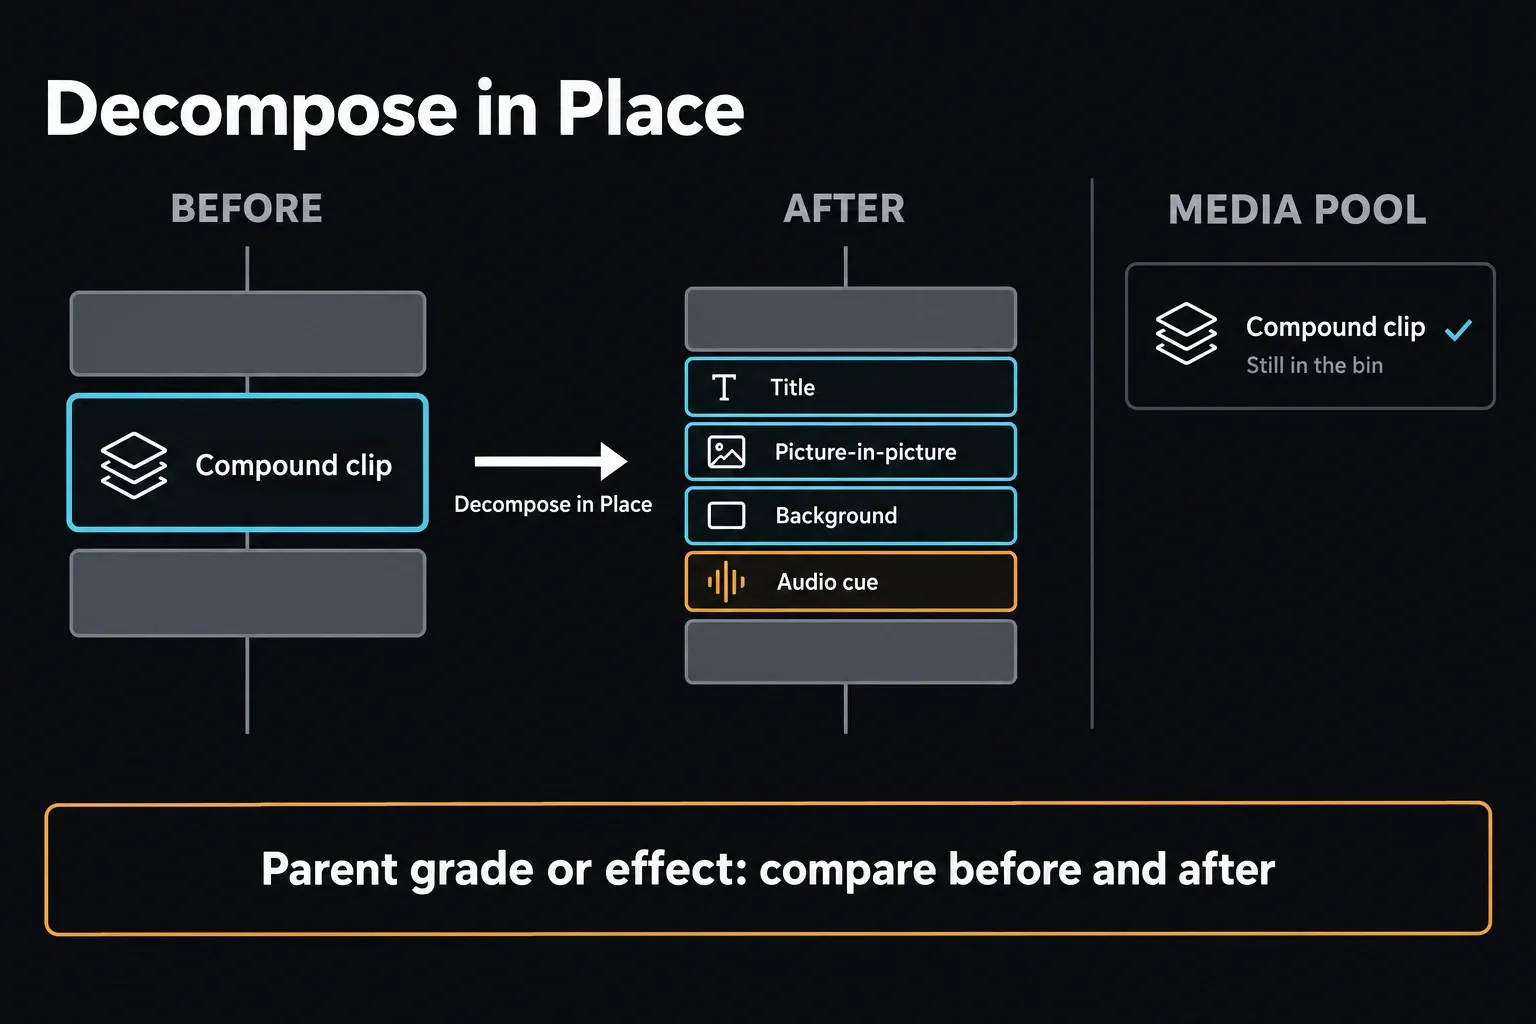
For an ordinary compound clip on the Edit page, the manual's base command is simply Decompose in Place.
Resolve documents Using Clips Only and Preserve Audio Data separately, for nested-timeline audio work in Fairlight and on the Edit page. Those options decide how clips, tracks and audio data come back. They don't promise to carry a grade or effect from the parent compound onto every child clip, so compare the duplicate before and after you decompose.
Decomposing one timeline instance doesn't delete the compound from the Media Pool and doesn't touch its other uses. It only replaces the instance you selected with the edit elements underneath. If those elements need more video, audio or subtitle tracks than the timeline has, the manual notes that Resolve adds tracks to make room.
Check grades before and after decomposition
A compound can carry a grade or effect as one parent clip, while the source clips inside carry their own grades and effects. Those are two separate processing levels. Before you decompose, work out where the approved look actually lives: on the parent compound, on individual clips inside, in a group or at timeline level.
Don't count on Decompose in Place to bake a parent grade into the restored clips. Grab a reference still or a short render, decompose only a duplicate timeline, and compare the scopes as well as the viewer. When the decomposed version has to match, rebuild or copy the parent operation on purpose.
Create handles before adding parent transitions
A parent transition needs usable compound frames beyond the visible edit, the same way an ordinary clip needs handles. If the compound starts or ends on its first or last internal frame, a centered transition has no extra nested material to reveal on that side.
Open the compound, extend the internal layers that need it, then come back and trim the parent instance so those extra frames stay hidden as handles. Check titles, generators, masks and audio at both edges. The transition guide walks through the handle math and the insufficient-handles warning.
Test delivery with the compound intact and decomposed
Before you export or hand anything off, render a short range that includes the compound's first frame, last frame, strongest motion, transparency and any parent effect. If the next department needs source clips, compare that reference with a decomposed duplicate. That's how you catch changes in scaling, alpha, retiming, color order and audio routing.
Keep the approved reference movie next to the project transfer. XML or AAF interchange may not rebuild a Resolve compound the way the receiving application expects. Hold on to the editable compound timeline, and decompose and verify a separate handoff version only when the recipient needs source-level access.
Control how source timelines and compounds edit into a timeline
Edit > Decompose Compound Clips on Edit is a source-editing mode. With it on, a compound or timeline loaded from the Media Pool or Source Viewer edits into the destination as its underlying clips, not as one nested object.
Resolve lists Fit to Fill and Place on Top as exceptions. And this mode isn't the same command as decomposing an instance that's already in the timeline.
The mode earns its place with selects timelines. Turn it on when the chosen source clips should land in the program one by one, and off when the source timeline has to stay a single nested object. Try the exact edit command and track destinations before you lean on it across a long assembly.
Understand processing order before adding effects
An effect, transform or grade applied to the compound in the parent processes the combined result. Operations inside the compound process the individual layers before that parent result exists. Move an operation across that boundary and you can change scaling, masks, motion blur, alpha and which layers the effect actually sees.
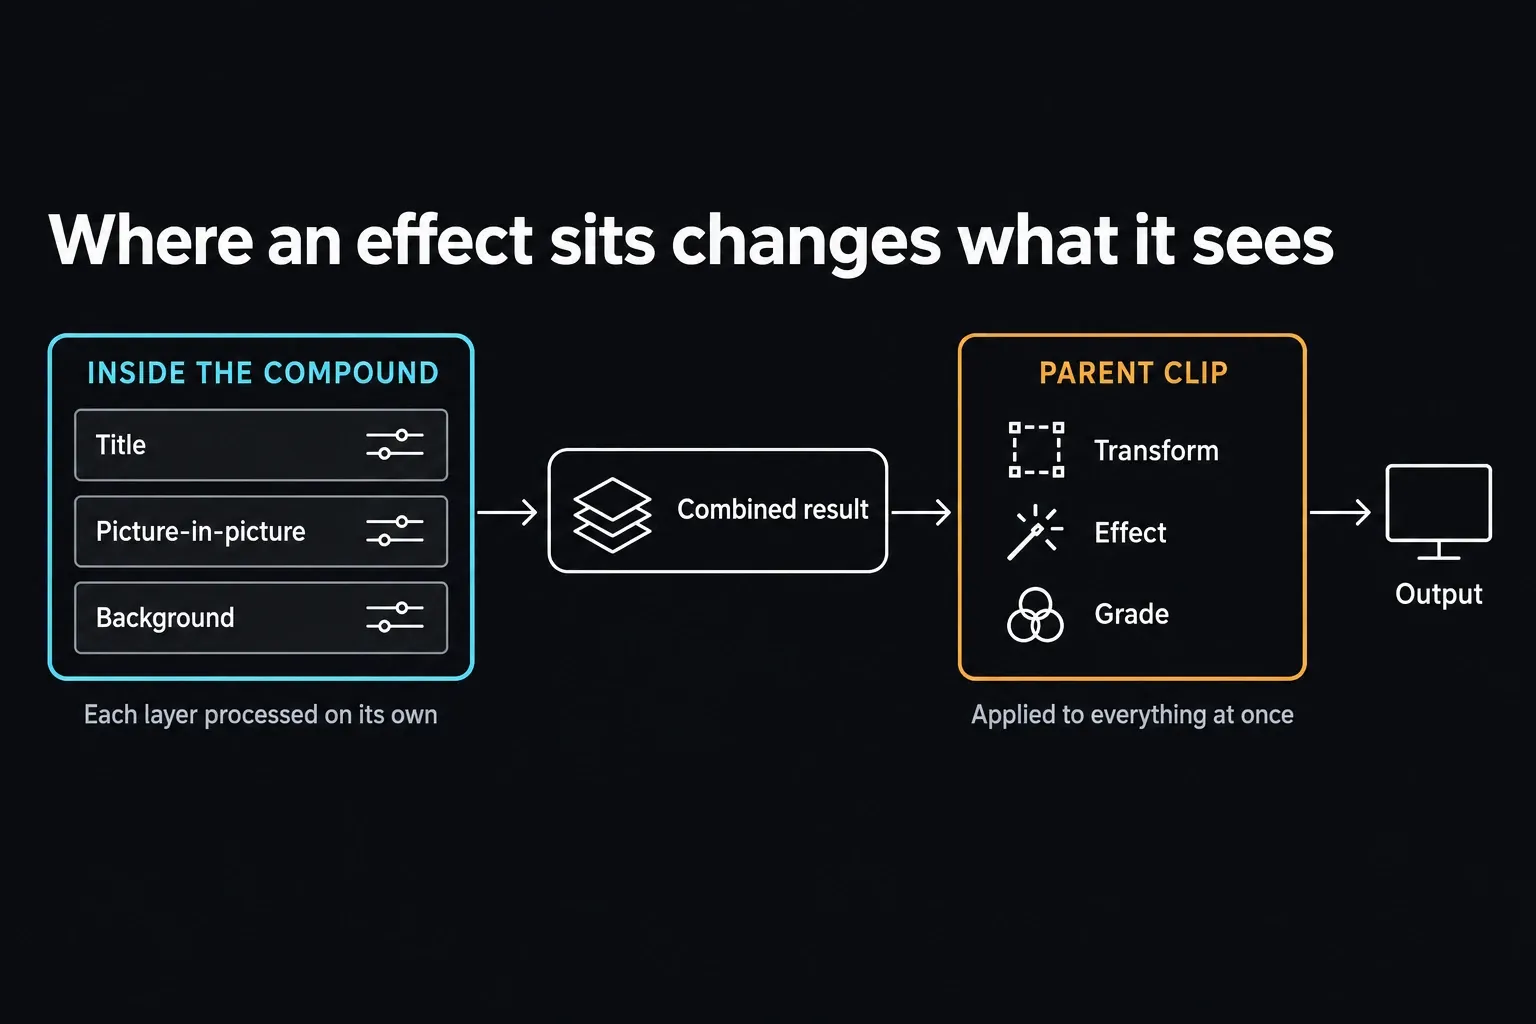
That's handy when one transform has to move a whole picture-in-picture build. It gets murkier when retiming or Optical Flow spans several internal edits. Check the compound's head, tail and every internal cut for repeated or synthesized frames.
If you want one look over visible clips while keeping them exposed in the parent timeline, compare the adjustment-clip workflow. If playback is the real problem, use proxies, optimized media, render cache or Render in Place through the slow-playback checklist. Nesting won't buy you speed.
Keep audio routing understandable
A compound can hold several audio clips and tracks while showing a simpler object in the parent. Before you nest dialogue, multichannel production audio or a premix, decide whether the mixer needs individual clips and automation at the parent level.
Check channel mapping, fades, clip gain, Fairlight effects and sync right after creation and again after decomposition. Keep a pre-compound timeline. For a complex deliverable, go through the Fairlight routing map before nesting hides the tracks the mixer has to audit.
Avoid compounds that hide the real workflow
- Don't compound every finished scene just so the timeline looks tidy.
- Don't use a compound as a stand-in for linked selection, groups, bins or track organization.
- Don't expect nesting to cut decode or effect processing the way rendered media does.
- Don't retime a complex compound without checking every internal transition, title, generator and audio cue.
- Don't send nested structures to another editor or colorist until you've confirmed the turnover requirement.
- Don't give compounds generic names when several versions share a project.
Use a naming and version rule
Name the Media Pool item by purpose and version, like Lower Third - Guest - v03 or Phone Screen Composite - v02. Keep shared instances when one edit should update every use. When only one use should change, duplicate the Media Pool item and bump the version first.
For handoff, keep one timeline with the compounds intact and make a separate, reviewed decomposition only when someone asks for it. Add a reference movie with burn-in so the receiving editor can spot a nesting, scaling, timing, grade or audio change.
Frequently Asked Questions
What is a compound clip in DaVinci Resolve?
It's an editable nested container that shows selected timeline items as one clip in a parent timeline. Resolve doesn't render or merge the source files when you create it, and the clips inside stay editable through Open in Timeline.
How do I undo a compound clip?
Use normal Undo right after you create it. Later, duplicate the timeline, right-click the compound instance and choose Decompose in Place. Then compare the restored clips, audio routing, transitions and any grade or effect that sat on the parent compound.
Why do both copied compound clips change together?
Copy and paste on the timeline creates another instance of the same Media Pool compound. Duplicate the compound in the Media Pool, rename it and replace the timeline instance that needs to go its own way before you edit its internal timeline.
Why can’t I extend a compound clip?
The internal timeline has no more duration available at that edge. Open the compound in its timeline, extend or add the internal material you need, go back to the parent and trim the compound outward. If a parent transition needs handles, leave the extra internal frames hidden.
Does a compound clip improve playback?
Not by itself. It's still an editable nested construction, and Resolve still processes its media and effects. When playback performance is the actual problem, use proxy media, optimized media, render cache or Render in Place.
