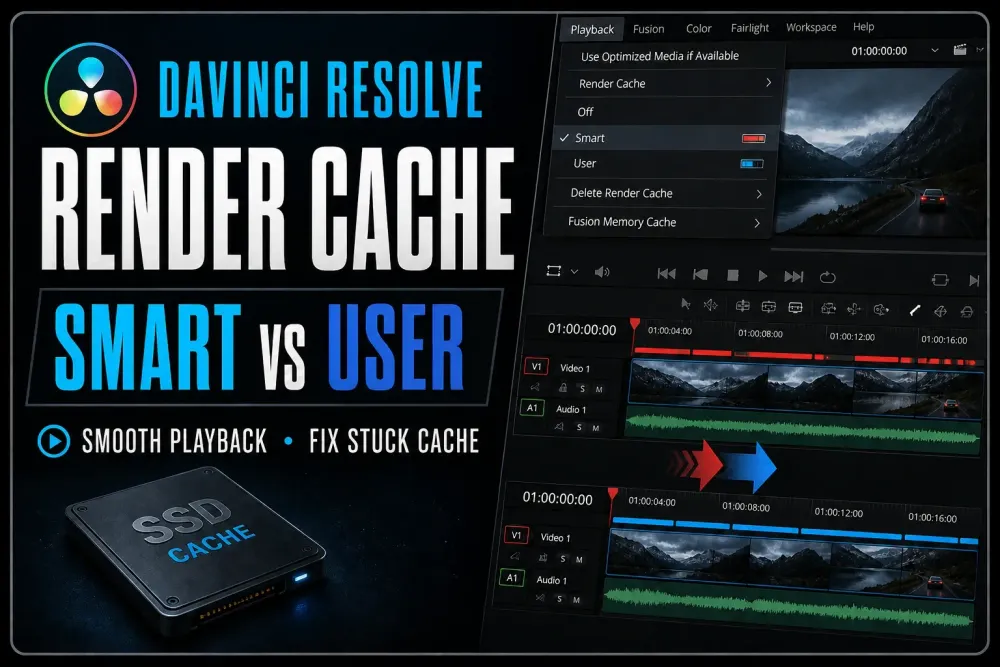
Quick answer: choose Playback > Render Cache > Smart when you'd like Resolve to find the expensive clips and effects on its own. Choose User when you want to decide yourself which clips, Color nodes and effects get cached.
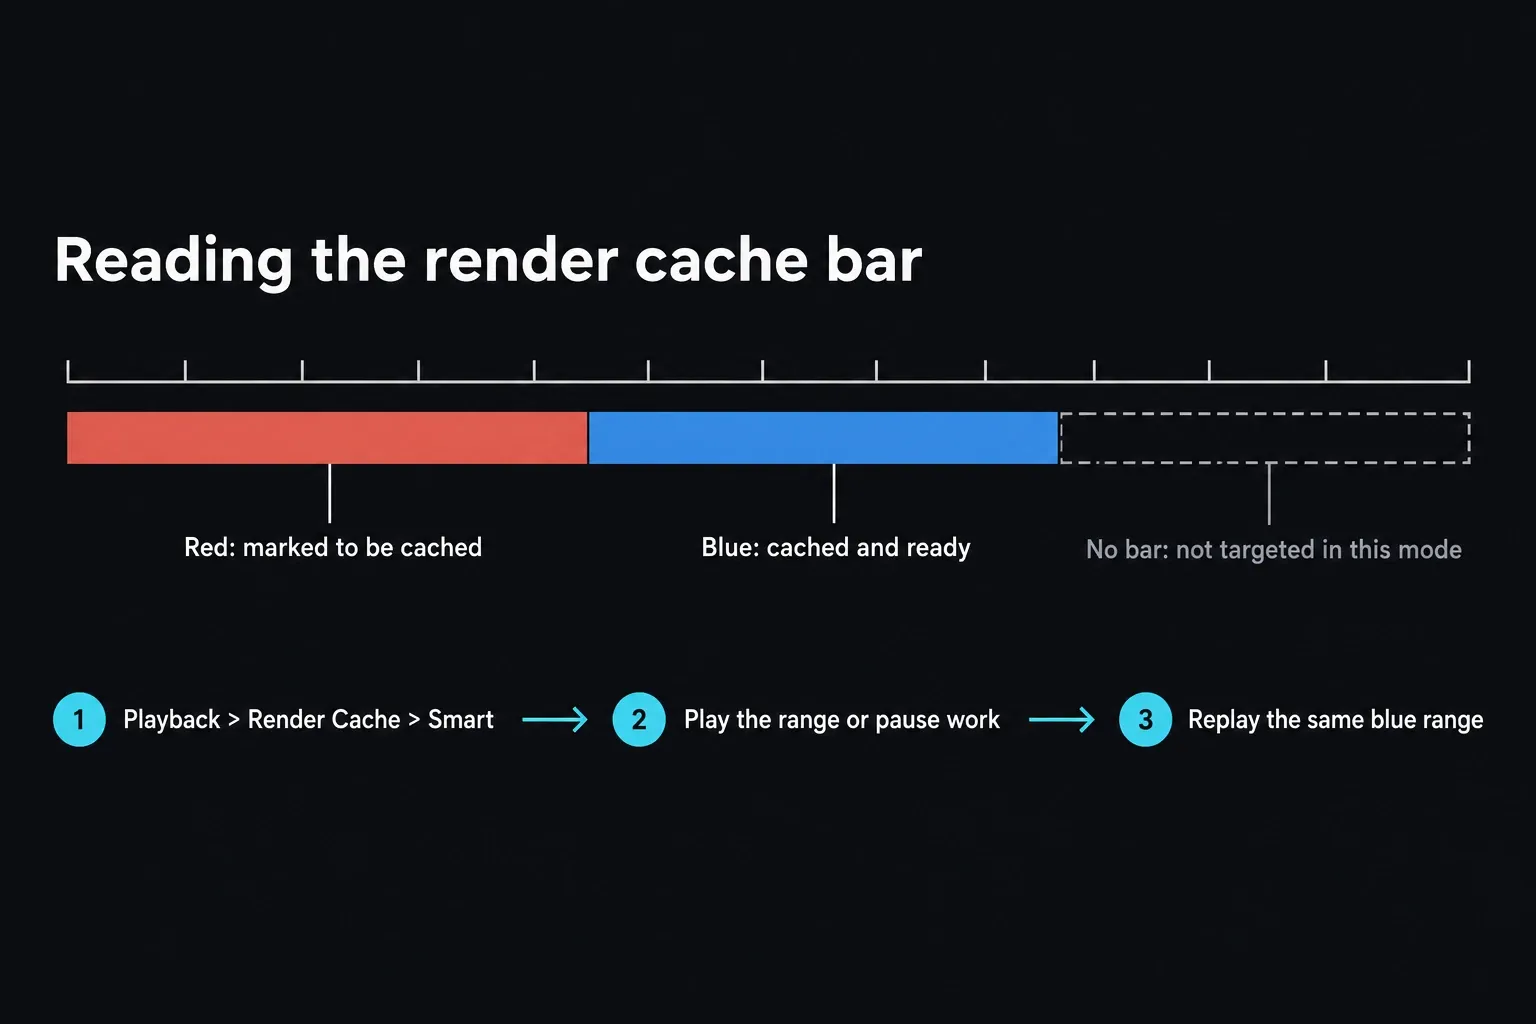
A red cache bar means that range is still waiting to be cached. Blue means the cached result is ready. Wait for blue, then replay the same range before you decide whether cache fixed anything.
Render Cache writes temporary working media with the processor-heavy work already calculated. Resolve then plays that media back and skips rebuilding the live effect, grade or composition on every frame.
It earns its keep on a difficult section of a timeline. It won't stand in for sensible source-media handling, and a stutter isn't automatically a cache problem.
If the whole timeline is slow before you add a single effect, start with the slow-playback diagnostic. If you need lightweight files that travel between workstations, the Proxy Media workflow is the right tool. This guide sticks to one job: getting Resolve 21's render cache under control without filling the project with mystery files.
The 60-second Render Cache setup
- Open the timeline and mark a short range that stutters every time.
- Choose Playback > Render Cache > Smart.
- Play the range once, or stop touching the project long enough for background caching to start.
- Watch the thin cache indicator along the bottom of the timeline ruler.
- When the red section you care about turns blue, replay exactly the same range.
Treat that as a test. It's not a setting to lock in forever. If Smart caches far more than you need, or skips the one operation that's really expensive, choose Playback > Render Cache > User and flag the clip, node or filter yourself.
On the Edit and Color pages, Option-R (Alt-R on Windows) cycles through Off, Smart and User. While you're still learning the system, I'd use the menu, since you can see which mode is active before you press play.
Smart vs User: choose by control, not by computer speed
| Mode | What Resolve does | Best first use | Watch for |
|---|---|---|---|
| Smart | Automatically targets formats, grades and timeline operations Resolve considers expensive. Manual cache flags still work. | A quick test, a mixed timeline, or a machine that needs broad playback help. | It may cache more media than you expected, and it does not guarantee that every expensive operation will be the right target. |
| User | Caches the clips, nodes and filters you flag. Project settings can still automate transitions, composites and Fusion effects. | A predictable workflow where most of the timeline is already real time and only specific operations need help. | “User” does not always mean “nothing automatic.” Inspect the User Mode automation checkboxes. |
| Off | Disables Render Cache playback for the project. | A control test when cached playback is stale, corrupt or slower than the live result. | Turning cache off does not delete the stored files. |
My working rule is short: start with Smart on one repeatable range. If it helps but caches too broadly, move to User and cache only the expensive boundary. Don't switch modes while you're comparing different ranges, or you won't know whether the mode or the footage changed the result.
In File > Project Settings > Master Settings, the Optimized Media and Render Cache group has three User-mode automation boxes: transitions, composites and Fusion effects. I rechecked these controls on October 1, 2026 in the 21.1 edition of the DaVinci Resolve 21 Reference Manual, and only “Automatically cache Fusion Effects in User Mode” is on by default.
Check the real boxes in this project. A preset you remember from another timeline tells you nothing about this one.
The three cache levels Resolve manages
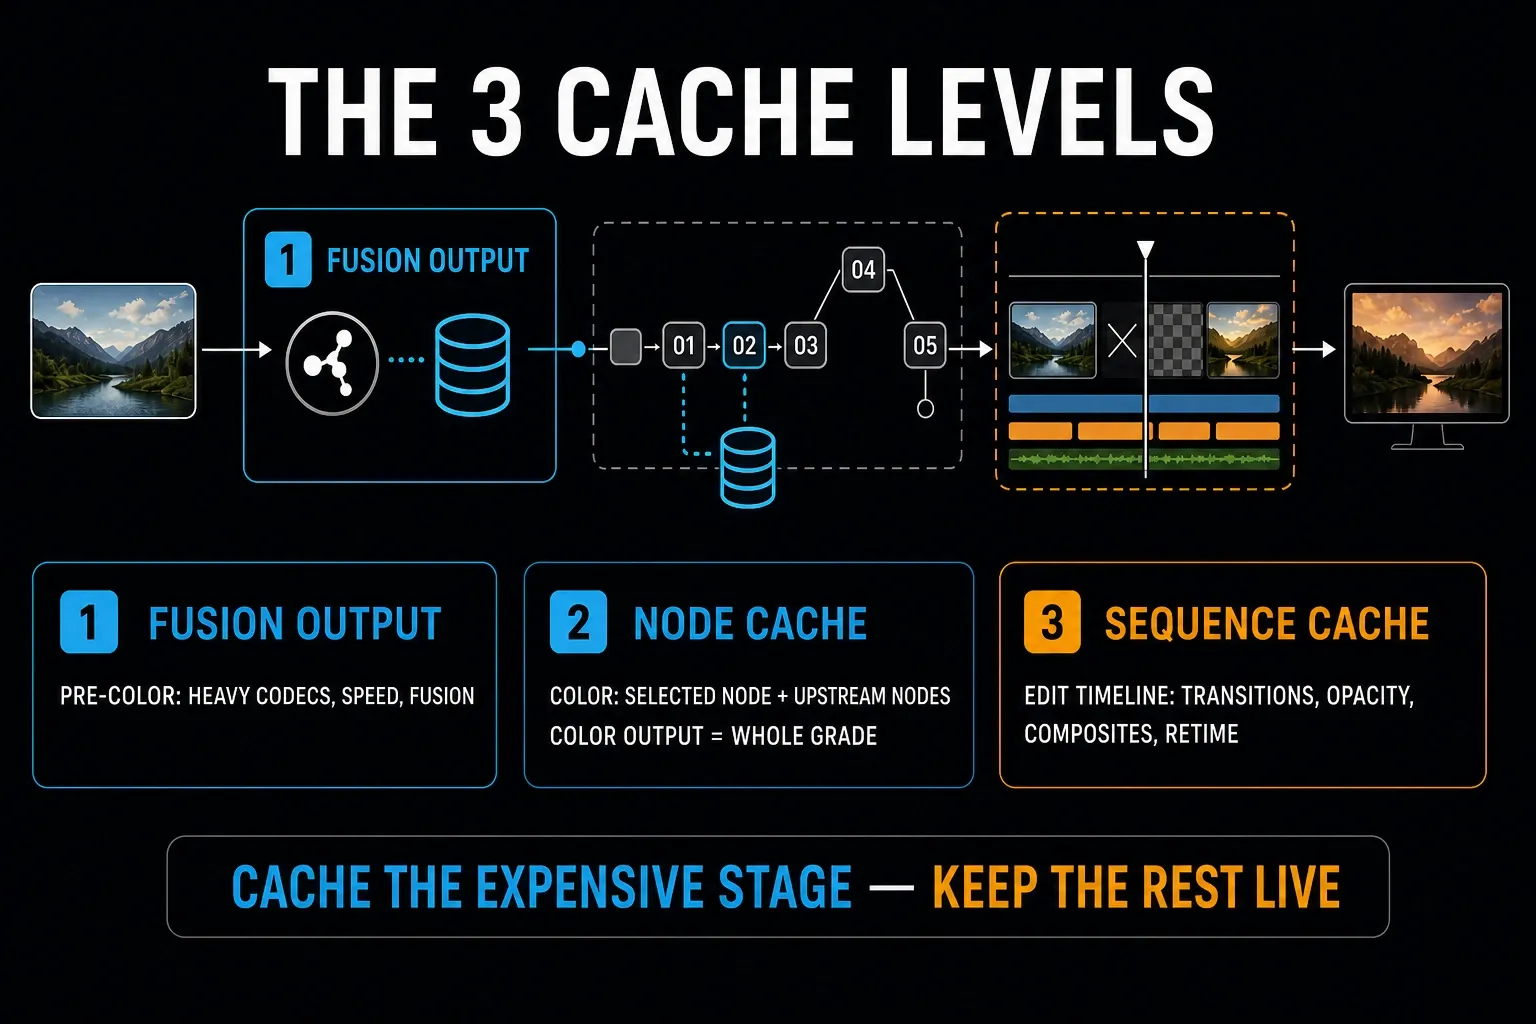
The menu makes Render Cache look like a single switch. Underneath it, Resolve runs three separate cache levels, so a timeline change doesn't force a grade to re-cache and a grade change doesn't force the timeline to re-cache. Picking the right level decides which work gets baked into the temporary media and which work stays live and editable.
Fusion Output Cache: before the Color page
Fusion Output Cache is the pre-Color cache; older versions called it the Source Cache. In Smart mode, Resolve uses it for source formats that are hard to decode, such as H.264, H.265, DCP, JPEG2K and camera raw, for speed effects, and for clips with Fusion work.
In User mode, select one or more clips in the Edit timeline or the Color page's thumbnail timeline, right-click, and choose Render Cache Fusion Output > On. The same submenu has Auto and Off too; Off keeps a clip out of the cache even in Smart mode.
Use this level when the expensive work happens before the grade. It's also the first thing I'd flag by hand when a Fusion composition is clearly where playback breaks.
If the clip still struggles after its Fusion Output cache turns blue, the remaining cost sits somewhere else: an Edit-page filter, the Color graph, a layer above it, storage, or another link in the playback chain.
Node Cache and Color Output: inside the grade
On the Color page, right-click a node and choose Node Cache > On. Resolve caches that node along with every upstream node feeding it, and a red node number shows where caching will happen. That's the precise choice for an expensive early operation such as temporal noise reduction: cache the heavy foundation and keep adjusting the look downstream.
Render Cache Color Output isn't a fourth level. It uses the Node Cache to store the whole Color-page output for a clip. Right-click the clip in the Edit timeline or the Color thumbnail timeline and turn on Render Cache Color Output.
It's useful when the grade is finished enough to bake for now. Any change to the grade can send the whole result back to be cached again, and every grade version on that clip gets cached along with it.
Sequence Cache: Edit-page timeline work
Sequence Cache covers timeline operations such as transitions, opacity changes, adjustment layers, composite modes and speed or retime effects. You can't flag Sequence Cache clip by clip; Smart mode handles it automatically.
In User mode, the project-level transition and composite boxes decide which of those categories cache automatically. With them on, you can keep a whole track live by right-clicking its track header and choosing Exclude track from caching, which suits a track of titles that already plays in real time.
Edit-page Resolve FX and OFX filters get their own manual control. Right-click the clip, open Render Cache OFX Filter, and tick only the expensive filter. That's more predictable than baking everything on the clip when one filter is what misses real time. One catch: these filters go through the Node Cache, so changing a cached filter on the Edit page re-caches the clip's grade on the Color page, and the other way round.
What the red and blue cache bars actually tell you
The thin indicator along the bottom of the timeline ruler is a status signal:
- Red: this part of the timeline is marked to be cached.
- Blue: Resolve has already cached this part of the timeline.
- No bar: with the current mode and item settings, the range may not be marked for cache at all, or it doesn't need the kind of caching you expected.
Resolve builds cache while you play a red range. With background caching on, which is the default, it also starts once the project has sat idle for the number of seconds set in Master Settings. You can change that interval, so “wait five seconds” isn't a rule that holds on every system.
A blue bar doesn't last forever. Change something upstream and the old cached result is out of date; Resolve flushes it and turns the affected range back into work to be calculated. That rebuild is normal.
A cache that keeps invalidating when you haven't touched anything relevant is a different problem, and I'd test it one change at a time.
Set cache format and location before a large project
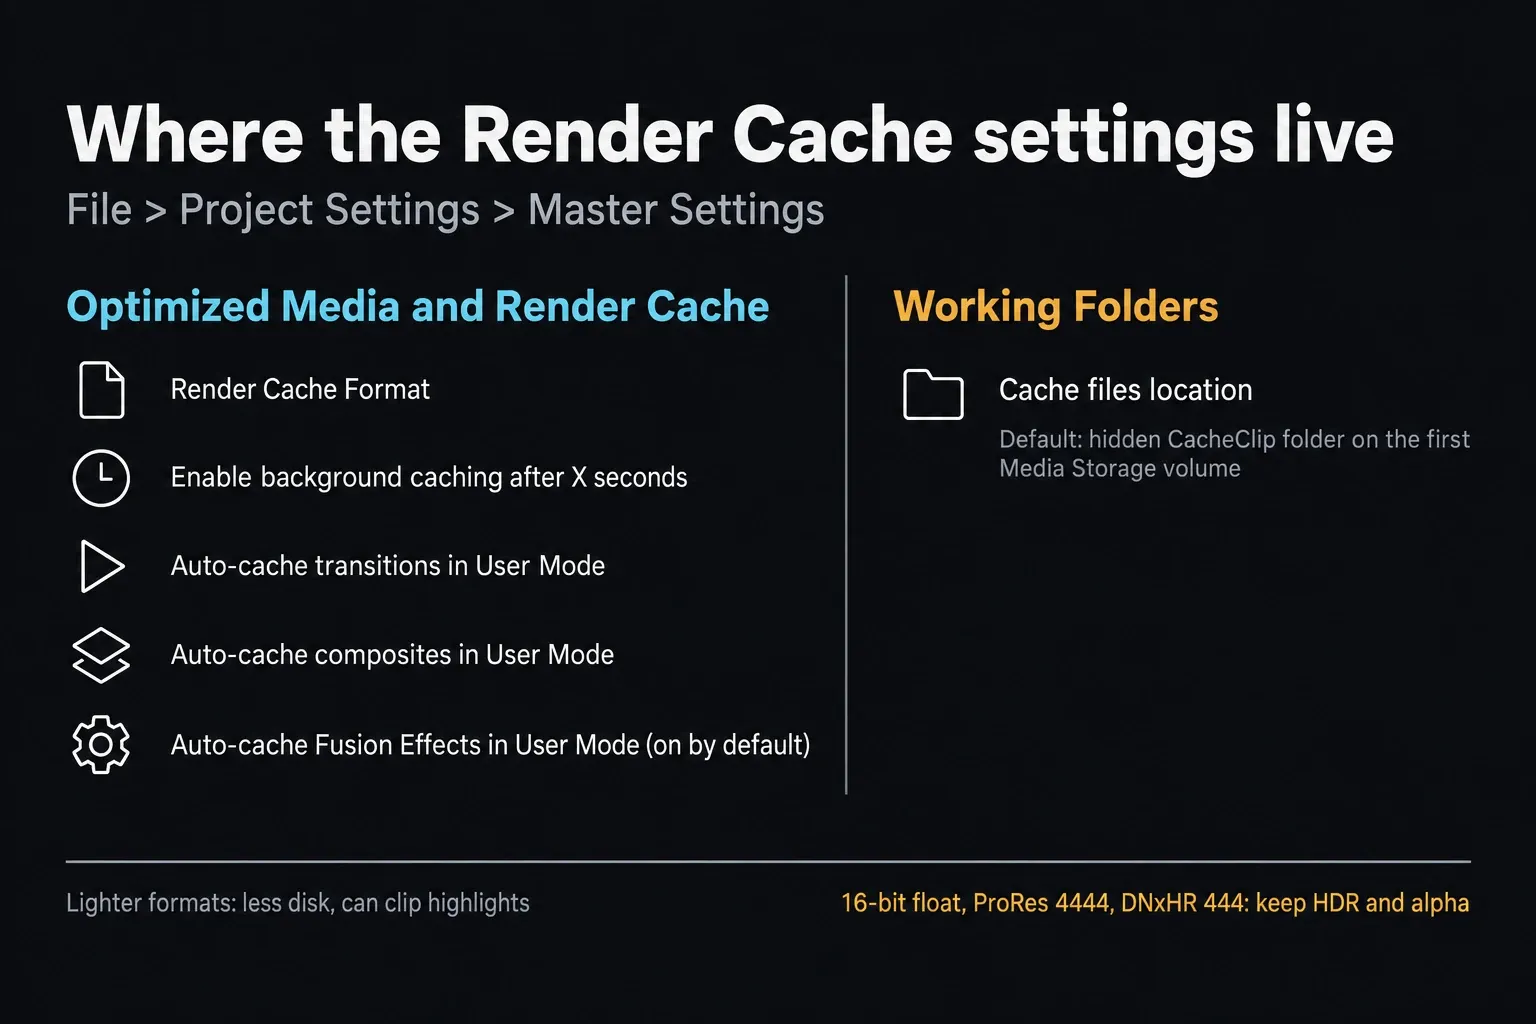
Open File > Project Settings > Master Settings. The two settings that matter most sit in different parts of the page:
- Render Cache Format lives in the Optimized Media and Render Cache group.
- Cache files location lives in Working Folders.
Choose a cache format that the editing machine decodes smoothly and the cache drive can keep up with. The menu offers ProRes, DNxHR and uncompressed 10-bit or 16-bit float formats, and Blackmagic's advice is the highest quality your storage can sustain.
ProRes and DNxHR families are the usual working choices. The right tier depends on whether the cache only feeds editorial playback or might end up in a finishing or delivery path.
For HDR, alpha or out-of-bounds image data, a lightweight format picked in a hurry can be the wrong compromise. Formats whose names end in “HDR” keep out-of-bounds values. Blackmagic lists 16-bit float, ProRes 4444 or 4444 XQ, and DNxHR 444 for grading from cached media, and those plus uncompressed 10-bit keep alpha channels.
None of those is an automatic pick for every offline edit. They trade extra storage and throughput for a higher-fidelity working result.
The cache location defaults to the first scratch disk listed under Preferences > System > Media Storage. With no scratch disk configured, Resolve falls back to the system disk, which can run short on space or speed.
Use a fast volume that stays mounted and has room to spare. A fast codec written to a full, sleeping or disconnected drive still breaks the cache workflow, and Resolve shows a warning dialog when the cache volume goes missing. If codec decode, GPU memory or storage throughput is still the bottleneck, the Hardware & Compatibility hub helps isolate the machine-side limit.
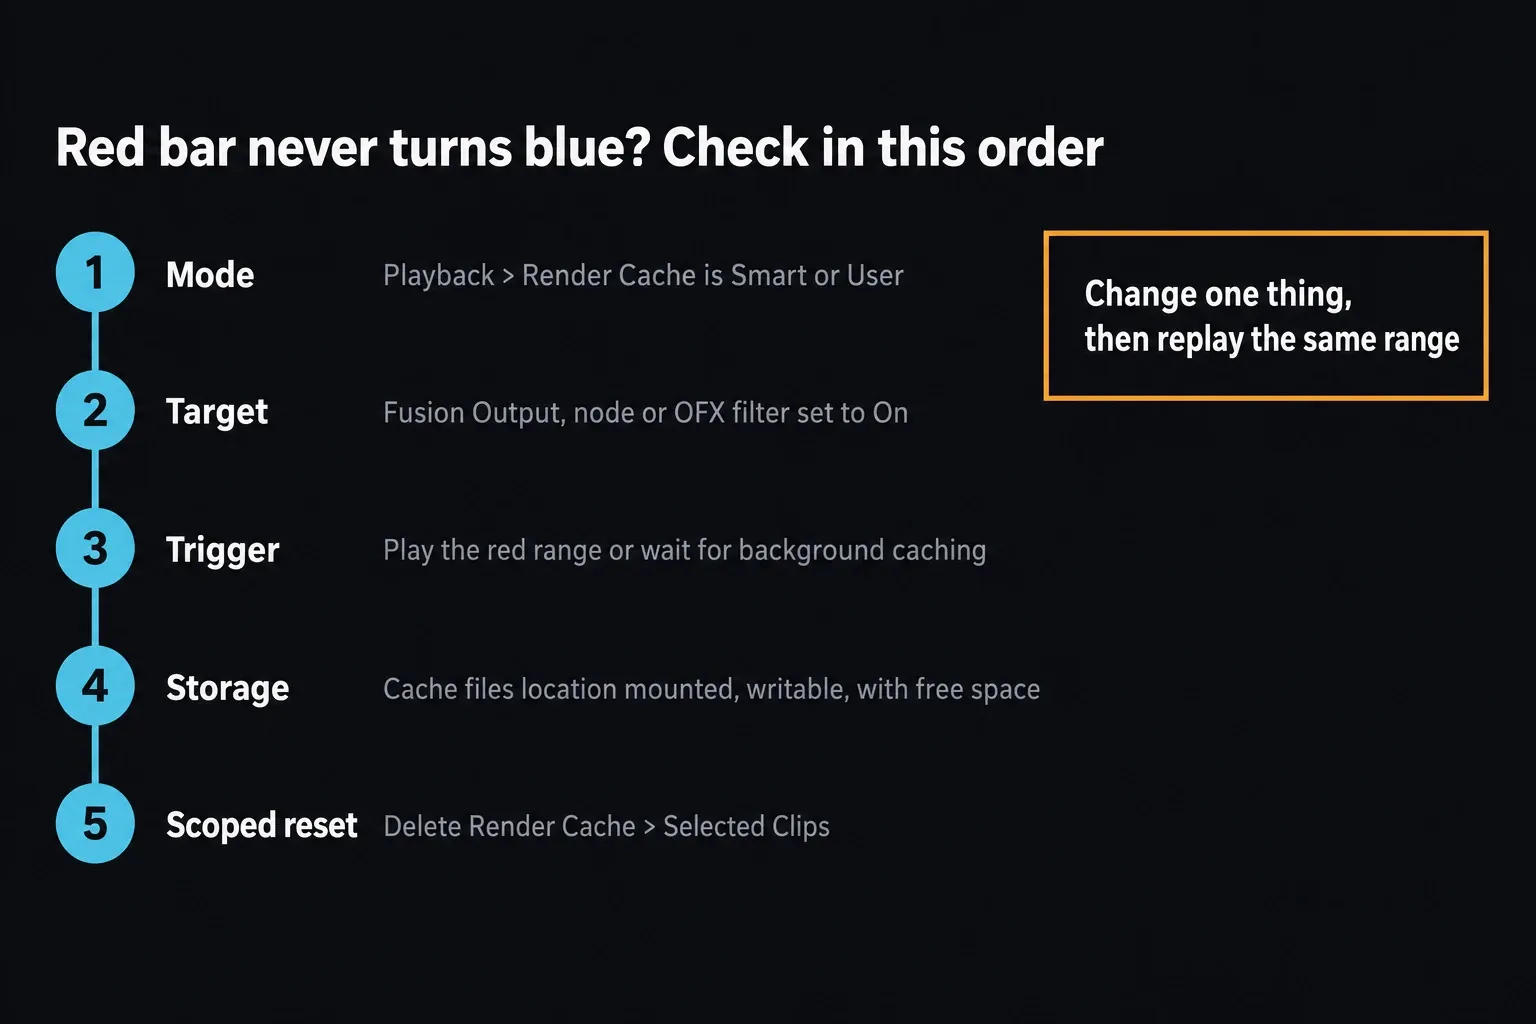
Render Cache not working: test in this order
Don't start by deleting every cache file. Find out which gate is actually failing first.
- Verify the global mode. Playback > Render Cache has to read Smart or User. Off disables caching entirely.
- Verify the target. In User mode, set the intended Fusion Output, node or OFX filter to On. For Sequence Cache behavior, look at the project-level User Mode boxes.
- Trigger the cache. Play the red range, or leave Resolve idle for the configured background interval.
- Watch the same range. If no red bar appears, the item isn't targeted the way you think. If red appears but never changes, move on to the storage and processing checks.
- Check the working folder. Make sure Cache files location exists, is writable, stays mounted and has free space.
- Run a scoped reset. Select the problem clip and choose Playback > Delete Render Cache > Selected Clips. Let only that range rebuild.
- Compare cache Off. If live playback is better, the chosen cache format, drive or target is adding overhead. More caching isn't automatically faster.
- Leave the cache topic when the evidence does. A blue range that still won't play smoothly points to a different bottleneck. Go back to the broader playback test sequence and stop rebuilding the same cache.
If a cache command is missing, greyed out or looks disabled, check the selection before you touch preferences. Fusion Output and Color Output controls apply to clips selected in the Edit timeline or the Color-page thumbnail timeline; Node Cache applies to a selected Color node.
Sequence Cache has no manual clip command because Resolve controls that level automatically. A Media Pool clip or an unrelated page won't show the same context menu.
If cached media shows up offline, test the selected clip with cache Off, then clear and rebuild only that clip.
If the original source is offline too, cache cleanup won't repair the media path; work through the Media Offline relinking checks. If the problem only shows up in the Deliver queue with an error message, follow the Render Failed diagnostic and keep the cache test scoped to the failing range.
Clear cache without treating every file as disposable
Render Cache is persistent, and closing the project doesn't remove it. Under Playback > Delete Render Cache, Resolve 21 offers three useful scopes:
- Selected Clips clears only the clips you've selected so they rebuild. Use it for one stale or suspect result.
- Unused removes cache data that no longer matches clips or effects in the current timeline. Use it for routine space recovery.
- All resets the entire render cache for the current project. Save it for times when the scope really is the whole project, or the other two can't isolate the problem.
Playback > Manage Render Cache opens the Cache Manager, which lists projects across every project library you can reach, whether local, network or cloud. The current manual warns that Clear Selected Cache has no warning dialog and no undo, so read the project and library columns twice before you click it.
For ongoing housekeeping, Preferences > User > Cache Management can delete local cache older than a chosen number of days. That's handy on a small scratch drive. It still doesn't replace picking the right working folder or keeping active project cache available.
Can you delete the CacheClip folder?
Yes, but deleting the whole folder is a broad reset that reaches past render cache. The DaVinci Resolve 21 Reference Manual says Cache files location defaults to a hidden CacheClip directory on the first Media Storage volume. It also says Optimized Media is written to that same Cache files location, while Proxy Media has its own generation location.
Deleting the confirmed CacheClip folder doesn't touch the Project Library, timeline edits or camera originals. It does remove the generated working media stored there, so deleted render cache and optimized media have to be calculated again. Expect red cache bars and a slower first playback until Resolve rebuilds what the active project needs.
- Confirm the exact folder. Open File > Project Settings > Master Settings > Working Folders and read Cache files location. A CacheClip folder you stumble on in Videos or on another drive isn't necessarily the active one.
- Try the scoped cleanup first. Use Playback > Delete Render Cache > Selected Clips, Unused or All. Open Playback > Manage Render Cache when you need to see cache beyond the current project.
- Close DaVinci Resolve. That way the application isn't reading or writing generated media while the folder is being removed.
- Delete only the confirmed CacheClip folder. Leave nearby source-media, project-library, gallery, proxy or backup folders alone, however related their names look.
- Reopen the project and rebuild deliberately. Let the render cache you need regenerate, and recreate Optimized Media only for clips that still need it.
Deleting it by hand makes sense when the cache is damaged, abandoned data survives normal cleanup, or disk usage doesn't drop the way it should. If original clips are offline, removing CacheClip won't repair their paths; the Media Offline diagnosis is where to go.
Should you use cached images for export?
In the Deliver page's Video settings, under More options, Use Render Cached Images writes from cached media and skips calculating the effects again.
That can save render time, but it also puts the cache format into the output-quality chain. If the cache was made in a lightweight editorial format, holds stale frames or was never checked at delivery quality, leave the option off and render from the live source and effects.
I'd use cached images only when you picked a suitable cache format on purpose, the complete delivery range is blue, and you've looked at the result. Smooth timeline playback on its own isn't a mastering decision.
Where Render Cache belongs in the workflow
Render Cache does its best work when a timeline is already organized and one processing stage can't hit real time. It's project-managed, replaceable working media tied to the result Resolve is currently computing.
Proxy Media is portable and tied to source clips. Optimized Media gives Resolve easier-to-decode source media on the workstation. Timeline Proxy Resolution lowers working resolution without generating any of those files.
These tools can work together, but switching all of them on out of habit doesn't help. Pick the one that matches the boundary you can prove. The DaVinci Resolve workflow hub sorts the next steps by job; the Resolve troubleshooting hub is the better route when the symptom is wider than cache.
DaVinci Resolve Render Cache FAQ
Should I use Smart or User Render Cache?
Use Smart for a quick automatic test, or when lots of different effects need help. Use User when most of the timeline already plays in real time and you want to cache specific clips, nodes or filters. Project settings can still automate transitions, composites and Fusion effects in User mode, so check those boxes too.
Why does the red cache bar never turn blue?
Make sure Render Cache is Smart or User, check the item-level cache target, play the range or wait out the configured background interval, and confirm that the cache drive exists, is writable and has free space. Then delete cache for Selected Clips and rebuild one range.
Why did a blue cache bar turn red again?
Resolve invalidates cached media when something upstream changes. A grade, Fusion composition, filter, retime or timeline edit can force the affected result to rebuild. That's normal when the edit really did change the cached processing path.
Where does DaVinci Resolve store render cache files?
The project writes to the Cache files location under Project Settings > Master Settings > Working Folders. By default that's the first scratch disk in Preferences > System > Media Storage; with no scratch disk configured, Resolve can use the system disk.
Can I safely delete Render Cache?
Yes. You can delete the whole CacheClip folder after closing Resolve, but that goes further than Delete Render Cache, because Optimized Media can share the Cache files location. Projects, edits and camera originals aren't stored there; deleted render cache and optimized media have to rebuild. Try Selected Clips, Unused, All or Manage Render Cache before you delete the folder manually.
Is Render Cache the same as Proxy Media?
No. Render Cache stores computed timeline, Fusion and Color results for playback. Proxy Media creates linked, portable versions of source clips for easier editing and handoff. When files need to move or be relinked, use the dedicated proxy workflow.
Does Render Cache change export quality?
Ordinary cached playback doesn't make the Deliver page use the cache. Turn on Use Render Cached Images and the chosen cache format becomes part of the output path, so pick a suitable high-quality format and inspect the cached range before you rely on it for delivery.
