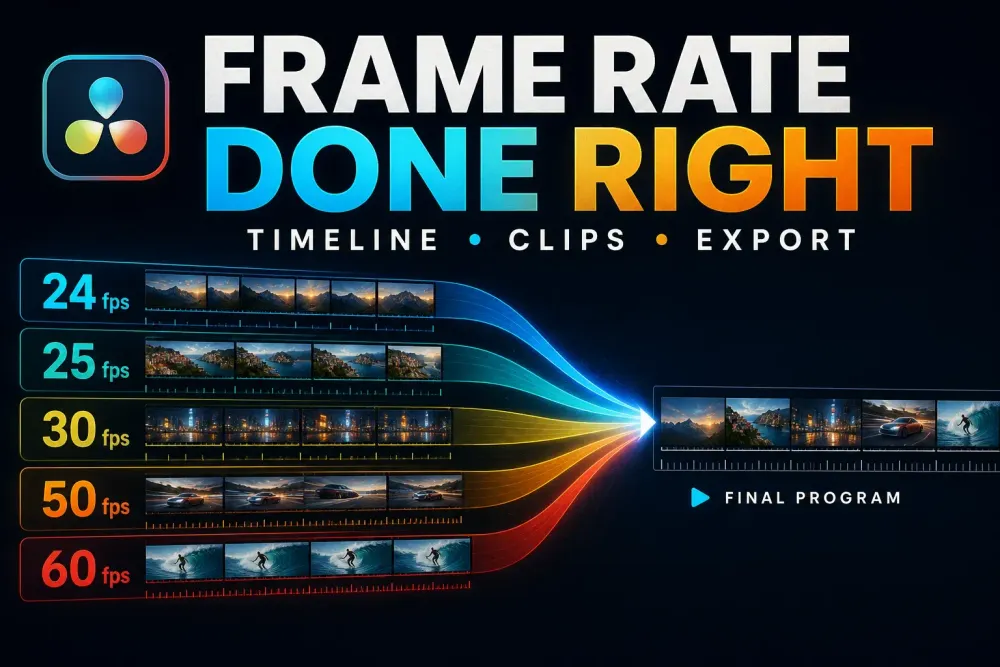
Pick the timeline frame rate from the delivery spec, not from the biggest number on the camera card. A 25 fps program can use 50 fps footage for half-speed shots, and a 29.97 timeline can use 59.94 material the same way.
So there are two decisions here. First, how must the finished program run? Second, what should each source clip do inside that timebase? If this is your first project, the Resolve tutorial map puts frame rate ahead of editing, audio and delivery, which is exactly where it belongs.
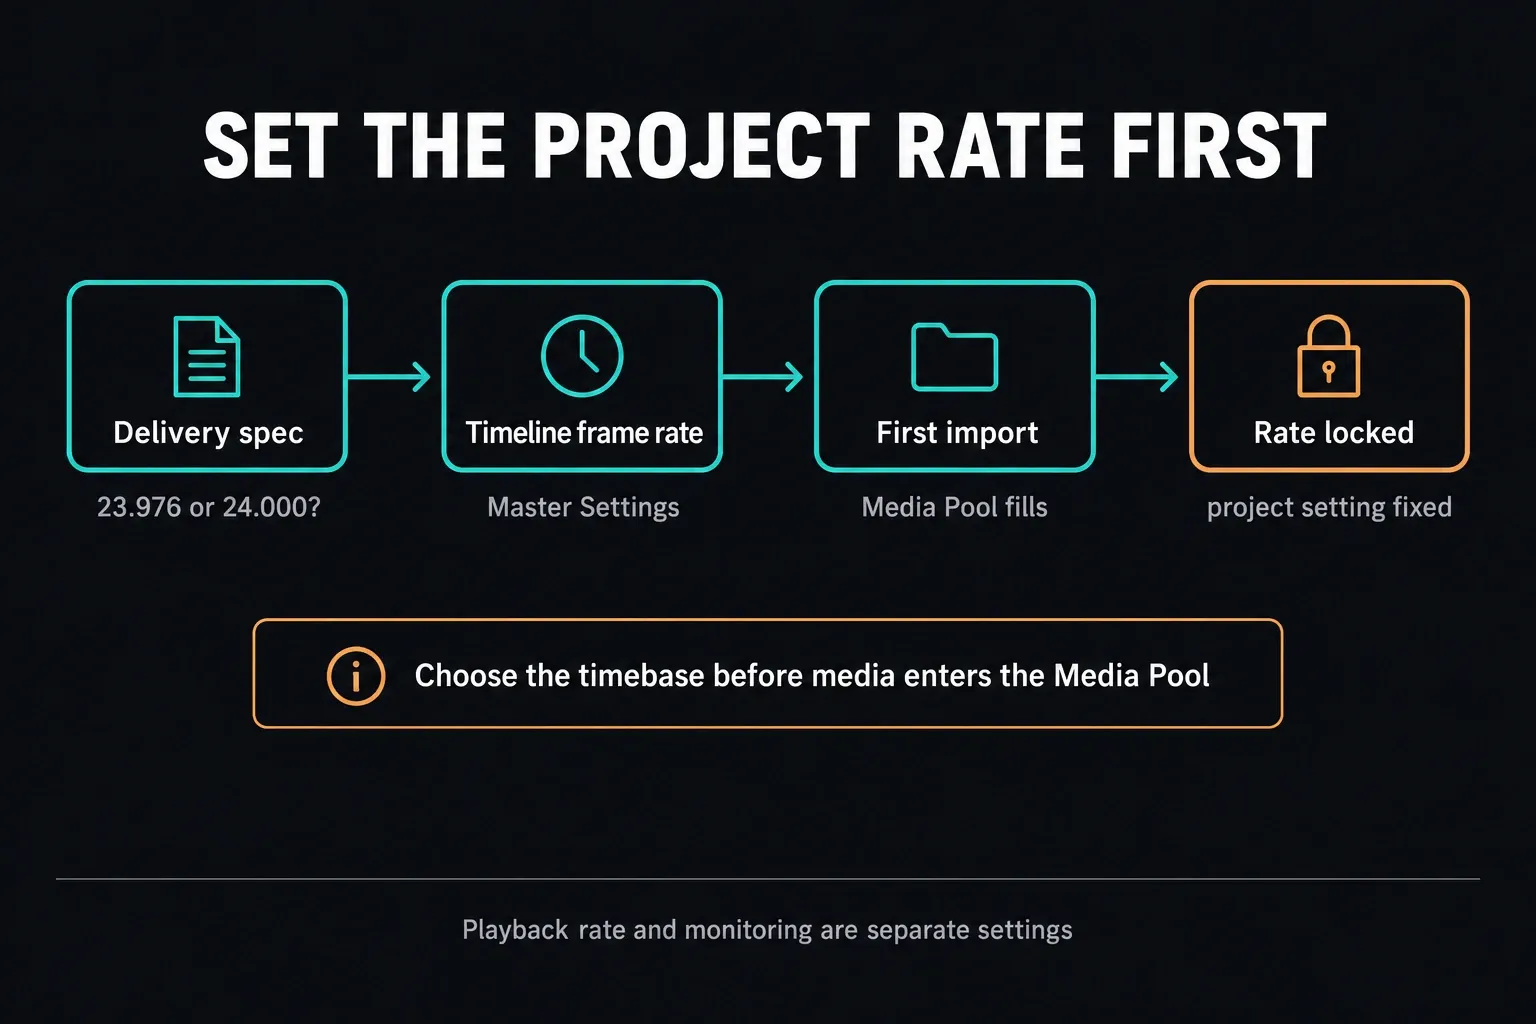
Out of the box, a new project runs its timeline at 24 fps and 1920 x 1080, the factory setup shown in Larry Jordan's tour of the Resolve project settings. If someone on that system saved a different default preset, new projects start from that instead. To change the rate, open File > Project Settings (Shift-9), choose Master Settings and set Timeline frame rate before you import anything, because the control locks once a clip is in the Media Pool.
Resolve has several frame-rate controls because each one solves a different problem. The project Timeline frame rate sets the primary time grid. An individual timeline can carry its own custom settings.
Clip Attributes reinterprets source video and changes its duration. Retime Process decides how frames get mapped when rates or speeds differ. The Deliver frame rate describes the rendered file.
Treat all five as one generic FPS setting and clean footage turns into judder or lost sync. I rechecked these controls on October 1, 2026 against the DaVinci Resolve 21 Reference Manual for Resolve 21.1; that's a documentation check, not a claim that I rebuilt every timeline below.
Choose the outcome before the setting
| What you want | Setting to use | What changes |
|---|---|---|
| A 25 fps broadcast or web master | 25 fps timeline before editing | The program time grid and normal delivery cadence |
| 50 fps footage at normal speed in a 25 fps timeline | Leave clip interpretation at 50; edit normally | Resolve conforms frames while duration stays real time |
| 50 fps footage as half-speed motion in 25 fps | Interpret at 25 fps or retime to 50% | All recorded frames play over twice the duration |
| Replace a 60 fps timeline with 30 fps | Create a new custom 30 fps timeline and test-copy the edit | A new time grid that requires full review |
| Fix a phone recording with irregular cadence | Inspect VFR and create a CFR intermediate when needed | The source file, not the timeline's intended cadence |
Set the project frame rate before adding media
- Create the project and open Project Settings > Master Settings.
- Set Timeline frame rate to the exact delivery timebase, including 23.976 versus 24.000 or 29.97 versus 30.
- Set Playback frame rate and monitoring for your actual display path. That doesn't replace the project timebase.
- Save a project preset if the same delivery spec keeps coming back.
- Only then add representative media. The project Timeline frame rate locks once one or more files land in the Media Pool, and the Mixed frame rate format choice under General Options is also only available before that first import.
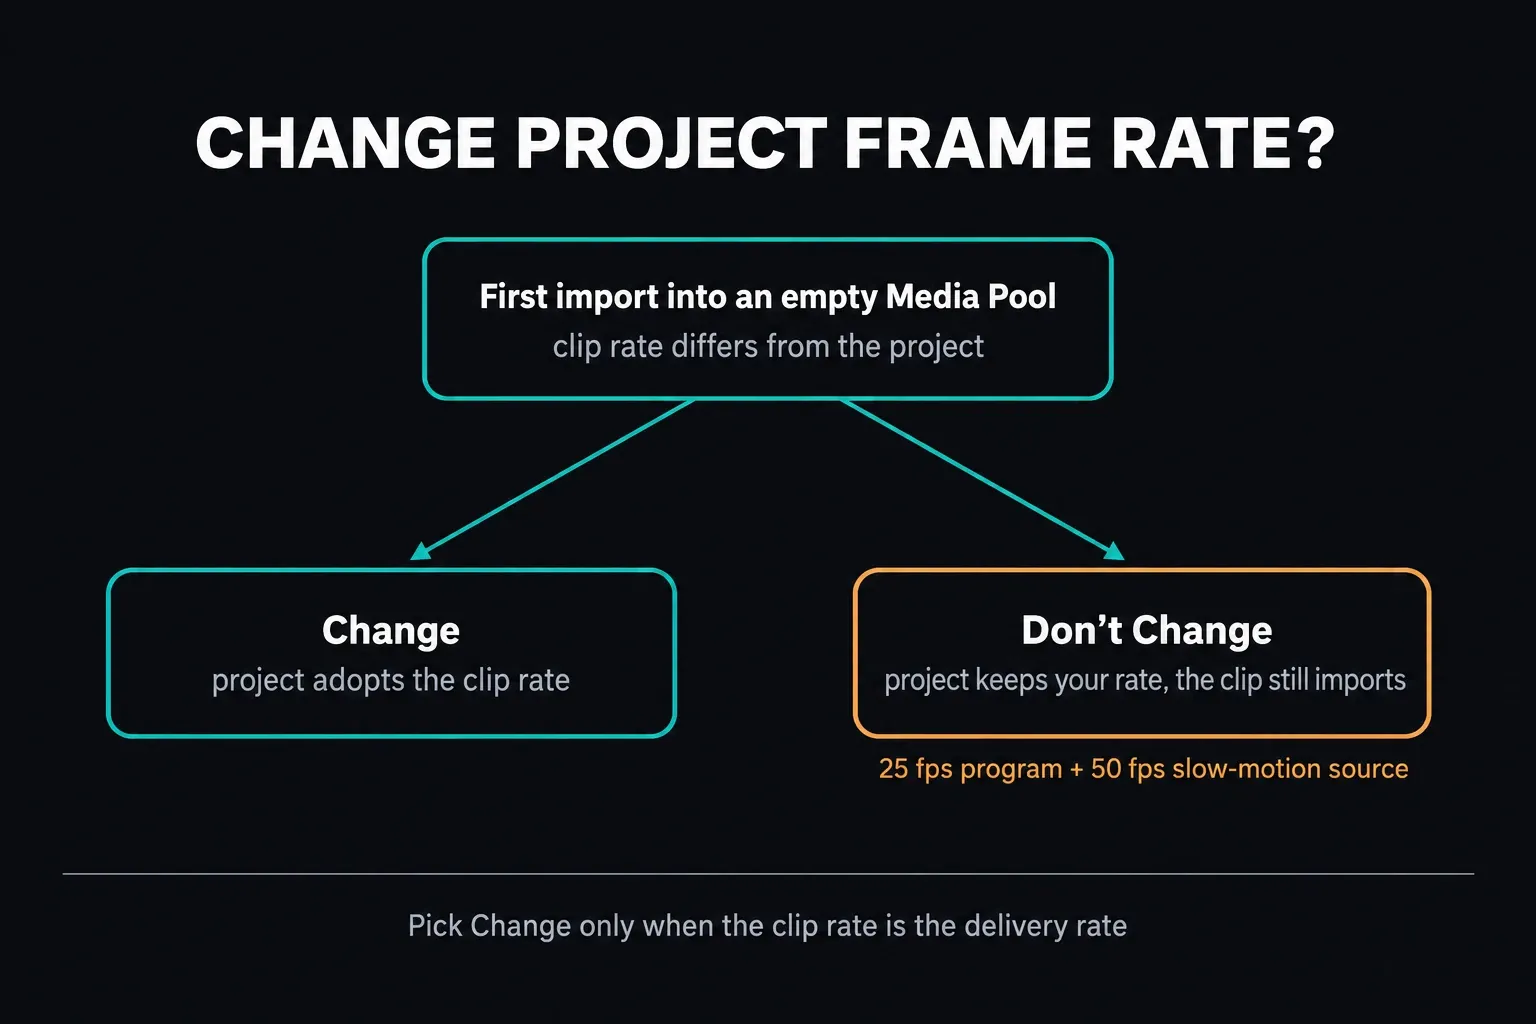
When the first media you import disagrees with the empty project, Resolve shows a Change Project Frame Rate prompt. Choose Change only when the detected source rate really is the rate the project needs.
Choose Don't Change when you set the project for another delivery cadence on purpose, such as a 25 fps program receiving a 50 fps slow-motion source. The import still goes ahead and the project keeps its previous frame rate. This choice is about the project timebase, not about whether Resolve can use the clip.
Change the default frame rate for new projects
If most of your work runs at 25, 29.97 or 30 fps, resetting every new project gets old fast. The Presets menu in Project Settings can replace the default that new projects load:
- In a new, empty project, open Project Settings and set Timeline frame rate, Playback frame rate and resolution the way you want projects to start.
- Click the three-dot option menu in the upper-right corner of the Project Settings window.
- Choose Set Current Settings as Default Preset and confirm with Update.
Every new project then loads those settings. Projects you've already made keep their own, so a locked one still needs the custom-timeline recovery further down. Overwriting the Default Preset has no undo, which is why Frame.io's walkthrough of the same menu suggests saving Resolve's original settings as a preset first. That gives you a way back.
Pick the delivery cadence, not the “cinematic” label
Start with the requirement from the client, broadcaster, camera system or live pipeline. Film workflows commonly separate 23.976 from 24.000. PAL-derived television and many European workflows use 25 or 50, while NTSC-derived work commonly lands on 29.97 or 59.94. Those labels aren't interchangeable, and a delivery spec beats any generic web recommendation.
YouTube's current encoding guidance says to encode and upload at the same frame rate you recorded, and lists common rates including 24, 25, 30, 48, 50 and 60. So don't convert 25 to 24 just because a tutorial calls 24 cinematic. Conversion changes cadence, and it may need dropped, repeated, blended or synthesized frames to get there.
Keep high-frame-rate clips real time when that is the intent
With mixed-frame-rate conforming on, a 50 fps source placed in a 25 fps timeline keeps its real-world duration unless you deliberately reinterpret or retime it. A one-second action stays one second; Resolve maps the source frames it has onto the timeline grid.
That's the behavior you want for sports, screen recordings or camera footage captured at a higher cadence but meant to play in real time. The timeline can only show its own number of frames each second, so the Retime Process you pick decides how the mismatch is handled.
| Retime process | Method | Tradeoff |
|---|---|---|
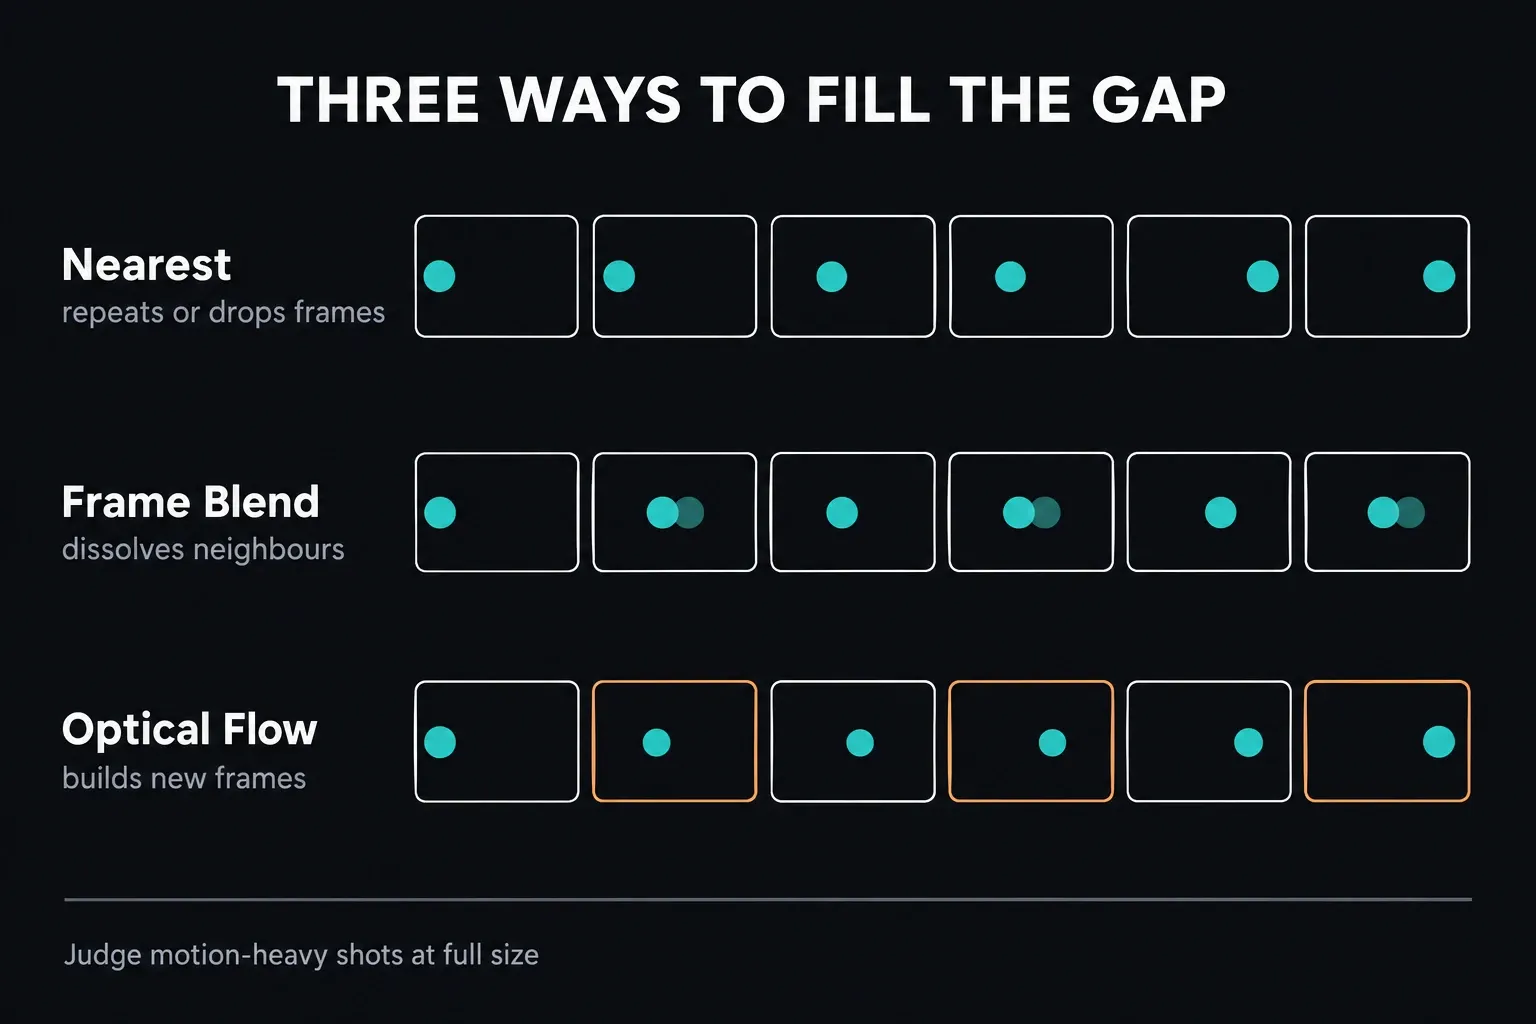
| Nearest | Selects existing frames | Fast and sharp, but cadence can judder with awkward ratios |
| Frame Blend | Blends neighboring frames | Smoother cadence can introduce ghosting |
| Optical Flow | Estimates motion between frames | Can look smoother but costs more processing and can warp edges |
Nearest uses the nearest source frame, dropping or repeating frames where it has to, and it's the lightest option on the processor. Frame Blend dissolves adjacent frames together; the manual suggests it when Optical Flow shows unwanted artifacts.
Optical Flow estimates motion and creates new intermediate frames. It costs the most processing and can break around crossing limbs, occlusion, water, particles, flashes or unpredictable camera movement. Test the motion-heavy section at full size, because Optical Flow isn't automatically the best result. The project default sits under Frame Interpolation in Master Settings, and the Inspector overrides it per clip.
Interpret high-frame-rate footage for slow motion
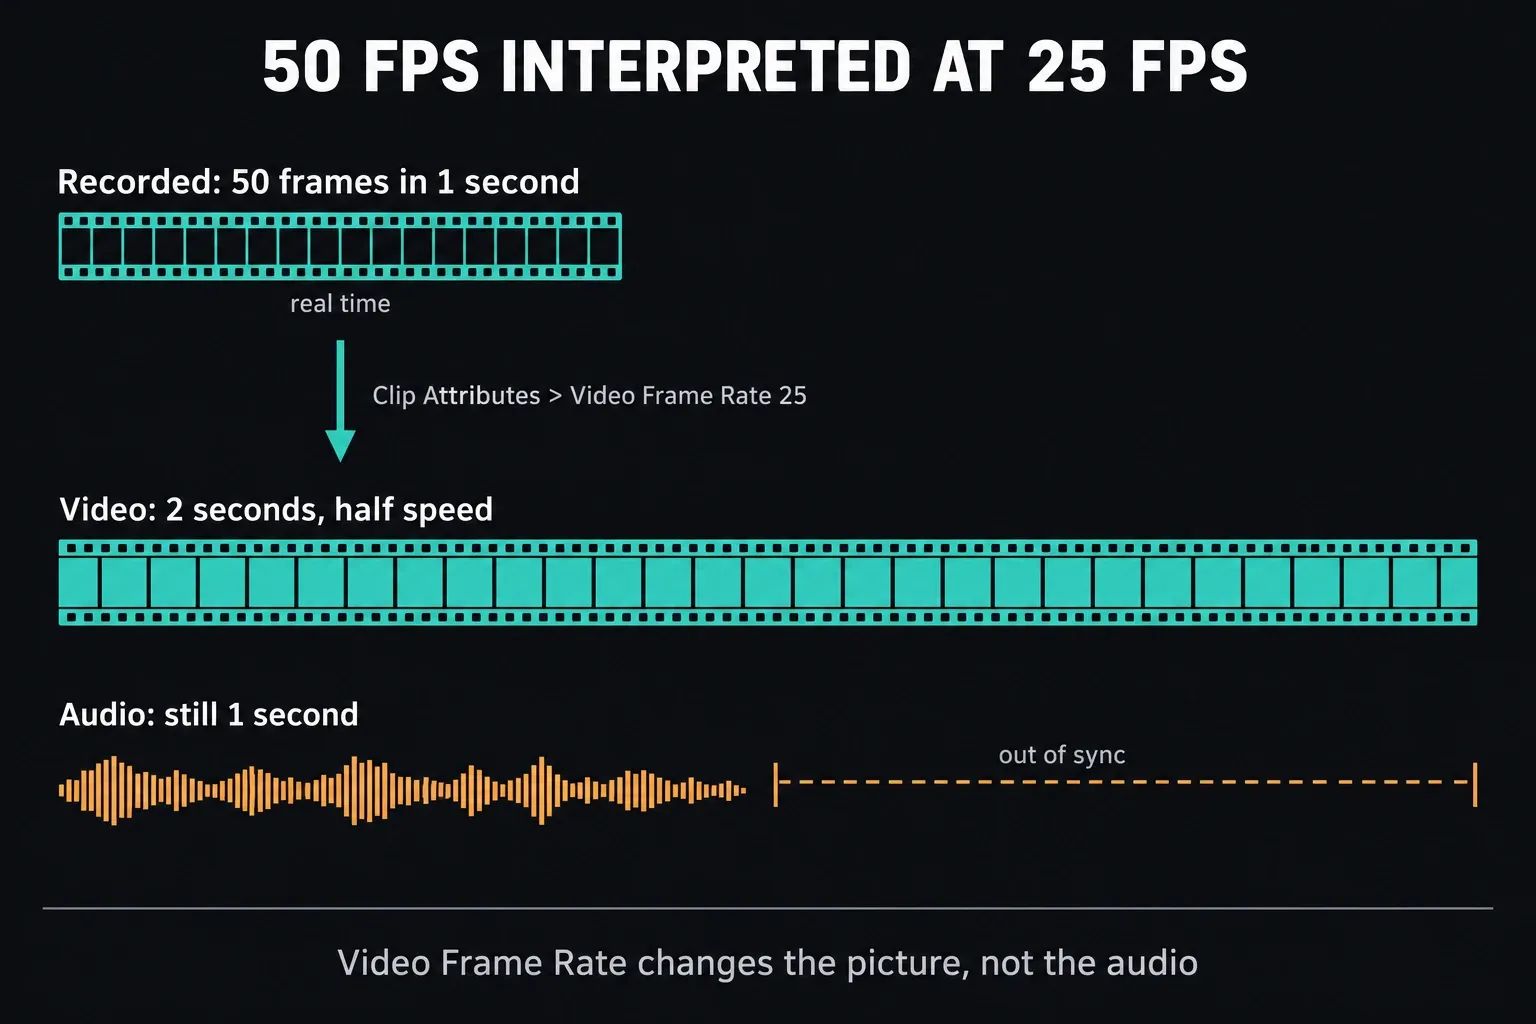
Say a camera recorded 50 progressive frames during one real second and you interpret that video at 25 fps. Those 50 recorded frames now fill two timeline seconds. The picture plays at half speed without any synthesized intermediate frames. That's source interpretation, not normal mixed-rate playback.
- In the Media Pool, right-click the original source and choose Clip Attributes.
- On the Video tab, set Video Frame Rate to the rate you want the clip interpreted at.
- Put the interpreted clip into a short test timeline and confirm the new duration.
- Check picture timing and sync. Clip Attributes changes the video, but it doesn't change the associated audio.
- Don't reinterpret a source you also use at normal speed elsewhere, unless every use should inherit that change.
Interpreting 60 fps at 24 fps gives you 40% speed, because 24 divided by 60 is 0.4. Interpreting 59.94 at 29.97 gives you 50%. For a speed ramp or one selected slow section, use the clip-speed and retime workflow rather than changing the source interpretation for every use.
Be careful with audio when interpreting clips
Some high-frame-rate camera modes record no usable production audio at all.
The bigger catch: the Resolve 21 manual says changing Clip Attributes > Video Frame Rate changes the clip's duration and playback speed, while its audio is unaffected. The picture duration changes and the audio duration doesn't, so a synchronized clip can fall out of step straight away. Plan for that; it isn't a fault in the audio engine.
For dialogue or double-system sound, leave normal-speed sources at their intended interpretation and retime only with a clear audio plan. And never reinterpret a synced multicamera angle after synchronization without rebuilding or checking the whole group from beginning to end. The multicam editing guide covers the synchronization stage on its own.
Recover when timeline frame rate is locked
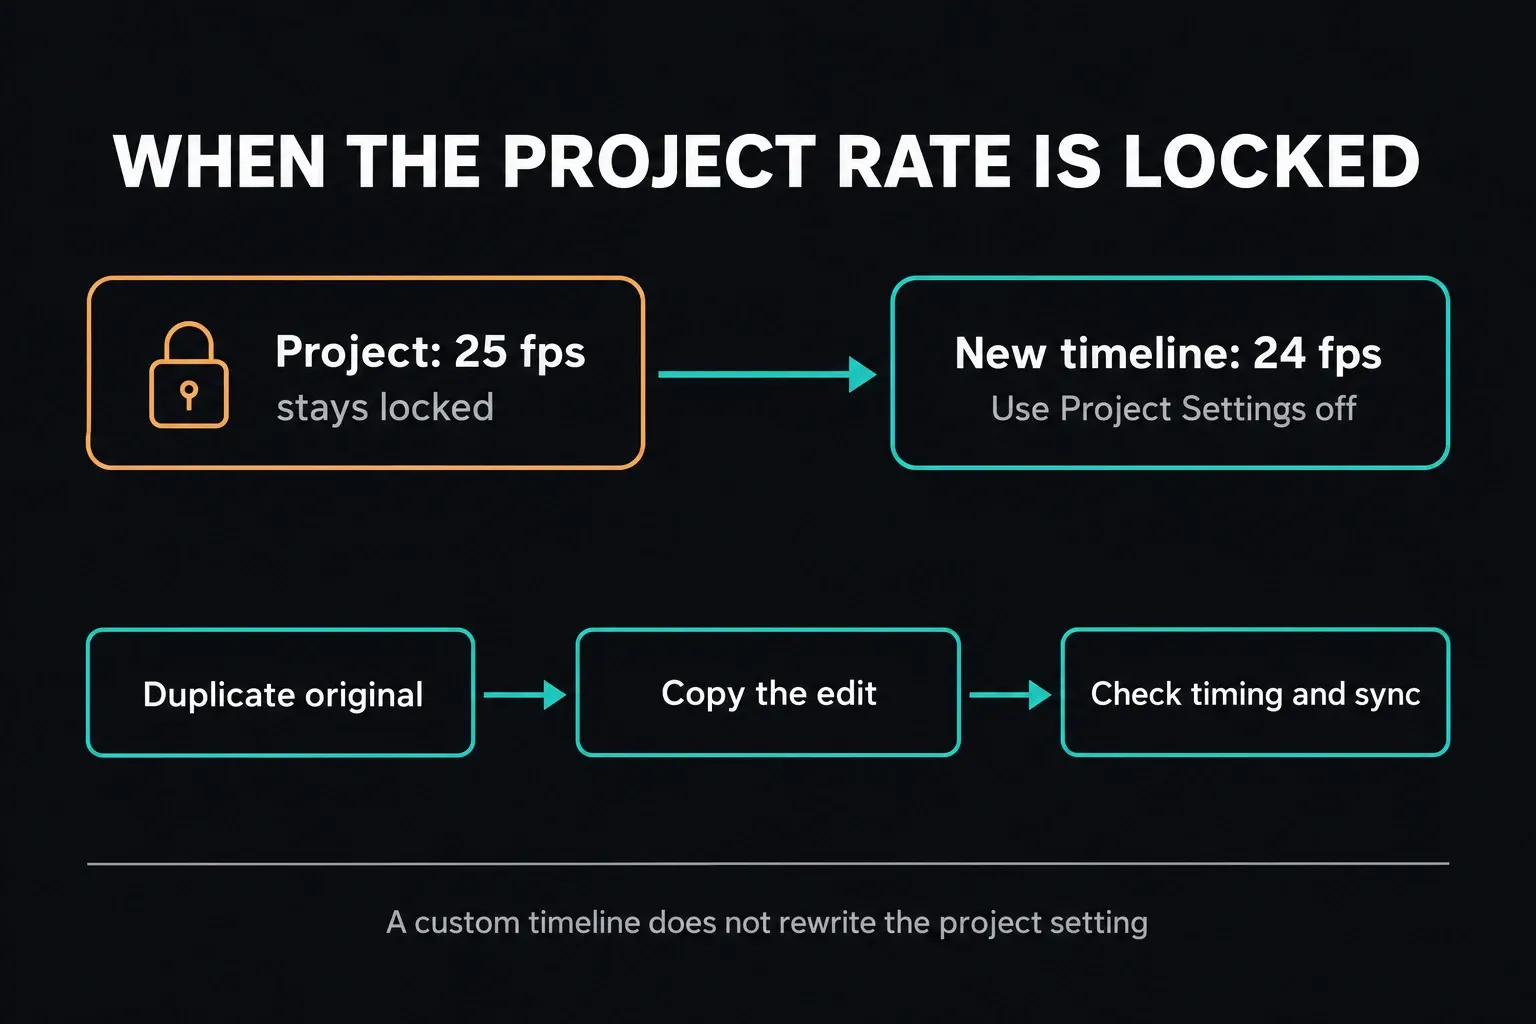
The project Timeline frame rate locks as soon as one or more files are added to the Media Pool. If the project-level control is greyed out, don't go editing databases or preference files. A new custom timeline can run at another timebase, although it doesn't change the locked project setting:
- In the Media Pool, create a new timeline.
- Uncheck Use Project Settings before you confirm the new timeline.
- Set the Timeline Frame Rate you need in the custom Format settings.
- Duplicate the original timeline before moving any edit content.
- Copy the edit into the new timeline, then check timing, transitions, keyframes, speed effects, captions and audio sync.
A different cadence means a different time grid, so copying clips is only the start of the recovery. Frame-based keyframes, retimes, transitions, compound clips, captions and externally synced audio can land differently. Compare the first frame, the last frame and several timing landmarks before you replace the original timeline.
Handle mixed 23.976, 24, 25, 29.97 and 30 sources
Mixed frame rates are normal in documentary and creator projects. Choose one master timeline from delivery, keep mixed-frame-rate conforming on for normal-speed sources, and look closely at clips whose cadence doesn't divide cleanly into the timeline. A mathematically valid conversion can still look uneven on a pan or a scrolling screen.
Check pans, scrolling interfaces, LED walls, stage lighting, motion blur and shutter cadence. Converting 24 to 25 produces a different pattern from 60 to 30. If exact running time and sync matter, don't reinterpret a clip just so its metadata matches the timeline.
Do not change timeline FPS to fix slow playback
If the viewer manages only 18 frames per second on a 25 fps timeline, switching the timeline to 18 isn't a performance fix. The timeline defines the finished program. Real-time playback depends on decoding, effects, storage, GPU work and the current render cache.
Play the same range with effects bypassed. If the source codec is expensive to decode, use proxies or optimized media. If Fusion, noise reduction, retiming or scaling causes the miss, cache that operation or lower the preview load. The slow-playback checklist covers the rest without touching the approved cadence.
Check exchange timelines and external audio at exact rates
An XML, AAF, DRT or imported timeline can carry a timebase that differs from the receiving project. Read the import dialog; if the project already has media in the Media Pool, the manual notes that its Timeline frame rate is locked during XML or AAF import. Then compare the first and last frame, clip durations, transitions, speed changes and markers against the source edit. A successful import doesn't prove a timing match.
Audio has no video frame rate, but clips, timecode and sync all live on a timeline grid. Confusing 23.976 with 24.000 can create cumulative timing or timecode disagreement over a long program. Verify the exact rate at ingest, interchange and delivery rather than fixing the end by eye.
For multicamera material, lock the program rate before synchronization, then check a point near the end of a long take. If sync drifts further and further, look at source timestamps, the recorder clock, variable frame rate and interpretation. Nudging later clips again and again hides the cause and makes the next conform harder.
Convert variable-frame-rate media before blaming FPS
Phones, screen recorders, meeting tools and browsers can all produce variable-frame-rate media. A file may report a nominal 30 fps while the time between encoded frames keeps changing. That kind of media can go along with uneven seeking, drift or inconsistent frame-accurate edits, but VFR on its own doesn't prove the cause.
Check Frame rate mode and timestamps in MediaInfo or another reliable inspector. HandBrake's current frame-rate documentation separates a variable source from a Constant Frame Rate output, and it names encoding for import into an NLE as one of the special cases where a fixed constant rate makes sense.
If a controlled test points at VFR, keep the original and transcode a separate constant-frame-rate copy at the intended cadence. Recheck sync from start to end before relinking. Changing only the Resolve timeline rate won't normalize the source timestamps.
Match export to the approved timeline
On the Deliver page, the Frame rate setting for a Single Clip render defaults to the Timeline Frame Rate. The manual describes its alternatives as variations of the conformed rate, such as 23.98 versus 24, which change the metadata written into the file. For a genuinely different cadence, build a separate timeline at that rate and review the conversion there.
A higher output number doesn't bring back motion samples the camera never recorded. An Individual Source Clips render keeps each clip at its original frame rate, while a Single Clip render converts everything to the timeline rate.
Use the export task map for codec, container, bitrate, audio and platform decisions, or follow the full Deliver-page walkthrough. Render a short motion-heavy section first and watch it in an external player before you commit to the full job.
Check frame rate before the real edit
- Confirm the exact delivery timebase, fractional rates included.
- Inspect representative camera, phone, screen and archive sources.
- Decide which high-rate clips play in real time and which become slow motion.
- Set the timeline before bulk import.
- Test motion, audio sync, titles, subtitles and export.
- Write down the project rate for every editor and camera operator.
Frequently Asked Questions
What frame rate should I use in DaVinci Resolve?
Use the exact delivery timebase the client, broadcaster or production requires. For your own uploads, I'd normally keep the cadence you planned and captured rather than converting it for a style label. Set the project rate before adding media.
What is the default frame rate in DaVinci Resolve?
A new project starts at 24 fps on a 1920 x 1080 timeline unless a different default preset has been saved. Change it in File > Project Settings > Master Settings before you import media, or set your usual settings once and choose Set Current Settings as Default Preset so every new project starts with them.
Why is timeline frame rate greyed out?
The project Timeline frame rate locks after one or more files are added to the Media Pool. You can still create a new timeline with Use Project Settings unchecked and choose a different timeline rate, but that doesn't unlock the project setting. Duplicate the edit before you copy it across, then check every timing-dependent element.
Should a 60 fps clip go on a 24 fps timeline?
Yes, when 24 fps is the required program rate. Keep mixed-frame-rate conforming for normal-speed playback, or reinterpret or retime the clip deliberately for slow motion. A 60 fps source doesn't need a 60 fps timeline.
Does changing Clip Attributes change video speed?
Yes. Changing Clip Attributes > Video Frame Rate changes the video duration and playback speed. That setting leaves the clip audio alone, so synchronized audio can fall out of step with the reinterpreted picture.
Is 23.976 the same as 24 fps?
No. They're close but distinct timebases. Use the exact rate that capture, production and delivery require, especially for long-form audio sync, timecode, interchange and broadcast specifications.
