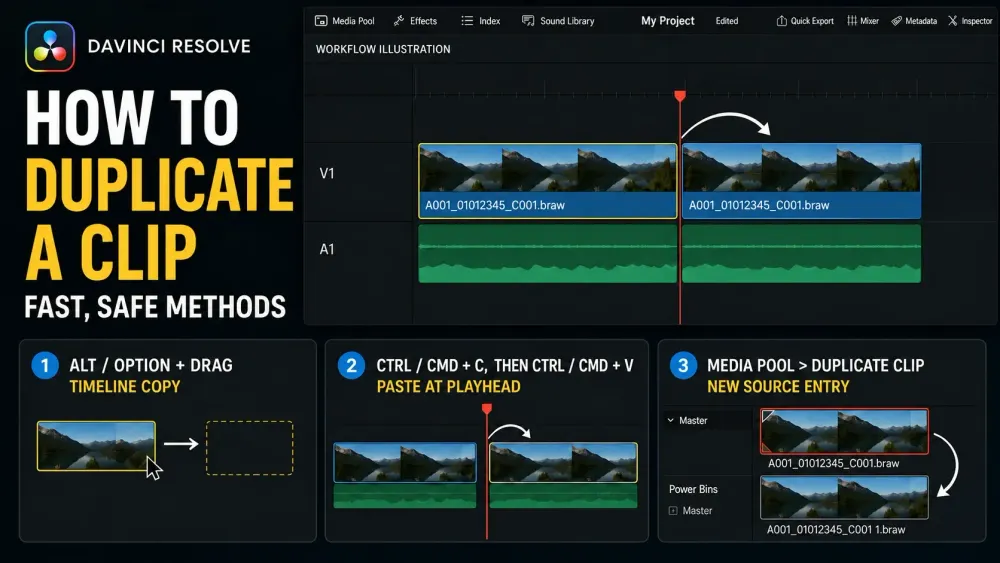
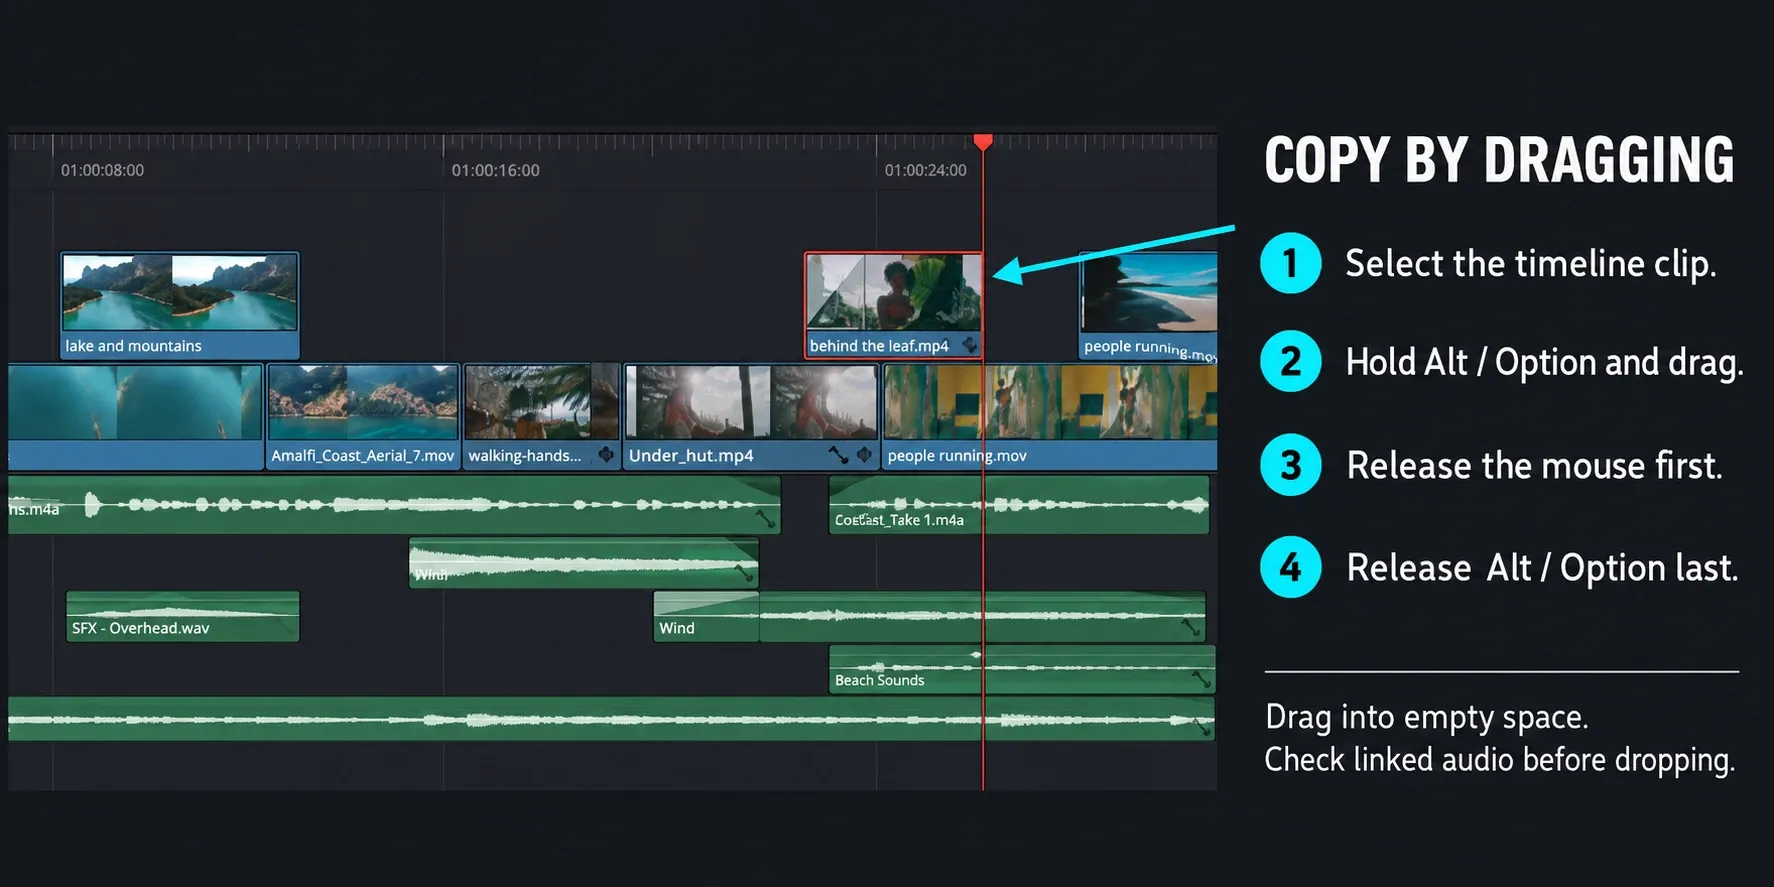
On the Edit page, select the clip you want to copy, hold Alt on Windows or Linux or Option on Mac, then drag it to the new position. Release the mouse button before releasing the key. The original stays in place.
For an exact start frame, copy the clip and paste at the playhead instead. Use Paste Insert when you need to make room between existing clips. Duplicate Clip in the Media Pool has a different purpose: it creates another project source entry, with its own metadata and markers. None of these operations creates another media file on disk.
The shortcuts below assume Resolve's default keyboard mapping. If you use a different preset, the menu command is the reliable reference.
Duplicate a timeline clip with Alt/Option-drag
- Select the clip, or select several clips to copy them together.
- Hold Alt on Windows/Linux or Option on Mac.
- Drag the selection to an empty destination in the timeline.
- Release the mouse, then release Alt or Option.
Keep the modifier down until the drop is finished. If the original disappears from its starting position, undo the move and repeat the sequence. Check the destination before dropping: a copy should not replace a shot you meant to keep.
You can copy a selected transition with the same modifier-drag gesture, dropping it on another edit point.
Copy only the video or audio
Turn off Linked Selection, select only the component you need, then duplicate it. The default toggle is Ctrl+Shift+L on Windows/Linux or Command+Shift+L on Mac. Turn Linked Selection back on afterward so your next move selects linked picture and sound together. You do not need to permanently unlink the clip; use the audio splitting guide if permanent separation is the task.
When copying linked video and audio to other tracks, inspect both components before dropping. Timeline > Linked Move Across Tracks controls whether dragging picture vertically also changes its linked audio track. It does not remove their horizontal timing relationship.
Copy and paste at the playhead
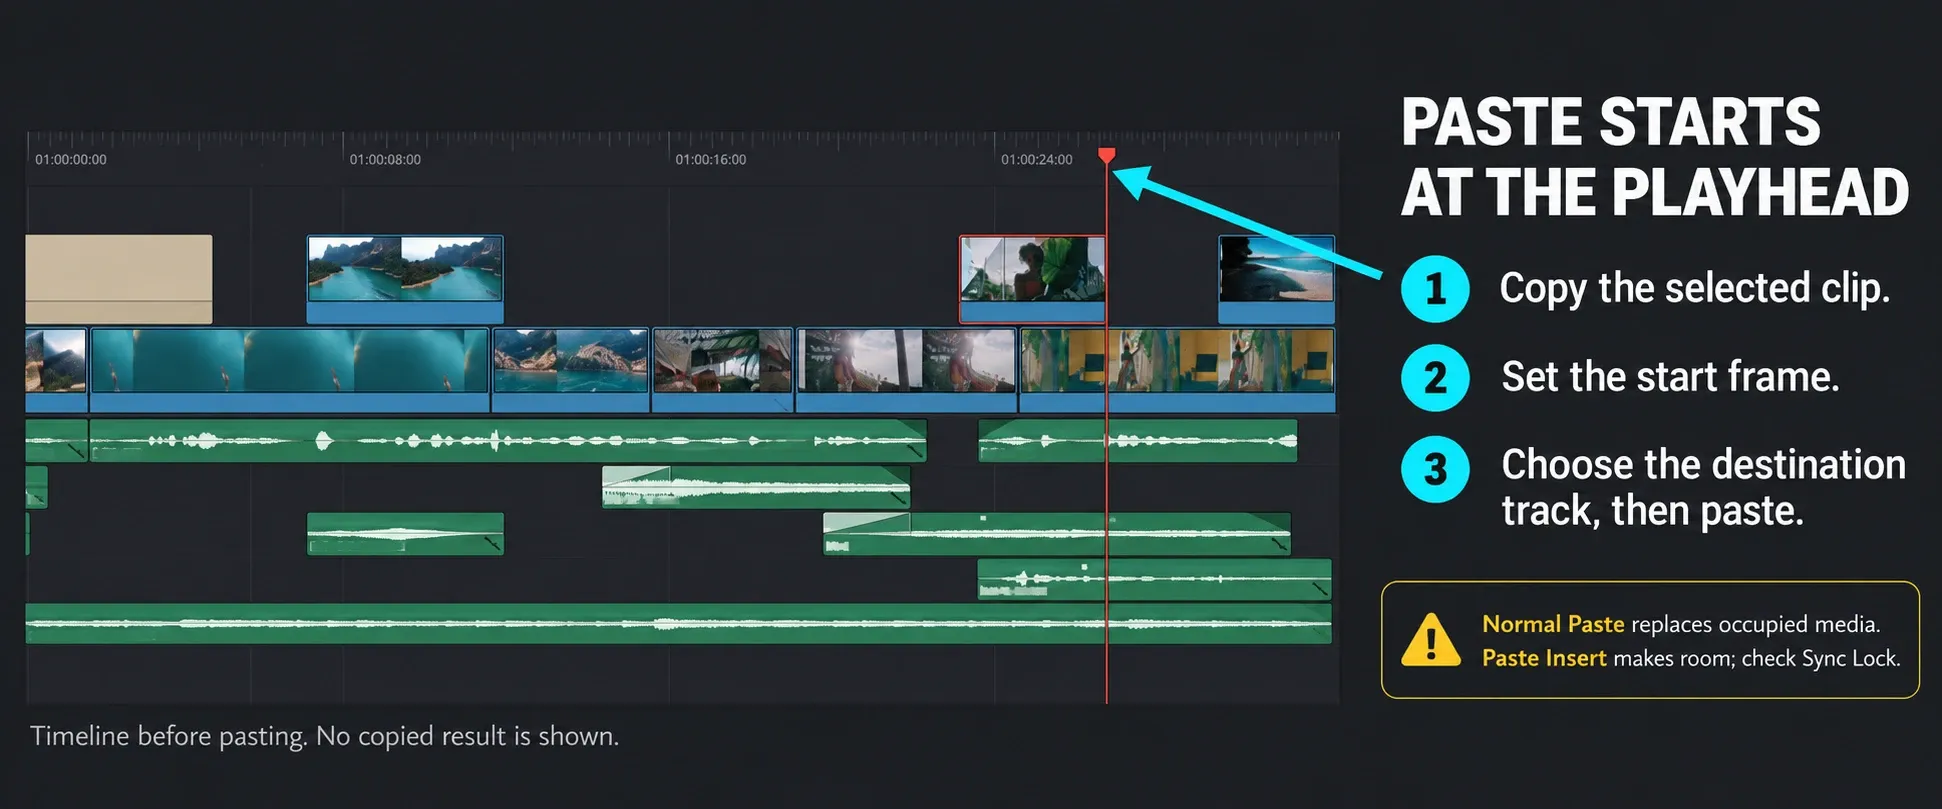
Select the timeline clip and press Ctrl+C / Command+C. Choose the destination track using the controls below, set the playhead where the copy should begin, then press Ctrl+V / Command+V. A normal paste overwrites media occupying that track’s destination range, so choose empty space unless replacement is intentional.
To put the duplicate directly above its original, place the playhead at the original's first frame and choose the higher video destination before pasting. If you also copied audio, choose its destination separately.
Paste onto a different track
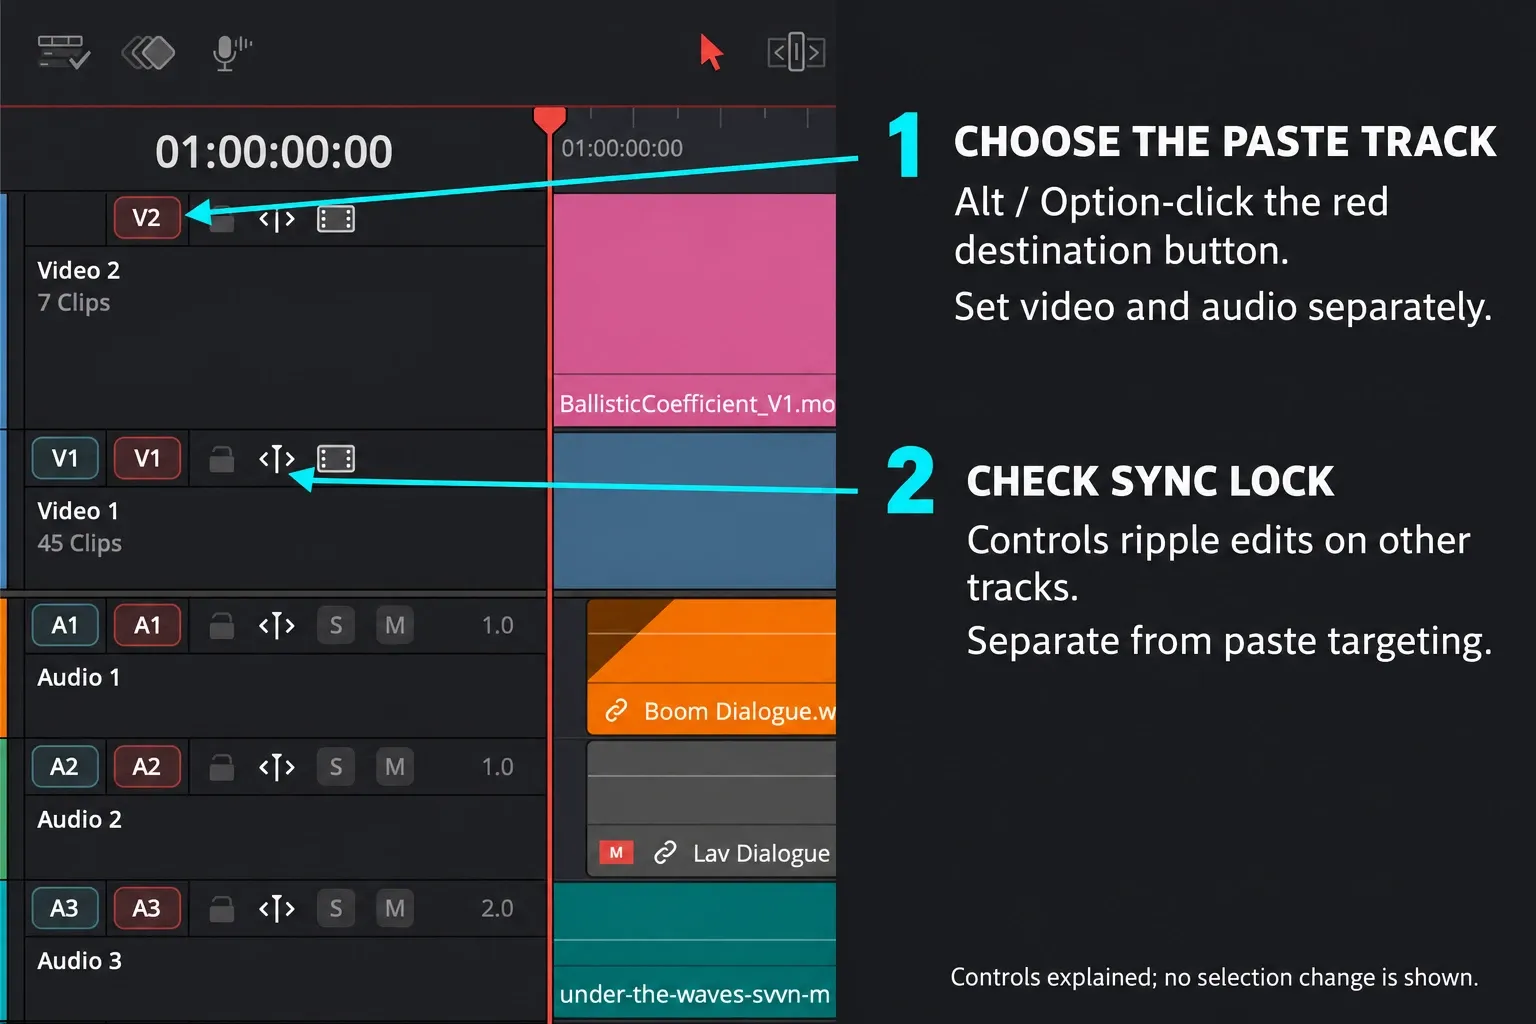
In the current Edit interface, use the red Destination Track Selector buttons in the track headers. Older tutorials call this Auto Select or Auto Track Selector. Since Resolve 20.2, the old standalone Auto Select icon has been replaced by the red timeline buttons. The blue column beside them patches source-viewer components.
- Copy the clip and position the playhead.
- Alt/Option-click the red destination button for the video track you want. This leaves that video destination enabled and disables the other video destinations.
- If the copy includes audio, choose the audio destination the same way. Video and audio selection are separate.
- Paste, inspect both components and restore the destination selection you need for subsequent edits.
Blackmagic's current reference manual describes these controls under Editing Basics. Do not confuse selecting a destination with locking a track or controlling its ripple behavior.
For a multi-track selection, the lowest copied track establishes the base and higher clips keep their relative arrangement. Resolve can create missing tracks. This matters when copying between timelines with different layouts: inspect the entire pasted stack, not just its first video clip.
If pasted audio loses a channel, check the destination track's format. Extra channels are muted when a clip contains more channels than the track supports. Right-click that track's header and use Change Track Type To to choose a suitable channel configuration.
Copy only part of a clip
Clear any manually selected clips, mark the required timeline range with I and O, and enable the destination selectors for the tracks you want to copy. Copy, clear the range with Alt+X / Option+X, move the playhead and paste. Clearing the marks prevents the old range from interfering with the destination.
To make the destination In/Out range limit a paste, enable Preferences > User > Editing > Prioritize pasting to the in and out range. Leave that behavior out of an ordinary whole-clip copy unless you specifically want a range-limited result.
Paste Insert without overwriting the next shot
Copy the selection, set the playhead and choose Edit > Paste Insert. Its default shortcut is Ctrl+Shift+V / Command+Shift+V. The selection is inserted at the playhead and later material moves to make room.
Before inserting, check Sync Lock on the other tracks that must follow the edit. Sync Lock controls participation in ripple operations independently of the red destination selectors. Blackmagic explains that separation in its track-control walkthrough.
For example, disabling Sync Lock on a music track can keep it from following an insertion on a video track. That also changes its alignment with picture that moves. Leave Sync Lock enabled when those moments must stay together, then check the first sync point after the insertion. A track's padlock is different: it prevents edits to that track.
Use Copy, not Cut, when the original must remain. After inserting, inspect titles, sound effects and dialogue on neighboring tracks before continuing.
Duplicate a Media Pool source
In the Media Pool, select the clip and choose Edit > Duplicate Clip, or right-click it and choose Duplicate Clip. You can also Alt/Option-drag a selected clip into another bin to create a duplicate there.
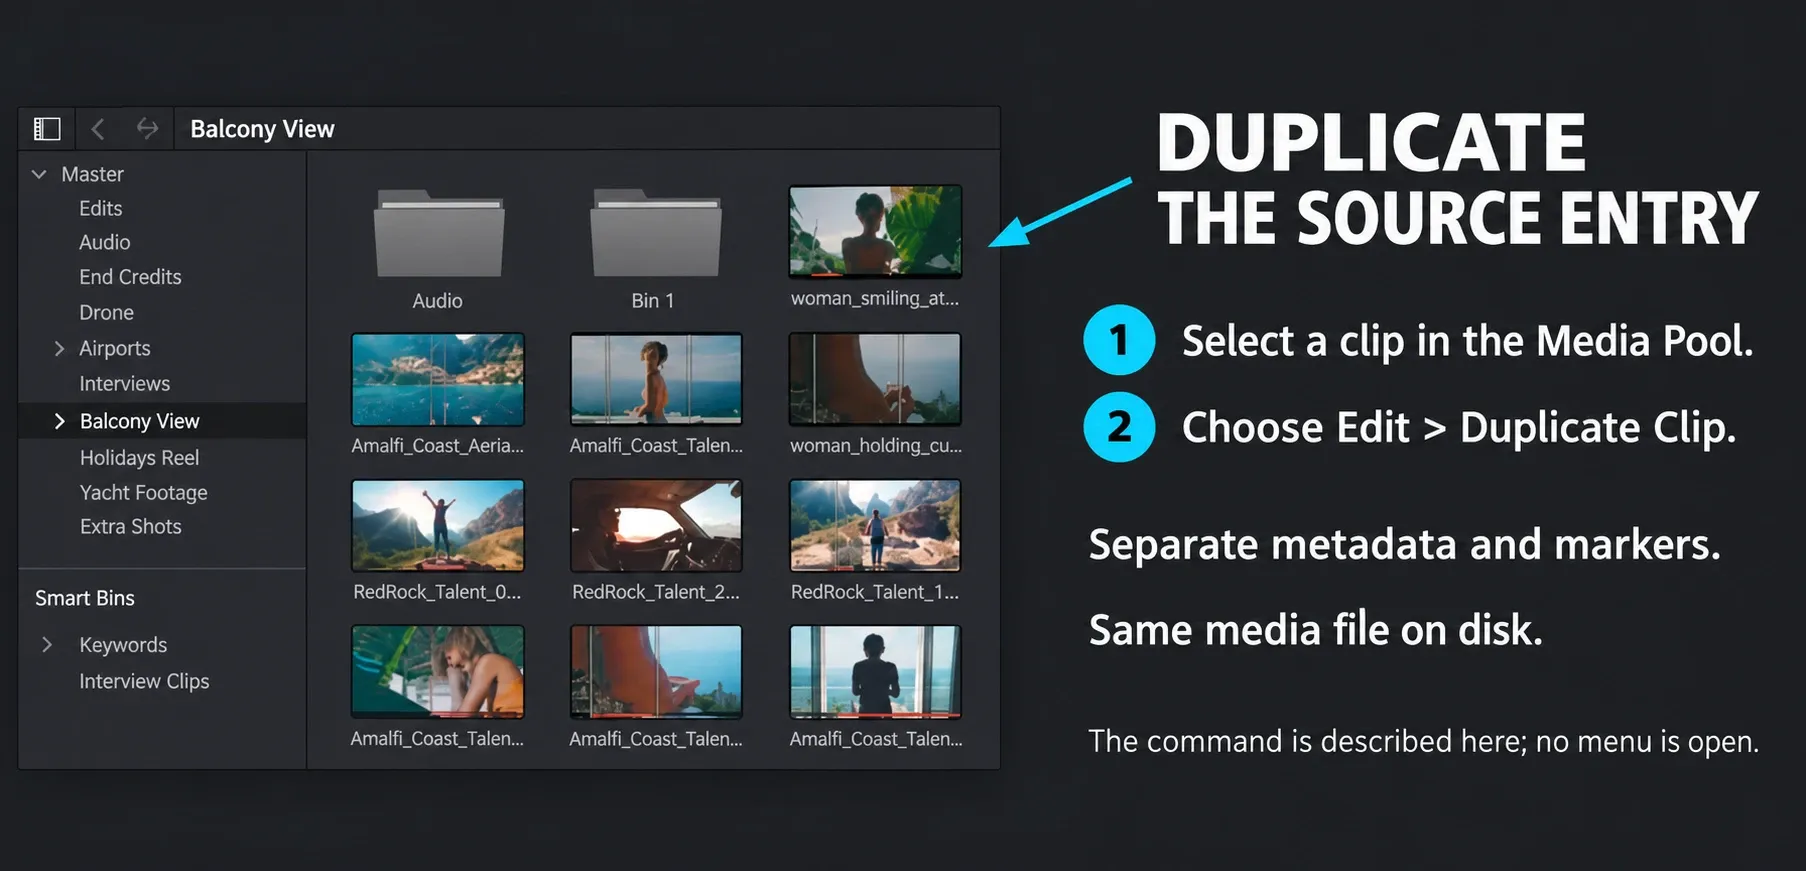
The new entry can have its own metadata and markers. It still refers to the same underlying media file. Renaming the project entry does not create a new recording or a second copy on storage.
Make an independent compound copy
Copying a compound clip on the timeline creates another instance of the same nested source. Editing clips inside that compound can therefore change what its other instances contain. That is different from trimming or applying an effect to one outer timeline instance.
For a separate nested version, duplicate the compound in the Media Pool, give the new entry a recognizable name and insert that new source into the timeline. Confirm that you opened the new compound before changing its contents. The compound-clips guide covers opening, editing and decomposing compounds when you need their individual clips back.
If it arrives as separate clips, turn off Edit > Edit Options > Decompose Compound Clips on Edit before inserting the new source again.
Copy the settings instead of the clip
If you want a different shot to use the same adjustments, copy the source clip, select the target and choose Edit > Paste Attributes with Alt+V / Option+V. Tick only the attributes you want to transfer. You are applying settings to the selected shot, not inserting another clip.
When transferring a speed change, check Ripple Sequence in the dialog before applying it. Use the clip-speed guide for retiming decisions. On the Color page, = applies the grade from one clip prior; the copy-a-color-grade workflow explains the other grade-copy choices.
For the next editing step, use the split-and-trim guide to shape the copy or the text guide for title changes. The DaVinci Resolve Tutorial hub groups those beginner tasks.
Duplicate clip FAQ
What is the shortcut to duplicate a clip in DaVinci Resolve?
On the Edit page, use Alt/Option-drag or copy with Ctrl/Command+C and paste with Ctrl/Command+V. The Media Pool's Duplicate Clip command creates a separate source entry. Keyboard presets can change assigned shortcuts, so check the command in the menu if your mapping differs.
Why does Alt-drag move the clip instead of copying it?
Check the release order: keep Alt or Option held until after you release the mouse. Select the timeline clip before dragging and confirm that its destination track is unlocked. If you moved the original, undo before trying again.
How do I duplicate a clip onto another track at the same time?
Copy it, place the playhead at its original start frame, Alt/Option-click the red destination selector for the new video track, then paste. Set the audio destination separately if audio was copied. Check both components after the paste.
Does duplicating a clip create another media file?
No. Timeline copies reuse their source media. Duplicate Clip in the Media Pool creates another project source entry with separate metadata and markers, but it does not copy the physical media file.
How do I duplicate without overwriting existing clips?
Use Edit > Paste Insert, or Ctrl/Command+Shift+V. It inserts at the playhead and makes room for the copied selection. Check Sync Lock on neighboring tracks so the tracks that must follow the edit participate in the ripple.
Why does changing a copied compound affect the original?
Timeline instances can share the same compound contents. For an independently editable nested version, use Duplicate Clip on the compound in the Media Pool, rename it and insert that new source before opening its contents. Check that you are editing the new compound, not the original source.
