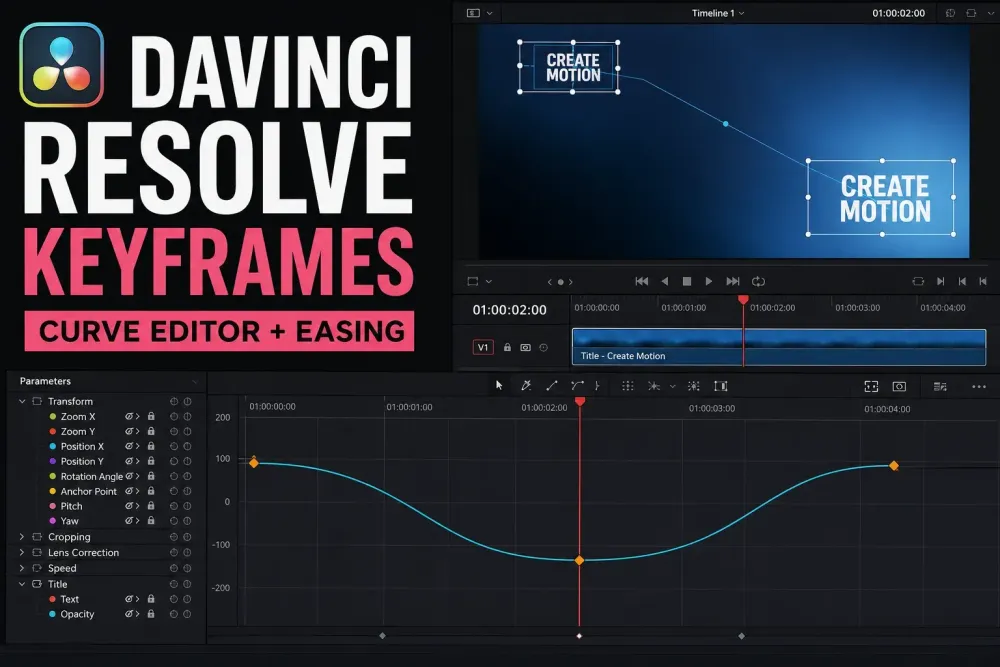
Quick answer: select the clip, park the playhead where the animation should start, and click the gray diamond beside an Inspector parameter such as Position X or Zoom. Then move the playhead, change that same value, and Resolve creates the second keyframe for you. Open Show Keyframe Tray when you want to slide the diamond markers in time, and switch to Curves when you need to change values, apply Ease In and Out, or shape Bezier handles. One keyframe only stores a value. A simple move needs a second point at another time with a different value.
Setting the first diamond is rarely the hard part. Picking the right editor afterward is. Keyframe lanes, value curves, the Viewer motion path and Fusion's Spline Editor each handle a different piece of the animation.
The menu names below come from chapter 60 of the DaVinci Resolve 21 Reference Manual. This guide sticks to keyframing on the Cut and Edit pages. If you're deciding which editing skill to learn next, the DaVinci Resolve tutorial hub is a good place to pick it.
Choose the control that matches the job
| Control | Use it for | What it does not replace |
|---|---|---|
| Inspector diamond | Create, delete and jump between keyframes for one parameter | Detailed timing and curve shaping |
| Keyframe Editor or Tray | See many parameter lanes, select points, retime, copy and paste | Changing a keyframe's numeric value by graph height |
| Curve Editor | Change time and value, interpolation, easing and Bezier handles | Drawing the clip's spatial path in the Viewer |
| Viewer motion path | Change the route Position X/Y follows across the frame | Inspecting the full numeric time-and-value graph |
| Fusion Keyframes/Spline | Animate nodes inside a Fusion composition | Basic Edit-page Transform animation |
If all you need is a start value and an end value, the Inspector is often enough. Open the bigger editors when you have to compare parameters, retime several points, or take the mechanical edge off linear motion. The Resolve Inspector guide explains the other Inspector groups. Here I'm only interested in how to animate their values.
Create your first two keyframes
- Put a clip on the Cut or Edit timeline and select it.
- Open Inspector > Video and expand Transform.
- Move the playhead to the first frame where you want the starting state locked in.
- Set the starting Position, Zoom, Rotation Angle or any other keyframable value.
- Click the gray diamond beside that parameter. It turns orange, which tells you the playhead now sits on a stored keyframe.
- Move the playhead to the next moment and change the same value. Once a parameter has its first keyframe, any later change at a different frame adds another one automatically, including changes you make with the onscreen Transform controls in the Viewer.
- Play across the interval and watch the actual result before you add more points.
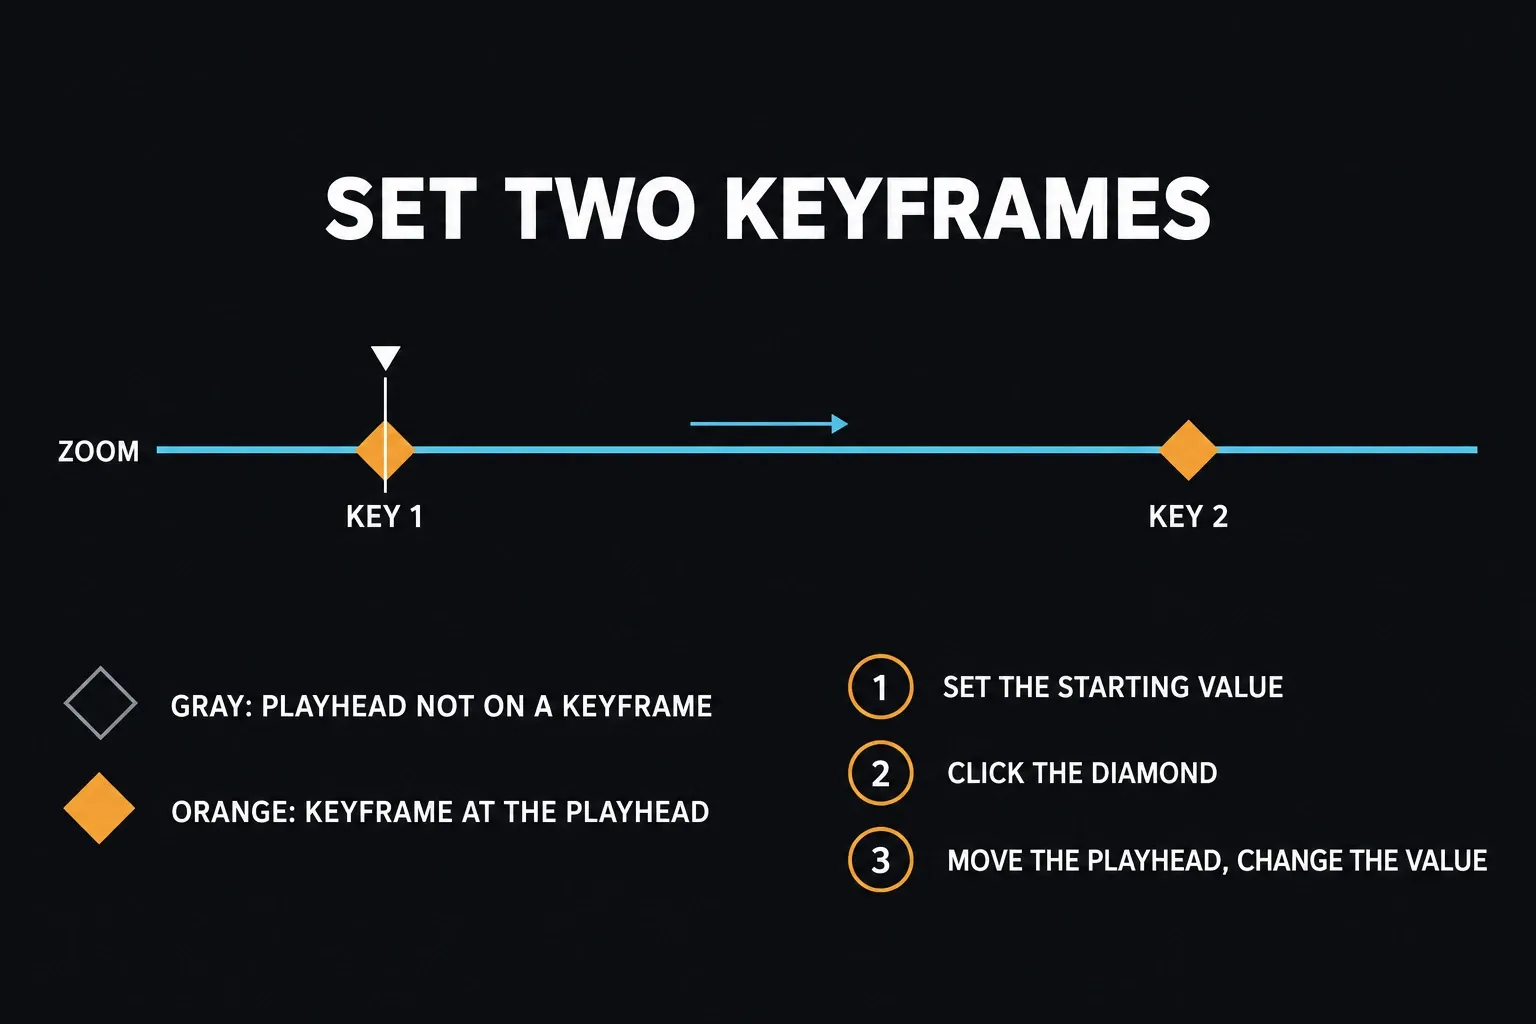
A gray diamond doesn't mean the parameter has no keyframes at all. It only means the playhead isn't sitting on one. The small arrows on either side of the diamond jump to the previous and next stored points, and the bracket keys do the same from the keyboard. Use them before you overwrite a value that changes as you scrub.
Click an orange diamond and you delete the keyframe at the playhead. The reset control goes further: resetting a parameter wipes all of its keyframes. Reset the whole Transform group and you can lose the animation on several parameters in one click, so I treat reset as a destructive cleanup command, not a quick fix.
Open the Keyframe Tray, Editor and Curve view
On both Cut and Edit, select the animated clip and click Show Keyframe Tray on the main timeline toolbar. The tray follows whichever clip is selected. Expand the parameter group you need, then pick the keyframe lanes or the Curves view.
When you want a bigger panel, click Keyframes at the upper left of the Cut or Edit page. You get the same parameter hierarchy, and the Curve icon at the upper left flips it to the graph. On the Edit page, the Expand control opens the Keyframe and Curve Editor in its own resizable window. Cut doesn't offer that standalone window, so a missing pop-out on Cut is a page limitation, not a broken install.
If you'd like a keyboard shortcut, open DaVinci Resolve > Keyboard Customization, search for Toggle Keyframe/Curve, and assign the command for Cut, Edit or the Keyframe Editor. The manual treats this as a key you set yourself, not one universal default, so I wouldn't copy a shortcut from someone else's layout without checking what it's bound to on yours.
The Parameters menu is how you cut the clutter. Display Parameters with Keyframes hides empty tracks, and Display Selected Parameters lets you pick individual video, audio, Open FX or Resolve FX controls. To see a parameter's curve in the graph, click the Toggle Curve Visibility icon beside it. That's a separate switch from listing the parameter in the panel. With several curves on screen, click the dim one you want to make active. Resolve displays several curves but edits one curve at a time.
Audio clips also take keyframes right on the timeline. Each one carries a flat Volume overlay line: Option-click the line (Alt-click on Windows) to add a keyframe, and add at least two before the level can change. The Audio Curve Editor button at the bottom right of each audio clip opens a curve editor for that clip's volume, and right-clicking selected volume keyframes offers Ease In, Ease Out, Ease In and Out or Linear. A plain fade at the start or end of a clip doesn't need keyframes at all; the guide to fading audio compares fade handles, volume keyframes and crossfades.
Keyframe Editor vs Curve Editor
In the keyframe lanes, dragging a diamond left or right changes when the stored value happens without touching the value itself. Select several points to shift a whole beat or delete a bad section. To reuse a move, copy the selected points, park the playhead where the pasted sequence should start, and paste with the Keyframe Editor focused. Trimming a clip doesn't delete the keyframes past its visible edges either. Resolve keeps those hidden points and marks them with a directional arrow.
To reuse a whole animation on other clips, copy the clip rather than its points. Select it and press Command-C (Ctrl-C on Windows), select the target clips, then choose Edit > Paste Attributes (Option-V, or Alt-V on Windows) and tick the attributes to carry over. A pop-up under the checkboxes sets how pasted keyframes are applied, Maintain Timing or Stretch to Fit, and pasted speed effects get a Ripple Sequence checkbox. Going the other way, Edit > Remove Attributes clears whatever you tick from every selected clip. I'd use it instead of resetting clips one at a time, because one pass removes the same attributes everywhere and leaves the rest of each clip alone.
In the Curve Editor, horizontal movement retimes a point and vertical movement changes its value. Hold Shift while you drag when a correction has to stay on one axis. On macOS, Option-click a curve to drop a point straight onto it, or switch to the Add Keyframes tool to click in several. The standard Cut, Copy, Paste and Delete commands work on selected keyframes too.
Auto Zoom Graph Height is enabled by default and scales the visible graph around the active values. It's a display aid, not an animation effect. Turn it off when several parameters have wildly different ranges and you want to set the graph height yourself with the zoom height slider.
Make motion smooth with Ease In and Out
Linear interpolation changes the parameter value at a constant rate between keyframes. That's right for a progress bar or a mechanical move, but it usually feels abrupt when a title, a photo or a subject should start and stop naturally.
- Open Curves and activate the parameter you want to shape.
- Select the start and end keyframes you want to shape.
- Choose Ease In and Out for a smooth start and finish, or use the single Ease In or Ease Out control when only one side should change.
- Enable Show Handles if you need them, then drag the Bezier handles to set how quickly the value leaves and approaches each keyframe.
- Play the animation at full speed. A pretty graph doesn't prove the move reads well.
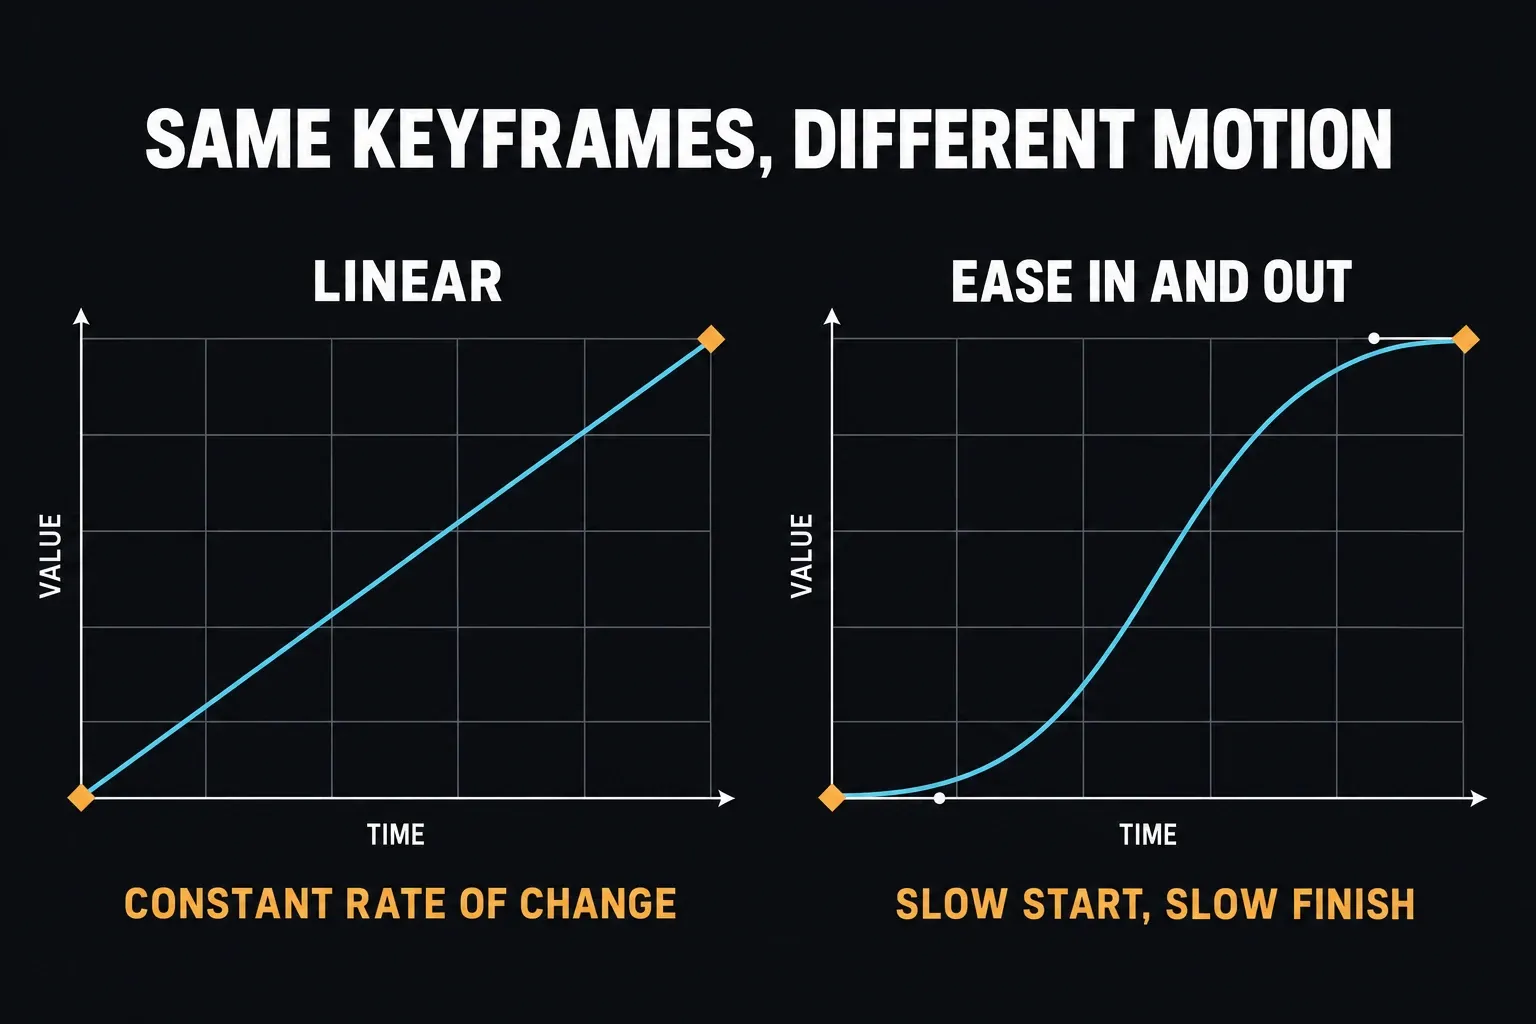
You can also right-click the orange Inspector diamond and choose Linear, Ease In, Ease Out or Ease In and Out. For a simple two-point move, that's quicker. I'd open the Curve Editor when you need to see the entire change, compare neighboring segments, or stop a handle from creating an overshoot you didn't ask for.
Motion path shape is not the same as easing
When Position X and Y are animated, turn on the Transform controls in the Viewer and the motion path appears. Right-click a path point and choose Smooth to add spatial Bezier handles. Moving those handles changes the route across the frame. The Bezier stem also carries an acceleration handle, so the Viewer can shape timing as well as the path. The dots along the path show relative speed: dots bunched together mean slower movement, and wider spacing means faster movement.
The Curve Editor answers a different question: how the parameter value changes over time. You can draw a curved path around a subject and still get a harsh linear start, or build a straight path with smooth acceleration. Judge the route in the Viewer, and check how the values change over time in Curves.
For a simple title move, add and style the title first with the DaVinci Resolve text guide, then animate only the parameters the entrance needs. A control having a diamond isn't a reason to keyframe it.
Resolve 21 keyframe tools worth using
Blackmagic's Resolve 21 New Features Guide lists several additions that older tutorials simply can't show:
- Step In: hold the previous keyframe's value, then jump at the next point.
- Step Out: jump immediately to the next value and hold it until another point.
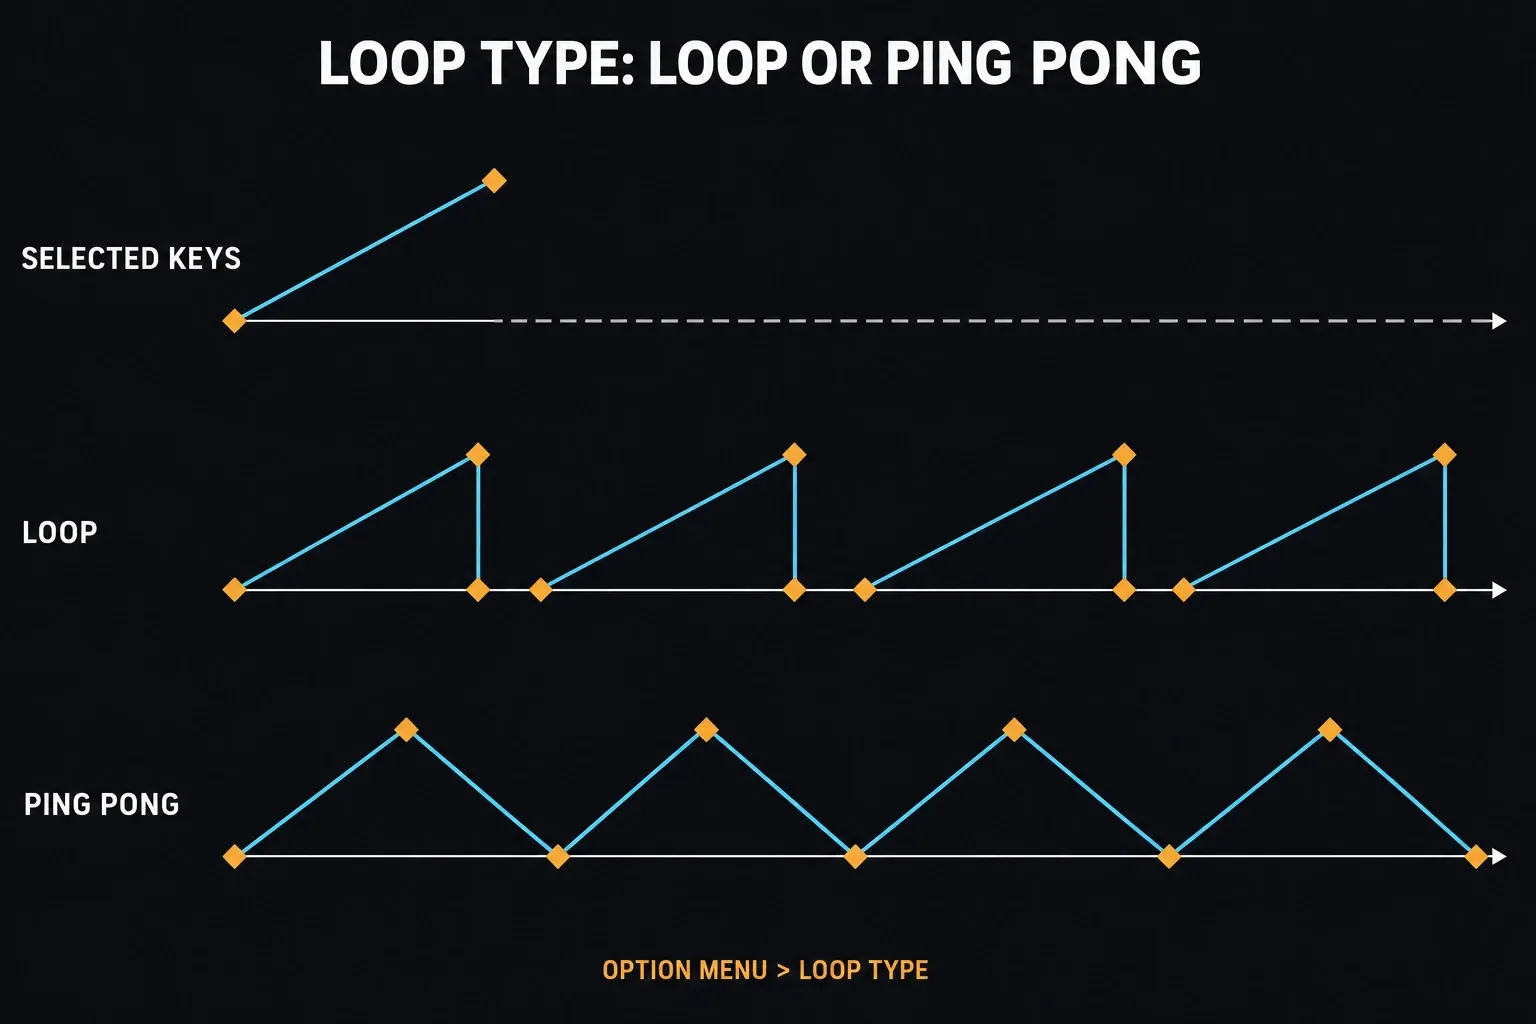
- Loop: repeat the selected keyframe sequence along the whole clip.
- Ping Pong: play the sequence forward, then backward, and keep bouncing between the two.
- Reverse Keyframes: run the selected keys backward, flipping their order and interpolation.
- Shape Box: stretch or squeeze a selected group; on macOS, Option-drag a corner to skew the selected points.
- Multi-clip editing: stacked clips show their keyframes at the same time, while side-by-side selections show them one after another.
Retime Speed can now use the same Bezier easing tools, but speed ramps bring extra frame-blending and timing decisions with them. The Resolve clip-speed guide covers those retiming decisions in detail. The point here is simple: Speed curves aren't ordinary Position curves.
Resolve 21 also lets you move Edit-page audio keyframes with subframe, audio-sample accuracy once you're zoomed far enough into the timeline. That's handy for precise clip-volume moves. It doesn't turn visual Transform keyframes into subframe video events. For automatic dialogue and music balancing, the audio ducking guide explains the Ducker, sidechain and AI Audio Assistant choices.
Why keyframes or curves are not showing
The wrong clip is selected
The Tray follows whatever you've selected on the timeline. Click the animated clip itself, not its linked audio, an adjustment clip above it or the title next to it.
The parameter is hidden
Open Parameters and choose Display Parameters with Keyframes, or select the exact property under Display Selected Parameters. Then switch on its Toggle Curve Visibility icon, because a listed parameter can still have its curve hidden. If you can see the points but can't move them, check the keyframe lock beside the parameter.
There is only one keyframe
One point stores a value, but it can't define an interpolated interval on its own. Add a second keyframe on the same parameter at another time. Two keys with the same value form a flat line, and that line is still a curve. If you want a simple move, change the value.
The playhead is not on the point
The Inspector diamond stays gray between keyframes. Use the previous and next arrows or the lane, and don't read a gray diamond as proof that the animation vanished.
The points are outside the trimmed clip
Trimming can hide keyframes beyond the clip's current edges. Look for the directional arrow, jump to the point or extend the clip before you decide to rebuild the animation.
You are looking for Fusion's Spline Editor
Fusion effects, titles and generators exposed on Cut/Edit can show up in this Curve Editor. A normal Fusion clip or composition still uses Fusion's own Keyframes and Spline panels, and the Fusion beginner guide explains that node-based workflow.
Keyframe a color grade on the Color page
Everything above happens on the Cut and Edit pages. A grade is animated on the Color page, which has its own Keyframe Editor at the right of the palette area and works differently from the Edit page Curve Editor. Each node in the grade gets a keyframe track, Sizing has a track of its own, and a master track at the top shows every keyframe on the clip.
Check the Keyframe Timeline mode before you add anything. It sits in the dropdown at the top right of the Keyframe Editor and under Mark > Keyframe Timeline mode. All is the default and keyframes every node plus Sizing at once, Color keyframes only the node selected in the Node Editor, and Sizing keyframes only the pan and scan track. I'd switch to Color for a grade, because All leaves keyframes on nodes that never needed them, and those get in the way when you adjust that node later. The mode also decides what gets copied, so with Color selected you can copy a grade to another clip without its sizing.
Dynamic keyframes are diamonds and animate from one state to the next. Park the playhead, choose Mark > Add Keyframe (Command-[, or Ctrl-[ on Windows), move to the second frame, add another keyframe and change the grade there. The color wheels and curves won't follow the animation during playback; they jump to their final position when the playhead reaches the next keyframe, while the settings themselves animate. Static keyframes, or marks, are circles made with Mark > Make Static Keyframe (Command-], or Ctrl-] on Windows), and they switch the grade on a single frame, which suits several shots inside one clip or a lightning flash. Mixing them has one catch: a Dynamic keyframe placed after a Static one gets no interpolation from that mark, so if a fade jumps, right-click the mark and choose Change to Dynamic Keyframe.
Watch the playhead when you change a value, because Resolve updates a keyframe even when the playhead isn't sitting on one. Between two Dynamic keyframes, your adjustment goes into the keyframe on the left and the one on the right stays as it was. The change from one Dynamic keyframe to the next is linear by default; right-click a keyframe and choose Change Dynamic Attributes to set its outgoing acceleration with the Start slider and the incoming one with End. I'd build the animated part of a grade in a separate node, because if the keyframes get tangled you can reset that node or its keyframes without touching the rest of the grade.
Free vs Studio
Blackmagic documents the Cut/Edit Keyframe and Curve Editor workflow without a Studio-only marker, so the core tools work in both Resolve Free and Studio. The effect you animate can still carry its own edition restriction. If a specific Resolve FX or AI control adds a Studio watermark or isn't available, that doesn't turn ordinary Transform, Crop, Composite or clip-audio keyframes into paid features.
DaVinci Resolve keyframes and Curve Editor FAQ
How do I add keyframes in DaVinci Resolve 21?
Select a clip, open the Inspector, park the playhead and click the gray diamond beside a keyframable parameter. Then move to another time and change the same value, and Resolve adds the next keyframe.
What is the difference between the Keyframe Editor and Curve Editor?
The Keyframe Editor shows parameter lanes and is the best place to select, move, copy and retime points. The Curve Editor adds a value graph, interpolation controls and Bezier handles.
How do I Ease In and Out in DaVinci Resolve?
Select the start and end points in Curves and choose Ease In and Out, or right-click the orange Inspector diamond and pick an Ease option. Drag the handles when the preset shape needs refining.
Why are my keyframes not showing?
Select the animated clip, show the correct parameter and turn on its Toggle Curve Visibility icon. Check that keyframes exist at the times you expect. Two points at different times still draw a line when their values match; it's just flat, so you don't need different values to see a curve.
Can I open the Keyframe and Curve Editor in a separate window?
Yes, on the Edit page: click Expand in the Keyframe Editor. Cut gives you the panel and the timeline Tray, but not the separate resizable editor window documented for Edit.
Does Resolve 21 support looping keyframes?
Yes. Select a sequence of keys and choose Loop or Ping Pong under Loop Type in the Keyframe Editor's Option Menu. Loop repeats the sequence; Ping Pong alternates forward and reverse motion.
Are keyframes available in DaVinci Resolve Free?
The core Cut/Edit keyframe, Curve Editor, easing and loop workflow isn't marked Studio-only. Individual effects or AI controls you animate inside it may still need Studio.