Copying a grade is easy once you answer two questions first: should the destination grade be replaced or should new nodes be appended, and should later changes stay linked across clips? A middle-click can replace twenty grades in one action. The same click can also erase twenty clip-specific corrections if you chose the wrong method.
Before replacing a grade, save the project and preserve the destination correction as a still or separate version. Test one destination first. Appending preserves existing nodes but can still change the image incorrectly if transforms, LUTs or effects are doubled.
Use ordinary copy/paste, middle-click or Apply Grade for a one-time replacement. Use Append Node Graph to keep the existing tree, or paste into a chosen node to replace only its settings. For ongoing linked changes, consider Groups, Shared Nodes or Remote Grades. Check the preservation settings before copying.
DaVinci Resolve Copy Grade Methods Compared
| Method | What it moves | Overwrites? | Stays linked? |
|---|---|---|---|
| Cmd/Ctrl+C then Cmd/Ctrl+V | The whole grade | Yes | No |
| Middle-click a clip in the film strip | The whole grade | Yes | No |
| Gallery still, then Apply Grade | The saved node tree | Yes | No |
| Gallery still, then Append Node Graph | The saved nodes, added on | No | No |
| Copy and paste a single node | One correction | That node only | No |
| Apply Grade From One Clip Prior | The previous clip's whole grade | Yes | No |
| Groups | A group-level grade | No | Yes |
| Shared Nodes | One node, live on many clips | No | Yes |
| Ripple Node Changes to Selected Clips | One node's change, once | That node only | No |
One-time copies are independent only when the copied graph has no linked Shared Nodes and the destination is not using a linked remote version. Inspect those relationships before changing a copied correction.
Checked on September 15, 2026 against Blackmagic's Resolve 21.1 Reference Manual. Here, whole grade means the node tree at the active grade level, subject to the preservation settings. Ordinary clip-to-clip copying excludes keyframes and motion tracking; the Gallery and individual-node workflows below control those separately.
In a project with Node Stack Layers, do not assume a middle-click transfers every layer. Check the copy scope and active layer before applying a grade to multiple clips. A Gallery still saves all stack layers, while the documented Copy Active Layer command is explicitly layer-specific. Inspect the destination layers after applying the saved grade.
Groups and Shared Nodes keep chosen corrections linked. Remote Grades offer a third relationship: clips using remote versions and the same Media Pool source share grades, even across timelines in one project. This is not remote grading between workstations. Ripple Node Changes is a one-time command, not a persistent link.
Copy a Whole Color Grade With the Keyboard
Click the source clip in the Thumbnail Timeline, press Cmd+C on macOS or Ctrl+C on Windows, select the destination clip or clips, and press Cmd+V or Ctrl+V. The current DaVinci Resolve 21.1 Reference Manual documents two behaviors: Thumbnail Timeline focus copies the whole grade, while Node Editor focus copies the selected node.
The catch is that the same two shortcuts do a different job depending on what has interface focus. With the Node Editor active they operate on the selected node rather than the whole grade. There is also a checkbox at Preferences, then User, then Color, labeled Always perform copy and paste on selected nodes, which pins the behavior to nodes only.
If Ctrl+V is pasting one node when you wanted the whole tree, or the whole tree when you wanted one node, that checkbox and where you last clicked are the two things to check.
On the Edit page, use Copy on the source clip, select the destination clips and choose Edit > Paste Attributes (Option+V on macOS, Alt+V on Windows/Linux in the default preset). Enable Color Correction and leave unrelated attributes unchecked. This is a clip-level operation, not the Color-page node dialog. It replaces the copied color correction rather than appending nodes.
How to Copy a Color Grade With Middle Click
Blackmagic calls this the fastest route on its own Color page documentation: middle-click a clip in the film strip to copy its grade to the current shot in the viewer. Most copy-paste habits run source first, destination second. This one runs backwards.
- Open the Color page and make sure the Thumbnail Timeline is visible.
- Click the clip you want to change. It becomes the current clip.
- Middle-click the thumbnail of the clip you want to copy from.
The destination grade is replaced, subject to the Copy Grade preservation settings. Select several destination clips first to apply the same operation to all of them. Inspect the first result before repeating this on valuable graded shots.
A trackpad has no middle button by default, and you don't need to save a still to work around it. Select the destination clip or clips, right-click the graded source clip, and choose Apply Grade. A third-party trackpad utility can also map a three-finger click to mouse button 3 if you want the one-action version back.
Copy a Color Grade With Gallery Stills and Apply Grade
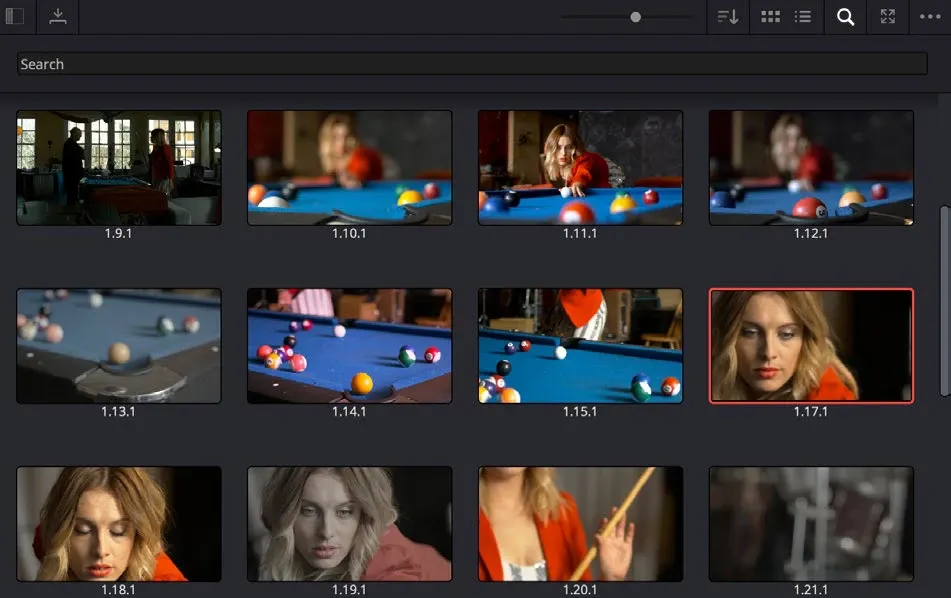
A Gallery still is more than a picture: Resolve saves the grade with a reference frame so you can recognize, compare and reuse it.
- Grade a clip the way you want it.
- Right-click anywhere in the viewer and choose Grab Still. Blackmagic spells out this as the way to save a grade into the Gallery.
- The still appears in the Gallery at the top left. Stills sort into albums.
- Select one or more destination clips in the timeline.
- Right-click the still and choose Apply Grade. Middle-clicking the still does the same job.
Enable Live Preview in the Gallery options menu to inspect a saved grade before applying it. The preview depends on the selected node and preview settings, so check the actual applied result as well. A hover preview is not a saved change.
Add a Saved Grade Without Overwriting Nodes
Apply Grade replaces the destination tree. When you want the saved correction sitting on top of a balance pass you already built, right-click the Gallery still and choose Append Node Graph instead. Resolve places those nodes after the existing ones rather than in place of them.
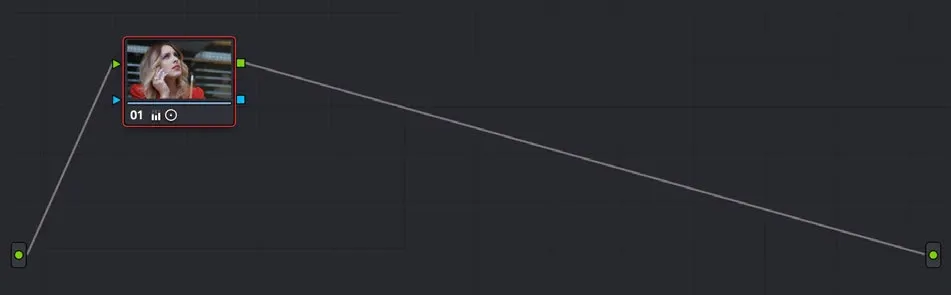
You can also drag a still from the Gallery onto a connection line in the Node Editor and drop it when the plus icon appears, which lets you choose where in the tree the nodes land.
Command-drag on macOS or Ctrl-drag on Windows appends the saved graph as a single compound node, which keeps a long saved grade from turning your graph into a row of boxes you have to scroll past.
This is the answer to a common complaint about the Gallery, which is that reusing a look destroys the per-shot correction underneath it.
Copy One Node Instead of the Whole Resolve Grade
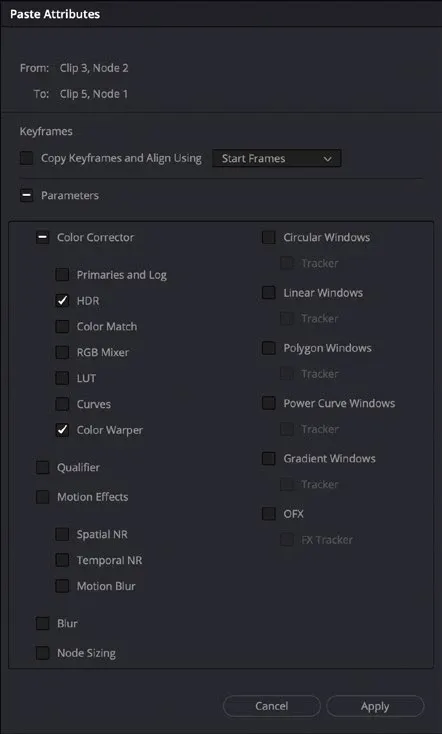
Select the node you want, press Ctrl+C or Cmd+C, select the node on the destination clip, then press Ctrl+V or Cmd+V. Holding Option or Alt and dragging a node onto another node is the same idea with the mouse: it pushes that node's settings across.
Use node-level copy for a window, qualifier, keyframed correction or tracked operation that must move without replacing the rest of the grade. The node's settings overwrite the selected destination node, so create or choose the correct target first.
For selective node copying on the Color page, copy the source node, select the destination node and choose Edit > Paste Attributes (Option+V on macOS, Alt+V on Windows/Linux). Choose the palettes, individual windows, effects and keyframe options you need. The dialog copies palette-level settings, not arbitrary individual parameters. Recheck or retrack a copied window on different footage; the old movement does not describe a different subject.
How nodes pass signal down the tree is what makes node-level copying safe. Paste a saturation node into position 2 of a tree that expected a balance node there and every node downstream sees a different image than it was built for.
Shortcuts for Copying the Previous Clip's Grade
Two commands live in the Color section of Keyboard Customization: Apply Grade From One Clip Prior and Apply Grade From Two Clips Prior. In the default DaVinci Resolve keyboard preset, Equals (=) applies the grade from one clip prior, and Minus (-) applies the grade from two clips prior.
Custom presets, remapped keyboards and non-US layouts all change this. If neither key responds, open DaVinci Resolve, then Keyboard Customization, choose Color in the Commands list, and search for Apply Grade to see what your build has assigned.
Both commands copy the entire grade from the earlier clip, so they suit grading a scene in timeline order rather than cherry-picking a look from somewhere else in the edit.
Copy a Color Grade to Many Clips With Groups
Use Groups when several clips need the same correction and later revisions should affect every member. Group clips by the correction they actually share, not just because they sit next to each other in the timeline.
Select the clips you want to group, right-click one and choose Add Into New Group. Switch the Node Editor to Group Pre-Clip or Group Post-Clip before making the shared correction. Clip mode is separate from the group grade; it can still contain Shared Nodes or use a linked remote version.
Grouped clips add Group Pre-Clip and Group Post-Clip choices to the Node Editor mode selector alongside Clip and Timeline. Balance shared camera or scene conditions in Pre-Clip, keep shot-specific corrections in Clip, and place a common look or output-side adjustment in Post-Clip.
Node trees built in Group Pre-Clip and Group Post-Clip affect every member of the group automatically. That's a persistent group-level relationship, not a one-time Ripple Node Changes command.
Share One Node Across Clips Without Copying It
To share one correction, build a Corrector node, right-click it and choose Save as Shared node. Give it a useful label. Add that named node to other clips through the Node Editor's Add Node submenu.
Blackmagic locks shared nodes by default so you can't change every clip in a project by accident. Unlock it and your edits transfer across every clip using that node.
Use Shared Nodes for adjustments that must remain identical: a camera-wide CST, a show LUT, a film-emulation layer or an output trim. Use a plain copy for anything a shot might need to deviate from later.
Check every instance before unlocking a Shared Node. To make one instance independent, right-click it and choose Convert to Corrector. Switching to local grades does not unlink Shared Nodes already in the tree. Avoid broad remote-to-local conversion as a quick fix: some timeline conversion commands overwrite local versions and cannot be reversed with normal per-clip Undo.
Ripple a Resolve Grade Change Across Clips You Already Graded
Rippling is for clips you already copied a grade onto and now need to revise together. Select the clip you want to change so it's outlined orange, then Command-click on macOS or Ctrl-click on Windows to add non-adjacent clips, or Shift-click for a continuous range, so the targets turn red.
Make your adjustment, then choose Color, then Ripple Node Changes to Selected Clips. A matching command exists for the current group.
Rippling matches by node number. A change made to Node 3 reaches Node 3 on every other selected clip. Clips with no node of that number receive nothing at all, silently.
Color, then Append Node to Selected Clips, adds the currently selected node to the end of every selected clip's node tree. It helps when the targets are missing the node you're about to ripple, but it won't reorganize node structures that already differ from each other.
Save a Resolve Color Grade for Other Projects
PowerGrade albums make reusable grades available to projects stored in the same project library for the same user login. Each project library has its own PowerGrade collection; an ordinary still album remains project-specific.
Create a PowerGrade album from the Gallery album list and move or save the still there. For another library, workstation or colorist, export the still.
Exporting a still in an image format writes the reference image and a matching DRX file containing the grade. A DRX can also be imported by itself: the node structure survives, but there is no reference image to wipe against. Keep both files when available.
Right-click the still and choose Export, then import it into the destination Gallery. Keep the reference image and DRX together when sending a pair. A DRX is not a project backup: confirm required LUTs, DCTLs, plug-ins and supported effects are available on the receiving system.
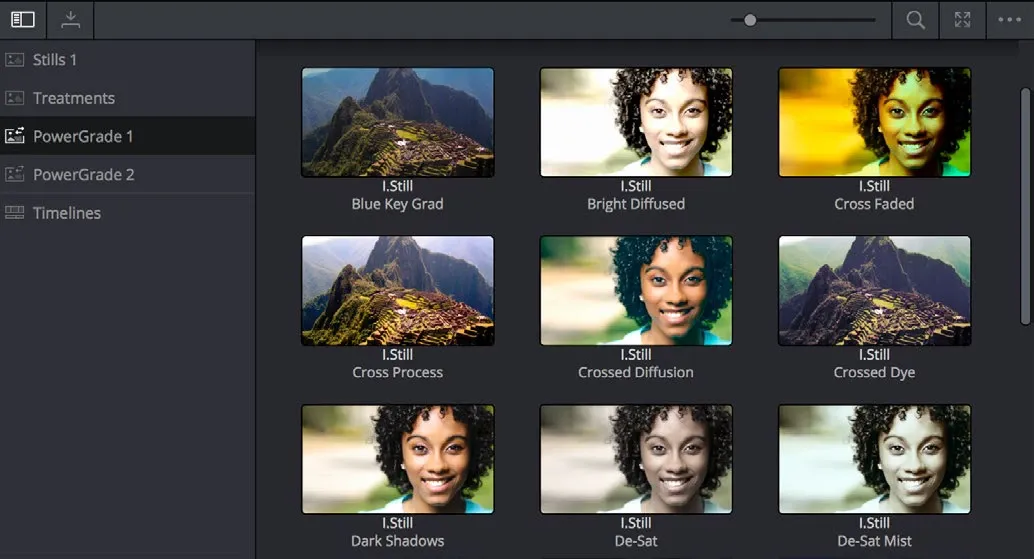
Blackmagic's free official training guides work through the same gallery and group workflows in lesson form.
Why Copying a Color Grade Does Nothing
If the grade does not change, check these controls before repeating the paste:
- The Keyframe Timeline Mode is on Sizing. Mark, then Keyframe Timeline Mode, sets what a copy carries. All copies both the grade and the sizing. Color copies only the grade and leaves the target clip's Input Sizing alone. Sizing copies only the Input Sizing and leaves the target's grade alone. Sitting on Sizing while you copy a color change looks exactly like nothing happening.
- Copy Grade: Preserve Number Of Nodes is above zero. Right-click the gray background of the Gallery to find it. Set it to 5 and the first five nodes of a copied grade are ignored, as long as the destination clip already has at least five nodes. It exists for colorists who reserve leading nodes for balance and shot matching. On a short node tree this can make the copy appear to do nothing, because every copied node falls inside the protected range.
- Copy and paste is acting on nodes, not the grade. Preferences, then User, then Color: Always perform copy and paste on selected nodes. When enabled, Ctrl+V only writes into the selected node.
- Keyframes aren't coming across. Right-click the gray background of the Gallery and open Apply Grades Using. No Keyframes applies the state of the grade at the frame the still was saved from. Keyframes Aligning Source Timecode suits copying back to the same clip or a duplicate of it. Keyframes Aligning Start Frames suits a completely different clip with different timecode.
Check the selected clip, active grade level and node focus again before applying the correction to several clips.
Keep Sizing and Stabilization When You Copy a Resolve Grade
Set Mark, then Keyframe Timeline Mode, to Color so the target clip keeps its own Input Sizing. When keyframes aren't part of what you're copying, set Apply Grades Using to No Keyframes as well. Copy Grade: Preserve Input Sizing in the Gallery menu protects the destination clip's Input Sizing values directly.
Stabilization and other clip-specific operations can differ by copy method and preservation setup. Do not assume a setting survived: copy to one destination, open the Stabilizer and Sizing controls, and verify the result before applying the same operation to a full selection.
Also review Copy Grade > Preserve Camera Raw Settings before applying a look to raw footage. A copied tree may contain camera-specific CSTs or LUTs. Confirm source, working and output color spaces in both projects; do not add duplicate input/output transforms to an RCM-managed pipeline. The RCM and CST workflow guide explains which transforms belong where.
Copying a Resolve Grade Is Not the Same as Matching Shots
A copy moves numbers. It doesn't know that your second camera was a stop and a half under, or that the sun moved between takes. Identical wheel positions on differently exposed footage produce two different images, which is why a copied grade so often looks wrong on the clip next door. Balance first, then copy the look.
Shot Match analyzes clips against a reference instead of copying a node tree. Auto Color analyzes the current frame for an automatic correction. A LUT is a color transform, not a saved editable node graph. Keep those operations separate from copying an existing grade.
Review automatic corrections rather than treating them as a finished match. The shot-matching guide covers reference selection and comparison; the automatic-color guide explains the separate analysis tools.
Check both the image and the waveform or vectorscope after every copy. The scopes expose black-point, exposure and color-balance differences that can be harder to judge on an uncalibrated display. The beginner grading workflow covers the correction order that makes copying work at all.
Copy Grade FAQ
Does copying a color grade in DaVinci Resolve also copy power windows and tracking?
Power windows and qualifier settings are part of a grade, but an ordinary clip-to-clip grade copy excludes keyframes and motion tracking. Use Apply Grades Using when copying keyframed Gallery grades, or copy/paste the individual node when you need its windows, qualifiers, keyframes or tracking. Input Sizing remains controlled by Keyframe Timeline Mode and Copy Grade: Preserve Input Sizing.
Can I copy a color grade between two different DaVinci Resolve projects?
PowerGrade albums are shared across projects in the same project library for the same user. For another library or machine, export a still and send its reference image with the matching DRX file. A DRX can be imported alone, but cannot provide the missing reference image for a wipe.
Do I need DaVinci Resolve Studio to copy a color grade?
No. Copy and paste, middle-click copying, gallery stills, Apply Grade, Append Node Graph, groups, shared nodes and node rippling are part of the standard Color page.
Remote Grades that link instances of one Media Pool source are different from Studio's remote grading between systems. A copied grade can still depend on Studio-only effects, installed LUTs or third-party plug-ins. Copying the nodes does not provide those licenses or missing resources. Check the free versus Studio guide before sharing effect-heavy grades.
Can I copy a grade to a clip on a different timeline?
A saved Gallery still is one way to copy a grade between timelines, but it is not required. Open the Gallery Timelines album and use its timeline dropdown to browse grades from another timeline in the current project. Select the destination and apply the source grade. Check the active grade level and node-stack scope before applying it.
How do I undo a copied color grade in DaVinci Resolve?
On the Color page, select the affected clip and use Edit > Undo: Cmd+Z on macOS or Ctrl+Z on Windows/Linux with the default preset. Each clip has its own Color undo history, so inspect every affected clip after a multi-clip operation. Closing the project clears undo history. Reset commands remove adjustments; they do not restore the previous grade. Restore a saved version, still or project backup if undo is unavailable.
Does copying a color grade overwrite the grade already on the clip?
Middle-click, a full clipboard paste and Apply Grade overwrite the destination grade, subject to the Copy Grade preservation settings in the Gallery menu. Append Node Graph adds the saved nodes to the existing tree instead. Copying a single node writes into the one node you paste onto and leaves the rest of the tree alone.
The safe shortcut is the one that preserves the boundary you need: replace, append or stay linked. The Color Grading hub connects this transfer workflow with nodes, scopes, LUTs and color management.
