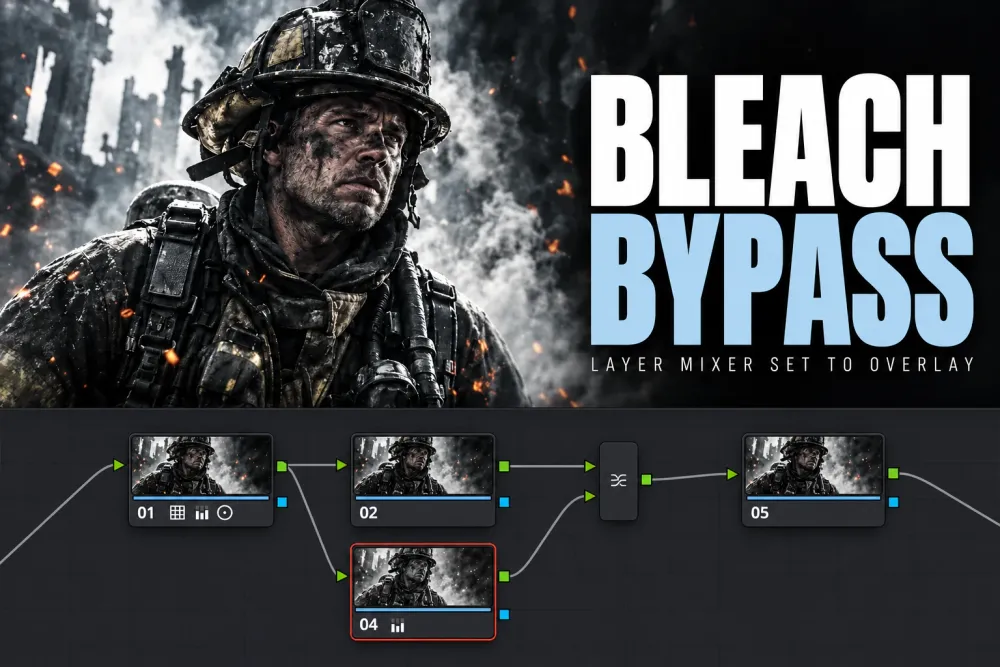
To get a bleach bypass look in DaVinci Resolve, open the Color page, select a node after your balance and press Option-L (Alt-L on Windows) to add a layer node. Set the new lower node's Saturation to 0, right-click the Layer Mixer and choose Composite Mode > Overlay, then lower that node's Key Output Gain from 1.00 until skin still reads as skin. In Studio, the Film Look Creator effect has a Bleach Bypass slider for the same family of high-contrast, muted-color looks.
Everything except the Film Look Creator and the Film Grain effect works in the free version: the Layer Mixer, composite modes, Key Output Gain, the RGB Mixer and Soft Clip all ship in it. The free version features guide lists the other tools that need Studio, and you don't need a paid plug-in for this look.
What bleach bypass did on film
Bleach bypass started in the lab. Kodak's page on skip bleach, bleach bypass and ENR processing describes them as related techniques that leave some or all of the silver in the film along with the dyes. That silver adds gray and black to the dye image, so contrast goes up and saturation goes down. Plain desaturation only does the second half, which is why a bleach bypass grade needs both moves.
Kodak also separates two flavors. Skip the bleach on the original negative and the print comes out with lighter, possibly blown highlights, higher contrast and perhaps more grain. Do it on the print and the effect lands mostly in the shadows: darker, richer and more contrasty, with less shadow detail and muted color. Kodak adds that results depend on the scene, which holds for the digital version too.
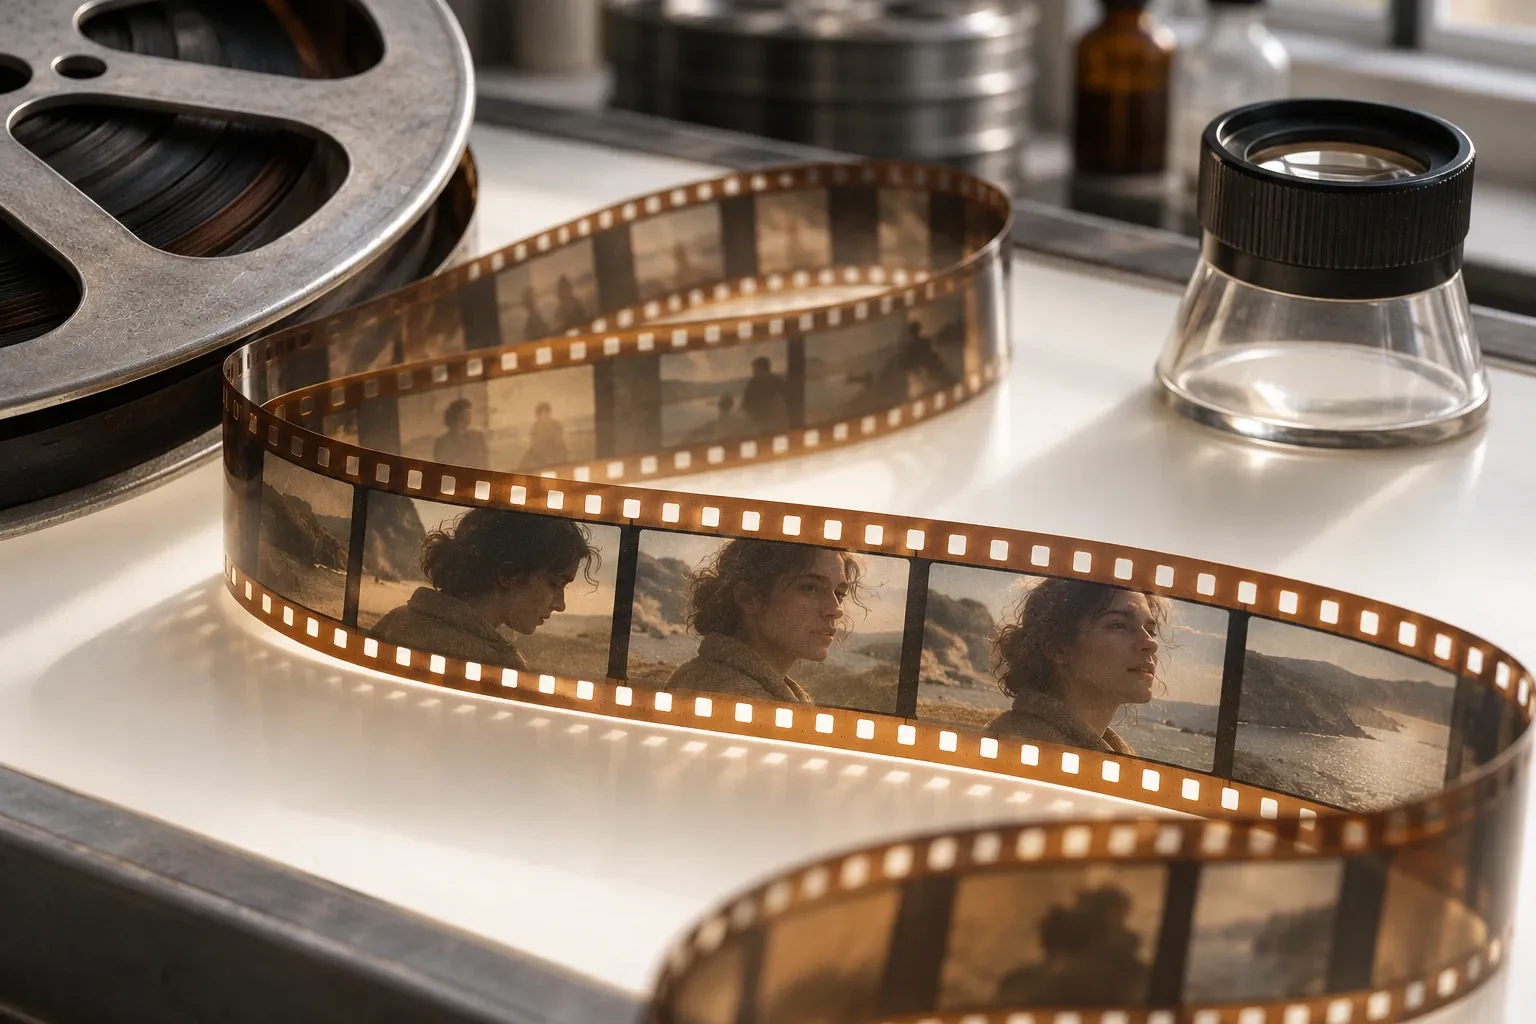
The Film Look Creator adds a desaturated, higher-contrast version of the shot to itself, as the Reference Manual describes. The node recipes below pursue that family of looks with different operations. Published tutorials use Saving Private Ryan, Minority Report, 300 and Sin City as visual references. Use them as shorthand for the look you want, not as a record of how each film was finished.
Pick a method
All four routes end at the same kind of image. They differ in how much you can shape the black-and-white layer and whether you need Studio.
| Method | Version | Best for | Strength control |
|---|---|---|---|
| 1. Layer Mixer set to Overlay | Free and Studio | Most shots; you can shape the black-and-white layer on its own | Key Output Gain on the lower node |
| 2. One node set to Overlay | Free and Studio | A quick look on a single node | Key Output Gain and Saturation on that node |
| 3. Contrast and saturation, no mixer | Free and Studio | Subtle looks and simple node trees | The Saturation value and the curve |
| 4. Film Look Creator Bleach Bypass | Studio | Color-managed timelines and looks you want to export as a LUT | The Bleach Bypass slider |
Method 1: Layer Mixer set to Overlay
This is the route I'd use on most shots, because the black-and-white layer sits on its own node where you can change its contrast or channel mix without touching the color image.
- Balance the shot in node 01 first. The color grading walkthrough covers that pass, and the look will only be as clean as the image it starts from.
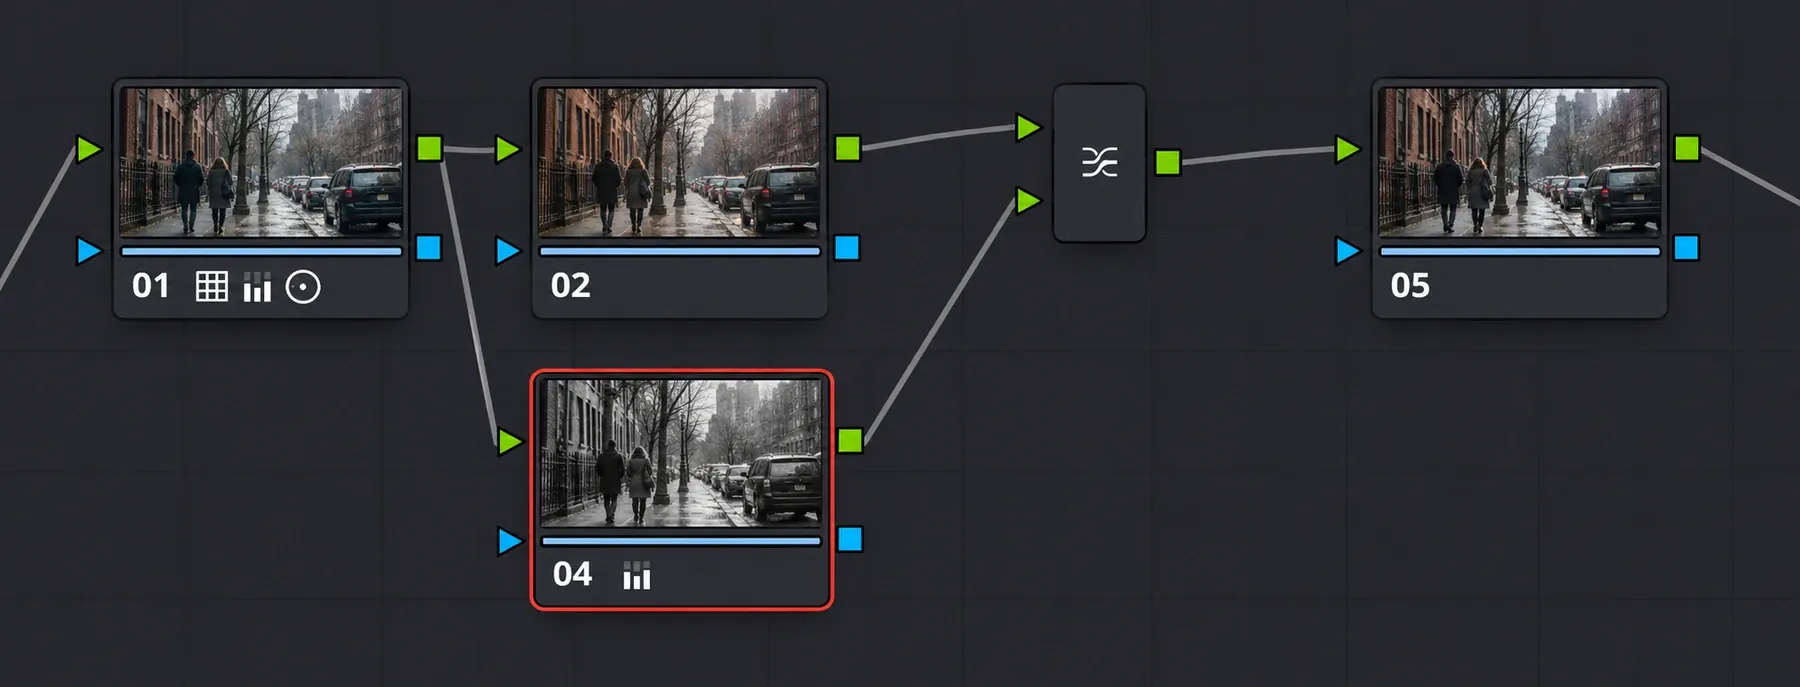
- Add a serial node with Option-S and keep it selected. Choose Color > Nodes > Add Layer, or press Option-L (Alt-L on Windows), as the Reference Manual's Color page shortcuts list. Resolve adds a Layer Mixer after the selected node and a new node wired to the mixer's second, lower input, in parallel with the node you selected, the same structure the manual's Layer Mixer steps show.
- Select the new lower node and drop Saturation to 0 in the Primaries palette. You can also open the RGB Mixer and turn on Monochrome: its default 21/71/7 mix gives the same result as Saturation 0, and changing the mix gives you a different black and white, per the manual's RGB Mixer section.
- For a harder look, add contrast to this lower node as well. The manual's stylized Overlay example makes its black-and-white node super-high contrast and desaturates the other node just a bit.
- Right-click the Layer Mixer and choose Composite Mode > Overlay.
Until you change the mode, you'll see a plain black-and-white image. The Layer Mixer gives priority to the node on its lowest input, and the manual's Layer Mixer section says each lower node's output completely obscures whatever is behind it. Overlay combines the two images with compositing math; input order still matters. The Layer Mixer uses the same composite modes as the timeline. The nodes guide explains how the Layer Mixer and Parallel Mixer differ.
Set the strength with Key Output Gain
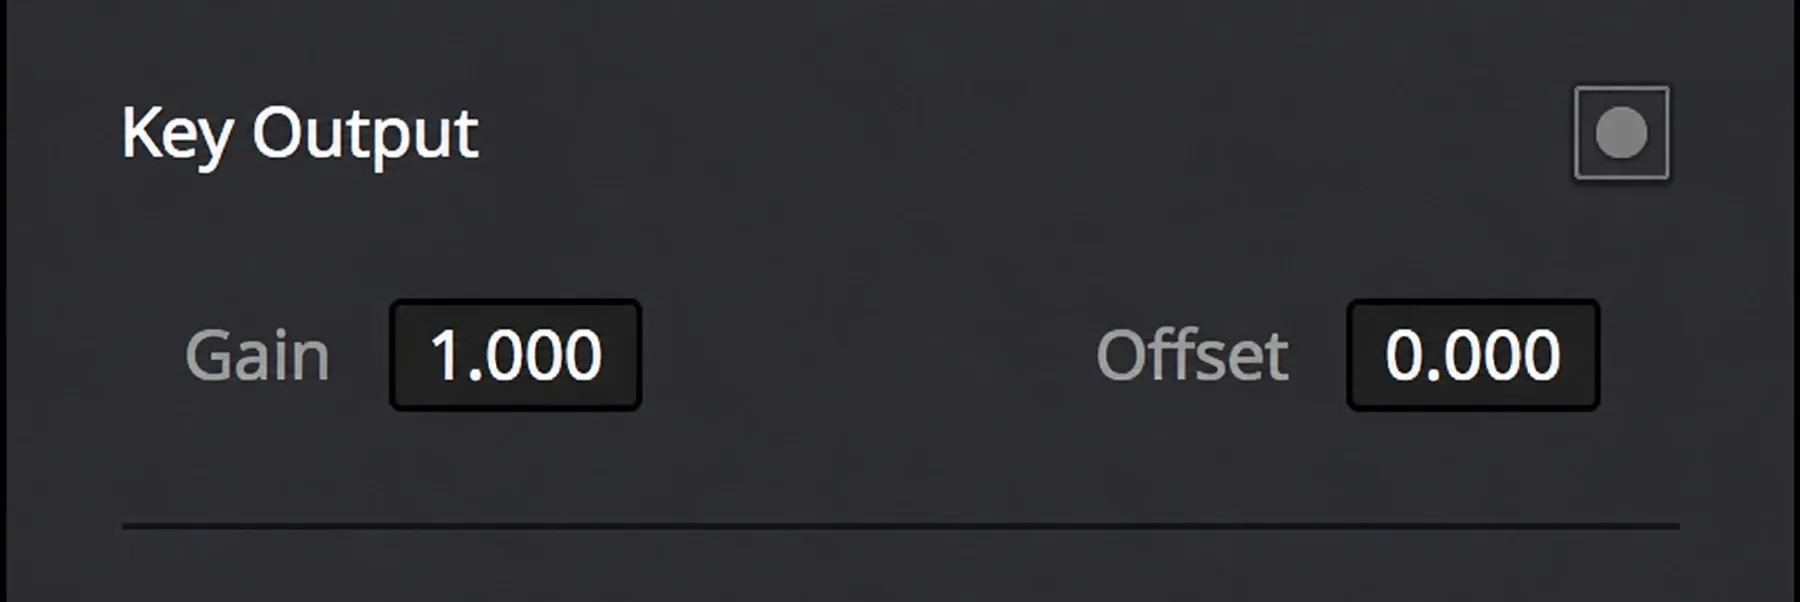
Check the look at full strength before settling on it. Select the lower node, open the Key palette and lower Key Output Gain. The manual documents a default of 1.00, and lowering it reduces that node's contribution to the Layer Mixer; its own example halves an effect at 0.50. PremiumBeat's bleach bypass grade notes you can halve the effect by typing .5, then backs its own example off to .7 after the client found the look too extreme. That .7 belongs to PremiumBeat's serial-node example. For this Layer Mixer, lower the black-and-white node's gain while checking skin, highlights and shadows.
Keep the Layer Mixer as it is once you're happy. If you right-click and convert it to a Parallel Mixer, the manual warns that the composite modes are lost. For trims, add a serial node after the mixer: Noam Kroll's layer-node bleach bypass found his first result a bit too contrasty and lowered the contrast in a node after the mixer.
Method 2: One node set to Overlay
BorisFX's three-method bleach bypass guide gets the look from a single serial node. Every corrector node has a Composite Mode submenu in its right-click menu, which the manual describes for node compositing.
- Add a serial node after your balance.
- Right-click it and choose Composite Mode > Overlay.
- Set the node's Saturation to 0.
- If the result is too extreme, raise Saturation a little, and use Key Output Gain on the same node as an opacity control.
It's fast, and it's handy for testing whether a shot suits the look at all. You can't shape a separate black-and-white layer here, though, so I'd move to Method 1 once the look is staying in the grade.
Method 3: Contrast and saturation without a mixer
This route skips compositing and builds the look from the two things Kodak describes: more contrast, less color. PremiumBeat's version balances the shot, adds an S-curve in Custom curves, and brings saturation down to "somewhere around 15 or 20". Resolve uses 50 for unchanged saturation and 0 for full desaturation, as the manual's Primaries controls specify.
The Luma sliders in the Primaries Bars mode are worth knowing for this method. The manual's Bars mode section says Y-only contrast reduces perceived saturation as contrast goes up, calls it a great way to get muted saturation or a gritty look, and recommends it for adding shadow density without adding colorfulness. That last part is the print-style version of bleach bypass. Y-only contrast depends on Lum Mix: at its default of 100 it works fully, and at 0 it's turned off.
This route has a long history. In a 2011 Creative COW bleach bypass thread, Mike Most describes the usual technique on 2K systems as lowering the master RGB gain and raising the luminance gain, and warns that lowering luminance lift crushes the blacks but adds saturation in them. The controls have changed since, but the idea maps straight onto the Bars mode sliders.
Method 4: Film Look Creator in Studio
In DaVinci Resolve Studio, the Film Look Creator puts the whole look on one slider. Drag it from the Effects panel's Resolve FX Film Emulation group onto a node, as Envato Tuts+ walks through in Resolve Studio 19. Its preset list includes a Bleach Bypass look that "washes out most color", and the manual's figure shows a Bleach Bypass Super 16mm version.
To use only the bleach bypass part, start from the Clean Slate preset, which applies no base film look, and raise the Bleach Bypass slider in Color Settings. The manual lists those settings in this order: Exposure, Contrast, Highlights, Fade, Fade Rolloff, White Balance, Tint, Skin Bias, Subtractive Sat, Richness and Bleach Bypass. Skin Bias sits in the same group if faces need help.

Two conditions matter. The Film Look Creator is built for scene-referred footage: with Resolve Color Management or ACES it picks up the timeline color space automatically, while on a display-referred DaVinci YRGB timeline you set the source and display transforms in Color Space Overrides, per the manual's Film Look Creator section. The color management guide covers both setups. The manual adds that it works best with video that fills the whole frame. Turn on 3D LUT Compatible if you want to export the look as a LUT, since that switch removes the effects a LUT can't carry. The Film Look Creator guide covers the rest of the effect, and the free vs Studio comparison lists what else Studio adds.
Overlay, Hardlight, Softlight or Luminosity
The composite mode decides how the two layers combine, and the published recipes don't all agree on it. Here's how the manual defines the modes that come up:
- Overlay screens or multiplies depending on whether the bottom layer is above or below 50%. The manual calls it excellent for combining grain, noise or damage layers, which is why it suits a gritty look.
- Hardlight is the opposite of Overlay: the same screen-or-multiply split, reversed. BorisFX's layer recipe uses it and reports the colors coming back with high contrast. If Overlay looks wrong on a shot, swapping to Hardlight is a one-click test.
- Softlight is a less intense Hardlight with a more even blend, a good choice for a gentler version.
- Luminosity combines the hue and saturation of the bottom layer with the luma of the top layer. That's the blend the 2012 forum question below asked for: a monochrome layer driving brightness while the color layer keeps its hue.
That last mode has a forum history of its own. In a 2012 Creative COW thread on a luminosity layer mode, Eric Johnson describes his skip bleach setup: a primary on node 1, an empty node 2 on the top input, a Monochrome RGB Mixer node fed from node 1 on the second input, and the black-and-white node's Key Output Gain lowered toward 0. He adjusts the monochrome mix for contrast and notes that it does change chroma.
Eight published bleach bypass recipes compared
I compared eight published bleach bypass setups from seven documents and five publishers, from 2011 forum threads to 2025 guides and the DaVinci Resolve 21.1 manual, and logged their structure, strength control and follow-up adjustments:
| Recipe | Structure and mode | Second image | Strength | Fix-up step |
|---|---|---|---|---|
| Noam Kroll, 2015 | Layer Mixer, Overlay | Untouched copy | Not set | Serial node lowers contrast |
| PremiumBeat, 2016 | One node, S-curve, no blend mode | None | Key gain .5, settled at .7 | Soft Clip |
| BorisFX, layer, 2025 | Layer Mixer, Hardlight | Saturation 0 | Not set | Shadows and highlights on node 1 |
| BorisFX, one node, 2025 | One node, Overlay | Saturation 0 | Key Output Gain | Raise saturation if too extreme |
| BorisFX step-by-step, 2025 | Layer Mixer, Overlay | RGB Mixer Monochrome | Not set | Refine node 1, grain after |
| Mike Most, Creative COW, 2011 | One node, RGB gain down and luma gain up | None | Not set | None |
| Eric Johnson, Creative COW, 2012 | Layer node; mode not stated | RGB Mixer Monochrome | Key Output Gain toward 0 | None |
| Reference Manual 21.1 | Layer Mixer, Overlay | Saturation 0 plus high contrast | Not set | Keyed skin node after the mixer |
Overlay appears in 4 of the 8 recipes, Hardlight in one, and one layer recipe leaves its mode unstated; two don't composite at all. Of the six recipes that combine two images, five desaturate the second image or make it monochrome. Kroll overlays an untouched copy, then pulls the contrast back. Three recipes use Key gain. PremiumBeat alone gives numeric guidance: .5 to halve the effect and .7 in its final example. Six include follow-up adjustments, including conditional advice to raise saturation. Three describe an unwanted result: excess contrast, a look the client found too extreme and overly monochromatic skin.
My verdict: build the look with a Layer Mixer set to Overlay, make the lower node black and white, and keep its strength adjustable. I'd lower Key Output Gain while checking faces, highlights and shadows, then add any finishing trims after the mixer. In Studio on a color-managed timeline, the Film Look Creator slider is the quicker route.
Fix the shot after the look
Highlights blow out
A high-contrast grade can push highlight detail out of view. Use Soft Clip in the Curves palette: the manual's example compresses highlights that were pushed beyond the display range by the grade. PremiumBeat uses it to bring back detail in a hat and cheek. Lowering the Primaries Highlights control can also retrieve high-dynamic-range detail still present in the signal. Neither control recreates detail clipped in the recording.
Shadows go solid
Lower Contrast's Pivot on darker shots, since the manual's contrast notes say darker images may need it to avoid crushing the shadows, or raise the Shadows slider a little. If you want dense shadows on purpose, the print-style version, use the Y-only Luma sliders in Bars mode instead of more saturation-heavy contrast.
Skin turns gray or metallic
Lower Key Output Gain first. If faces still look dead, use the manual's fix for exactly this case: skin keyed after the Layer Mixer is hard to pull because there's so little saturation left, so add a node after the mixer, add an unattached corrector node, feed it node 01's output, and connect its key output to the new node's key input. You key skin from the clean first correction and adjust it after the look. The skin tone correction guide covers the key itself. The RGB Mixer also changes skin in the black-and-white layer: the manual notes that more blue and less red and green gives skin a darker, metallic sheen, which some war-film looks want and most portraits don't.
Add grain
Film Grain is a Studio-only Resolve FX, per the manual's Film Grain section, and the Film Look Creator has its own grain controls. In the free version, the manual's texture example brings a grain or texture clip in through an EXT MATTE node, feeds it to a corrector on a Layer Mixer and sets the mixer to Overlay. Desaturate the texture clip if it carries color. A vignette after the mixer finishes the look on many shots.
Apply the look across a scene
Once one shot works, wrap the look so it travels as a unit. Select only the look nodes, leaving the shot-specific balance outside, right-click and choose Create Compound Node; the manual's compound node section notes this is useful when you save an effect to the Gallery and reuse it with Append Grade. Append keeps each shot's own balance in front of the look. The copy color grade guide covers appending, shared nodes and groups, and the LUT guide covers Generate LUT for taking the look to another app.
Bleach bypass FAQ
Can I do a bleach bypass in the free version of DaVinci Resolve?
Yes. The Layer Mixer, composite modes, Key Output Gain, the RGB Mixer and Soft Clip are all in the free version. The Film Look Creator slider and the Film Grain effect need Studio.
Should I use Overlay or Hardlight?
Start with Overlay, the most frequent mode in the eight recipes compared here. Hardlight reverses Overlay's screen-or-multiply split, so it's worth a quick switch on any shot where Overlay looks wrong.
How is bleach bypass different from just desaturating?
Desaturating only removes color. Bleach bypass also adds contrast, which is what Kodak describes the retained silver doing on film. A digital version needs both tonal and saturation changes; the routes above make them with blending or contrast controls.
Can I save a bleach bypass as a LUT?
Yes. In Studio, turn on 3D LUT Compatible in the Film Look Creator so the look can export as a LUT. For a node version, Generate LUT works in the free version, as the LUT guide explains; leave grain out, since a LUT can't carry it.
Do I need a plug-in for this look?
No. Paid plug-ins add a dedicated control, but the native routes above cover the look, and the black and white guide covers the rest of the desaturation tools.
Why does my bleach bypass look muddy?
Check the image before and after the look to see where the muddiness begins. Fix exposure and white balance in node 01 before the look, check the result on the scopes, and lower Key Output Gain before you add more contrast.
Final verdict: the bleach bypass recipe worth keeping
The look is simple once you see it as a black-and-white copy laid over color. I'd build it with a Layer Mixer set to Overlay, keep the black-and-white layer on its own node so its contrast and channel mix stay adjustable, and fade it with Key Output Gain until faces survive. Use trims after the mixer when you want to leave the look's internal settings intact. In Studio, the Film Look Creator's Bleach Bypass slider is the quicker route on a color-managed timeline; enable 3D LUT Compatible when exporting its color look as a LUT. The color grading hub collects the rest of the Color page guides.