Film Look Creator is a fast way to build a film-inspired grade in DaVinci Resolve Studio, provided the image reaches the effect in the right color space. Balance the shot first, put the effect on its own Color page node, set the base look and color before adding grain or glow, then check the result across a sequence. It creates a flexible Blackmagic film look rather than a precise reproduction of a named film stock. Blackmagic describes that distinction in its Resolve 21.1 Film Look Creator documentation.
If you use the free edition, this particular Resolve FX is unavailable. You can still grade with the Color page, but the steps below refer to the Studio effect.
Prepare the image before you choose a preset
Start by identifying your timeline's color pipeline. In Resolve Color Management or ACES, Film Look Creator uses the timeline color space for its input and output by default. In a manual display-referred DaVinci YRGB workflow, set the effect's Color Space Overrides for the input and output you are actually using. Those overrides do not perform tone mapping on their own. Do not copy another project's settings until you know where its transforms sit. Blackmagic spells out the distinction in the Color Space Overrides section of the reference manual; our RCM and CST guide covers the wider pipeline.
Correct the shot's basic exposure and white balance before judging a creative look. I recommend a separate node for Film Look Creator after those corrections: it lets you bypass or reduce the look without unpicking the source balance. If the image has black borders or sits smaller than the timeline frame, fix the sizing before you judge Halation or Film Gate. Both may behave unexpectedly when the image does not fill the frame, according to Blackmagic's frame-fill note. Crop only when losing the edge of the picture is acceptable.
Build the color look before the film effects
Add Film Look Creator to the isolated node and begin with a modest preset rather than treating the preset as a final grade. For a clean starting comparison, know the difference between two options: Clean Slate removes the underlying Blackmagic film look, while Default No Effects keeps that base look and turns off the additional effects. That distinction matters when a supposedly neutral starting point still changes your contrast or color. The manual's Main Controls section names both behaviors.
Three blend controls answer different questions. Film Look Blend adjusts the initial base film look before the other parameters. Color Blend mixes that color look together with changes from the color settings and split tone. Effects Blend is the master strength for the spatial effects; at zero, those effects are off. If the image feels overcooked, identify which part is responsible before dragging down every control. Reduce the base look when the overall response is too strong; adjust Color Blend when your color treatment is the issue; lower Effects Blend when glow, texture or edge treatment draws attention. These roles follow the Film Look and Main Controls descriptions.
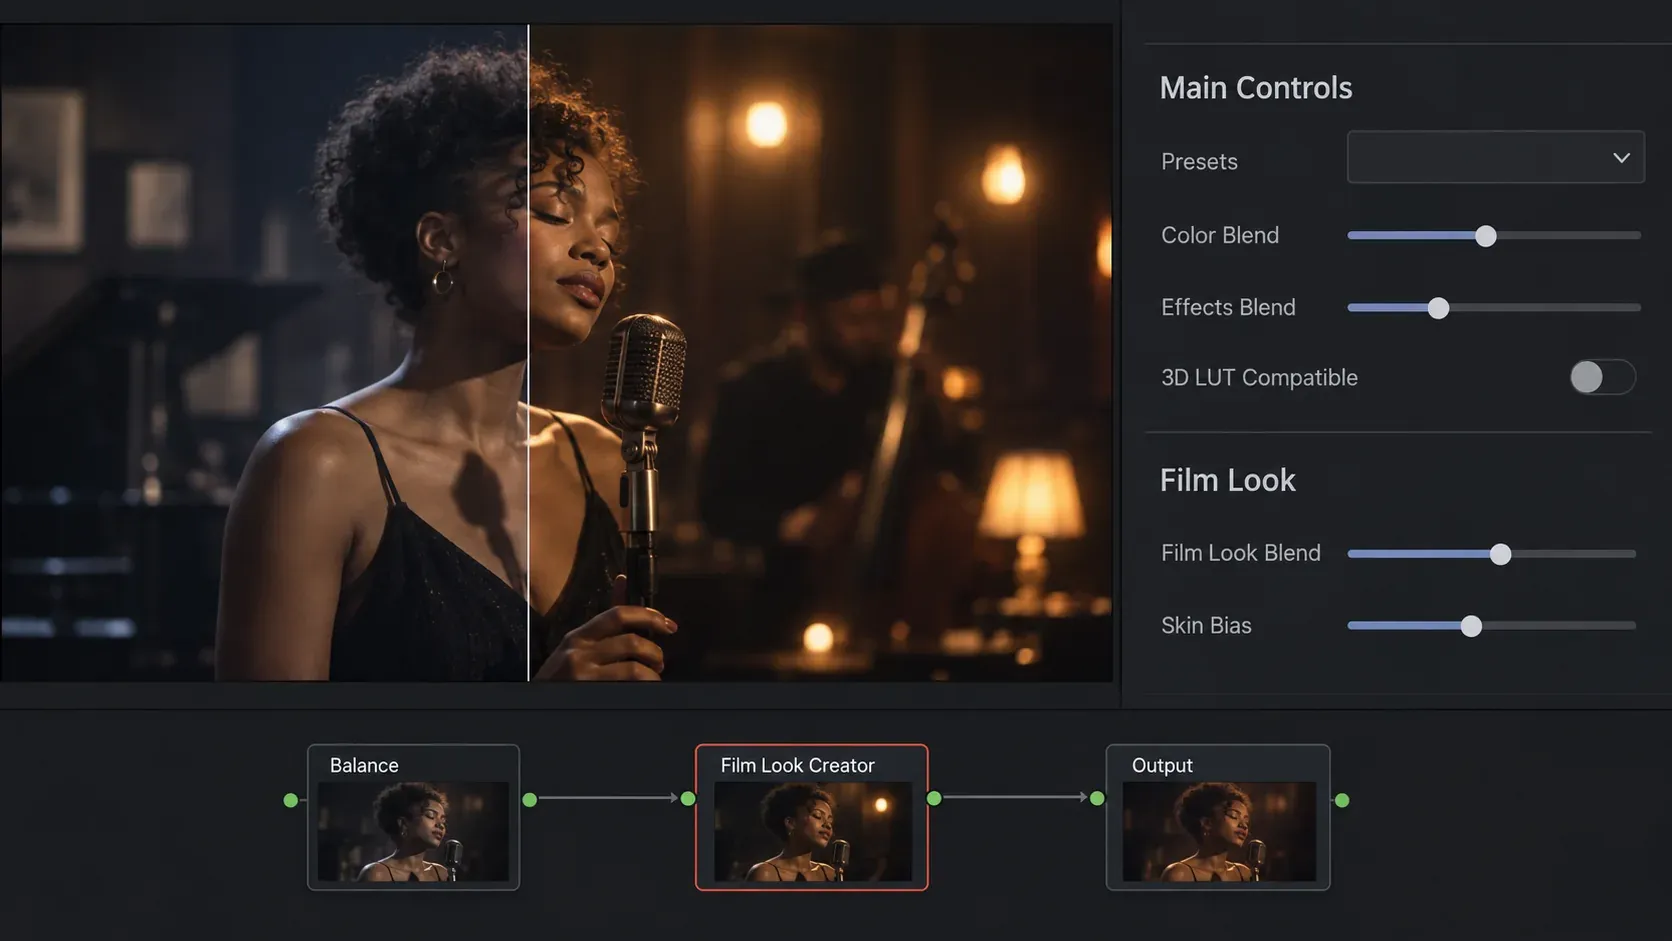
Next, use Exposure and Contrast to place the image, Highlights to shape the bright end and Fade to control the dark end. Subtractive Sat and Richness are different tools: Richness acts on already saturated regions, so a vivid coat or sign can change before the quieter colors do. Split Tone can steer highlights and shadows in opposite directions. Make one change at a time while watching skin and neutral objects, rather than pushing every color control because a preset looks too subtle.
Skin Bias is a broad look control, not a face isolation tool. Negative values make skin warmer, darker and more saturated; positive values make it brighter, rosier and less saturated. If one face is wrong while the rest of the image is right, use a separate targeted correction instead of forcing the whole look around that face. The documented Skin Bias behavior is in the Film Look and Color Settings sections.
Add texture only where it helps the shot
Halation adds a soft edge glow, particularly useful to inspect around bright practical lights. Bloom softens the area around highlights. Grain introduces a texture pattern with controls for amount, size, softness and saturation. View the image at a useful zoom and inspect both a face and a dark, even area; a texture that seems harmless in a small viewer can compete with detail when seen larger. If the built-in module cannot give you the control you need, disable that module and use the corresponding dedicated Resolve FX. Blackmagic explicitly describes Film Look Creator as a simplified collection of tools in the Film Emulation chapter.
Keep the moving cues deliberate. Flicker pulses exposure; Gate Weave shifts the image; Film Gate adds blanking at the edges. They can suit a memory, archival passage or overtly stylized insert, but they are not automatic ingredients for every film-style grade. Check the moving shot, not just a still frame, and watch for distracting motion or a crop that changes the composition. If you are also removing source noise, make that decision before adding a new grain texture; our noise reduction guide explains the separate cleanup task.
What survives a LUT export?
A 3D LUT carries color transforms; it cannot reproduce spatial or time-varying picture effects such as halation, grain, flicker or gate movement. Film Look Creator's 3D LUT Compatible option removes effect choices that cannot be represented in a 3D LUT. Use it when the deliverable is a LUT, then compare the LUT result with the live effect instead of assuming they are identical. Blackmagic states the compatibility behavior in the Main Controls description. For importing and applying a LUT in a different workflow, see our Resolve LUT guide.
Carry the look across a scene
Use one representative shot to establish the base look, then compare a bright frame, a shadow-heavy frame and a face from the same scene. Copy the creative starting point, but correct differences in exposure and white balance per shot before deciding whether the look needs adjustment. A night exterior and a daylight close-up should not be forced into identical control values merely for consistency. Our shot-matching guide takes that comparison further.
If the result is wrong, diagnose it in this order:
- The preset changes the image when its extras are off: compare Clean Slate with Default No Effects; the latter still includes the base Blackmagic look.
- Contrast or color behaves unexpectedly: verify the project color pipeline and the effect's input/output overrides before compensating with creative sliders.
- Glow or gate edges look strange: check whether the source fills the entire frame.
- Skin looks unnatural: reduce the broad look or correct that face separately; do not rely on Skin Bias for isolation.
- The LUT is missing texture or movement: those effects are outside a 3D LUT. Keep them as live effects where the delivery format permits.
My final check is simple: bypass the look node, turn it back on, then review a moving shot and a neighboring shot at the intended viewing size. The effect should serve the scene. If the viewer notices the flicker, grain or glow before the subject, pull that module back.
