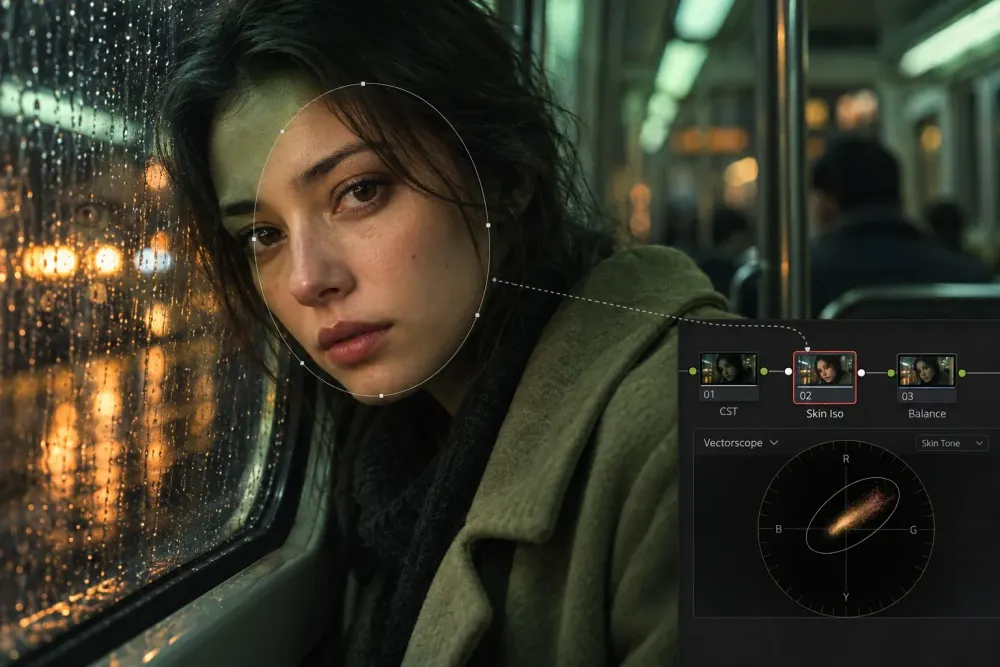
Quick answer: Correct the image before you correct the face. Confirm the clip is interpreted through the intended color-management path, fix the shot’s exposure and overall balance, then decide whether the skin still needs its own node. If it does, inspect the qualifier as a matte, constrain it with a soft tracked Power Window, and keep that isolation active while you adjust hue or saturation. The skin-tone line is a useful hue reference, not a universal target for brightness, saturation or every lighting setup.
The Skin-Tone Correction Order
Use this order when skin looks wrong after the first grade:
- Confirm the input, timeline and output color path.
- Correct the whole shot’s exposure and color balance.
- Decide whether a global adjustment can solve the remaining problem.
- Create a separate skin node only when the correction must be local.
- Build and inspect the qualifier in Highlight mode.
- Restrict the key with a soft Power Window when the background overlaps.
- Track the window and check the matte through the full clip.
- Correct hue first, then saturation and density as needed.
- Bypass the node, watch the clip at speed and compare adjacent shots.
This sequence matters because a technically wrong input transform, a white-balance error and a leaking qualifier can all make the same face look unnatural. Adding another curve before identifying the cause makes the node tree harder to debug.
What the Skin-Tone Line Can and Cannot Tell You
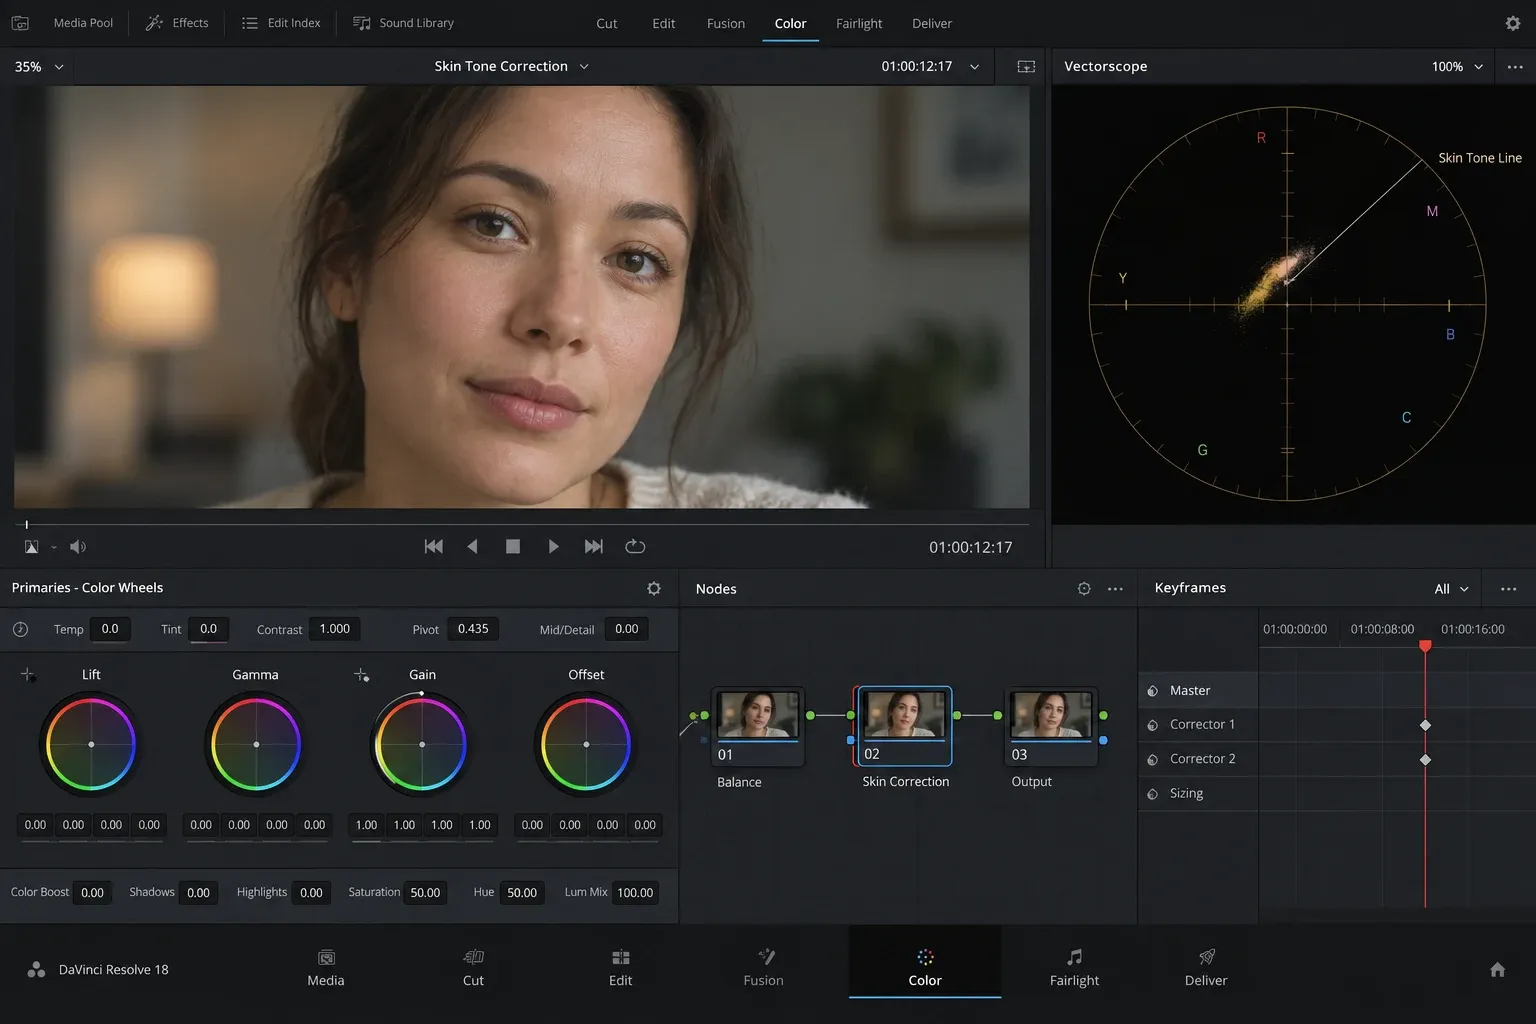
On the vectorscope, skin usually forms a trace near the skin-tone indicator when it is lit and reproduced in a familiar way. The line helps you judge hue direction: whether the trace leans too far toward magenta or yellow-green. It does not specify the correct luminance, contrast or saturation for the person in the shot.
That distinction prevents a common mistake. Two people with different complexions should not be pushed to the same waveform level or saturation distance. A face under a red practical light also should not be neutralized automatically. The detailed DaVinci Resolve scopes guide explains how the vectorscope maps hue and saturation; for skin correction, use its line as a reference and keep judging the picture.
Highlight view or the scopes’ Qualifier Focus can make a representative skin sample easier to read. Once you have inspected it, ask whether the intended correction should affect only that region. If the answer is yes, the isolation cannot simply disappear when you start moving a hue curve.
Step 1: Fix Color Management and the Whole Shot
Start upstream. If log footage is tagged incorrectly, if a Color Space Transform is duplicated, or if the output transform is wrong, skin will not respond predictably. Resolve’s current Color page documentation places color management, primaries, curves, qualifiers, Power Windows, tracking and scopes in the same correction system. The tools do different jobs, but they still depend on a coherent signal path.
Next, balance the shot with broad controls. Correct an obvious cast, place exposure where the scene requires it and shape contrast before trying to extract a face. Frame.io’s skin-tone workflow makes the same useful distinction: establish a color-managed image and use the broadest suitable tool before reaching for a narrow secondary correction.
This does not mean every shot should become neutral. Keep warm sunset light warm. Keep a blue night scene blue. The goal is to remove an unintended error while preserving the light that explains the scene. The full beginner color-grading workflow covers the input-to-output path and the correction order in more depth.
Step 2: Decide Whether Skin Needs a Local Correction
Do not pull a key just because the subject has a face. A small global temperature, tint or primary-wheel adjustment may fix the skin and improve the rest of the shot at the same time.
A separate skin node becomes useful when:
- the face is affected by a local color cast that the rest of the frame should keep;
- a creative look pushes skin farther than the environment;
- the skin needs a modest saturation or hue adjustment while similarly bright objects should remain unchanged;
- the subject moves through uneven light and the correction needs a controlled spatial boundary;
- one shot must be matched to nearby shots without rebuilding the full grade.
Give the node one clear responsibility, such as Skin Balance. A separate node is not mandatory for every adjustment, but it gives you a clean bypass point and keeps the local key away from unrelated look decisions. If node order is unclear, follow the image and key paths in the Resolve nodes guide.
Step 3: Build a Clean Skin Qualifier
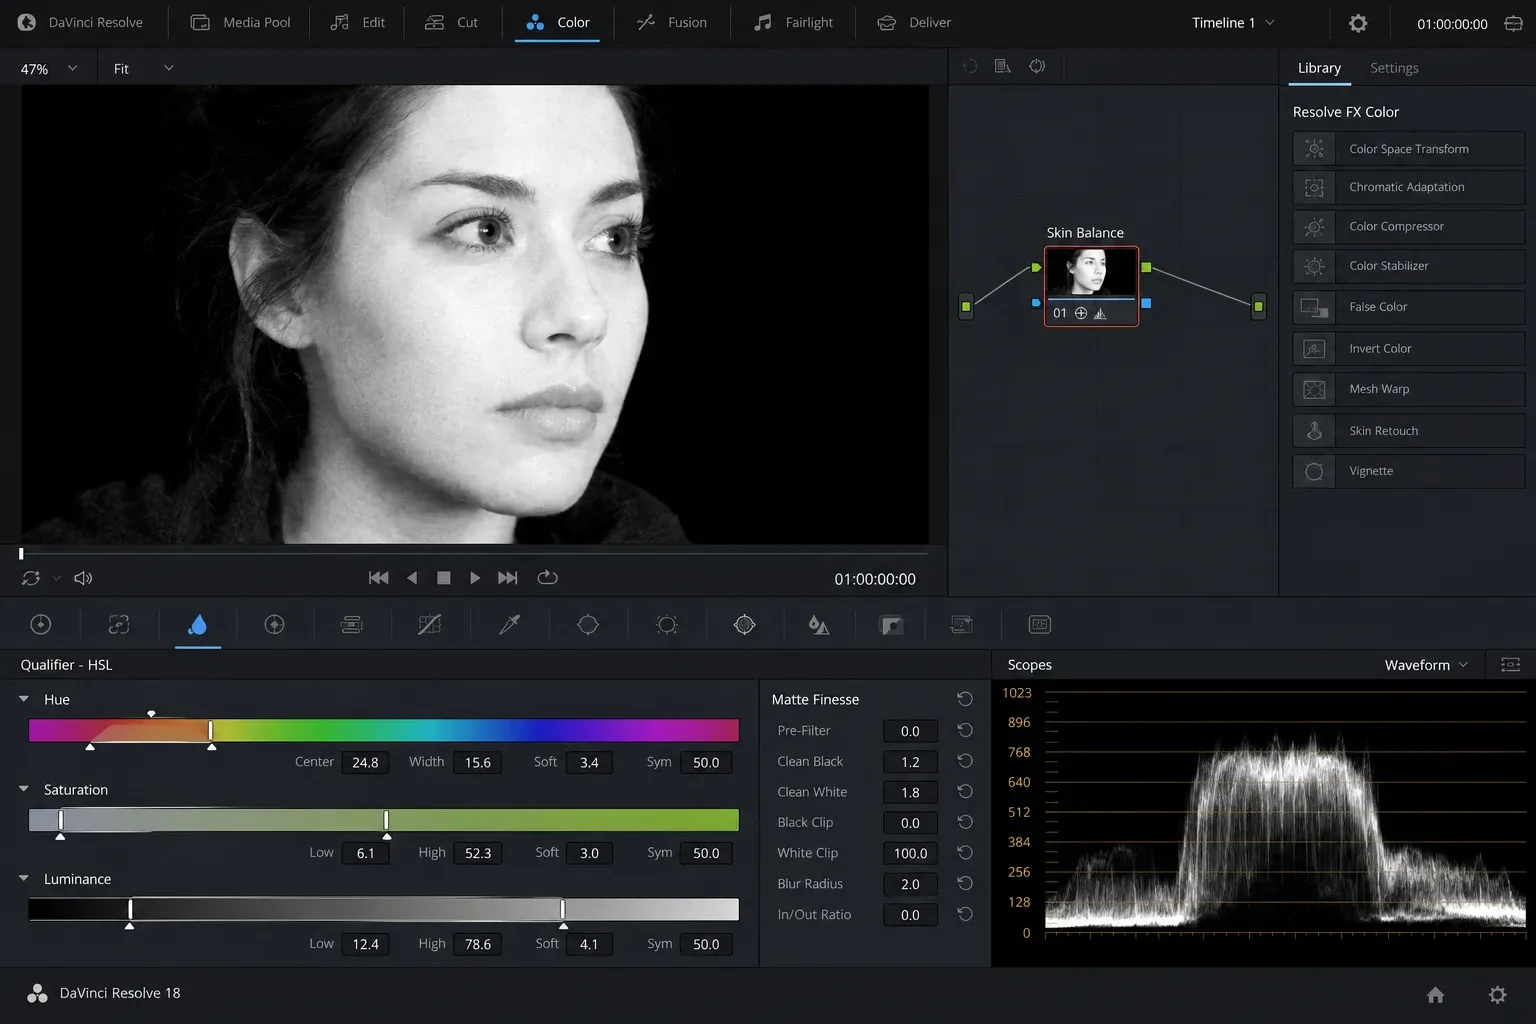
Open the Qualifier palette on the skin node and start with the HSL qualifier. Sample a representative part of the face, then add nearby skin values rather than relying on one pixel. Turn on Highlight mode so the selection becomes visible as a matte.
Judge the key by what it includes and how it behaves, not by whether it looks like a perfect white cutout. A useful skin matte can contain natural texture. It should cover the regions you intend to correct, avoid large unrelated areas and keep soft transitions at the edges.
Refine hue, saturation and luminance ranges in small moves. Use the matte-finesse controls to remove isolated specks, fill distracting holes and soften brittle edges. Stop when the key is stable enough for the size of the correction. Aggressive cleanup can make the face look laminated because different parts of the skin stop moving together.
If the Qualifier Sparkles or Breaks Apart
A noisy key often means the sampled range is too narrow, the footage is noisy, or the face crosses different lighting. Widen the range carefully and soften the matte before trying to crush every gray pixel into black or white. If the correction is subtle, a less perfect but softer key can produce a more natural result than a hard cutout.
Check several frames, including the darkest and brightest parts of the move. A qualifier that looks clean on the paused hero frame may chatter as the head turns.
Step 4: Limit the Key With a Tracked Power Window
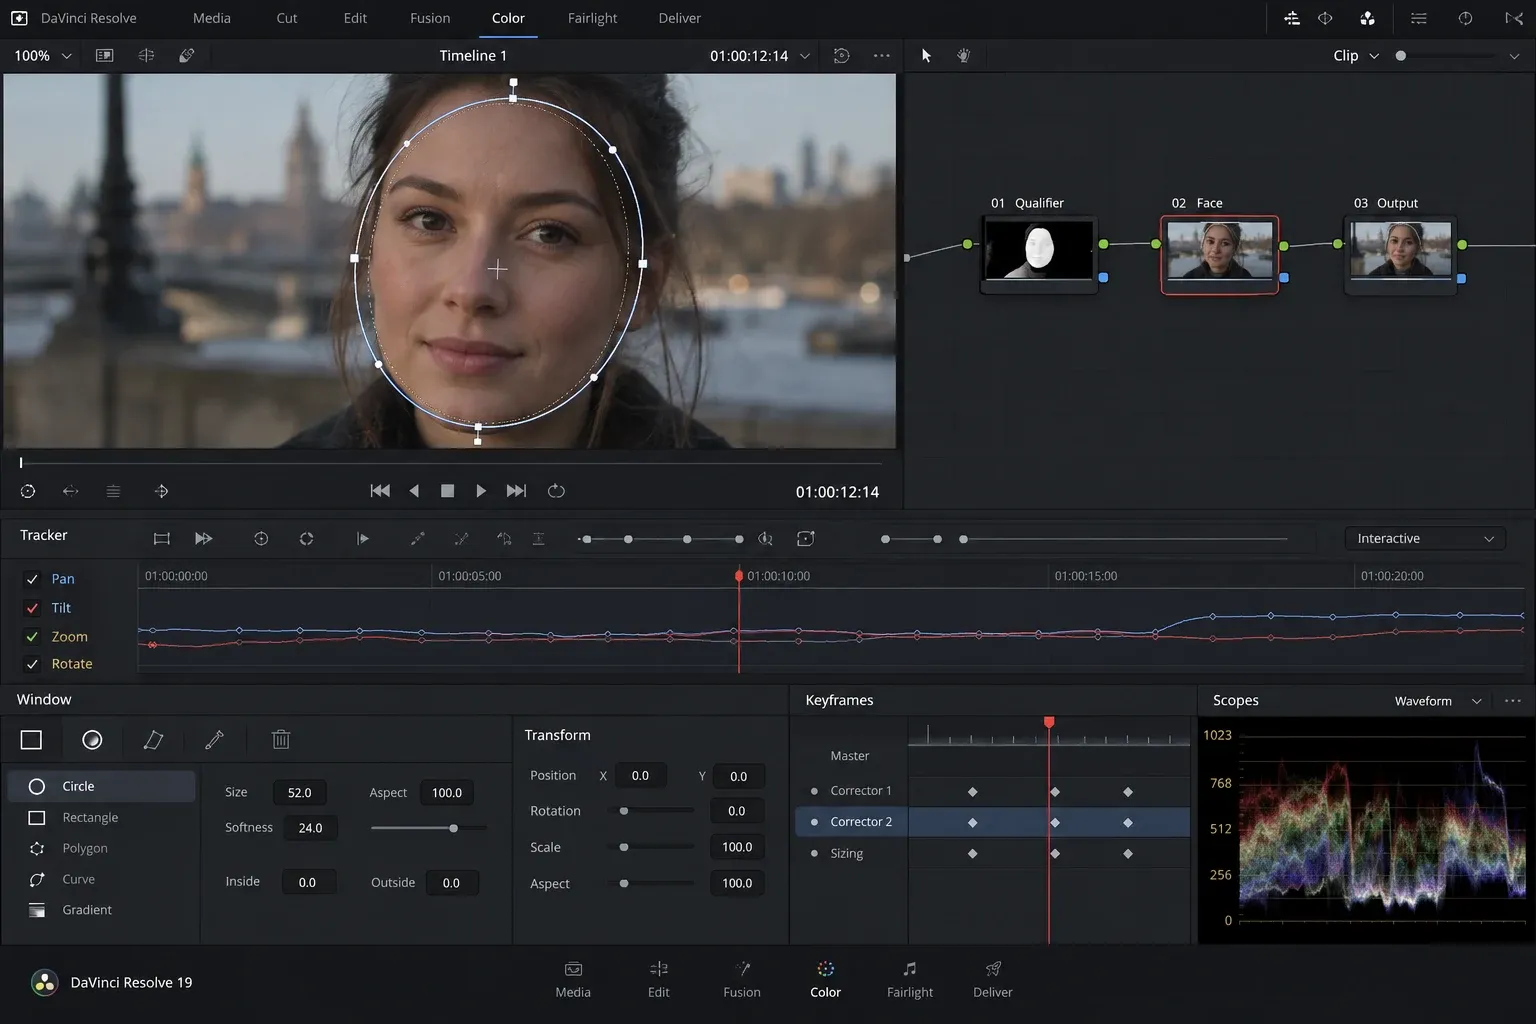
If walls, wood, clothing or practical lights share the skin hue, the qualifier alone may select too much. Add an oval or custom Power Window around the face and soften its edge. The resulting correction is limited by both color and position: pixels must fall inside the window and satisfy the key.
Track the window forward and backward through the shot, then inspect the result manually. Noam Kroll’s practical qualifier workflow also uses a soft Power Window and tracking to constrain skin isolation. The important part is not the shape itself; it is preventing similarly colored background objects from entering the correction.
Leave enough room for natural movement. A tight window that clips the forehead or jaw will reveal the correction edge. A broader soft window is often safer because the qualifier still separates skin inside it.
Step 5: Correct Hue and Saturation Without Moving the Background
With the isolation active, make the smallest correction that solves the visible problem. Hue vs Hue is useful when skin leans toward the wrong hue. Hue vs Sat can reduce excessive redness or restore color that has become too weak. Primary or HDR controls inside the keyed node can also adjust the balance when a curve is not the clearest tool.
Work in this order:
- Move the skin hue toward a believable direction while watching both the image and vectorscope.
- Adjust saturation only after the hue is close.
- Change brightness or density only if the face still needs separation from the scene.
- Bypass the node and compare the size of the correction.
Do not disable or delete the Power Window after measuring the face if the curve still affects all pixels of the selected hue. A Hue vs Hue adjustment has no idea which red-orange pixels belong to skin. Without a qualifier or spatial limit, it can shift a wooden wall, a red shirt, warm highlights and the background along with the face. That is why an apparently correct vectorscope trace can accompany a visibly broken image.
Mixed Lighting: Correct the Error, Keep the Scene
A face lit by a cool window on one side and a warm lamp on the other should contain color variation. Forcing the entire face onto one narrow scope trace can erase the lighting design and create a flat result.
First decide whether the variation belongs to the scene or comes from a technical mismatch. If only one side is objectionable, use a second soft window or a more selective key for that region. Keep both corrections gentle and watch the transition as the subject moves. If the lighting changes naturally during the shot, keyframe the correction or accept some variation rather than locking the face to one static value.
The same rule applies to creative looks. A cyan-and-orange grade may intentionally separate skin from the environment, but the face still needs to feel integrated with the light. Preserve enough of the surrounding color that the subject does not look pasted over the background.
Preserve Texture and Avoid the Plastic Look
Color correction and beauty work are separate decisions. A clean hue adjustment should not require the qualifier to erase pores, hair, specular highlights or natural color variation. If the keyed node makes the face look smooth or waxy, inspect three things:
- the key may be too hard at its edges;
- the correction may be too strong for an imperfect matte;
- a separate retouching or noise-reduction operation may be doing more than expected.
The qualifier, Power Window, tracker and curve workflow does not depend on automated face retouching. Blackmagic lists Face Refinement as a DaVinci Resolve Studio feature; it is optional and solves a broader facial refinement task. The basic skin-color workflow remains useful without it.
Step 6: Check the Full Clip and Neighboring Shots
A skin correction is finished only when it survives playback. Watch the clip while checking for:
- a window that drifts off the face;
- a matte that flickers as exposure or angle changes;
- background objects entering the key;
- a visible edge where the window crosses hair or the jaw;
- a hue jump at the cut to the next shot;
- a face that looks correct on the scope but wrong in the scene.
Match the sequence from a dependable reference shot instead of polishing every face independently. The DaVinci Resolve shot-matching guide explains how to choose a hero shot, compare adjacent clips and separate technical continuity from deliberate variation.
Skin-Tone Troubleshooting by Symptom
The Background Changes Color
The curve is acting globally, or the qualifier includes a background hue. Re-enable the intended key, inspect Highlight mode and add a tracked Power Window. Do not judge the face alone; watch the whole frame while bypassing the node.
The Trace Reaches the Skin Line but the Face Still Looks Wrong
The problem may be exposure, saturation, contrast, lighting context or a wrong transform rather than hue. Return to the whole-shot correction. The skin line cannot validate the complete image.
Skin Color Changes During the Shot
Check the track and matte first. If both are stable, the subject may be moving through mixed light. Use a small keyed or keyframed correction only where the change is unintended.
The Qualifier Edge Is Visible
Soften the matte and Power Window, reduce the correction strength, and widen the tracked region. A visible edge usually means the correction is too large for the isolation quality.
Every Shot Needs a Different Fix
That can be normal. Camera angle, exposure, makeup, lighting and transforms change the input to the qualifier. Reuse the decision order, not identical HSL values. Build one believable reference shot, then match the surrounding shots to it.
Final Check Before You Move On
- The clip uses the intended color-management path.
- The whole shot is balanced before the skin node.
- The skin-tone line is treated as a hue guide.
- The qualifier is inspected through the full motion.
- A soft tracked window blocks similar background colors.
- The correction keeps natural variation and texture.
- Bypassing the node reveals a controlled change, not a different scene.
- The face remains coherent across the cut to adjacent shots.
Once those checks pass, stop moving the curve. Skin does not need to be numerically identical from shot to shot; it needs to remain believable inside the light, contrast and story of the sequence.
