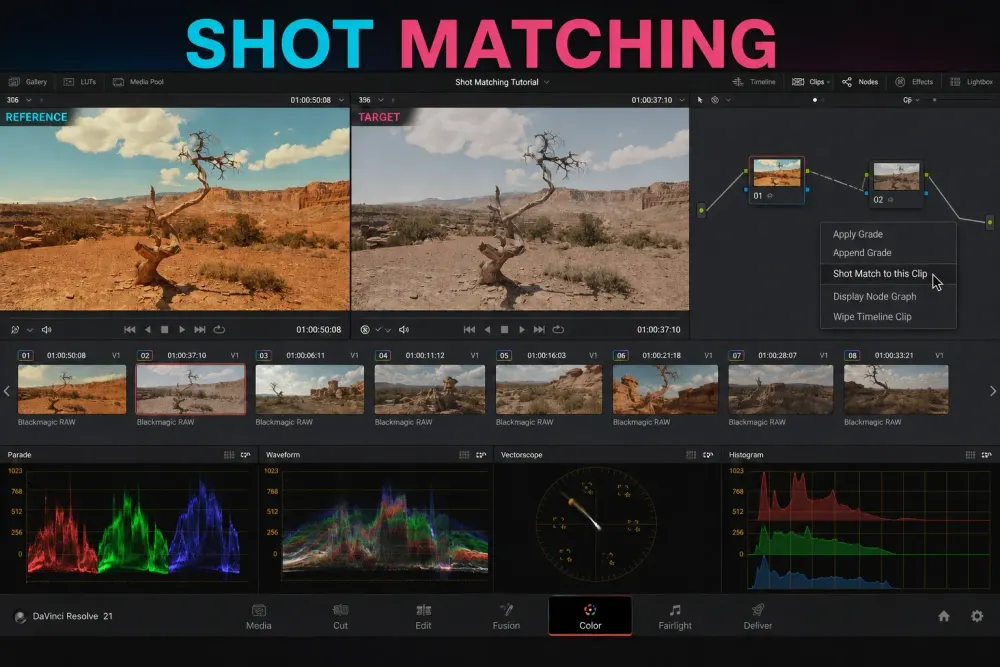
Quick answer: on the Color page, select the clip you want to change, then right-click the reference clip and choose Shot Match to This Clip. Resolve pulls the target toward the reference in color and contrast. Before you trust it, normalize the footage consistently, isolate the test on a dedicated node and check the result across the cut. Expand to several clips only after that first match holds up.
The direction trips people up all the time. You don't right-click the bad clip and ask it to match itself. Select the targets first, then right-click the reference. If the automatic result helps, refine it. If it doesn't, remove the dedicated Shot Match node and match the shot manually.
What Shot Match changes, and what it cannot repair
Shot matching means making the angles of a scene feel like they were shot at the same time and place: consistent exposure, color balance, contrast and saturation. Blackmagic's Color page overview describes the automatic command as matching color, contrast and brightness. It cannot rebuild detail that was never recorded. Clipping caused by your own grade or output transform is a different problem, so inspect the source before you assume that detail is lost.
The Shot Match guidelines in the Resolve 21 Reference Manual are blunter about the limit. I reread them on October 1, 2026; that's a documentation check, not a grading test. Shot Match tries to make clips look the same, not good, and it stops before stretching a weak image until it falls apart. Ask it to make an underexposed interior equal a noon exterior and it will split the difference. That restraint protects the picture, but it also means the command cannot force unrelated lighting into a convincing match.
Treat the automatic correction as a neutral starting point, not a finished creative grade. It isn't a Studio perk either: Blackmagic's 21.1 feature list shows Shot Matching as a plain Yes for the desktop app, where Studio-only tools are marked Studio. Build the scene look after the shots agree, not inside the reference clip you're using to calculate the match.
Choose a reference shot that makes sense
A good reference represents the scene you want the audience to believe. I look for a clip with stable exposure, a clear view of skin or neutral objects, no large temporary color wash and enough tonal detail to judge. The prettiest frame isn't always the best reference. A heavily stylized close-up can be a poor target for a wide shot with different lighting and background colors.
For an automatic match, keep the reference simple. Blackmagic recommends basic Lift, Gamma and Gain adjustments on it; custom curves, qualifiers and other secondaries make the comparison much less reliable. Keep normalization, the test adjustment and the creative look on separate nodes so you can inspect each one. Exactly where they sit depends on your color-management pipeline.
For the reference-balancing steps, use the beginner color grading workflow. Pick a reference the other shots can reasonably approach. If matching to it wrecks shadow or highlight detail in the weaker footage, soften the reference instead of pushing those clips harder.
Normalize log and mixed-camera footage before matching
Shot Match works best when the target and reference live in a common normalized space. The current manual says the control was developed around Rec.709 gamma 2.4 and recommends Resolve Color Management as a way to normalize media first. That doesn't mean every project has to be converted to Rec.709 by hand. It means the algorithm should compare equivalent image states. Since Resolve 16 the command has run on a DaVinci Neural Engine algorithm, and Preferences > User > Color still has a separate Use Legacy Shot Match checkbox if you need the older behavior.
Don't ask Shot Match to compare unnormalized LogC with unnormalized RED Log3G10, or a normalized clip with a flat log clip. Those signals encode tone and color differently, and the manual says plainly that Shot Match isn't equipped for that case. Resolve may still change the image, but the comparison is no basis for a scene. Get everything into one managed pipeline or verified transforms first. The RCM and CST guide explains how to avoid missing or double transforms.
Protect the existing grade before you experiment. Don't stack the test over a complicated creative look or secondary corrections. Keep the input normalization your pipeline needs; “start clean” doesn't mean deleting every CST or switching off project color management.
Should you use Auto Color first? Blackmagic's Resolve 21 manual contradicts itself here: its introduction recommends the A button on both target and reference, while the guidelines that follow call for ungraded targets. The Shot Match lesson in Blackmagic's Resolve 20 Colorist Guide also demonstrates Shot Match on its own node after a Balance node. I'd treat Auto Color on both clips as a separate test, not a compulsory step or a guaranteed improvement. Preserve your original grade, compare the simple normalized baseline with that test, and keep the better result.
How to use Shot Match to This Clip
- Open the Color page and show the thumbnail timeline.
- Select one target clip that needs to change. Hold off on multi-clip selection until that first test works.
- In the Node Editor, right-click a node and choose Add Node > Add Serial (Option-S on macOS, Alt-S on Windows). Label the new node Shot Match and leave it selected. Keep required normalization where it is.
- Right-click the good reference clip. It doesn't have to be part of the target selection.
- Choose Shot Match to This Clip and give Resolve a moment to analyze and apply the match.
- Then select the target and reference for comparison, enable Split Screen > Selected Clips and play across the cut.
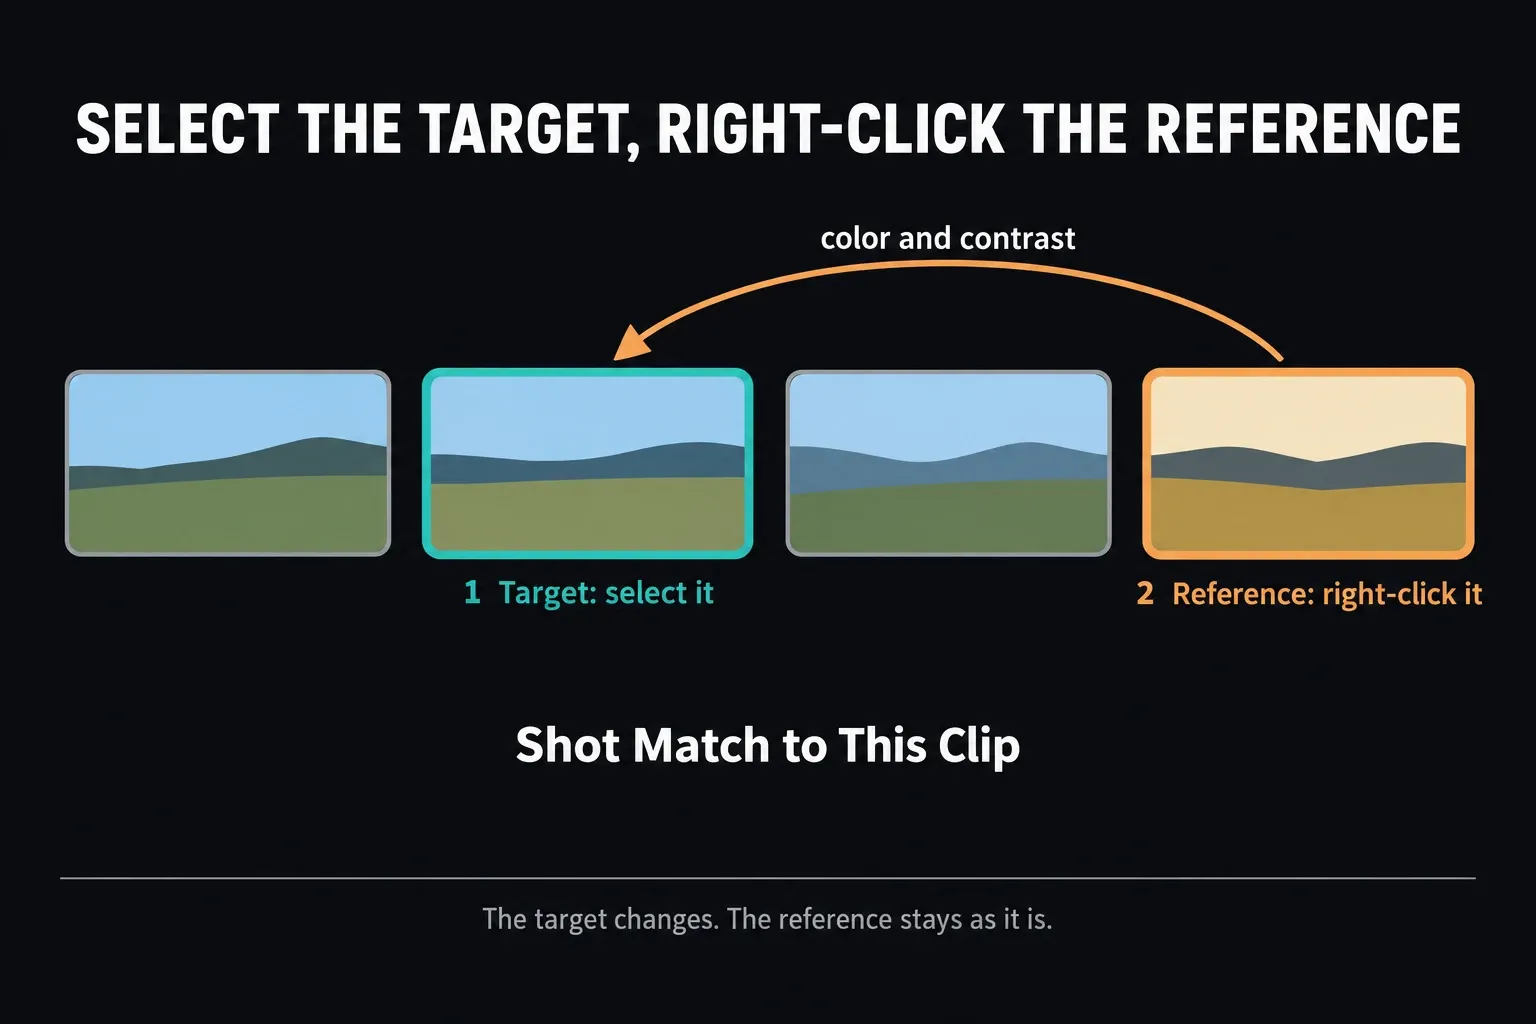
For a contiguous batch, select the first target and Shift-click the last; Command-click or Ctrl-click picks clips that aren't next to each other. Start with one camera angle, not a mixture of wides, close-ups, interiors and exteriors. Before you run the match, check that each target has an isolated test node selected. If you can't keep the adjustment apart from work you need to preserve, match those clips individually instead.
Why the color wheels do not move after Shot Match
Shot Match doesn't write any Lift, Gamma, Gain or curve values you can inspect. The Resolve 21 manual says the adjustment is applied invisibly as the final adjustment in the node that was selected, similar to a LUT. So the image changes while the familiar primary controls sit untouched.
That's why a dedicated node is worth the extra click: it gives you a clean before/after switch. Select it and press Command-D on macOS or Ctrl-D on Windows with the default shortcuts. That bypasses only the selected node; Shift-D bypasses the whole node tree. To remove the test, right-click its node and choose Reset Node Grade, or delete the node. Resetting also clears other adjustments and keyframes in that node, so never run the match on a node that holds work you need to keep.
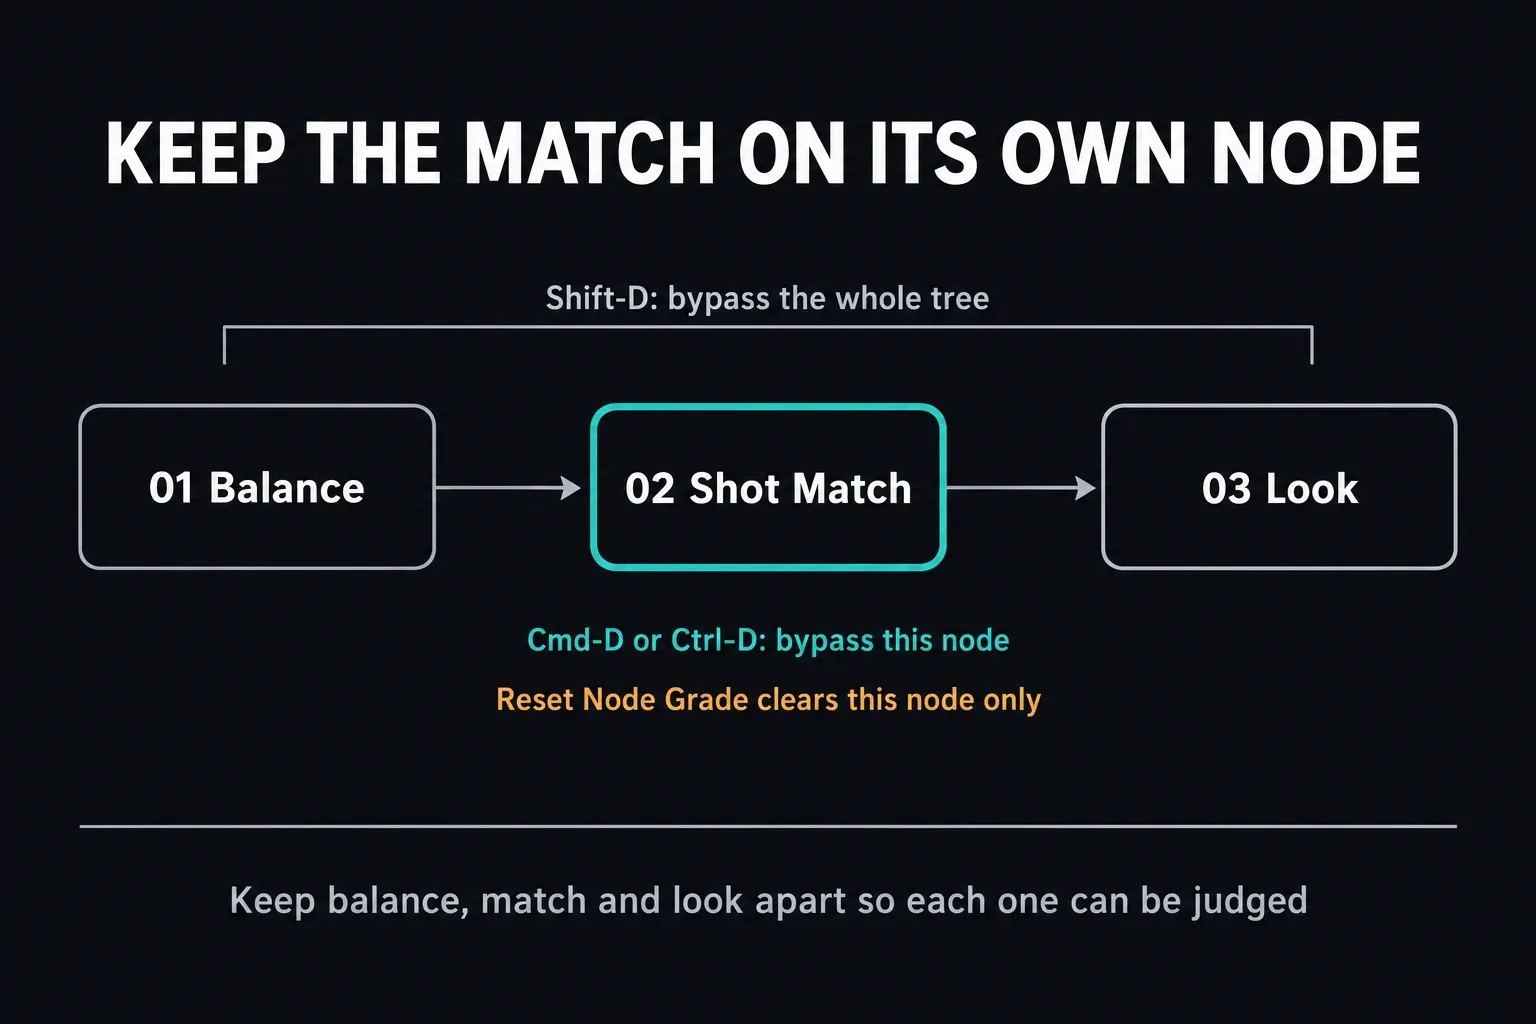
It also explains why copying the visible wheel numbers cannot reproduce a Shot Match result. There are no numbers to copy. If you need an editable correction, use the automatic result as a visual hint, then rebuild the match with normal primary controls on a fresh node. The node guide covers serial order, isolation and safe bypassing in more detail.
Match multiple clips without creating an undo trap
Every timeline clip has its own undo history. Blackmagic warns that a Shot Match applied to several clips cannot be undone across all of them with one global action. You have to revisit each affected clip and either undo the operation there or remove its isolated test adjustment. Don't reach for Reset All Grades and Nodes just to get rid of one match.
- Group the scene by camera angle and lighting setup.
- Pick one target from Angle B and match it to your chosen reference from Angle C.
- Check that cut in split screen, on the scopes and in normal playback.
- If the test holds, select the other Angle B clips and repeat the same reference match.
- Test one clip from the next angle before you expand the selection again.
Don't run the command on shots that already match. A small automatic nudge can make a stable angle less consistent, and the manual warns about exactly that. If one angle refuses to cooperate, try matching it to an angle you've already matched. Lightbox is useful after the first pass because it makes a mismatched clip easy to spot across a full scene.
Refine the match with waveform, RGB parade and vectorscope
A match has to survive the cut, not just produce similar scope shapes. After matching, select both the reference and target, enable Split Screen and choose Selected Clips from its mode menu. Then read the scopes in this order.
- Waveform: compare corresponding black, midtone and highlight regions. Fix exposure and contrast with primary controls. Don't force unrelated backgrounds to the same level.
- RGB parade: check neutral objects and shadows for channel imbalance. Correct the cast, but protect light that's meant to be colored.
- Vectorscope: compare hue and saturation, then check skin-tone direction when there's skin in frame. The traces don't need to become identical.
- Playback: loop the edit. A still that measures close can still flash warmer, darker or more saturated during the cut.
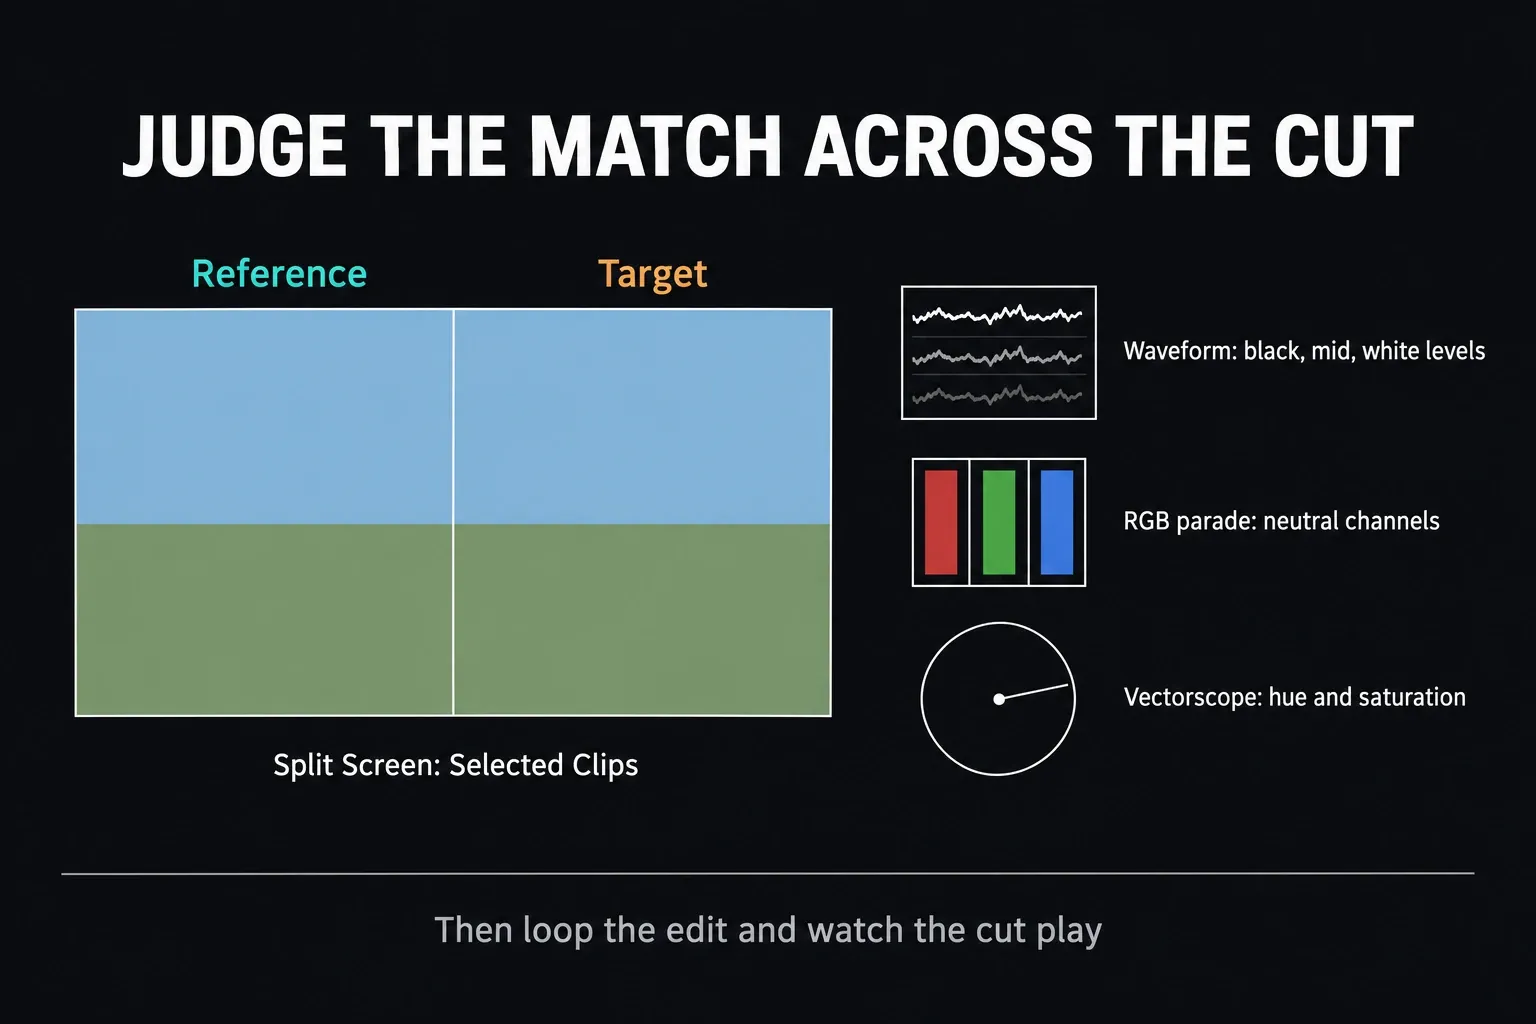
The Resolve scopes guide explains what each display measures and where skin, clipping and channel imbalance appear. Shot Match gets you there faster when the scopes tell you what's still wrong, instead of tempting you into random wheel moves.
For a manual comparison against a fixed frame, park on the reference, right-click the Viewer and choose Grab Still. Switch to the target, select that still in the Gallery and turn on Image Wipe in the Viewer toolbar. Drag inside the Viewer to move the dividing line, then adjust the target with normal primary controls. You're comparing against the still, not choosing Apply Grade or copying its node tree. If you'd rather skip the still, right-click the reference in the thumbnail timeline and choose Wipe Timeline Clip.
Why Shot Match is not working or gives a bad result
The reference and target are reversed
Select the clip that should change, then right-click the different clip it should resemble. If Shot Match to This Clip isn't in the menu, the Colorist Guide gives the usual reason: you've right-clicked the active target itself. If the wrong image changes, undo on that clip or reset its isolated test node before you repeat the selection.
The clips are in different image states
A normalized reference and a flat log target aren't comparable. Check input color spaces, color management, CST placement and whether one clip has a display transform the other one lacks.
The targets already contain corrections
A complicated target grade can throw the comparison off. Protect it and test a simpler version while keeping the normalization you need. The manual's Auto Color advice and its ungraded-target warning don't agree, so don't assume every preliminary balance is forbidden, or that adding Auto Color always fixes a poor match.
The shots do not share enough scene information
A frame dominated by a purple wall can distort the comparison with an angle full of green foliage. The manual names large background colors that don't appear in the other angles as a case that often throws Shot Match off. Try a more representative reference, match angle by angle, or switch to manual scope work.
The images are too far apart
Severe exposure gaps, mixed lighting or missing source detail can be beyond any automatic match. Try a more representative reference or balance the target manually. If you test Auto Color before another match, run that experiment on both clips using protected versions and compare it with the baseline. Don't keep stacking failed automatic adjustments.
Shot Match vs Auto Color, Color Match and copying a grade
| Tool | Best use and limit |
|---|---|
| Auto Color | Move one current frame toward a neutral starting point. It does not compare that clip with a separate reference. |
| Shot Match | Move scene clips toward a chosen reference. It does not expose editable wheel values or guarantee a final match. |
| Color Match | Use a supported color chart recorded in the shot. It is not the same as matching one ordinary image to another. |
| Copy grade | Apply the same existing node correction to genuinely similar clips. It does not analyze differences between shots. |
| Manual match | Use visible controls when lighting, cameras or backgrounds differ. It takes longer but keeps every correction editable. |
The Auto Color guide explains one-frame automatic balancing. If clips already share the same setup and need the same correction, use the copy-grade methods instead. Copying a grade repeats one correction everywhere; calculating a match works out a different one for each target.
A repeatable scene-matching order
- Normalize every camera into a consistent working pipeline.
- Choose one honest reference per lighting setup.
- Balance that reference with simple primaries.
- Test Shot Match on one clip from one angle.
- Refine the target with waveform, parade and vectorscope.
- Expand to the rest of that angle only after the test works.
- Review the scene in Lightbox and loop every cut.
- Add the creative look after the scene is internally consistent.
Keep the test small enough to reverse: one clip, then one angle. In a manual creative workflow you can also match to a developed hero look. The advice to keep the reference simple is specifically about giving the automatic Shot Match command a useful starting point.
DaVinci Resolve Shot Matching FAQ
Where is Shot Match to This Clip in DaVinci Resolve?
Open the Color page, select the target clip or clips in the thumbnail timeline, then right-click the reference clip. Shot Match to This Clip is in that reference clip's context menu.
Which clip should I select first for Shot Match?
Select the clip or clips that need to change first, then right-click the good reference clip. The targets receive the adjustment; the reference only supplies the color and contrast direction.
Why did Shot Match change the image without moving the color wheels?
Resolve applies Shot Match as an invisible final adjustment in the selected node, similar to a LUT. It doesn't move the normal editable primary controls, so put it on a dedicated node you can bypass or remove.
Can I Shot Match multiple clips at once?
Yes. Select several target clips, right-click the reference and run Shot Match. Test one clip from each camera angle first, because every clip has its own undo history and a bulk match can't be undone with one global action.
How do I undo or remove Shot Match?
If it was the last action on the current clip, use Undo. For several clips, go back to each one. If Shot Match sits on its own node, delete that node or right-click it and choose Reset Node Grade. Reset also removes other adjustments and keyframes in that node; it isn't the same as resetting every grade and node.
Does Shot Match work with log footage and different cameras?
It can, but the manual says normalized clips produce more reliable results. Don't match different unnormalized log encodings, or mix normalized and unnormalized clips. Put both cameras into one color-managed or verified transform pipeline first.
Why does Shot Match look wrong?
Check the reference choice, complicated target corrections, mismatched normalization, exposure or lighting differences, and large background colors that appear in only one angle. Test a simpler protected version or another reference. Auto Color before matching is an optional comparison, not a guaranteed fix; finish by hand when the automatic result stays worse.
Use Shot Match when the reference means something and the inputs are comparable. When either condition fails, a visible manual correction is safer than forcing the automatic result.
