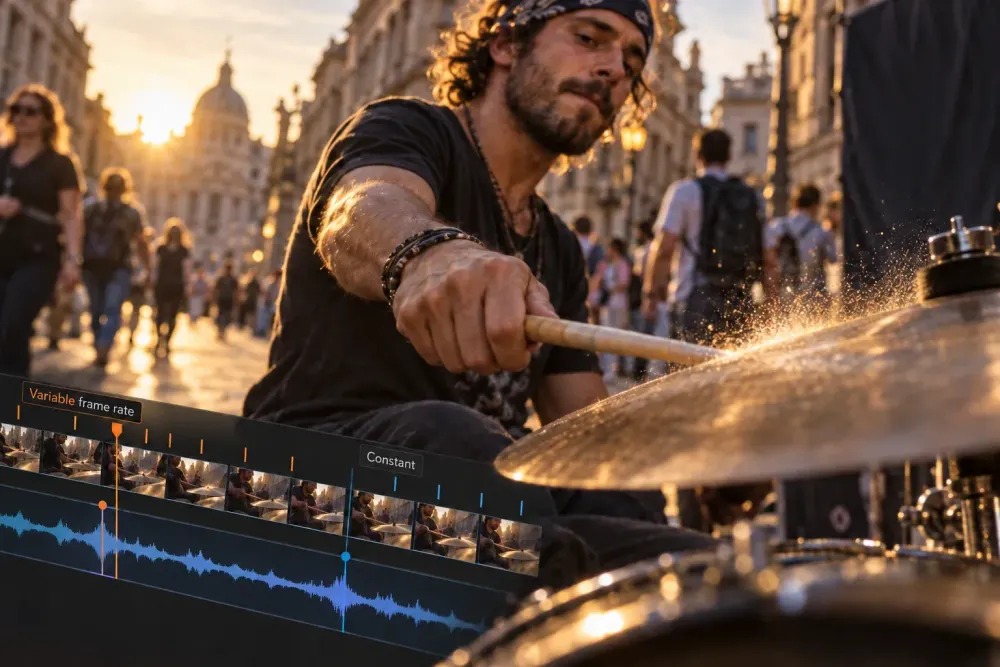
Quick answer: do not convert an entire project because a phone clip stutters or drifts out of sync. First inspect the suspect file in MediaInfo, test that single clip in a clean Resolve project, create one constant-frame-rate copy, and repeat the same test. Keep the original untouched. Use the CFR copy only if its duration, audio channels, cadence and sync all pass comparison.
Variable frame rate can cause real editing problems, but it has become a catch-all diagnosis for almost every awkward phone or screen recording. That wastes time. A file can be difficult because of its codec, a wrong timeline rate, damaged frames, slow storage or clock drift from a separate audio recorder. The useful question is not “Did this come from a phone?” It is “Do this file’s timestamps vary, and does regularizing them fix the same symptom?”
VFR Is Not the Same as Mixed Frame Rates
A variable-frame-rate file changes the interval between frames within one recording. A constant-frame-rate file places frames on a regular time grid, even if the content itself contains duplicated frames or uneven motion.
Mixed frame rates describe a different situation. You might have one 23.976 fps camera clip, one 25 fps clip and one 59.94 fps clip. Each can still be constant. Resolve must fit them into the timeline rate you selected, but that does not make the sources VFR.
Keep four settings separate in your head:
- Source timing: the timestamps stored in the media file.
- Clip interpretation: how Resolve treats that source when it is placed in a project.
- Timeline frame rate: the time grid used for editing.
- Playback performance: whether your hardware can decode and display frames in real time.
Changing Timeline Frame Rate or Clip Attributes may change how media is interpreted. It does not create a new source file with evenly spaced timestamps. If your problem is broader project setup, use the dedicated DaVinci Resolve frame-rate guide before starting a transcode.
When VFR Is a Reasonable Suspect
Investigate VFR when the problem follows one particular recording or source family and includes one or more of these symptoms:
- picture and embedded audio begin together but drift apart later;
- a long capture behaves worse near the end than near the beginning;
- scrubbing lands inconsistently around the same section;
- the waveform and visible action do not remain aligned;
- the file behaves differently after a CFR conversion while every Resolve setting stays the same;
- a phone, conferencing app or screen recorder changed its recording cadence under load.
Those symptoms justify a test. They do not prove the cause. Blackmagic’s user forum contains recurring reports of sync, audio breakup and visual artifacts with some phone and capture files, along with CFR transcoding as a workaround. The discussion is useful as community evidence of the workflow problem, not as an official statement that every such file is unsupported.
Look elsewhere first when:
- every H.264 or H.265 clip plays slowly, including known CFR camera media;
- the issue disappears when proxies or optimized media are used;
- audio was recorded on a separate device and drifts against every camera file;
- multiple clips have different constant rates but behave consistently inside their own files;
- the source will not import at all;
- the media repeatedly goes offline because paths or drives change;
- the file contains obvious corruption or decoding errors.
For slow decoding, follow the Resolve slow-playback workflow. If the file fails at import, check the MP4 import guide and the current supported codecs and formats overview. Do not ask a frame-rate conversion to solve a codec, edition or operating-system limitation.
Preserve the Original Before You Test Anything
Never overwrite the only source. A timing conversion changes the media essence and may also change stream layout, metadata, timecode or color tags depending on the application and preset.
Create a small test folder with:
- the untouched source file;
- one CFR copy with a clear suffix such as
_CFR_TEST; - a note recording the source duration, reported frame-rate fields and audio-track count;
- a clean Resolve project used only for the comparison.
Choose a representative clip. If the reported failure occurs only after 35 minutes, a 20-second sample from the beginning proves very little. Use a clip long enough to include the failing region, or make a test copy that retains the relevant section without changing its timing first.
Check the Source in MediaInfo
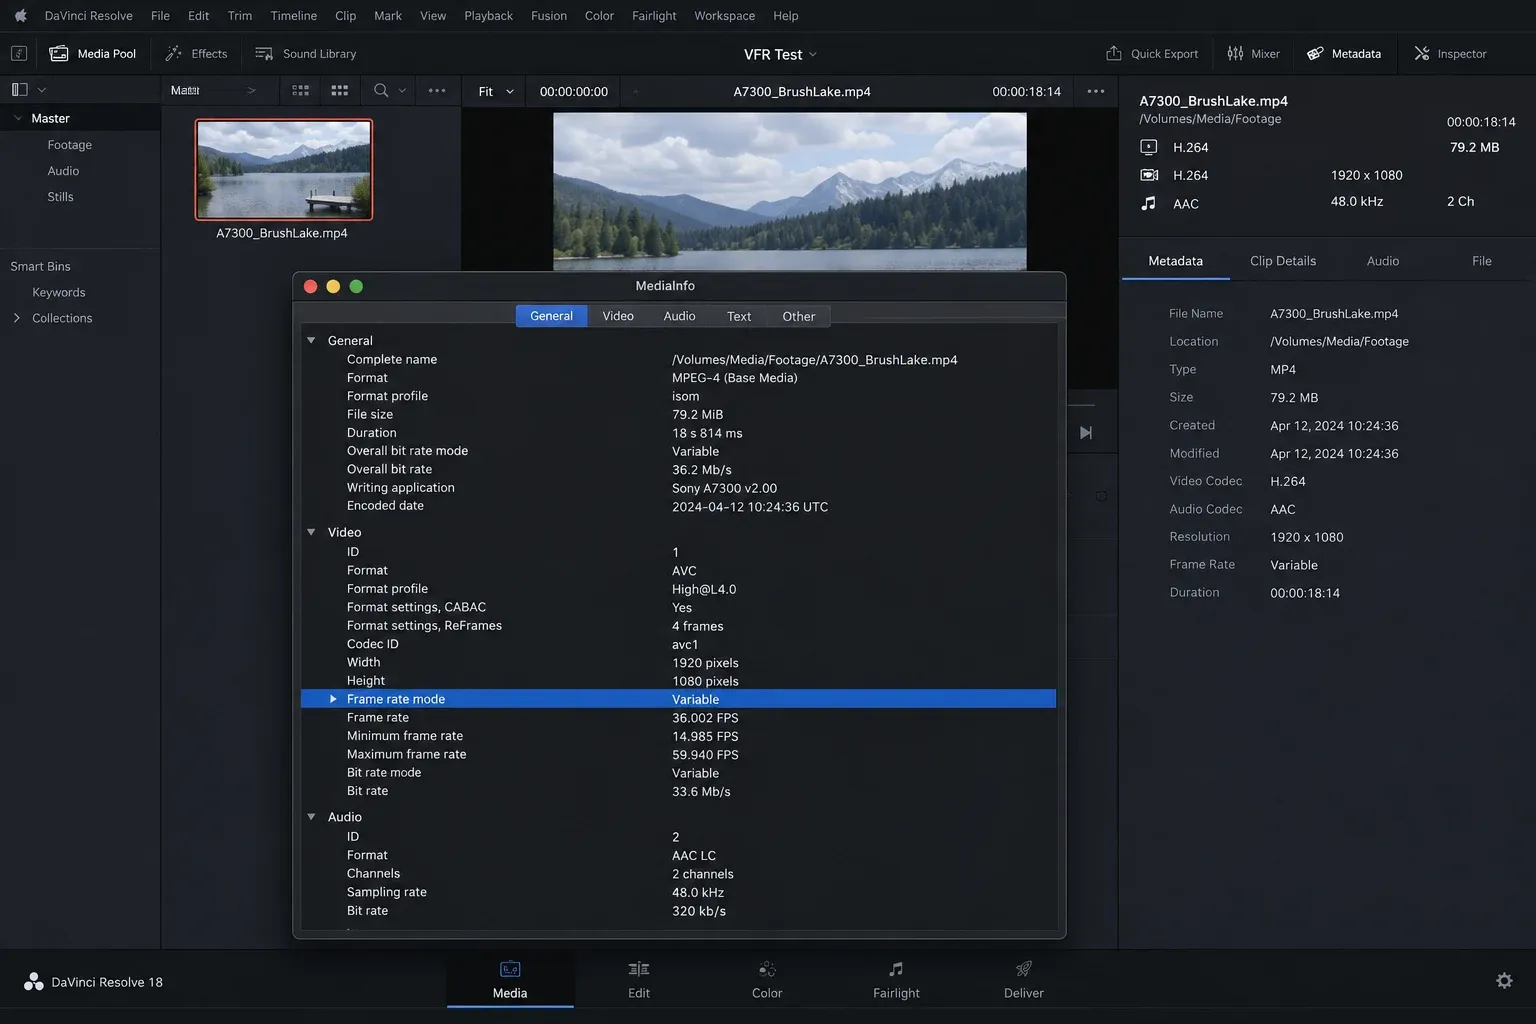
MediaInfo is a fast first pass because it reads stream and container metadata without asking Resolve to interpret the file. Its official field reference documents frame-rate mode, nominal, minimum and maximum frame-rate fields.
Open the file and switch to a detailed view such as Tree or Text. Inspect the video stream for:
- Frame rate mode — Constant or Variable;
- Frame rate — often an average or reported working value;
- Minimum frame rate;
- Maximum frame rate;
- Nominal frame rate, when present;
- duration and frame count;
- codec, bit depth, chroma subsampling and color information;
- audio stream count, channel layout and sample rate.
A reported Variable mode is strong evidence that the source uses irregular timing. A meaningful difference between minimum and maximum frame rate supports that finding. A single average such as 29.97 is not enough by itself: a VFR file can still report an average close to a familiar broadcast rate.
Metadata can also be incomplete or misleading. Some files omit fields; some containers expose a nominal value that says little about actual frame intervals. Treat MediaInfo as the first evidence layer, then use a controlled playback and sync comparison.
Save the MediaInfo output with the project notes if the footage matters. That gives you a factual record of the original before any transcode changes its structure.
Build a Controlled Resolve Test
A useful test changes one thing at a time. Do not compare the original in a heavy production timeline against the CFR copy in a new empty project and call the result conclusive.
Set up the test like this:
- Create a new project.
- Choose the intended timeline rate before importing the test media.
- Import only the original suspect clip.
- Place it at the start of a new timeline.
- Add visible sync markers at the beginning, middle and near the end. A hand clap, spoken consonant, mouse click, slate or clear visual action works better than vague lip movement.
- Note the exact sections where drift, stutter, audio breakup or frame instability appears.
- Close the project or duplicate the timeline before importing the CFR copy.
- Place the CFR copy at the same start position and repeat the same checks.
Keep render cache, effects, scaling and speed changes out of this stage. The goal is to compare source timing, not grade performance or Fusion load.
If both files behave the same, VFR is probably not the useful diagnosis. If the CFR copy fixes the same repeatable symptom while duration and audio remain correct, you have a defensible reason to use it.
Convert One Sample in HandBrake
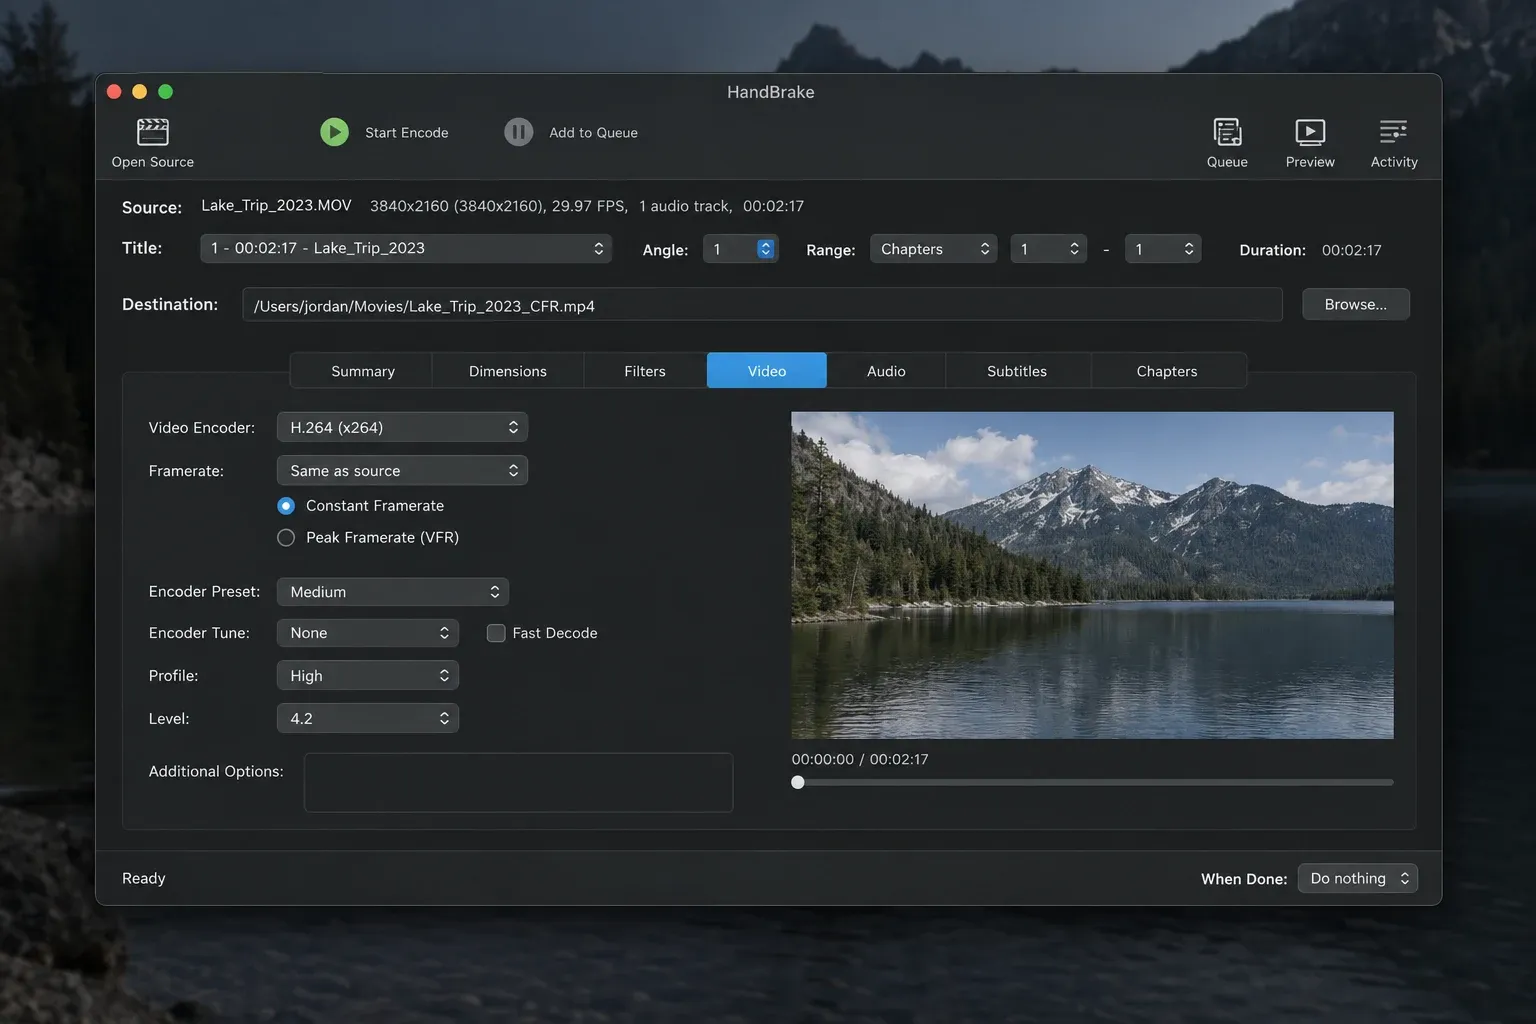
HandBrake provides a clear GUI route for making a CFR working copy. Its frame-rate documentation distinguishes variable and constant output: VFR preserves the source timing pattern, while CFR creates a constant output rate.
For the first sample:
- Open the untouched source in HandBrake.
- Choose a container and video encoder that Resolve can decode reliably on your system.
- Open the Video tab.
- Set Framerate (FPS) to Same as Source.
- Select Constant Framerate.
- Review the Audio tab and include the tracks and channel layouts the edit actually needs.
- Send the output to the test folder with the
_CFR_TESTsuffix. - Leave the original file in place.
HandBrake documents that Same as Source + Constant Framerate determines the source rate and makes variable portions constant. That makes it a sensible first comparison when you want to regularize the recording rather than impose a new creative frame rate.
Do not choose 24, 25 or 30 merely because one looks familiar. Set an explicit rate only when the target is known: for example, a production is deliberately built around 25 fps, or the source was intended to be 30000/1001 and the conversion is restoring that known cadence. A wrong explicit choice can introduce extra dropped or duplicated frames before Resolve sees the file.
Frame-rate mode is only one part of a transcode. Confirm the video encoder, quality setting, dimensions, color metadata and audio choices separately. The fact that the output is CFR does not guarantee it retained every source track or tag.
Optional FFmpeg Diagnosis and Conversion
FFmpeg is useful when you need a repeatable command, batch control or a second diagnostic signal. Its official vfrdet filter detects variable timing. A diagnostic command has this form:
ffmpeg -i input.mp4 -vf vfrdet -an -f null -
Read the filter output as evidence, not a verdict on the whole edit. It analyses timestamp variation; it does not tell you whether your particular Resolve symptom is caused by that variation.
FFmpeg’s documented fps filter creates a specified constant frame rate by dropping or duplicating frames as needed. A simplified conversion example is:
ffmpeg -i input.mp4 -map 0:v:0 -map 0:a? \
  -vf "fps=fps=30000/1001:round=near" \
  -c:v libx264 -crf 18 -preset medium \
  -c:a aac -b:a 320k output-cfr.mp4
30000/1001 is an example, not a universal target. Replace it only after identifying the intended constant rate. The codec and audio options are also workflow decisions. This example maps the first video stream and optional audio streams, but a source with multiple languages, unusual channel layouts, subtitles, data streams or production timecode needs a deliberate mapping plan.
For long-term editing media, you may prefer an intraframe mezzanine codec instead of H.264. Choose that because of the project’s quality, storage and platform requirements, not because VFR itself demands one specific codec.
Verify the CFR Copy Before Relinking
A successful encode is not an accepted edit source. Compare the new file against the original and your project requirements.
Duration
Compare the reported duration closely. A tiny rounding difference may be expected around frame boundaries, but a growing discrepancy or a large duration change needs investigation. Place both clips at the same timeline start and compare their end points.
Audio structure
Check how many tracks survived, their sample rates, channel counts and channel order. Listen to every required channel. A stereo preview track is not a substitute for isolated microphones if the project needs them.
Sync
Check the beginning, middle and end. Do not approve a one-hour recording because its first ten seconds line up. Use sharp visual and audible events wherever possible.
Cadence and motion
Watch pans, scrolling text, game motion and cursor movement. CFR conversion may need to drop or duplicate frames. Confirm that the resulting cadence is acceptable at the chosen target rate.
Color and levels
Compare representative dark, bright and saturated frames. A transcode can involve more than timing if color tags, range handling, chroma format or bit depth change.
Metadata and timecode
If the edit relies on source timecode, reel names, creation dates or camera metadata, check those fields explicitly. Never assume a consumer conversion preset retained them.
If any required element fails, revise the conversion path before touching the project. The safe result is not “a file Resolve opens.” It is “a working copy that preserves what this edit needs.”
Replace Media Safely in Resolve
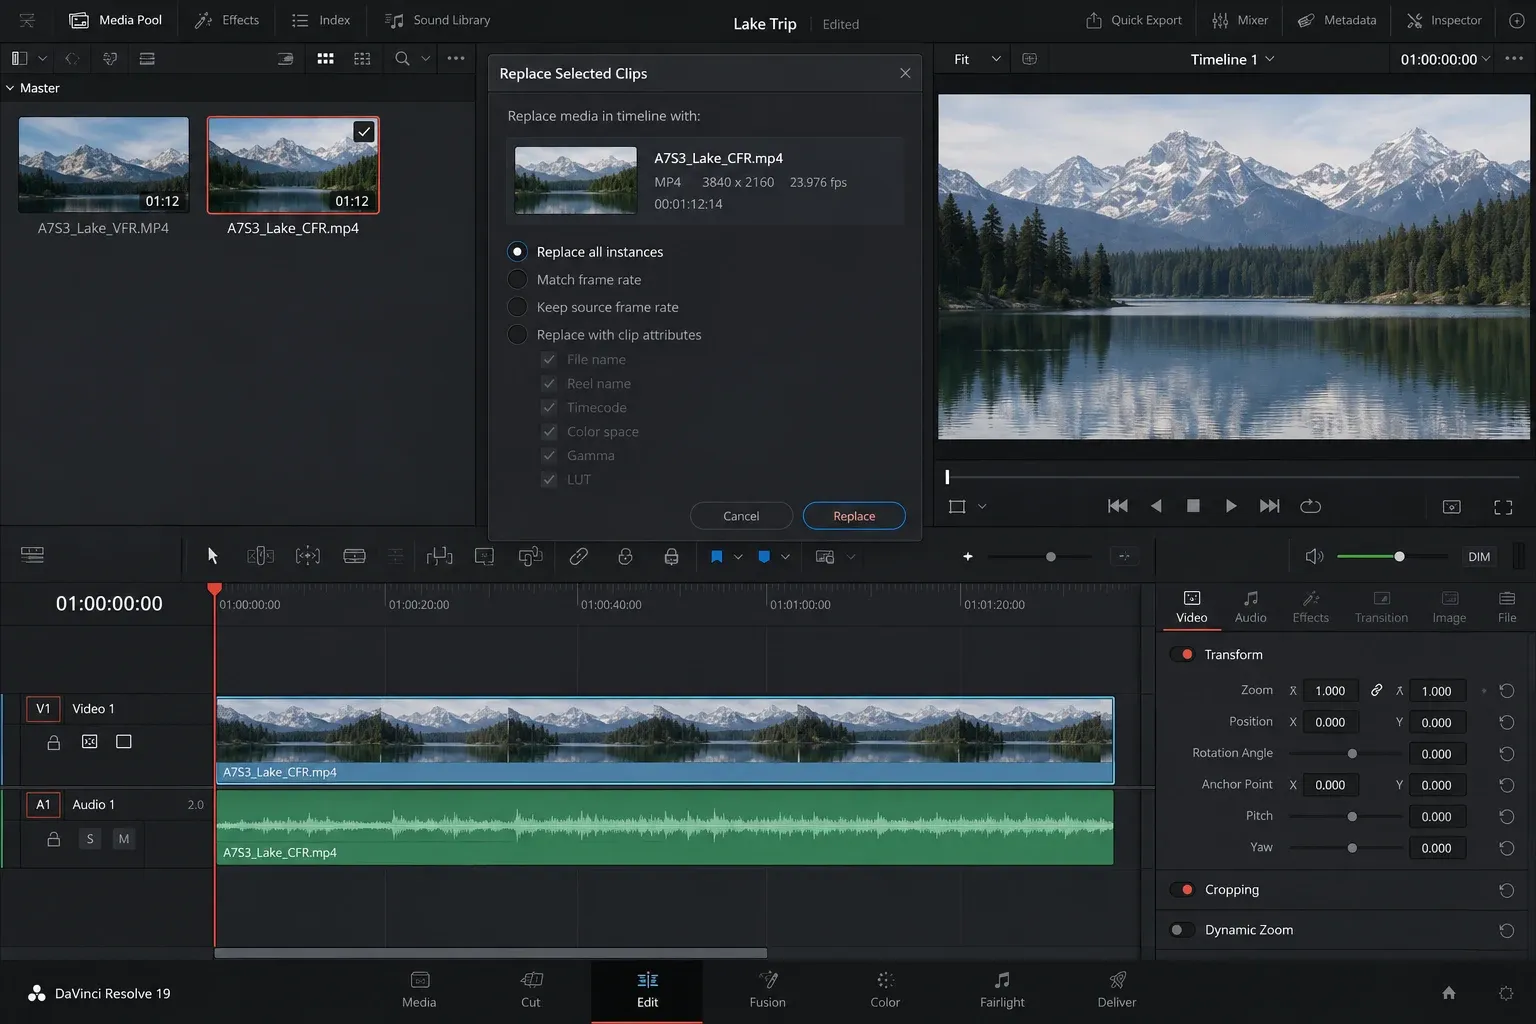
Do the first replacement in a duplicate project or timeline. Keep the original media online and preserve a clear mapping between original and CFR filenames.
For a small number of clips, import the copies into a separate bin and replace them deliberately. For a larger set, consistent basenames and folder structure can make relinking easier, but duplicate names across phones, cards or capture sessions can point Resolve to the wrong file.
After replacement, verify:
- clip identity;
- in and out frames;
- timeline duration;
- speed changes and freeze frames;
- audio channel mapping;
- sync at multiple points;
- any edit that lands near a dropped or duplicated frame.
If the media goes offline during the process, stop and use the Media Offline diagnosis guide rather than changing more variables at once.
If the CFR Copy Does Not Fix the Problem
That result is useful. It means you can stop treating VFR as the leading explanation and inspect the next branch.
Timeline or clip-rate mismatch
A known CFR source can still judder if the timeline cadence and source rate are poorly matched. Recheck project, timeline and clip interpretation settings.
Decode performance
If both files use similarly demanding H.264 or H.265 settings, CFR alone may not make playback easier. Try an editing codec, proxies or optimized media and compare again.
Separate-recorder clock drift
Two devices can run at slightly different clock speeds. Both files may be CFR while long recordings still drift. That calls for audio resynchronization or time correction, not a blind video frame-rate conversion.
Damaged media
Corrupt packets or missing frames can create local glitches that survive conversion or cause the converter to conceal damage by duplicating nearby frames. Inspect the source around the exact failure point.
Storage or transfer faults
A slow, disconnecting or damaged drive can cause dropped playback, offline events and read errors. Copy one file to a reliable local drive and repeat the clean-project test.
When to Convert the Whole Set
Batch conversion makes sense only after one representative sample passes and the source group is consistent enough to use the same rules.
Convert the wider set when:
- MediaInfo shows the same timing pattern across the group;
- the clips share the same recording method and required streams;
- the sample CFR copy fixes a repeatable problem;
- the chosen output codec, frame rate and audio mapping suit the full set;
- storage and processing time are planned;
- the originals remain preserved.
Keep testing clip by clip when the source folder mixes devices, apps, rates, orientations, HDR/SDR modes or audio layouts. One preset can produce technically valid files while silently stripping something needed from half the set.
A Short VFR-to-CFR Checklist
Before conversion:
- preserve the original;
- inspect Frame rate mode plus minimum, nominal and maximum fields;
- separate VFR from mixed constant FPS;
- reproduce the symptom in a clean project;
- choose one representative sample.
After conversion:
- compare duration;
- verify every required audio track and channel;
- check sync at the beginning, middle and end;
- inspect motion cadence and critical edit points;
- compare color and metadata;
- replace media only in a duplicate project or timeline;
- expand to a batch only after the sample passes.
That process takes longer than changing one dropdown, but it prevents a much more expensive mistake: converting an entire project for the wrong reason and discovering the damage after the originals have been displaced.
