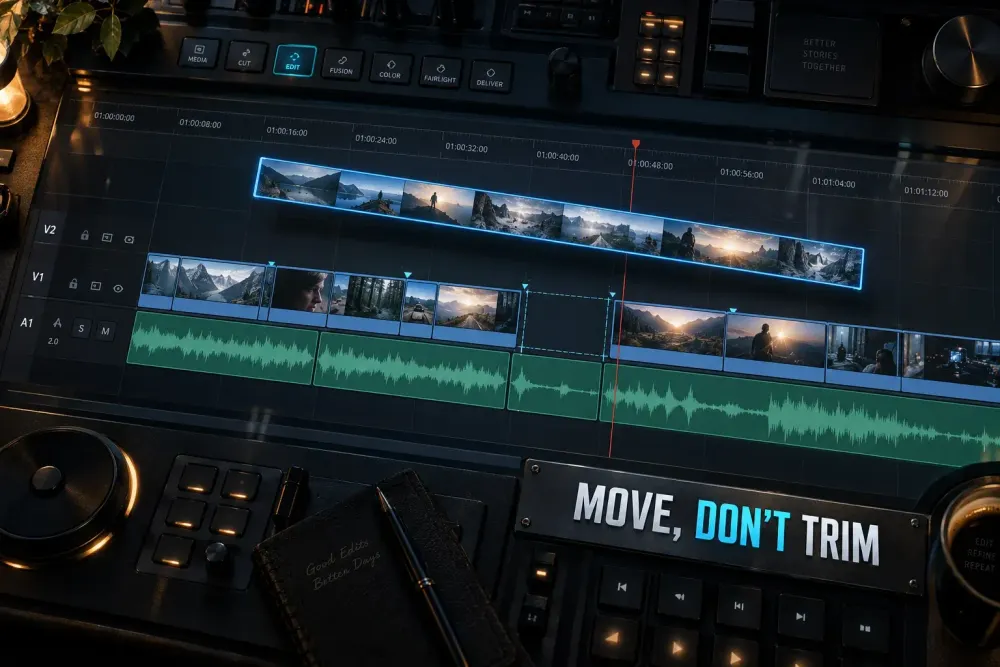
Quick answer: press A for Selection Mode, grab the middle of the clip, and drag it. Grabbing the clip body moves the whole clip and keeps its duration. Grabbing the left or right edge changes its in or out point, which is why the clip appears to shorten.
What happens at the destination depends on the edit you actually need. Drag into empty time for a free move. Use Swap Clips Toward Left/Right to reorder neighboring clips without leaving a gap. Use Insert when a new source clip must push the existing edit later. Use a Ripple Trim when you want to extend an existing clip and move everything after it.
Choose the Right Move
The phrase “move a clip without shortening it” can describe four different timeline problems. Pick the result first; the correct command follows from it.
| Goal | Use | What stays unchanged | What moves |
|---|---|---|---|
| Move a whole clip into empty time | Selection Mode and drag the clip body | The clip’s duration and source range | Only the selected clip and its linked audio |
| Reorder neighboring clips with no gap | Swap Clips Toward Left or Right | Each clip’s duration | The selected clip and the clips it crosses |
| Add a source clip between timeline clips | Insert Edit | The inserted source range | Later timeline material shifts right |
| Make an existing clip longer | Ripple Trim the clip edge | Neighboring clips remain intact | Later material shifts to fit the new duration |
| Replace a shot with a longer or shorter source | Ripple Overwrite | The replacement source duration | Later material shifts by the duration difference |
Blackmagic’s official Edit page separates these behaviors: drag-and-drop movement, swap and shuffle, Insert, Overwrite, Ripple Overwrite, and context-sensitive trimming each solve a different timeline relationship.
Move a Whole Clip Without Changing Its Length
- Open the Edit page and press A to return to Selection Mode.
- Click the middle of the clip, away from both edges.
- Drag it to an empty section of the same track or another unlocked track.
- Release only when the clip outline is entirely over open timeline space.
The clip keeps the same duration because you moved the timeline item rather than one of its edit points. If video and audio are linked and Linked Selection is on, they should move together. If you intend to move picture without its linked sound, turn Linked Selection off for that edit, then restore it.
If the pointer turns into a trim cursor, move farther into the center of the clip before dragging. Pressing A also clears the common mistake of remaining in Trim Edit Mode after an earlier adjustment.
My rule: if I want the same frames in a new place, I grab the clip body. If I want different start or end frames, I grab an edge.
Reorder Clips Without Leaving a Gap
Dragging a clip directly over occupied material can perform an overwrite-style move, depending on where and how you drop it. That is risky when the goal is simply to change the order.
For adjacent timeline clips, select the clip and use Swap Clips Toward Left or Swap Clips Toward Right. The command moves the selected clip through its neighbor and closes the timeline behind it. Each clip keeps its duration.
The exact shortcut depends on your keyboard preset. Search for the two command names in DaVinci Resolve > Keyboard Customization rather than assuming a shortcut copied from another system or preset. The DaVinci Resolve keyboard shortcuts guide explains how to verify and customize commands without relying on another editor’s layout. The JayAreTV guide to moving timeline footage demonstrates the same swap approach, although its track-selector notes describe an older Resolve interface.
Do not confuse Swap with Slide. A Slide edit keeps the middle clip’s duration, but it shortens one neighboring clip and lengthens the other. That is useful for changing when the middle shot appears while preserving the total sequence length. It is the wrong choice when both neighbors must remain untouched. The Trim vs Blade guide shows where Slide fits among the other trim operations.
Insert a Clip Without Overwriting What Is Already There
Use Insert when the clip comes from the Media Pool or Source Viewer and must go between clips already in the timeline.
- Load the source clip and mark the range you want with in and out points if needed.
- Place the timeline playhead at the insertion point.
- Check the red destination controls for the video and audio tracks that should receive the edit.
- Choose Insert from the edit overlay or toolbar. In the standard DaVinci Resolve keyboard preset, F9 performs an Insert Edit.
Insert puts the source at the playhead and pushes later material right to make room. If the playhead is inside a timeline clip, that clip is split at the insertion point. Blackmagic documents that behavior in its Insert Edit description.
Use Overwrite only when replacing the occupied time is intentional. Overwrite writes across material already at the playhead; it does not protect the neighboring clips by moving them away.
Extend a Clip and Move Everything After It
If “move without shortening” really means “make this clip longer without taking time from the next clip,” use a Ripple Trim.
- Press T for Trim Edit Mode.
- Point at the end of the clip until the ripple-trim cursor appears.
- Drag the edge right to reveal more source frames.
- Watch the later timeline material shift right by the same amount.
A normal Roll trim shares time between two neighboring clips: one gets longer while the other gets shorter. A Ripple Trim changes one clip’s edge and shifts everything later, so the next clip does not donate frames. The source clip still needs unused media beyond its current out point. If the shot already reaches the end of its source, Resolve has no extra frames to reveal.
Before the ripple, check Sync Lock on music, titles, graphics, and alternate camera tracks. Sync Lock determines whether those tracks follow a ripple performed elsewhere. The red destination controls choose where an edit lands; they are a separate control. The guide to splitting video in current Resolve identifies the red destination controls, track locks, Sync Lock, Linked Selection, and Position Lock.
Replace a Clip With One of a Different Length
Use Ripple Overwrite when you are replacing one timeline shot with a source clip that is longer or shorter and you want the sequence to adapt to the difference.
- A longer replacement pushes later material right.
- A shorter replacement pulls later material left so no gap remains.
- The replacement does not have to be forced to the exact duration of the old timeline clip.
That last point separates Ripple Overwrite from Replace. Replace fits the incoming shot to the duration of the timeline clip it replaces. Ripple Overwrite lets the incoming duration change the timeline. Both behaviors are described on Blackmagic’s Edit page.
Fix an Accidental Overwrite
If a neighboring clip suddenly became shorter or disappeared after the move, stop before making another edit.
- Undo the move.
- Confirm that you were in Selection Mode.
- Decide whether you wanted empty-space movement, Swap, Insert, or Ripple Trim.
- Check the destination track and track locks.
- Repeat the edit with the command that matches the intended timeline relationship.
Trying to repair an accidental overwrite by dragging several clips by eye usually creates a second problem: gaps, broken audio links, or a title left behind on another track. Undo preserves the state before the wrong edit and gives you a clean choice.
Keep Audio, Titles, and Other Tracks in Sync
A move that looks correct on V1 can still damage timing elsewhere. Run this short check before releasing the mouse or committing a ripple:
- Linked Selection: should the clip’s linked video and audio move together?
- Destination controls: which video and audio tracks should receive an Insert or Overwrite edit?
- Sync Lock: which tracks must follow a ripple so their timing stays aligned?
- Track lock: which track must reject direct edits?
- Position Lock: is horizontal timeline movement blocked?
Do not solve a track-scope problem by turning off every control. Decide what relationship you need to preserve, set only the relevant control, make the edit, and return the timeline to its normal state.
For linked production audio, check the cut after any move on another video track. The audio and video sync guide covers linked clips, waveform alignment, timecode, and the checks to make before separating picture from sound.
Use a Temporary V2 Track as a Manual Fallback
For an unusual rearrangement that crosses several clips, a temporary upper track is a safe manual option:
- Move the clip from V1 to open time on V2 without changing its horizontal position.
- Rearrange or close the space on V1.
- Move the saved clip from V2 into its final V1 position.
- Confirm that linked audio followed the intended clip and that no title or overlay was covered.
This method is slower than Swap or Insert, but the timeline remains readable throughout the move. It is especially useful when the final order is still undecided. Keep snapping on when you want the clip to land exactly on an existing cut, and zoom in before trusting a drop that is only a frame away.
The Short Version
To move a clip without shortening it, use Selection Mode and drag the middle of the clip. Use Swap Clips Toward Left/Right when reordering occupied timeline space. Use Insert when new source material must push the edit later. Use Ripple Trim when extending an existing clip without shortening the next one. Use Ripple Overwrite when a replacement clip’s different duration should change the timeline.
If a move starts changing clip edges, stop and check the pointer position and edit mode. A whole-clip move changes placement. A trim changes an edit point.
