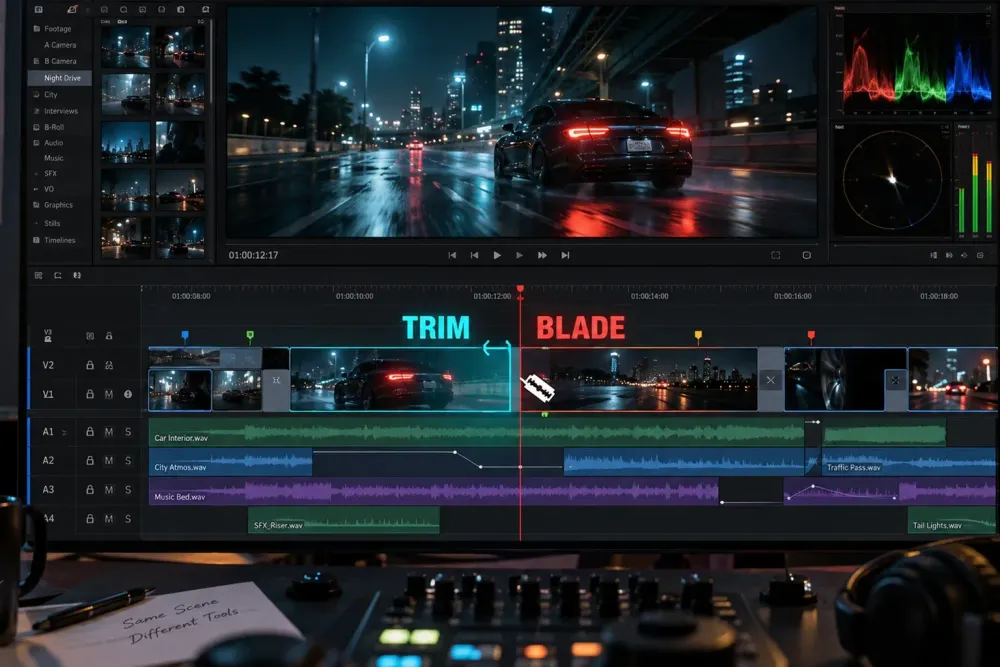
Use Blade when you need a new edit point. Use Trim when the edit point already exists and you need to change where the cut happens. That distinction is more useful than memorizing every cursor icon in DaVinci Resolve.
Blade divides one clip into separate timeline segments. A normal trim changes an edge. Ripple Trim changes an edge and shifts later material. Roll moves the cut between two neighboring clips. Slip changes which source frames appear inside a clip without moving the clip. Slide moves the whole clip while trimming its neighbors to preserve the timeline length.
My rule: if the sentence in my head starts with “split this clip,” I reach for Blade. If it starts with “make this cut earlier, later, tighter, or smoother,” I use a trim operation.
Blade vs Trim: the quick decision table
The important question is not which tool feels faster for one click. It is which parts of the edit Resolve is allowed to change.
| Operation | Best for | Creates a gap? | Changes timeline length? | Needs source handles? |
|---|---|---|---|---|
| Blade | Create a new edit point inside a clip | No, not by itself | No | No |
| Ripple Trim | Shorten or extend a clip and close or open time around it | Usually no; later material shifts | Yes | Yes when extending |
| Roll | Move a cut between two adjacent clips | No | No | Yes on both sides |
| Slip | Choose a different moment inside the same clip position | No | No | Yes |
| Slide | Move a clip earlier or later between its neighbors | No | No | Yes on neighboring clips |
Blade does not automatically create empty space. The split pieces still touch at the same frame. A gap appears only when you move or delete one of those pieces with an operation that leaves time behind. This is why “Blade created a gap” is usually a description of what happened after the cut, not what Blade itself did.
What the Blade tool actually does
The Blade Edit Mode places a cut through the clip or clips you target at the chosen timeline position. Resolve turns one continuous timeline item into two items that share an edit point. The source media is untouched, the visible timing does not change, and the timeline remains the same length.
Blade is the right choice when you need to isolate a section before moving, deleting, disabling, retiming, or applying an effect to only part of a clip. It is also useful when the visual location of a cut is easier to point at than to reach with the playhead. Our guide to splitting a clip in DaVinci Resolve covers the available split commands and track behavior in more detail.
Blade becomes inefficient when you make two cuts around a pause, select the middle piece, delete it, and then close the gap. Ripple trimming can often remove the same unwanted time with fewer steps and less cleanup.
Blade first when the section needs its own identity
Create a separate segment when you intend to treat that segment differently from the rest of the source clip. Examples include muting one phrase, adding a speed change to one action, replacing a short portion, or lifting a reaction shot to another track.
Skip Blade when you only want a tighter edge
If the cut already exists, another split adds an unnecessary edit point. Grab the existing edge and trim it. Fewer edit points make later revisions easier because you are changing the actual boundary instead of managing extra fragments.
Ripple Trim: remove time and move everything after it
Ripple Trim changes a clip edge and adjusts the timeline around that change. Shorten the outgoing edge and later material moves earlier. Extend it and later material moves later, provided the source clip has unused frames available.
This is the fastest choice for removing a pause, dead air, a late camera move, or an awkward lead-in when the following edit should stay attached to the sequence. It is also the operation most likely to surprise a new editor because its effect reaches beyond the clip under the pointer.
Before rippling, look at every track that must stay synchronized. Dialogue, music, graphics, subtitles, and cutaways may need their sync locks and track targets set deliberately. A ripple edit that is correct on V1 can still be wrong for the sequence if an associated title or audio cue does not move with it.
Blackmagic’s Edit page overview describes contextual trimming, ripple edits, and the dedicated trim editor as part of Resolve’s timeline workflow. The useful practical distinction is simple: ripple work is allowed to change the duration of the sequence.
Roll: move the cut without moving the sequence
A roll edit moves the boundary between two adjacent clips. One clip becomes longer by exactly the amount the other becomes shorter. The cut moves, but the combined duration of the pair and the total timeline length stay unchanged.
Use Roll when the structure is already right but the handoff is not. A reaction begins too late, the speaker change feels abrupt, or the motion does not line up across the cut. Rolling lets you search for a better transition without pushing music, graphics, or every later edit out of place.
Both clips need enough unused source material around the edit. If the roll stops, Resolve may have reached the beginning or end of one source. That is a media limit, not a broken tool.
Slip: keep the clip in place and change the moment inside it
A slip edit preserves the clip’s timeline position and duration while changing its source In and Out points together. The neighboring clips do not move. What changes is the part of the source file shown inside the existing container.
Slip is ideal for B-roll that fits the available gap but shows the wrong moment. Instead of moving the clip and repairing both surrounding cuts, slip through the source until the action inside the fixed duration works.
The operation needs handles before and after the currently used source range. If the clip already starts at the first available frame, you cannot slip farther in that direction. Compound clips can add another layer to this logic, so use our compound clips guide when the item on the timeline contains a nested sequence.
Slide: move the clip and let its neighbors compensate
A slide edit moves one clip earlier or later while keeping its own source In point, Out point, and duration. Resolve trims the outgoing edge of the clip before it and the incoming edge of the clip after it. The three-clip span stays the same length.
Use Slide when the middle clip is right but its timing within the surrounding sequence is wrong. A cutaway may need to start earlier without changing the cutaway itself, or a reaction may land better a few frames later while the overall scene length must remain fixed.
Slide requires room in both neighboring source clips. When one neighbor has no remaining handle, the move stops. If the middle clip itself needs a different moment, use Slip instead. If the boundary between two clips needs to move, use Roll.
Selection, Trim Edit, and Blade Edit modes
Resolve separates three common pointer behaviors. In the standard keyboard layout, A returns to Selection Mode, T opens Trim Edit Mode, and B opens Blade Edit Mode. These are default assignments, and your system may differ if the keyboard map has been customized.
- Selection Mode: the everyday mode for choosing and moving clips. Edge dragging can perform normal trims, and Resolve changes the cursor according to position and modifier keys.
- Trim Edit Mode: makes ripple and roll behavior easier to reach and supports live trimming around the selected edit.
- Blade Edit Mode: turns the pointer into a cutting tool so you can add edit points where you click.
Return to Selection Mode after a run of blade cuts. Accidentally slicing a clip while trying to select it is one of the most common reasons an editor finds extra edit points later. If the shortcuts do not behave as described, open Keyboard Customization and search for the command names. Our DaVinci Resolve keyboard shortcuts guide explains how to inspect and change the mapping safely.
Edit page or Cut page?
You can use both pages in the same project. The Edit page gives you detailed track control and the full set of trimming relationships. The Cut page is built for faster source review, compact timeline navigation, and context-aware editing.
Blackmagic’s Cut page overview emphasizes Source Tape, dual timelines, Smart Insert, append operations, and fast trimming. Those tools do not make Blade or Trim obsolete. They reduce how often you have to place the playhead and target a track precisely before making an edit.
I prefer the Cut page for finding and assembling material, then the Edit page when the relationships between tracks and edit points need closer control. A beginner does not have to choose a permanent side. The broader DaVinci Resolve beginner tutorial shows how the pages fit into one workflow.
Why the wrong clip moves, a gap appears, or the trim stops
A gap appeared after cutting
Blade did not create the empty time. Check whether you deleted a segment with a normal Delete command, dragged a piece away, or disabled snapping before moving it. Use Ripple Delete when later material should close the space, or close the gap deliberately after checking every track.
The wrong clip or track changes
Inspect track targeting, Auto Track Selector controls, linked selection, and sync locks. A trim operation can affect more than the visible video edge when linked audio, stacked tracks, or protected sync relationships are involved.
The trim reaches a hard stop
You have probably reached the available source media. Roll needs frames on both sides of the edit. Slip needs unused frames outside the current source range. Slide needs handles in the neighboring clips. No trim mode can create frames that do not exist.
The shortcut does something else
Keyboard presets and custom mappings can replace the usual A, T, and B assignments. Search for Selection Mode, Trim Edit Mode, and Blade Edit Mode in Keyboard Customization instead of assuming the key is fixed.
You cannot find the timeline tools
Make sure you are on the Edit or Cut page. The Color and Fusion pages have different purposes and controls. Blackmagic provides current project files and training books on its official DaVinci Resolve training page if you want structured practice with the editing pages.
A practical choice for common edits
- Remove a pause and close the time: Ripple Trim the edge, or use Ripple Delete if you already isolated the section.
- Separate one section for an effect: Blade at the start and end of that section.
- Make a reaction start sooner without changing scene length: Roll the cut.
- Keep B-roll in the same gap but show a better moment: Slip the B-roll.
- Move a cutaway earlier while preserving its duration: Slide the cutaway.
- Move a clip and intentionally leave empty time: use Selection Mode and drag it; that is a placement decision rather than a trim.
When two operations could reach the same final frame, choose the one that preserves the relationships you already trust. That usually means fewer temporary cuts, fewer cleanup steps, and less chance of losing sync.
Final answer: should you use Blade or Trim?
Use Blade to create structure. Use Trim to refine structure. Blade makes a new edit point without changing timing by itself. Ripple Trim changes timing and moves later material. Roll moves an existing cut while preserving duration. Slip changes the source moment inside a fixed clip. Slide moves a fixed clip while its neighbors absorb the change.
If you keep only one question in mind, use this one: Do I need a new piece, or do I need a better boundary? A new piece calls for Blade. A better boundary calls for Trim.
