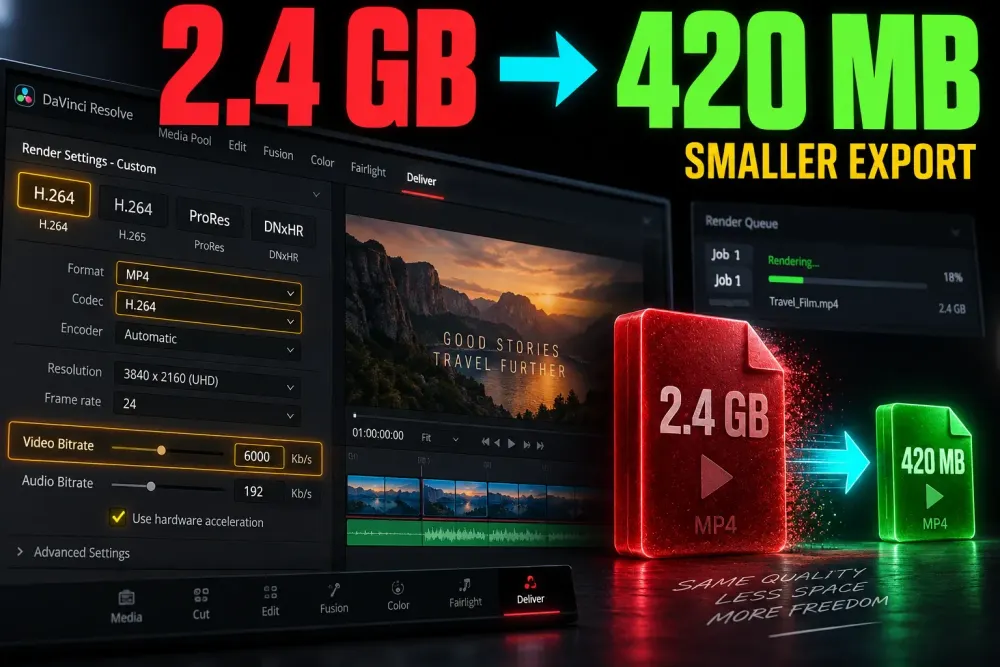
To reduce an export file size in DaVinci Resolve, control the average total bitrate for the selected duration. On the Deliver page, choose a compressed codec such as H.264 or H.265, find the Quality control, and use Restrict to X Kb/s when that field is available. Include audio bitrate in the calculation, leave room below any hard upload limit, then check the size and picture quality of the completed file.
The useful relationship is simple:
Estimated file size = (average video bitrate + total audio bitrate) × duration ÷ 8
That estimate predicts the media payload. It is not a byte-exact promise because variable bitrate, encoder behavior, container data, captions and extra streams can change the result. If a portal rejects anything above 500 MB, do not aim at 500.00 MB.
| Control | What it changes | Use it when |
|---|---|---|
| Video bitrate | The direct size budget for the picture | You must meet an MB or GB limit |
| Codec | How efficiently that budget preserves detail | Compatibility permits H.265 instead of H.264 |
| Resolution and frame rate | How much picture information competes for the bitrate | The delivery does not require the current values |
| Audio bitrate and streams | Part of the total data rate | The file carries audio, alternate tracks or more channels |
Work Backward From the File-Size Limit
Start with the maximum file size, exact timeline duration and combined audio bitrate. Our video bitrate and file-size calculator can solve the target rate and keep decimal MB separate from binary MiB. The same calculation can be done manually.
For a 500 MB decimal limit over ten minutes:
- 500 MB × 8 = 4,000 megabits available.
- 4,000 megabits ÷ 600 seconds = about 6.667 Mbps total.
- Subtract 192 Kb/s audio, leaving about 6.475 Mbps for video before any margin.
I would not enter 6475 Kb/s and assume the upload will pass. A practical first target could be 6200 Kb/s for video plus 192 Kb/s audio. The mathematical payload is then about 479.4 MB over ten minutes, leaving some room for the container and rate variation. The appropriate margin depends on how strict the destination is and whether you can render again.
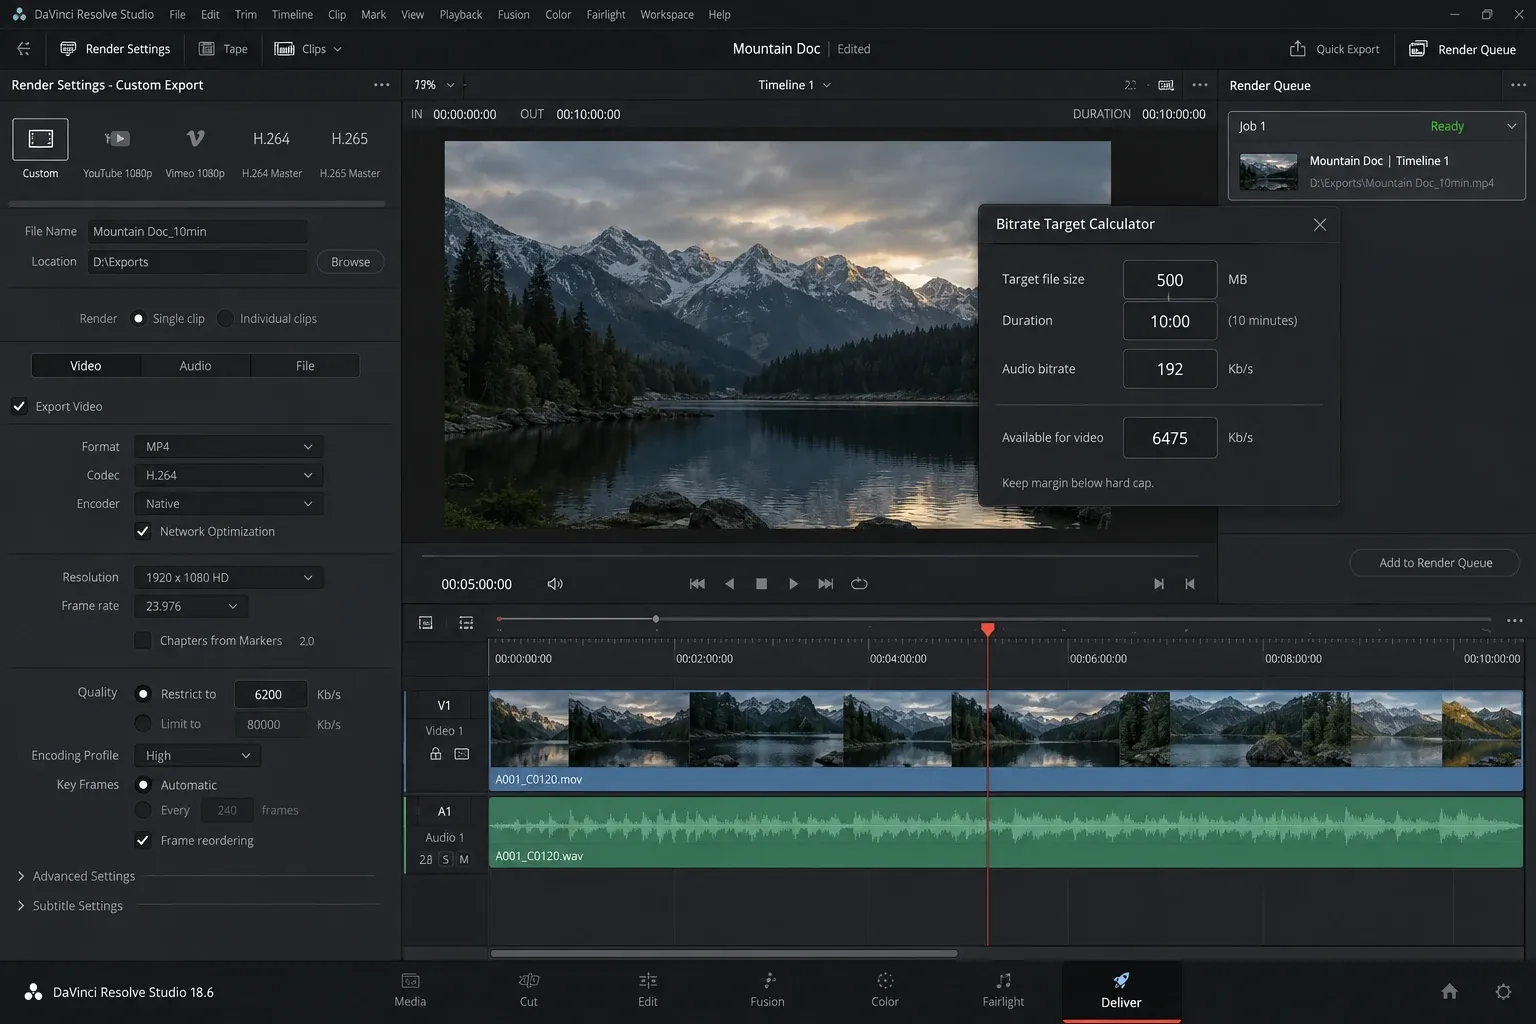
Check the unit before typing. Resolve commonly displays this field in Kb/s, while many delivery sheets use Mbps. A target of 6.2 Mbps is 6200 Kb/s. Confusing bits with bytes or Mbps with Kb/s can miss the target by a factor of eight or one thousand.
Set the Export on the Deliver Page
Open Deliver, select Custom Export, and confirm the correct timeline range. For one finished program, use Single Clip. The broader DaVinci Resolve export guide covers the Render Queue, In and Out marks, audio bus and completed-file checks.
For a compatibility-first review file, MP4 with H.264 is a common starting point where your operating system supports it. MP4 and MOV are containers; H.264 and H.265 are codecs. Changing MP4 to MOV does not create the major size reduction people often expect. The video rate and codec do far more work.
After choosing the format and codec, look under Quality. Blackmagic’s Resolve 21 reference material describes an Automatic choice and a maximum export data rate under Restrict to X Kb/s. The precise controls can change with format, codec, operating system, encoder and available hardware. If the field is absent, first confirm that you selected a bitrate-controlled H.264 or H.265 path rather than searching unrelated preferences.
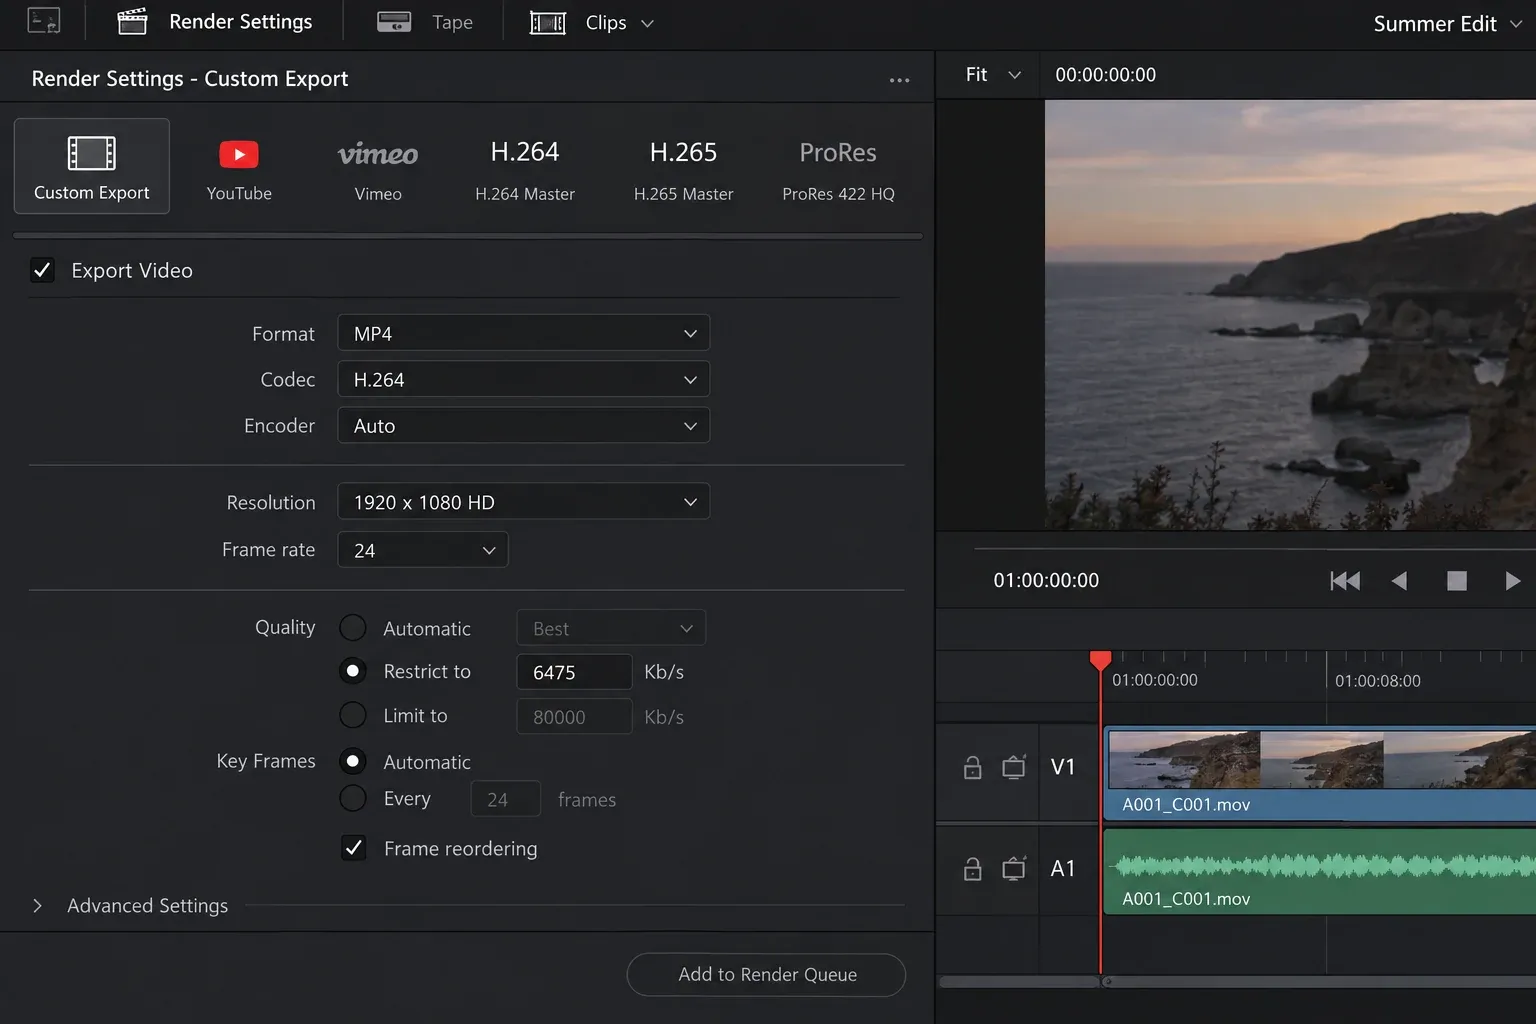
Automatic or quality-based modes can produce good files, but they are the wrong planning tool when the file must stay below a strict number. They ask the encoder to pursue a quality goal rather than obey a clearly defined size budget. A requested maximum still may not equal the final average rate, so the finished file remains the deciding evidence.
Choose H.264 or H.265 for the Real Destination
H.264 is the safer choice when the file must play on older devices, browser-based review systems or unknown hardware. H.265 can preserve comparable visual detail at a lower rate in many workflows, which makes it useful when the size limit is tight. It also has a higher compatibility and decoding cost. Do not choose it until the recipient, player or upload service accepts it.
Encoder options also differ by machine. Hardware and software encoders may not produce identical quality at the same number. Current Resolve builds expose platform-specific acceleration and encoder choices, and Blackmagic continues to add new H.265 paths on supported systems. Treat the bitrate as a budget, then judge the actual encoded picture instead of assuming every encoder spends that budget equally well.
ProRes and DNxHR are usually poor choices for a small review copy because they are intermediate or mastering codecs designed around easier editing and high image fidelity. Their large files are normal. Keep a high-quality master when the project requires one, then make a separate H.264 or H.265 delivery copy from the timeline or approved master.
Lower Bitrate First, Then Reconsider Resolution and Frame Rate
At a fixed total bitrate and duration, 1080p and 4K calculate to the same nominal file size. The difference is how much detail must fit inside that rate. A 4K image usually needs more bitrate than 1080p to avoid obvious compression, especially with grain, water, foliage, crowds, fast camera movement or detailed graphics.
If 4K is required, keep 4K and adjust the codec or bitrate within the destination’s limit. If the recipient only needs a 1080p review, exporting 1080p can make a restricted bitrate look cleaner because fewer pixels compete for the same data budget. Do not lower resolution simply to change the number in a file inspector; make sure the smaller raster still meets the delivery requirement.
Use the same reasoning for frame rate. A 60 fps export presents roughly twice as many frames as a 30 fps export over the same duration. Lowering frame rate can reduce the quality demand at a fixed bitrate, but arbitrary conversion can damage motion cadence. Preserve the source or required delivery rate unless the specification explicitly allows another value.
Platform reference rates are useful context, not universal limits. YouTube and Vimeo publish different recommendations because they transcode uploads for their own systems. A 500 MB client portal, an email attachment and an archive master solve different problems. Use the export-settings hub to start from the destination, then calculate the size constraint separately. For a platform-specific target, continue with the YouTube export guide.
Count Audio and Extra Streams
Audio is part of the total rate. One AAC stereo track at 192 Kb/s is small beside a high-bitrate 4K picture, but it matters when the video budget is only a few megabits per second. Multiple audio tracks, higher channel counts, PCM audio, embedded captions and other streams can make the final container larger than a video-only estimate.
If the file should be silent, switch audio off deliberately and verify the result. Do not set audio to zero in a calculator while leaving Export Audio enabled in Resolve. If the delivery requires several language tracks or channels, add their combined rates to the plan rather than counting only the first stereo pair.
Why the Finished File Can Miss the Estimate
The formula uses the actual average total data rate. Resolve’s Restrict value may act as a target or maximum for the chosen encoder, while the content itself changes how many bits are used from moment to moment. A static talking head, film grain and rapid water movement will not necessarily produce the same average at one requested setting.
The container adds metadata and indexing information. Long-GOP structure, keyframes, variable bitrate, audio packets, captions and rounding also affect the total. There is no honest overhead percentage that fits every export, so a calculator allowance is a planning choice rather than a measurement.
A short test section is still useful for judging whether faces, gradients, text and movement survive the selected codec and rate. It cannot guarantee the complete program’s size because the remaining scenes may be easier or harder to compress. Render the full range before deciding that the limit has been met.
Check Quality Where Compression Fails First
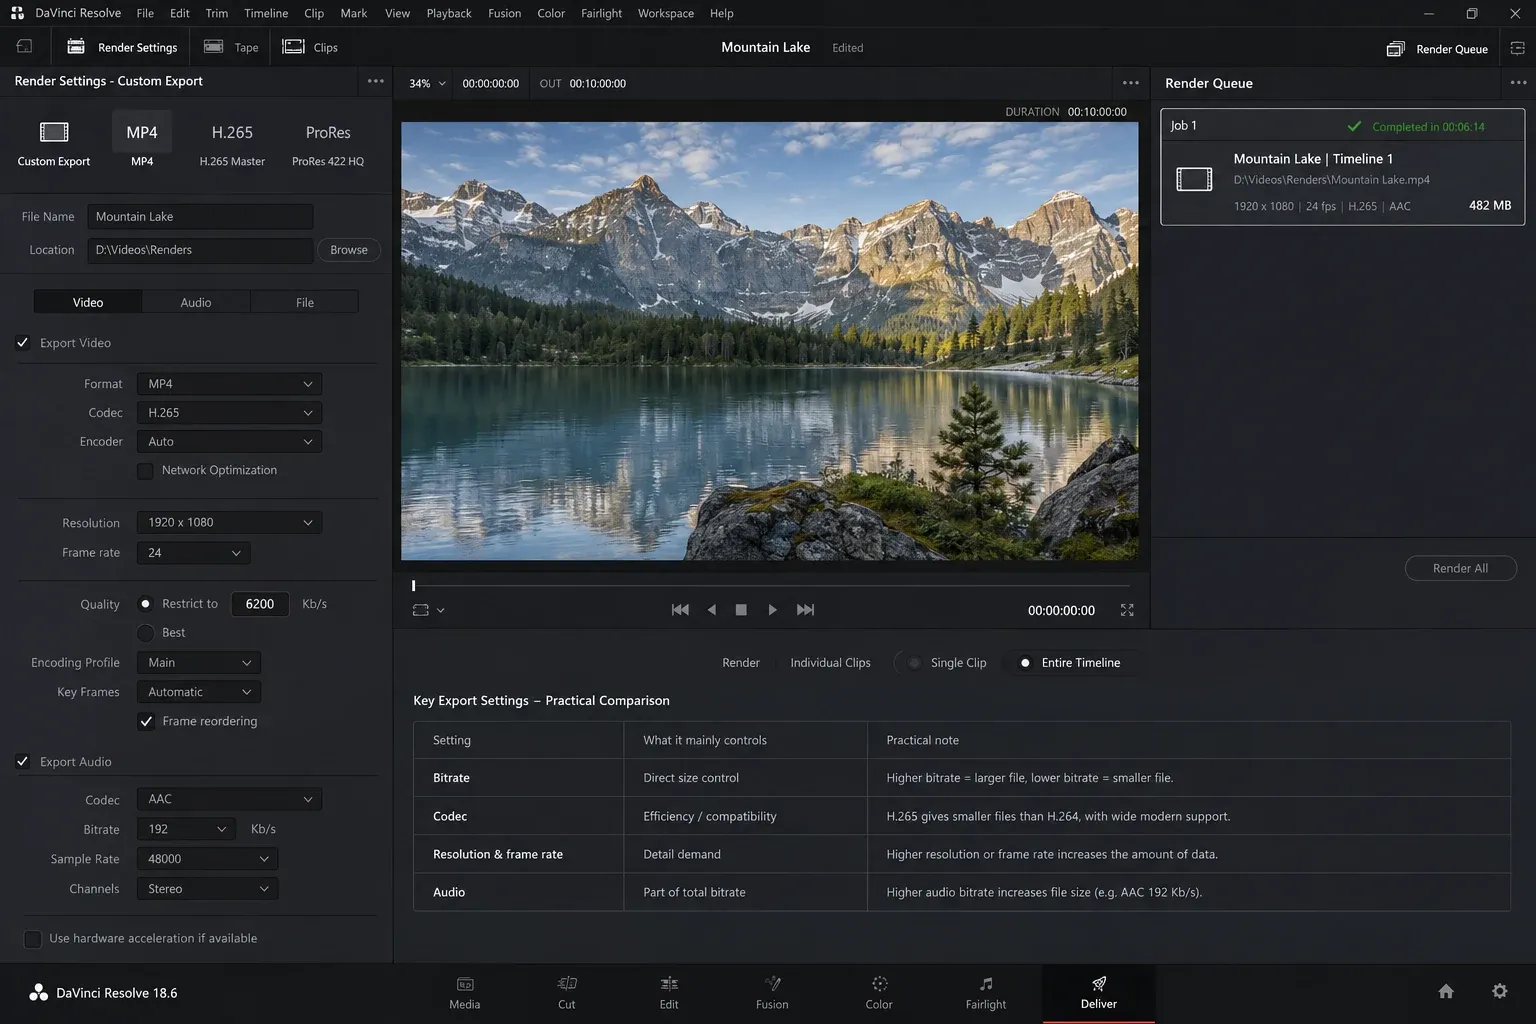
Open the completed file outside Resolve. Confirm duration, resolution, frame rate, audio channels and actual file size. Then inspect scenes that are difficult to compress:
- fine hair, grass, leaves, water and textured fabric;
- fast pans, handheld movement and busy crowds;
- dark gradients, smoke, fog and skies that can band;
- small text, screen recordings and thin graphic lines;
- added film grain or sensor noise.
If the file is safely below the cap but looks too damaged, raise the bitrate until the quality and limit meet. If there is no room, try a more efficient accepted codec or reduce resolution only when the destination allows it. Removing intentional grain before delivery is an editorial choice, not a universal compression fix.
Use the export preflight checker to record the container, codec, resolution, frame rate, bitrate mode and audio settings before rendering. It cannot read Resolve or predict the exact final size, but it helps catch a mismatch between the plan and the queued job.
Common Reasons an Export Is Still Too Large
- Quality stayed on Automatic: the encoder was not given your calculated rate limit.
- The queued job was not updated: changing Render Settings after adding a job does not necessarily change the saved job. Edit or replace the queue item and inspect its details.
- The wrong codec was used: a ProRes or DNxHR master is expected to be much larger than a compressed review file.
- Audio was omitted from the math: one or more audio streams consumed part of the budget.
- The wrong units were entered: MB, MiB, Mb, Kb/s and KB/s are not interchangeable.
- The target equaled the hard cap: there was no room for rate variation or container data.
- Only the extension changed: renaming .mov to .mp4 does not transcode the file or reduce its data rate.
Export Checklist for a Hard Size Limit
- Confirm the exact size unit, duration and required delivery format.
- Calculate a total bitrate from the cap and subtract every audio stream.
- Choose MP4 with H.264 for broad compatibility, or H.265 when the recipient supports it and the tighter rate needs better efficiency.
- Set the required resolution and frame rate rather than copying a generic preset.
- Use Quality > Restrict to X Kb/s when the selected encoder exposes it.
- Enter a working bitrate below the mathematical ceiling.
- Check the saved Render Queue job, not only the controls currently visible on the left.
- Render the complete selected range.
- Inspect actual file size, playback, audio and compression-prone scenes.
- Adjust one variable at a time and render again if the file misses either the size or quality requirement.
The reliable workflow is to calculate, restrict, render and verify. Bitrate gives you the direct size control; codec, resolution, frame rate and audio determine how well the export uses that limited budget.
