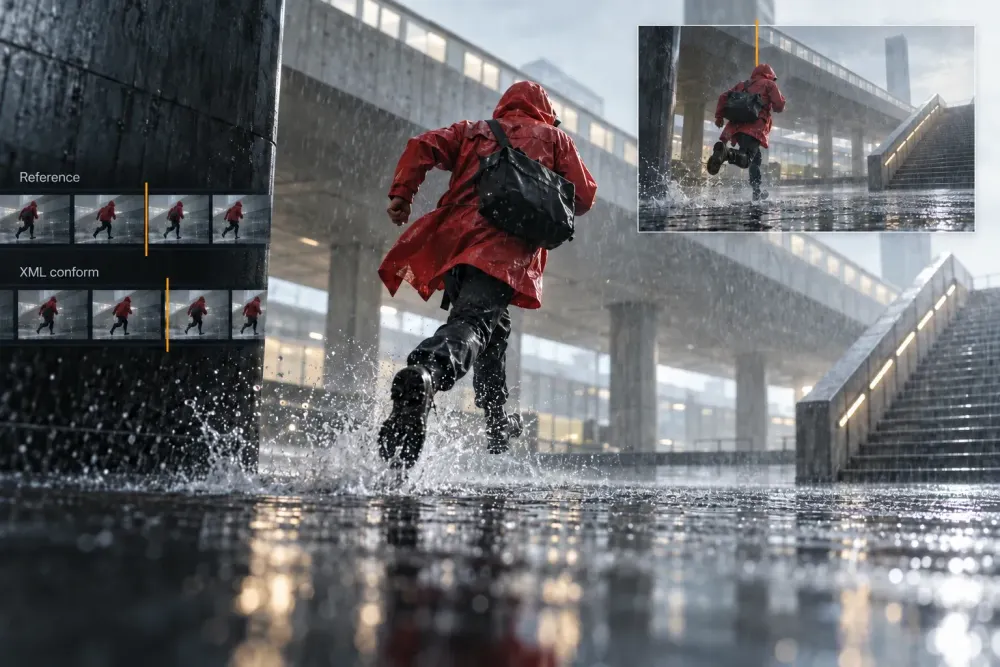
Quick answer: export a Final Cut Pro XML from a clean copy of the locked Premiere Pro sequence, transfer the original media, and include a reference movie. Import the media and XML into a correctly configured Resolve project, then compare the conform shot by shot before grading. XML carries timeline decisions. It does not carry the source files, a complete Premiere project, or every effect.
That distinction prevents most failed handoffs. The goal is not merely to make a timeline appear in Resolve. The goal is to prove that each event points to the right source clip, uses the right in and out frames, and matches the approved edit closely enough to begin color or finishing.
If you are still deciding which editor should own the project, start with the broader DaVinci Resolve versus Premiere Pro comparison. The workflow below assumes the edit already exists in Premiere and now needs to move.
What XML Transfers From Premiere to Resolve
Premiere Pro and DaVinci Resolve do not share a native project format. XML is an interchange file that describes part of a sequence: clip placement, source references, tracks, edits and some basic transitions or transforms.
It does not contain the camera originals. A useful Premiere-to-Resolve workflow from Daniel Grindrod makes the point directly: the XML stores timeline data, while the media must be transferred and relinked separately.
Treat these as likely to need inspection, rebuilding or rendering:
- nested sequences;
- multicam structures;
- Dynamic Link compositions;
- Essential Graphics and complex titles;
- adjustment-layer effects;
- third-party plugins;
- masks and effect-specific keyframes;
- Warp Stabilizer and other analysis-based effects;
- complex speed ramps, reverse clips and freeze frames;
- audio effects, automation and nonstandard channel mapping.
Some simple dissolves, clip positions and scale values may survive. That is useful, but it is never permission to skip the conform pass. Translation depends on the exact edit, source media, application versions and how the effect was built.
Decide What the Handoff Must Achieve
There are three common outcomes.
Color in Resolve, Then Return to Premiere
Premiere remains the finishing application. Resolve receives a simplified sequence and original media for color. Resolve then renders graded clips, usually with enough handles for transitions, and supplies interchange data for the return.
This route keeps graphics, captions, editorial effects and the final audio mix in Premiere. It also creates a second conform when the graded media comes back, so file naming and source identity must remain controlled.
Finish the Project in Resolve
The XML transfer is one-way. After conform, Resolve owns color, final picture, audio finishing and delivery. Titles or effects that cannot translate must be rebuilt in Resolve or supplied as rendered assets.
This removes the return trip, but it does not remove preparation. A bad conform is still a bad starting point.
Move the Editing Workflow to Resolve
This is closer to migration than a color handoff. XML can move selected timelines, but bins, markers, custom metadata, graphics templates, effect setups and project-level organization will not become a complete Resolve project automatically.
Move the sequences that matter, rebuild project organization intentionally and keep the Premiere project as the authoritative archive until the migration is accepted.
Duplicate and Lock the Premiere Sequence
Never simplify the only copy of the approved edit. Duplicate the picture-locked sequence and give the copy a clear handoff name. An institutional UT Austin Premiere-to-Resolve workflow follows the same durable pattern: duplicate the final sequence, prepare that copy, then export both the XML and a reference movie.
Before editing the handoff copy:
- Save the Premiere project under a new version.
- Confirm the approved sequence start timecode and duration.
- Remove unused disabled experiments that are not part of the intended handoff.
- Label every shot or section that will be rendered instead of translated.
- Keep the original locked sequence untouched for comparison.
Picture lock does not mean nobody can ever change a cut. It means the transfer has one declared version. If the sequence changes after XML export, create a new handoff package rather than quietly replacing one file inside the old package.
Reconnect Full-Resolution Originals
Do not assume an attached proxy means Resolve will find the corresponding camera original. Premiere's current guidance for reconnecting full-resolution media to proxies keeps proxies associated with full-resolution media and supports reconnecting those originals. Use that relationship before export, then verify it.
Check representative clips from every camera, recording day and storage root:
- the full-resolution file is online;
- frame size and frame rate match the intended source;
- source timecode is present where expected;
- audio channels are the correct originals;
- the clip is not accidentally linked to a proxy, transcode or duplicate file with the same name.
A proxy-only conform can look correct at first and still block RAW controls, resolution-dependent reframing or final delivery. If originals cannot be transferred, define the replacement media as a formal intermediate workflow rather than letting Resolve choose whatever file happens to match.
Simplify Structures That Do Not Travel Cleanly
The safest handoff copy is not always a one-track timeline, but every layer should have a clear purpose.
Multicam
Flatten multicam edits when the receiving editor only needs the selected camera angles. Keep the original multicam sequence in Premiere. After flattening, spot-check cuts around angle changes and confirm that the flattened clips point to the intended camera files.
Nested Sequences
Open each nest and decide whether Resolve needs the editable structure or only its final picture. A nest containing ordinary cuts may be expanded. A nest used to hold stabilization, compositing or motion work is often safer as a rendered replacement.
Adobe's current Render and Replace documentation describes a reversible way to flatten clips, After Effects compositions and nested sequences into replacement media. Use it on the handoff copy when translation risk is higher than the value of keeping the structure editable.
Graphics, Titles and Captions
If Premiere will finish the project, disable graphics for the color handoff and preserve them in the locked master. Include them in the reference movie so the colorist understands the approved composition.
If Resolve will finish, supply editable text, fonts, logos and source graphics separately, or render the element with an alpha channel when that is the agreed delivery. Do not expect XML to recreate an Essential Graphics template.
Effects and Stabilization
Classify each effect:
- remove it because it is editorial-only;
- rebuild it in Resolve;
- render it into a high-quality replacement;
- leave it as a visual reference only.
Stabilization deserves an explicit decision. If it should be rebuilt in Resolve, preserve enough source range and use the Resolve stabilization workflow after conform. If the exact Premiere result is approved and must survive, render that shot and keep the unrendered source in the archive.
Retimes and Freeze Frames
Simple constant-speed changes may transfer, but every retime still needs comparison. Speed ramps, reverse motion, optical-flow work and freeze frames are common conform failures.
For a complex retime, supply both the original source and a high-quality reference or replacement render. The reference proves timing; the original preserves grading flexibility.
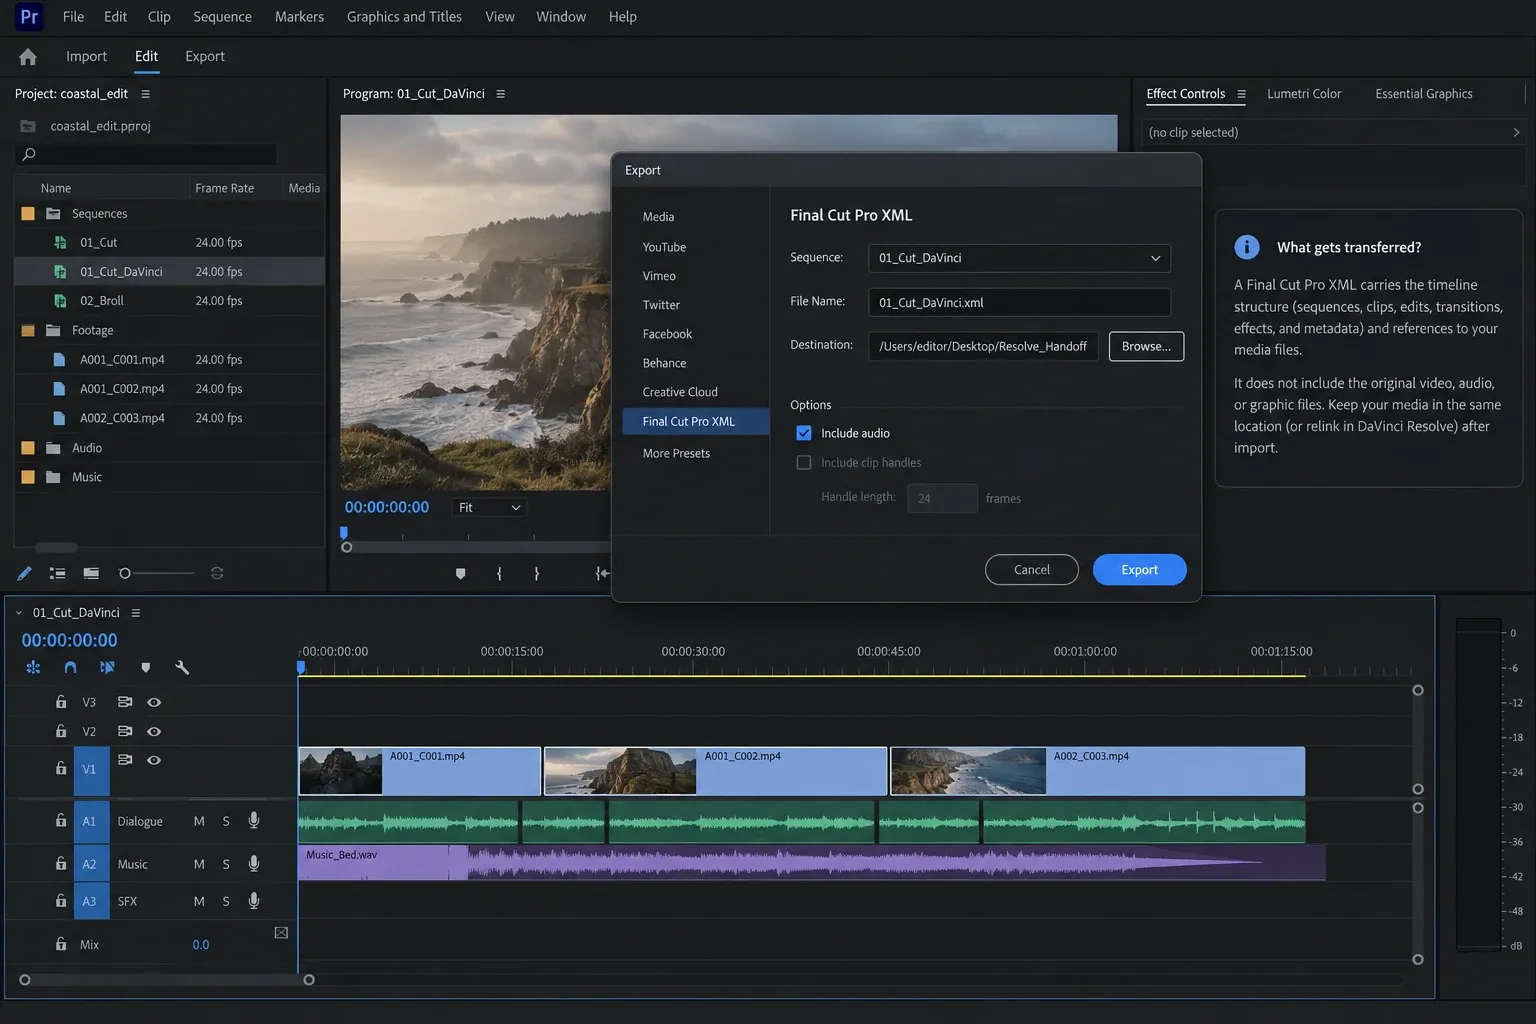
Export the XML and Read the Report
With the handoff sequence active in Premiere, export Final Cut Pro XML to a new package folder. Adobe's current XML export documentation explains that Premiere can produce a Translation Results report when sequence elements cannot be translated.
Read that report. It is a to-do list, not an export receipt to dismiss.
For every warning, identify the affected clip or timeline event and choose one of four actions:
- accept the translated result and verify it in Resolve;
- simplify the event in the handoff copy;
- render a replacement;
- document that it must be rebuilt after import.
Keep the XML filename tied to the sequence version. A name such as project_picture-lock_v12_resolve.xml is safer than final.xml because it identifies the actual editorial state.
Create a Reference Movie
Export a reference movie from the untouched locked sequence, not from the simplified handoff copy. It should share the same start timecode, frame rate, frame size and duration as the intended Resolve timeline.
When practical, include visible source or sequence timecode and a small version label. Keep the picture clear enough to inspect framing, cuts and transitions. Audio is useful for sync even if Resolve will not receive the final mix.
A practical Adobe Community accepted answer recommends sending XML or EDL together with a reference export, then checking cuts, sizing and speed changes. The reference movie is the visual contract. Without it, an imported timeline can look plausible while using the wrong frames.
Transfer the Media Deliberately
The package needs source media in addition to the XML and reference movie. Choose one of these routes:
- send the original camera and audio files with their folder structure intact;
- collect only the media needed by the locked sequence using a controlled media-management pass;
- transcode to agreed finishing media when originals cannot be used directly.
Preserve folder hierarchy when duplicate file names exist. Camera cards often restart names such as C0001, and a flattened folder can place several unrelated files under the same base name.
Record the intended media root, codec, frame rate policy and any rendered replacements in a short manifest. The receiving editor should not have to infer which of three similarly named folders is authoritative.
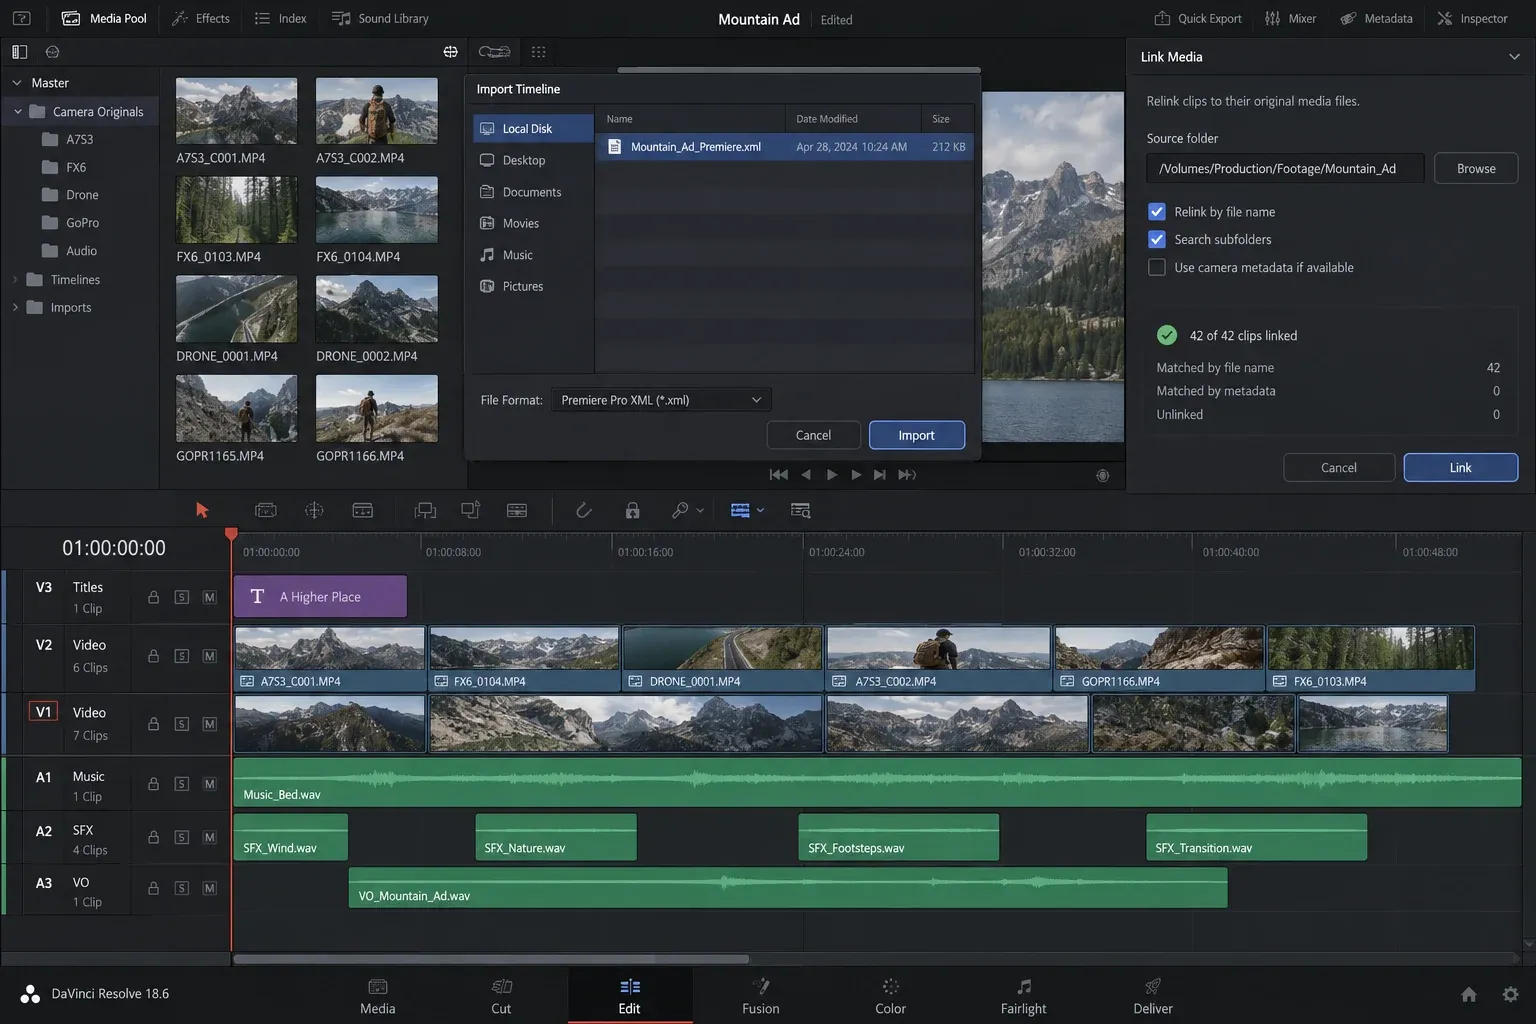
Configure Resolve Before Import
Create a fresh Resolve project for the conform. Set the intended timeline frame rate and resolution before building the timeline. Some timeline timing decisions become expensive to change after editing begins.
If the project mixes frame rates, decide whether clips should play at their recorded rate, conform to the timeline or represent intentional slow motion. Use the separate DaVinci Resolve frame-rate guide when the transfer includes mixed or ambiguous footage.
Variable-frame-rate phone or screen recordings deserve extra caution. Their nominal metadata may not describe every frame interval consistently. Convert them to a suitable constant-frame-rate intermediate before interchange when sync or source timing is unstable.
Import the original media into organized bins, then import the XML as a timeline. If Resolve asks whether to import source clips automatically, choose the route that keeps media identity under your control. For projects with duplicate names, importing and organizing the known media first often makes the relink easier to audit.
Relink Without Choosing the Wrong File
An offline clip is obvious. A wrong successful relink is worse because it can survive until export.
When the XML points to missing paths, relink to the declared media root. If several files share a name, check more than the filename:
- source timecode;
- reel or tape metadata;
- camera and card folder;
- duration;
- resolution and frame rate;
- audio channel count;
- source in and out frames.
If clips remain unavailable, use the Media Offline troubleshooting guide to separate a path problem from unsupported media, permissions, storage mounts or bad metadata. Do not start grading around unexplained offline events.
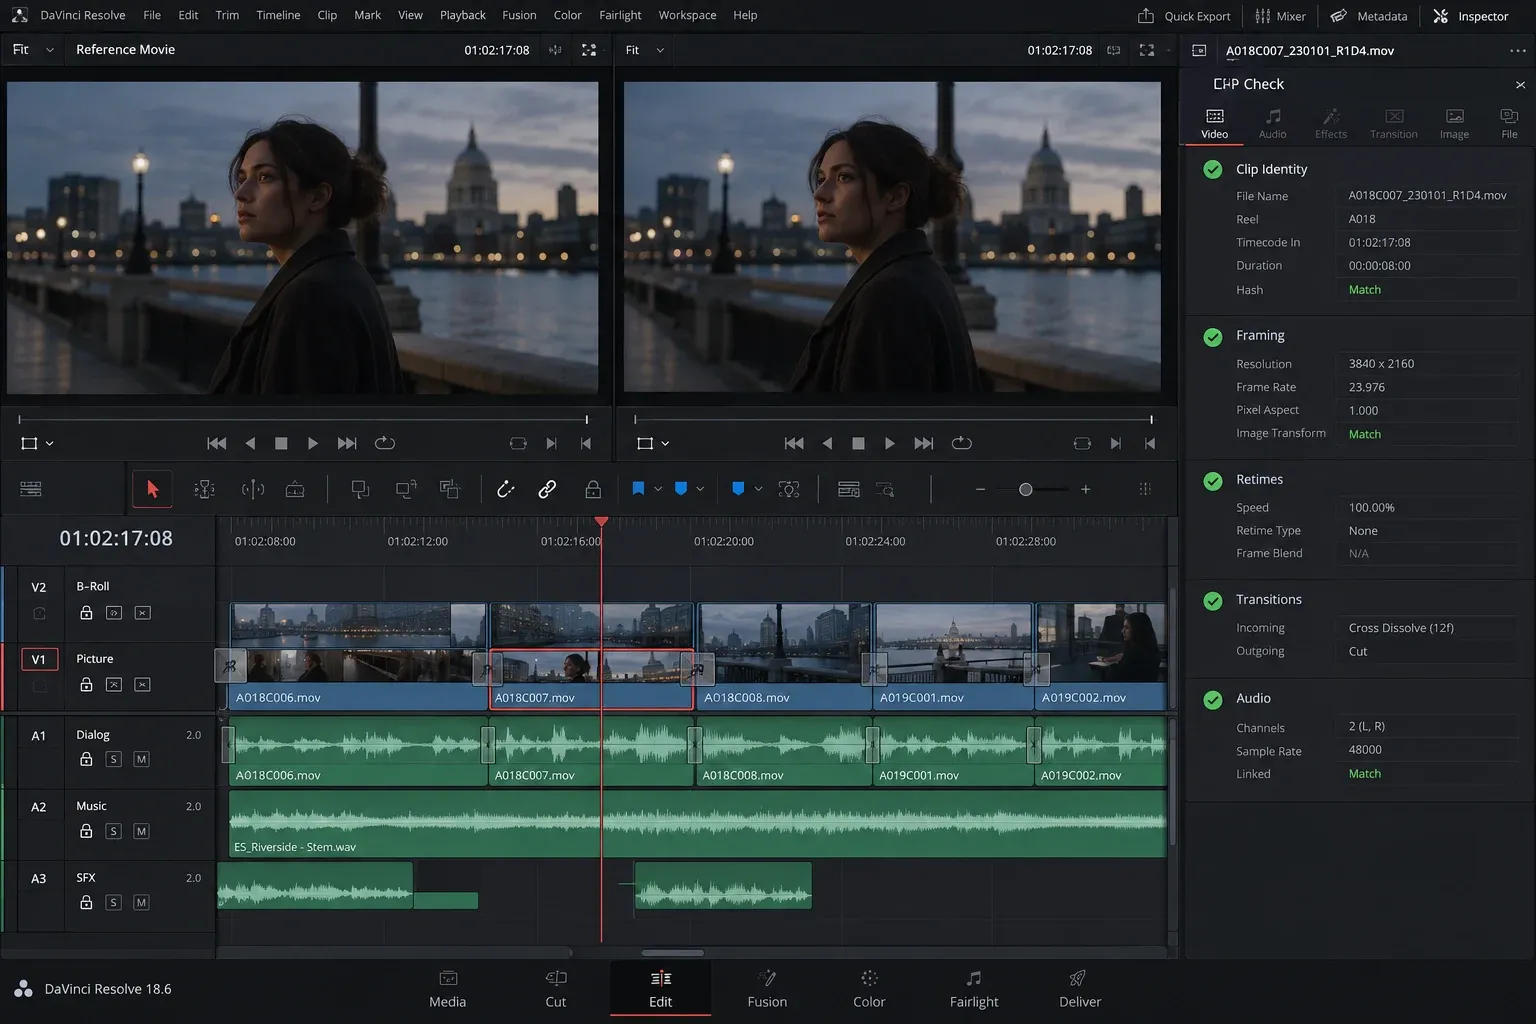
Run a Shot-by-Shot Conform Pass
Place the reference movie on a video track above the imported sequence. Align it to the same timeline start. Toggle the reference track, reduce its opacity or use a difference-style comparison where appropriate. The method matters less than comparing every event.
Work through the sequence in passes.
Pass 1: Clip Identity and Cuts
Confirm that every shot uses the correct source file and that each cut lands on the same frame as the reference. Check the first and last frame of every clip, not just the middle.
Pay special attention to repeated takes, duplicate file names, flash frames, one-frame edits and shots from multicam sequences.
Pass 2: Framing and Transforms
Compare scale, position, rotation, crop and opacity. Premiere's scaling choices can produce a different result after interchange, especially when source resolution differs from sequence resolution.
Do not correct framing by eye before identifying the cause. A global scaling mismatch calls for a consistent policy; one exceptional reframe calls for a clip-level fix.
Pass 3: Retimes and Transitions
Check every constant-speed change, ramp, reverse clip, freeze frame and optical-flow shot. Compare transition start, end and duration. Confirm that source handles exist on both sides of a dissolve.
If the imported retime cannot match reliably, rebuild it from the original source or use the approved replacement render. Document the choice.
Pass 4: Effects and Graphics
Confirm that every event marked for rendering or rebuilding has been handled. Do not grade a placeholder as though it were the final composite.
If graphics are meant to return in Premiere, use the reference movie to understand their placement while keeping them out of the color pipeline.
Pass 5: Audio and Sync
Listen at the beginning, middle and end of long clips. Check separately recorded audio, multicam sync, muted regions, channel mapping and any edit that begins or ends away from a video cut.
The reference mix is not a replacement for the final audio session. It is the quickest way to catch a shifted edit or incorrect source assignment.
Fix Common XML Transfer Failures
The Timeline Imports but Most Clips Are Offline
The XML arrived without the source media, or Resolve cannot resolve the old Premiere paths. Confirm the package contains the intended originals, then relink from the highest useful common folder. Avoid searching an entire workstation when a controlled media root exists.
Resolve Links to the Wrong Shot
Look for duplicate base names, stripped card folders, overlapping timecode or missing reel metadata. Unlink the incorrect media and relink from the specific camera/card folder. Verify the source in and out frames against the reference before continuing.
Framing Is Different
Compare source resolution, timeline resolution and the scaling method used in Premiere. Decide whether the project needs a consistent input-scaling rule or individual transform corrections. Check any shot that was resized inside a nest.
Retime Events Drift or Use the Wrong Frames
Rebuild the retime from the original source or replace it with the approved render. Confirm timeline and source frame rates before adjusting speed. A timing fix made under the wrong frame-rate assumption can create a second error.
Nests, Graphics or Effects Disappear
Return to the handoff copy and either simplify, expand, render or document the element. Do not patch a missing composite with the reference movie unless the reference was intentionally created as the finishing master.
The Edit Is Too Complex for a Clean XML Conform
Use a high-quality flattened master as a controlled fallback. Resolve can split a rendered master into shots with Scene Cut Detection, while the reference and original project preserve editorial intent. This route gives up source handles and much of the original clip flexibility, so choose it only when rebuilding the interchange costs more than those losses.
Finish in Resolve or Return to Premiere
If Resolve owns final delivery, save a clean conform version before grading. That version becomes the baseline for later troubleshooting. Build color, effects, audio and delivery work on a duplicate or later project version.
If the project returns to Premiere, agree on the delivery before rendering:
- individual graded clips or a single flattened master;
- file naming and destination folders;
- source resolution and frame rate;
- codec, bit depth and alpha requirements;
- audio included or excluded;
- handle length for transitions;
- XML or other interchange data for the return;
- treatment of speed effects and rendered replacements.
After importing the graded media back into Premiere, run another conform against the locked master. Check cuts, transitions, retimes, graphics and final audio before export.
Premiere-to-Resolve Handoff Checklist
Before color or finishing begins, confirm:
- the handoff sequence is a duplicate of the approved locked edit;
- the original Premiere sequence remains untouched;
- full-resolution media is online and proxies are not being mistaken for masters;
- multicam, nests, graphics, effects, stabilization and retimes have explicit treatment;
- Premiere's Translation Results report has been reviewed;
- the package contains XML, reference movie and the intended media;
- timeline frame rate, resolution, start timecode and duration are documented;
- Resolve links every event to the correct source clip;
- cuts, framing, transitions, retimes and audio match the reference;
- every discrepancy is resolved or documented before grading;
- the finishing destination—Resolve or Premiere—is agreed in advance.
A successful XML import is only the start. The handoff is ready when the imported timeline survives a shot-by-shot comparison with the locked reference and every exception has an owner.
