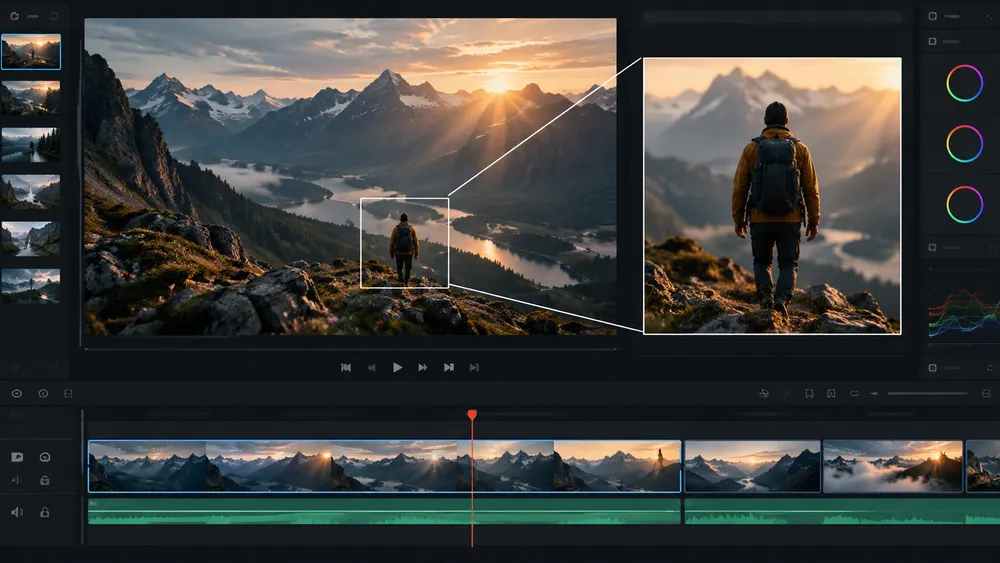
To zoom in on a clip in DaVinci Resolve, first decide what you mean by “zoom.” A viewer or timeline zoom only changes how large the interface appears. A clip zoom changes the pixels inside the frame. For a controlled push-in, pan across a still image or move toward a subject, use Dynamic Zoom or keyframes on the clip itself.
The quickest choice is simple: use Dynamic Zoom when you want a clean start-to-end move with two framing boxes. Use Inspector keyframes when you need several beats, a pause, a custom path or separate control over Position and Zoom. The steps below follow the current Resolve controls documented by Blackmagic Design’s Resolve reference manual.
Clip zoom, Viewer zoom and timeline zoom are different
Before changing anything, check which control you are touching. The zoom menu in the Viewer changes the size of the preview inside the interface. The timeline zoom changes how much of the edit is visible horizontally. Neither one changes the rendered clip.
A clip zoom lives in the selected clip’s Inspector under Transform, or in the Dynamic Zoom controls in the Viewer. That distinction explains many “my zoom does nothing” problems: the editor changes the Viewer magnification while expecting the image itself to move.
If the project uses a high-resolution photo or source clip in a smaller timeline, a moderate push-in can preserve more detail than scaling a low-resolution source. Excessive enlargement still has to invent or stretch pixels. The result depends on the source, the timeline and where the resize occurs; a zoom control is not a detail-recovery tool.
Use Dynamic Zoom for a straightforward push-in
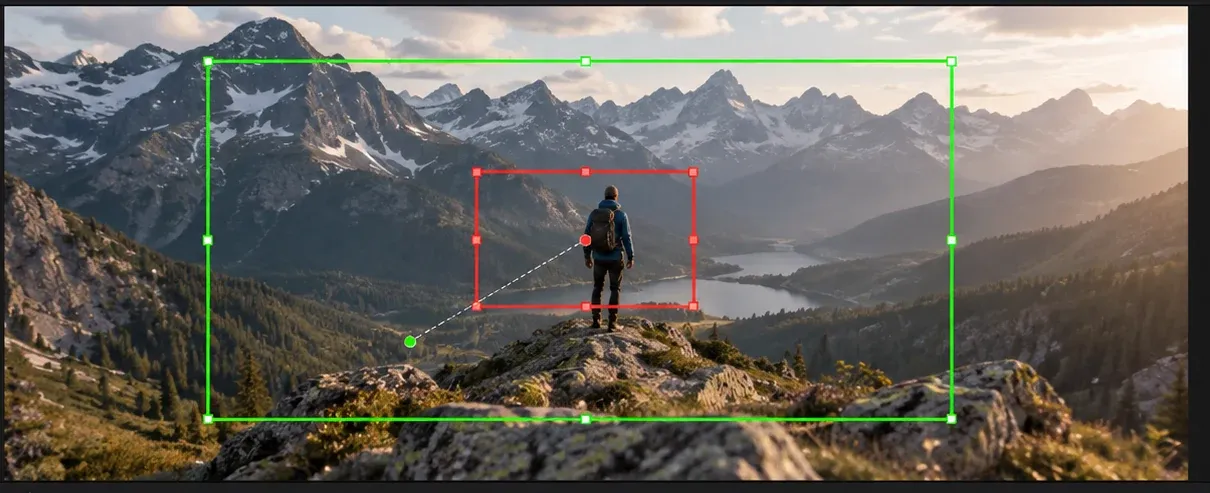
Dynamic Zoom creates a start frame and an end frame for the selected clip. Resolve shows the starting area with a green box and the ending area with a red box. You can move either box, resize it from the corners and read the connecting path in the Viewer.
- Select the clip on the Edit or Cut page.
- Open the Inspector and turn on Dynamic Zoom, or use the Dynamic Zoom button in the Viewer toolbar.
- Place the green box around the opening composition.
- Place the red box around the closing composition. Make it smaller for a push-in or larger for a pull-out.
- Drag the box to keep the subject in the part of the frame where you want it.
- Play the clip and choose an ease option if the motion accelerates too sharply.
Resolve provides Linear, Ease In, Ease Out and Ease In and Out for the motion. The Swap control reverses the start and end transforms. If the move travels away from the subject, check Swap before rebuilding both boxes.
Keep a person or object inside the move
Dynamic Zoom does not understand your story. It follows the two positions you set. Put the subject inside the closing box with enough breathing room for the intended crop, then play the move at normal speed. A centered box can be technically smooth while still losing the face or the object the viewer is meant to follow.
For a still photograph, use the first frame to establish the wide context and the second frame to land on the detail. For video, watch the subject’s movement before choosing the end box. If the subject walks across the shot, a straight diagonal path may need keyframes or a different edit rather than a single Dynamic Zoom move.
Use Inspector keyframes for a custom zoom
Keyframes give you explicit values at specific times. Select the clip, park the playhead where the animation should begin and click the diamond beside Zoom and, when needed, Position. Move the playhead, change those values and Resolve creates the next keyframe.
- Open Inspector → Video → Transform.
- Set the opening Zoom and Position values.
- Click the diamond beside each parameter you want to animate.
- Move the playhead to the point where the move should finish or pause.
- Change Zoom and Position. Resolve stores the new values at that time.
- Open the Keyframe Tray or the Curve Editor when you need to move keyframes, add a pause or change the interpolation.
Use the Keyframes and Curve Editor guide when the animation needs more than one simple move. The useful rule is to animate only the parameters that need to change. If Position stays fixed, do not add unnecessary position keyframes that make later adjustments harder to read.
Make the move feel deliberate
A zoom that starts and stops abruptly usually needs timing or easing, not more scale. With Dynamic Zoom, try the Ease controls. With keyframes, shape the curve so the move accelerates and settles instead of changing speed at a visible corner.
Short clips need smaller changes. A large scale increase over a few frames reads as a punch-in or impact rather than a camera move. A longer clip can carry a slower move, but compare the start, middle and end positions at the intended playback speed. Stillness in the middle is a choice: add a pair of matching values if the shot should hold before moving again.
For a complex route, split the move into clear beats: establish the frame, hold the subject, travel toward the detail and settle. That structure is easier to adjust than one large set of unrelated diamonds.
Zooming photos without losing the composition
Photos make the difference between crop and zoom obvious. Set the timeline aspect ratio first, then choose the opening frame that uses the available image area. If the photo has a different shape from the timeline, inspect the edges before animating. Our aspect ratio guide covers the project-level decision.
For a slow pan across a landscape, animate Position X or Y while keeping Zoom stable. For a reveal, combine a modest Zoom change with Position so the subject lands where the composition needs it. Avoid pushing a face or important text against the edge just because it fits the final frame at one point in the move.
Why the zoom looks soft or jumps
- The interface gets larger but the clip does not: you changed Viewer or timeline magnification. Select the clip and use Inspector Transform or Dynamic Zoom.
- The move goes in the wrong direction: check the green start box, the red end box and Swap.
- The subject leaves the frame: reposition the end box or add Position keyframes that follow the subject.
- The image becomes mushy: the source may not contain enough pixels for the enlargement, or the resize is happening after a lower-resolution operation. Reduce the scale or revisit the clip structure.
- The motion feels robotic: change the easing or reshape the curve instead of adding more keyframes.
- The animation stops at a cut: check where the clip ends and whether a second clip or adjustment layer is carrying the transform.
If a transform is difficult to inspect, open the Resolve Inspector guide and confirm that the selected clip owns the parameter you are changing. An adjustment clip can produce a different result from animating the original source clip, especially when the timeline contains several layers.
Which method should you choose?
| Task | Best starting point | Why |
|---|---|---|
| Simple push-in or pull-out | Dynamic Zoom | Two visual boxes make the start and end compositions easy to set. |
| Pan across a photo | Inspector keyframes | Position can move while Zoom stays fixed. |
| Follow a moving subject | Inspector keyframes | You can correct the path at several moments. |
| Zoom, pause, then zoom again | Inspector keyframes | Separate values and timing are visible in the tray or curve. |
| Preview magnification only | Viewer zoom | It changes the interface view and leaves the render alone. |
Start with Dynamic Zoom when two frames describe the move. Move to keyframes when the shot has a story between those frames. After setting the animation, review the whole clip at normal speed, check the subject at the beginning and end and confirm that the source has enough resolution for the crop you chose.
