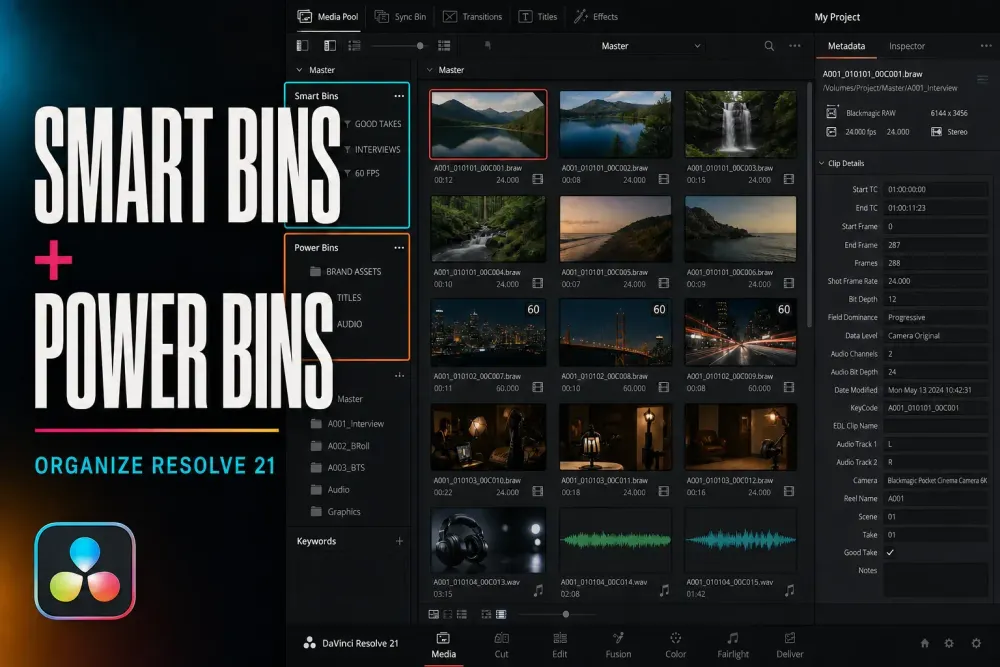
Quick answer: reach for a Smart Bin when you want Resolve to keep collecting clips that match metadata rules inside one project. Reach for a Power Bin when you want to file reusable assets by hand and open them from any project in the current Project Library. A regular Bin is still the right home for material that belongs to one project and that you want to file yourself.
The three types solve different problems, and mixing them up is where most of the confusion starts. A Smart Bin is a saved query, not a folder of copied clips. A Power Bin is a shared area of the Media Pool. It isn't a search rule, and it isn't a backup of your files on disk.
Blackmagic's Media page overview draws the same line. Everything here covers the desktop version of Resolve 21, and I rechecked it on October 1, 2026 against the Resolve 21.1 Reference Manual. The iPad interface works differently.
New to the Media Pool? Get the importing steps from the Resolve beginner guide first. Otherwise, pick the bin type below and build one small, useful example before you reorganize the whole project.
Smart Bins vs Power Bins vs regular Bins
| Bin type | How clips get there | Scope | Best use |
|---|---|---|---|
| Regular Bin | You drag or import items manually | Current project | Camera days, interviews, audio, timelines and project-specific graphics |
| Smart Bin | Resolve evaluates metadata rules dynamically | Current project's matching media; the rule can be shown in all projects | Good takes, one codec, one frame rate, interview keywords, offline clips or timelines |
| Power Bin | You add reusable items manually | Projects in the current Project Library, with user limits in multi-user installations | Logos, slates, music beds, sound effects, title generators and recurring graphics |
A quick way to decide: If membership should change when metadata changes, go Smart. If the same asset should be there when you open a different project, go Power. If neither is true, a regular Bin is usually the clearer choice.
Show Smart Bins and Power Bins in Resolve 21
- Open the Media Pool on the Media or Edit page.
- Open the Media Pool options menu, the three-dot control in the panel.
- Enable Show Smart Bins and Show Power Bins.
- Expand the new sections in the Bin list.
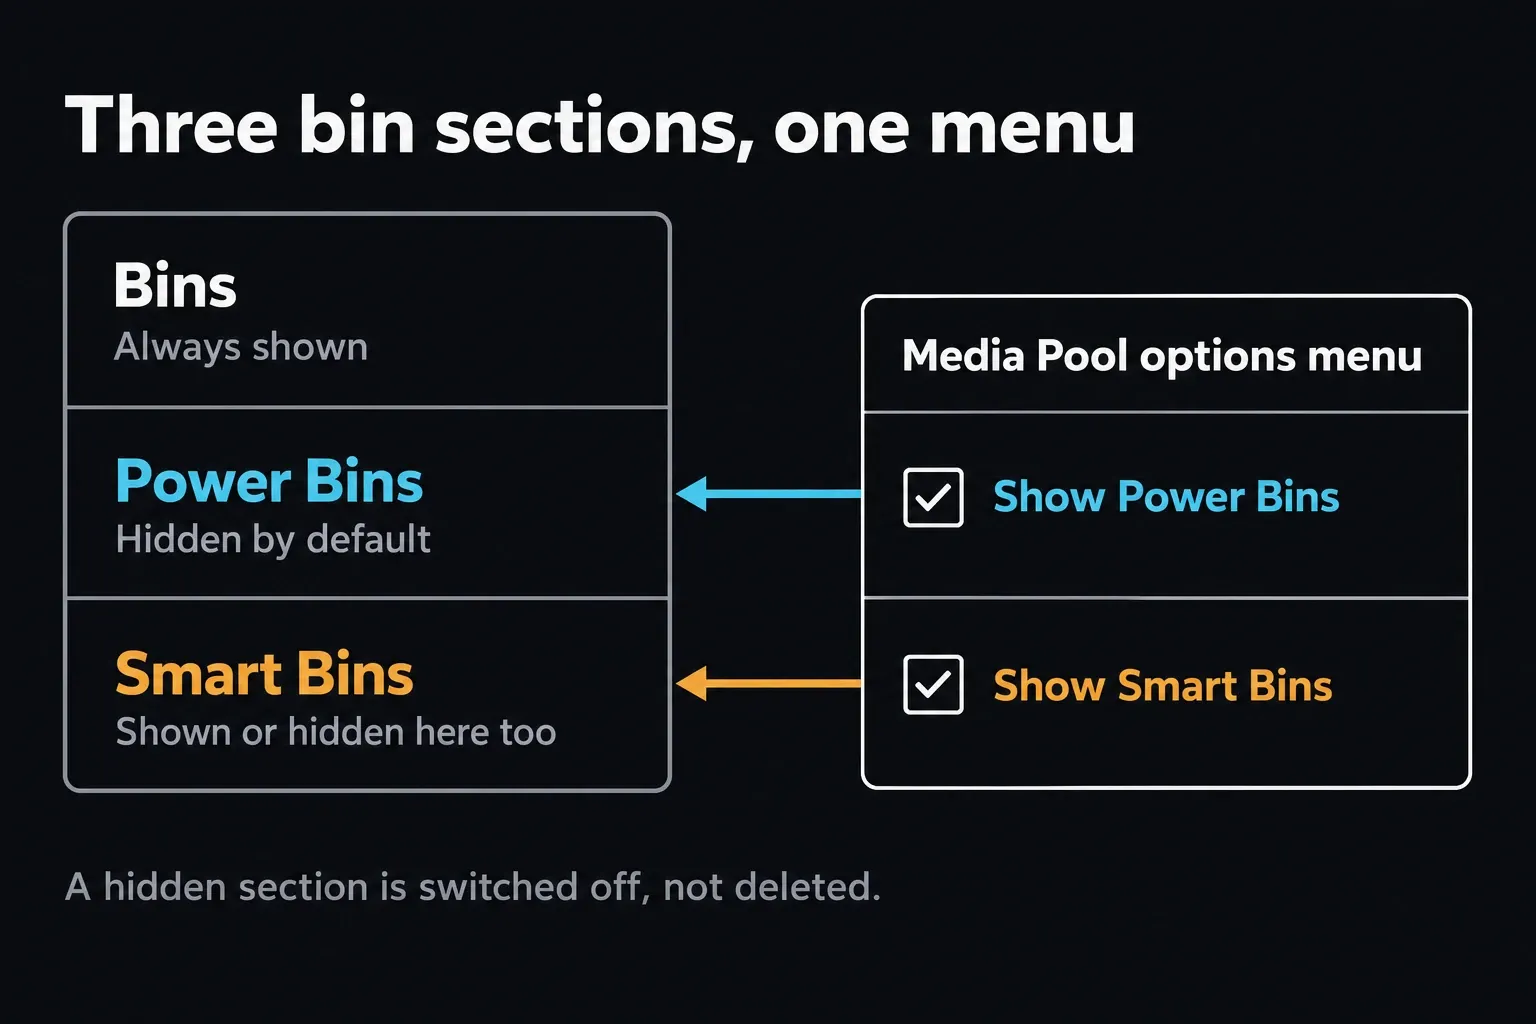
The Resolve 21 Reference Manual puts both switches in the Media Pool options menu. Older tutorials send you to the top-level View menu, so if your version has the panel menu, stop hunting there.
On the Cut page, bins open from the Bin dropdown at the upper left of the Media Pool. The Show Smart Bins and Show Power Bins switches live in the full Media Pool on the Media and Edit pages, so start there when you want regular Bins, Power Bins and Smart Bins side by side.
Create a Smart Bin that proves the rules work
The best first test uses a property you can confirm on one clip. Frame rate, codec and resolution come straight from the media. Good Take is different: it is a checkbox, not an automatic quality judgment. Select a clip in the Media Pool, open Inspector > File and tick Good Take before you build the example below.
- Show the Smart Bins section.
- Right-click its background and choose Add Smart Bin.
- Name the bin after its result, such as Good Takes.
- Choose Media Pool Properties > Good Take > is true.
- Click Create Smart Bin.
Check that the clip you marked shows up. For a second test, pick Resolution and enter the width and height of a source clip you know, such as 1920 × 1080. Use the clip's own frame size, not the timeline resolution.
Match All, Match Any and nested criteria
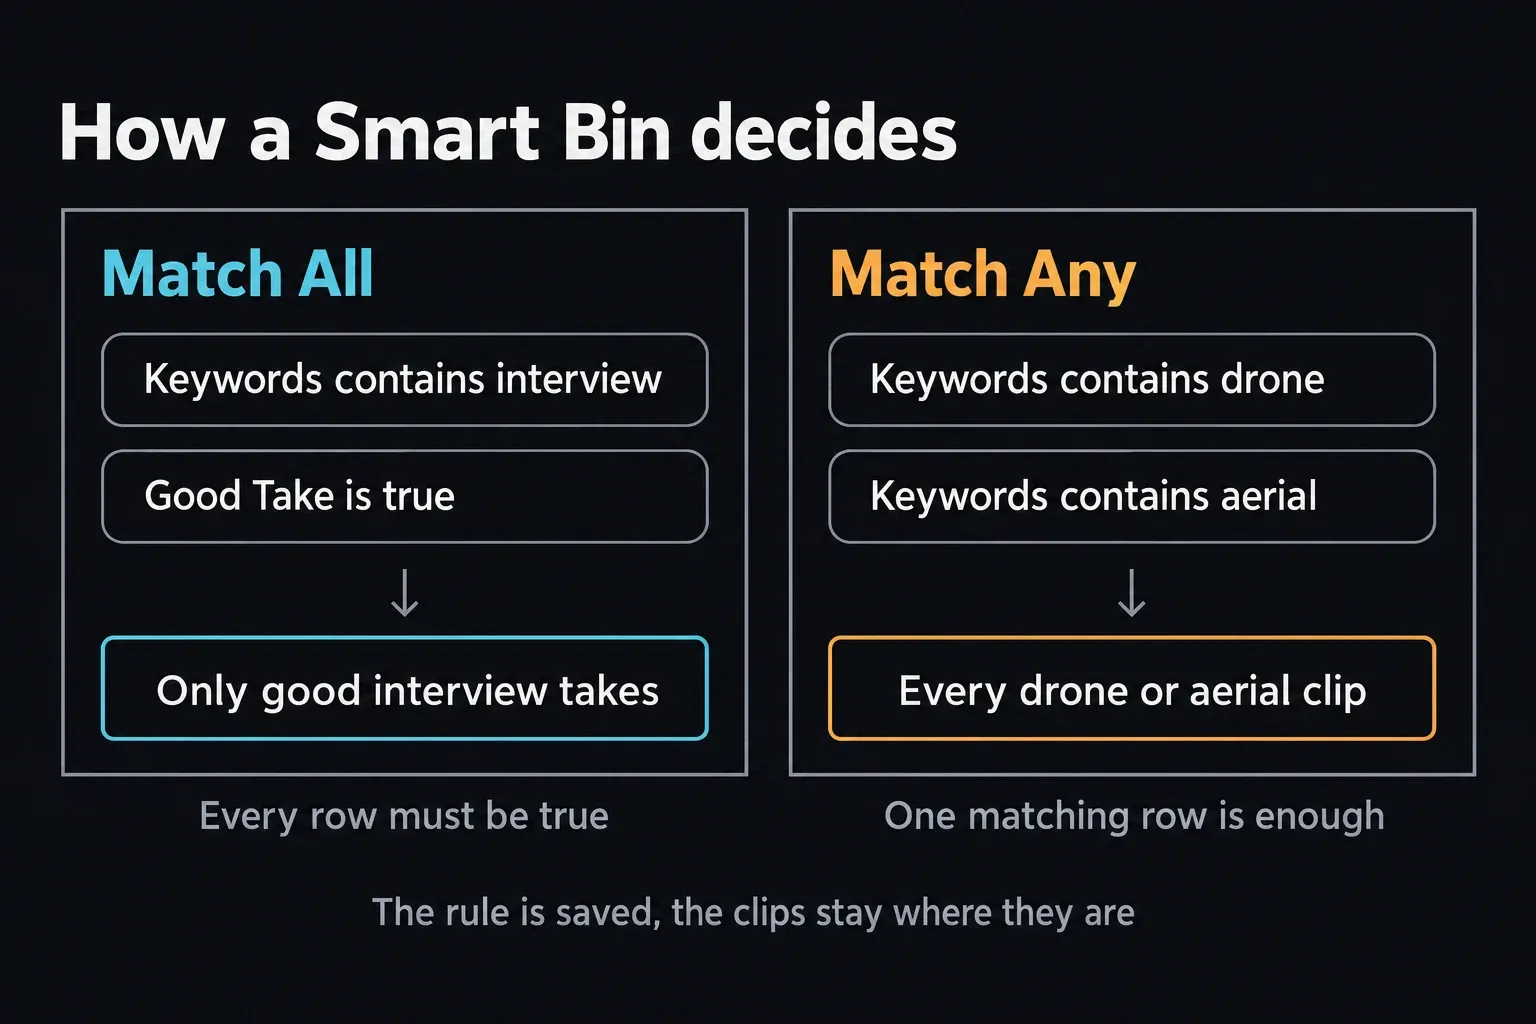
Match All narrows the result, because every enabled row has to be true. Keywords contains interview plus Good Take is true, for example, returns only the interviews you marked as good. Match Any widens it, because one matching row is enough, so it can gather Keywords contains drone or Keywords contains aerial in one place.
The plus button adds a criterion. Option-click it on macOS, or Alt-click on Windows, to add a nested match group. That's for rules that need all of one group and any of another; otherwise, two simple Smart Bins are much easier to troubleshoot. When you need a variation of a complex rule, right-click the Smart Bin and choose Duplicate.
Automatic Smart Categories are different
Resolve can also create automatic categories for Timelines, Photo Albums, Keywords, Collections, People, Shot, Scene and Offline Clips. You'll find the switches under Preferences > User > Editing > Automatic Smart Bins.
Keyword, Shot and Scene categories come with a handy shortcut: drag selected clips onto one of those automatic Smart Bins and Resolve assigns that bin's property to all of them at once. The current manual limits this to those three categories. Drop clips onto any other Smart Bin and nothing happens. They aren't filed, and their metadata doesn't change.
Need scene and take labels first? The Slate ID and Slate Finder guide covers that separate workflow. Check the labels before you trust a Smart Bin to pick your footage.
What “Show in all projects” actually shares
The checkbox makes the Smart Bin definition persistent. Resolve puts that rule in a User Smart Bins folder inside every project in the current Project Library. It doesn't merge Media Pools or make one project's clips visible in another.
So a persistent Good Takes rule can show up in two projects and return different clips in each. If none of the second project's clips has Good Take ticked, an empty result there is correct.
Build a Power Bin for reusable assets
- Show the Power Bins section from the Media Pool options menu.
- Right-click inside the section and choose Add Bin.
- Create a small structure such as Brand, Audio and Titles.
- Import or drag in only the assets you really reuse.
- Open another project in the same Project Library and check that the Power Bin is there.
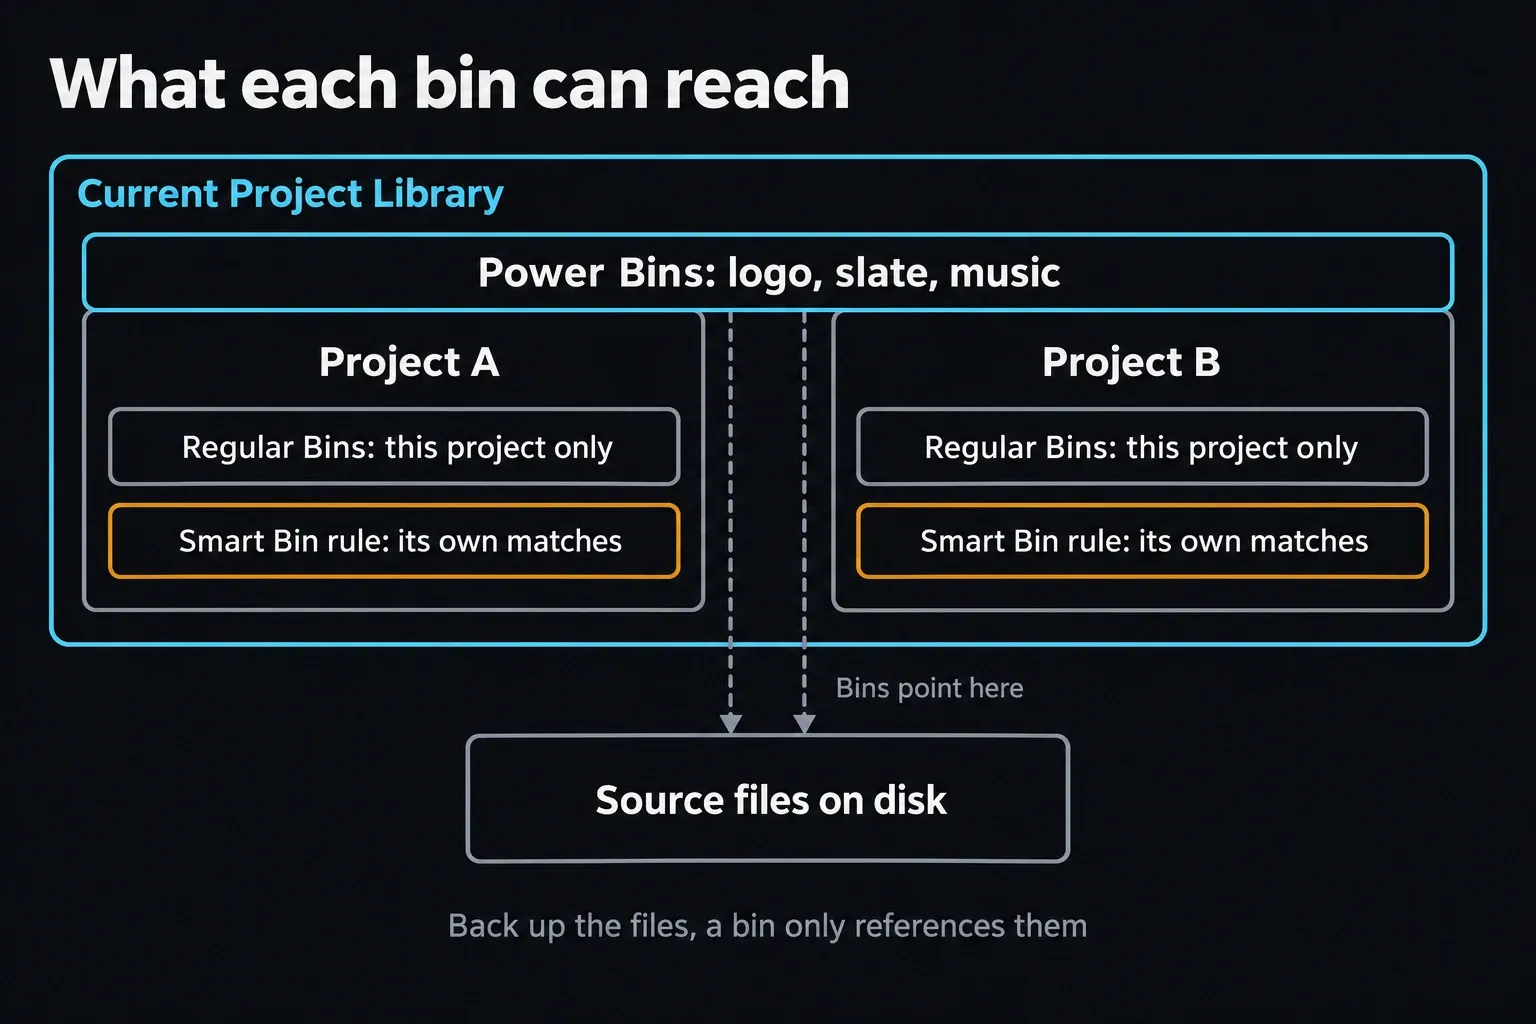
Keep it lean: an approved logo, a slate, a title generator, useful sound effects and music licensed for your work. Camera cards and one-off project footage belong in regular Bins, so the shared collection stays quick to scan.
The boundary is the current Project Library, not your whole account, so a different library can hold different Power Bins. In a multi-user installation, the manual narrows it further to that user's projects.
Power Bins do not replace source storage
A Power Bin points to your source files. It doesn't copy them into some protected media archive, so keep those files in a stable folder that gets backed up. If a disk goes missing or a file moves, follow the Media Offline relink steps.
Need to carry an editable sequence between projects? Export the timeline, or export a regular bin as a .drb file, which carries timelines, metadata and In/Out points along with the clips. Don't treat Power Bins as a catch-all for timelines, compound clips or multicam edits. If something won't drop into a Power Bin, check what kind of item it is first. A Fusion Composition and a Fusion Clip aren't the same thing, and a .drfx file is a template package, not an ordinary Media Pool clip.
Export and back up Power Bins without false security
To export a Power Bin, select it, right-click and choose Export Bin, then save the .drb file. In the destination Project Library, show Power Bins, pick where it should go, right-click and choose Import Bin, then select the file. Resolve adds the word "import" to an imported bin's name so it doesn't clash with an existing one. Check the bin and relink any offline assets before you rely on it.
The .drb file holds the bin information, not the logos, music or video it links to. Back those source files up separately. For whole-project backups and transfers, use the Resolve save and archive guide. The project location guide explains why the library, the project export and your media folders are three separate things.
Fix Smart Bins or Power Bins that look missing or broken
The section is not visible
On the Media or Edit page, make sure the Media Pool is open, then turn the missing section back on in its three-dot menu. Expand the Bin list and the section itself, and widen the Media Pool if space is tight. A hidden sidebar doesn't mean your saved bins are gone.
A Smart Bin is empty
Double-click the Smart Bin to edit it. Switch criteria off one at a time and look at the same field on a clip you know should match. With Match All, one false row is enough to exclude that clip. Keywords, Scene and Description may simply be blank, and Good Take may be unticked. Click OK to save the fixed rule.
The rule appears in another project but the clips do not
That's expected with Show in all projects turned on. The rule travels; the clips don't. Add or tag media in the second project and let the rule work on that project's Media Pool.
Power Bins disappeared after switching projects
Check that the new project sits in the same Project Library and user context, then turn Show Power Bins back on in the Media Pool options. If you moved to another library or computer, import the exported .drb and fix the source-media paths where needed.
A Power Bin item is offline
Find the actual source file before you reorganize any bins. Relink or replace that file reference. Rebuilding the Power Bin won't bring back deleted media.
Smart Bins and Power Bins FAQ
What is the difference between Smart Bins and Power Bins?
Smart Bins show clips that match metadata rules in the current project, and they update on their own. Power Bins hold reusable assets you add by hand, available across projects in the current Project Library.
Why can’t I see Smart Bins or Power Bins?
On the Media or Edit page, open the Media Pool options menu and enable Show Smart Bins or Show Power Bins. Expand the Bin list and the section, and widen the Media Pool if space is tight.
Do Smart Bins and Power Bins work in DaVinci Resolve Free?
Yes. Basic Smart Bins and Power Bins are desktop organization features in both Free and Studio. That doesn't make every AI tool you might use to create metadata free, though, and this guide doesn't cover the iPad interface.
Does “Show in all projects” share Smart Bin clips?
No. It shares the Smart Bin rule through the User Smart Bins folder, and each project shows only its own media that matches.
Can I back up Power Bins?
Yes. You can export and import Power Bins as .drb files. Back up the referenced source media separately, because the bin file isn't a copy of the logos, audio, titles or clips on disk.
Why is my Smart Bin empty?
Look for empty metadata, an unticked Good Take box, a wrong value or a Match All rule that shuts the clip out. Test one property you know, then add criteria back one at a time.
Does deleting a Smart Bin delete my clips?
No. The current Resolve manual says that deleting a Smart Bin doesn't delete any gathered media associated with it. Only the saved filter goes.
Regular Bins for the current project, Smart Bins for searches you repeat, Power Bins for assets you reuse: that split keeps a Media Pool easy to live with. For the next job, whether that's syncing, proxies or smoother playback, pick a guide in the Resolve workflow hub.
