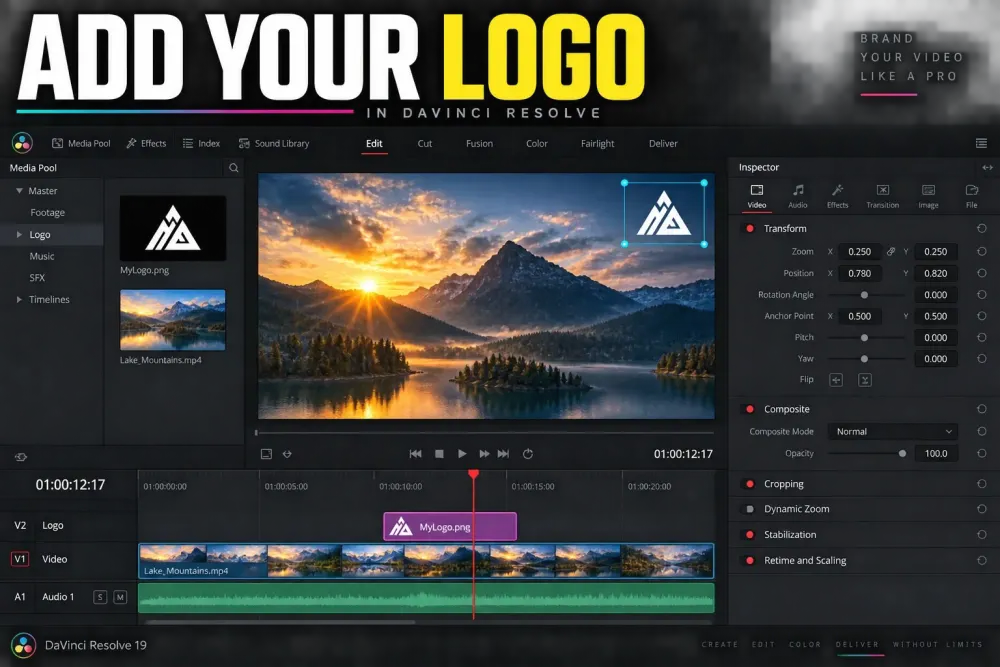
Quick answer: import a transparent PNG, place your finished video on V1, and put the logo on V2 or another track above every clip it should cover. Select the logo, open Inspector > Video, then use Transform > Zoom and Position to place it. Open Composite and reduce Opacity if you want a watermark rather than a solid logo. Finally, extend the still-image clip so it lasts for the required part of the timeline. The placement workflow fits the broader DaVinci Resolve tutorial hub.
This is the clean Edit-page method for a static channel mark, sponsor logo, event bug, or review watermark. It works because upper video tracks are composited over lower tracks. You do not need a Fusion composition for an ordinary corner logo.
The official DaVinci Resolve Edit page describes the stacked timeline, Inspector animation, onscreen controls, and compositing tools used here. This guide stays with a logo that becomes part of the exported picture. If you need the final file itself to retain transparency, use the separate transparent video export guide.
Prepare the logo before importing it
Use a PNG with a real transparent background when the mark is not rectangular. A checkerboard shown in a graphics editor usually represents transparency; a checkerboard baked into the image is just visible pixels and will appear in Resolve.
- Keep enough resolution: the source should be larger than the size it will occupy in the video. Scaling a small raster logo up makes edges and small lettering soft.
- Leave modest transparent padding: a few empty pixels protect glows and shadows, but a huge transparent canvas makes positioning feel imprecise.
- Use a finished color version: if the logo must be white, black, or brand-colored, export that version deliberately instead of expecting Composite Mode to recolor it.
- Name variants clearly: filenames such as
logo-white.pngandlogo-dark.pngprevent guesswork when the background changes.
A fully opaque JPG can still work as a rectangular badge, but it cannot preserve irregular transparent edges. For the common corner-logo job, transparent PNG is the predictable starting point.
Add the logo above the video
- Open the Edit page and import the logo into the Media Pool.
- Place the edited footage on V1.
- Drag the logo to V2, directly above the section where it should appear.
- Trim or extend the logo clip to set its duration.
- Select the logo clip and open Inspector > Video.
- Under Transform, keep Zoom X and Y linked, reduce Zoom, then set Position X and Position Y.
- Under Composite, leave the mode at Normal for a regular transparent logo. Lower Opacity only when a subtler watermark is required.
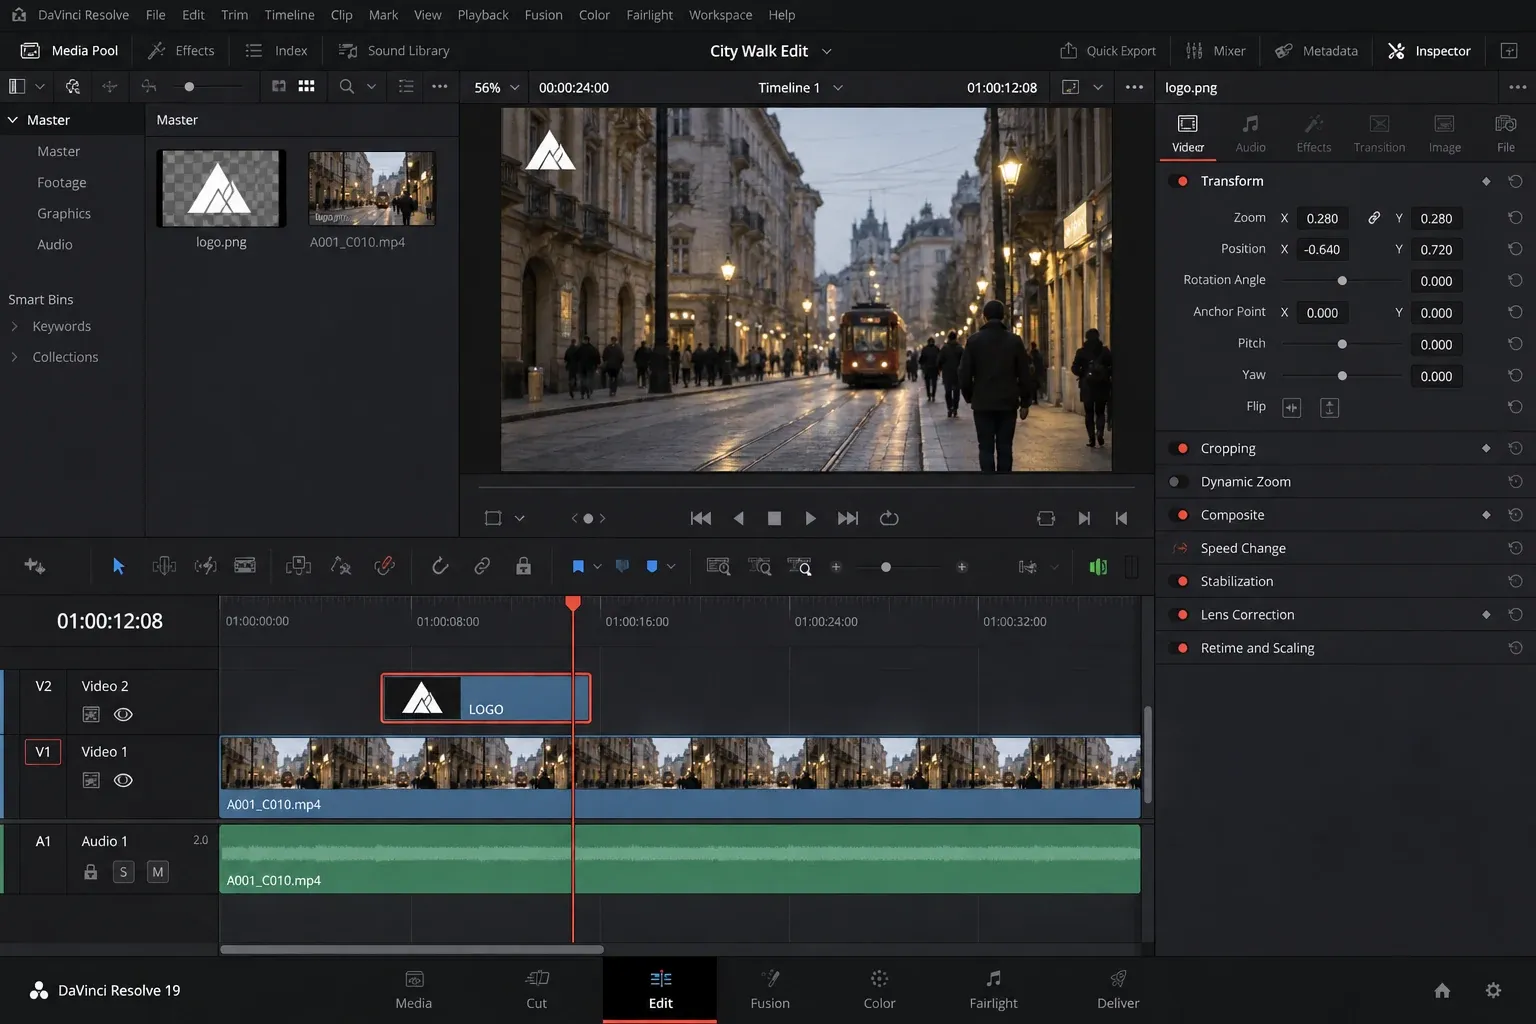
If V2 covers the entire Viewer with a black or white rectangle, stop before resizing. That symptom points to the graphic or its alpha interpretation, not to the Transform controls. The troubleshooting section below separates those causes.
Use the Resolve Inspector guide when a panel is missing or the selected item exposes different tabs. The logo clip, not the footage beneath it, must be selected before you change Transform or Composite values.
Choose logo size, position, and opacity
A logo identifies the source. A watermark also tries to discourage clean reuse. The controls are the same, but the visual decision is different.
| Use | Starting approach | What to check |
|---|---|---|
| Channel or company logo | Small, fully opaque, inside a corner | Readable at phone size without competing with captions |
| Sponsor mark | Follow the agreed size and display duration | Contract timing, safe area, and background contrast |
| Review watermark | Larger and lower opacity | Still visible over bright and dark shots |
| Event or broadcast bug | Consistent corner position | Titles, score graphics, subtitles, and platform crops |
Do not judge opacity on one convenient frame. A light logo can disappear over clouds or a white wall, while a dark version can vanish in a night shot. Scrub several scenes before choosing a value. If the background changes dramatically, a restrained shadow, outline, or small backing shape is more reliable than reducing opacity until the mark becomes unreadable.
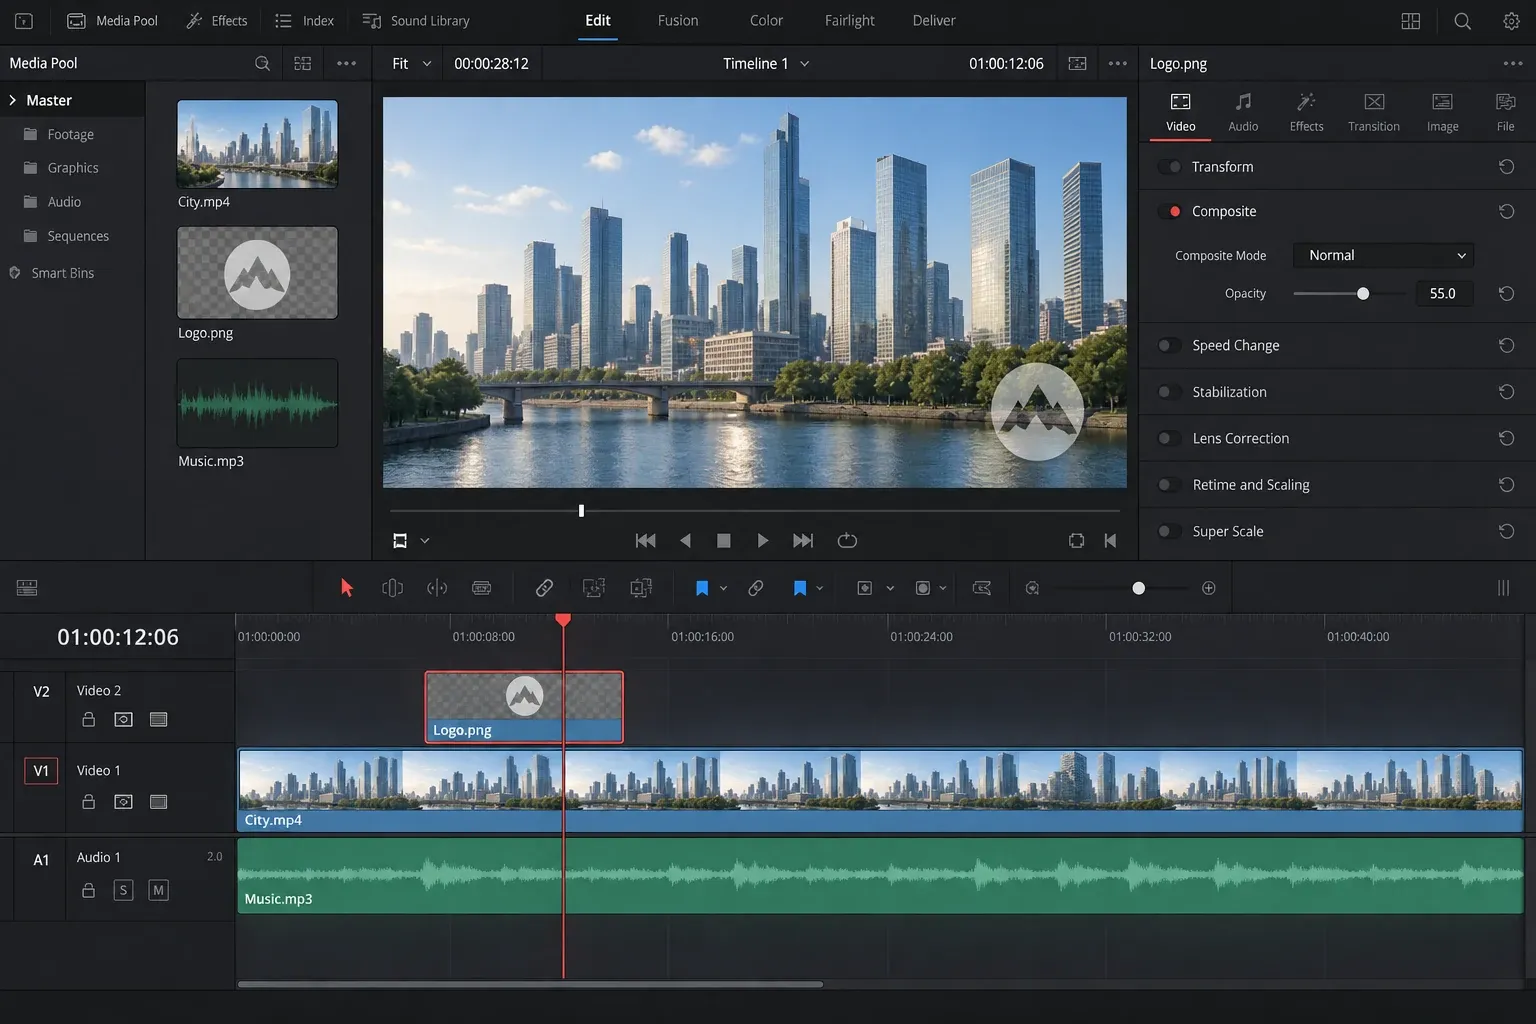
Keep critical marks away from the extreme edge. Delivery platforms may crop previews, viewers may use overscan-like display modes, and a later square or vertical version may need a different corner. If several aspect ratios are planned, duplicate the timeline and reposition the logo for each format rather than forcing one placement into every output.
Make the logo last for the right duration
Drag the logo clip's left and right edges to cover the intended range. For a logo across the whole program, place it above the first visible frame and extend it to the last frame of the edit. Check the actual tail after changing the timeline; a logo that ended at the old duration will not automatically grow when more footage is added.
Keep the graphic on a dedicated upper track. Rename that track Logo or Watermark, then lock it after placement if the edit below is still changing. Locking prevents accidental trims and moves, but it also blocks deliberate adjustments, so unlock the track before revising duration or animation.
A logo does not need to sit above tracks that are already above it. If a title, subtitle, or full-screen graphic must remain unobstructed, place that element on a higher track or trim the logo around it. Track order is part of the design: the highest visible clip wins wherever its pixels are opaque.
Fade or slide the logo on and off
For a simple fade, animate Composite > Opacity:
- Move the playhead to the first frame of the fade and set Opacity to 0.
- Click the diamond beside Opacity.
- Move forward several frames and set Opacity to the final value, such as 100 for a solid logo or a lower value for a watermark.
- Create two matching keyframes near the end if the logo should fade out.
For a slide, keyframe Position X or Position Y instead. Begin just outside the frame, move to the final corner, and leave enough time for the motion to read. Two clear positions are usually better than a busy path for a small mark.
The diamonds store values at specific frames. The keyframes and Curve Editor guide covers timing, easing, and point selection when a linear move feels abrupt. For a static watermark, skip keyframes completely; animation adds another failure point without improving identification.
Reuse the logo without rebuilding it
Once the first instance is correct, copy it to another timeline position or duplicate it in the Media Pool workflow you already use. A copied timeline clip retains its Transform, Composite, and keyframe settings. Confirm the copied duration and timing rather than assuming the destination needs the same length.
When many clips need the same settings, keep one approved master instance in a utility timeline or bin. This reduces variation between episodes, but it does not make every copy update automatically. If the brand mark changes, search the active timelines and replace or revise each used instance before delivery.
Do not use a logo overlay as a substitute for Picture in Picture. PiP frames a second video source and may need separate content and window controls. A watermark is normally a still graphic with transparency.
Fix a black rectangle or dark edge around the logo
First determine whether the PNG actually contains transparency. Open it in an image editor or file viewer that displays alpha clearly. If the black area is part of the pixels, Resolve cannot infer which pixels you meant to remove; export a corrected transparent asset.
If the file has transparency but Resolve shows a black rectangle, right-click the logo clip and open Clip Attributes > Video. Check Alpha Mode. Try the interpretation that matches the source, typically Straight or Premultiplied, and inspect the edge against both a light and dark shot. Do not treat either choice as a universal fix.
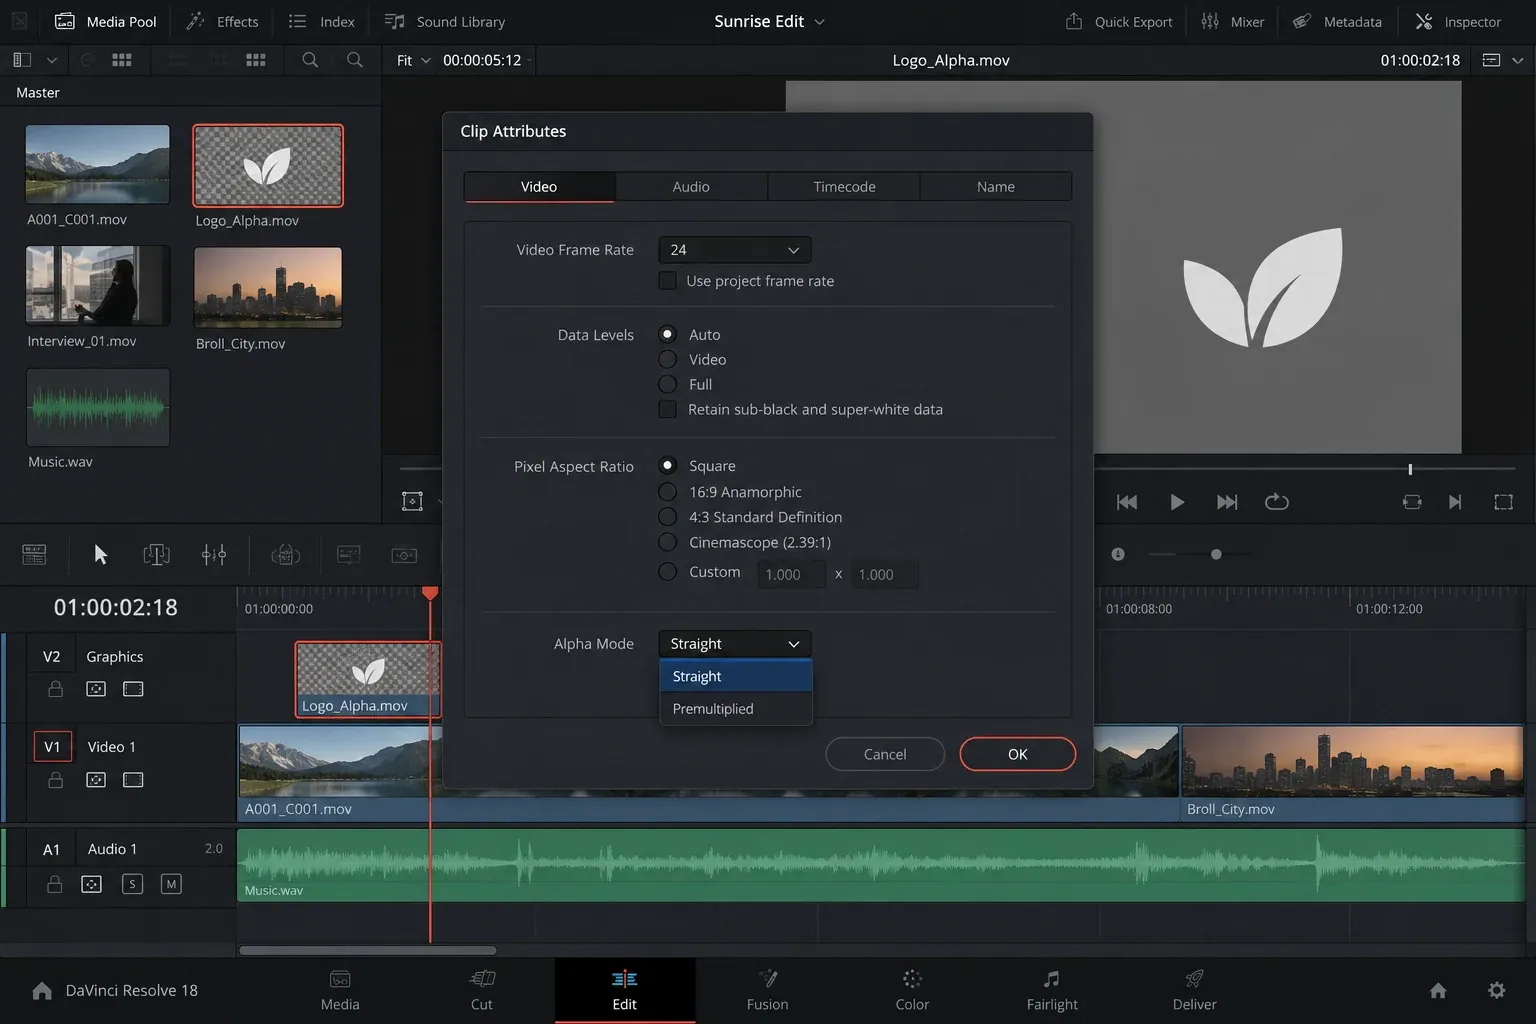
A current Clip Attributes overview documents Straight and Premultiplied alpha modes and the edge artifacts caused by a mismatch. The correct setting still depends on how the source was exported.
A dark or light fringe means the transparent edge pixels and alpha interpretation disagree. Test the alternate Alpha Mode first. If the fringe remains, return to the source artwork and export clean straight-alpha edges rather than piling on blur, crop, or color corrections in Resolve.
Fix a logo that is soft, missing, or different after export
The logo looks pixelated
Check the source dimensions and the Inspector Zoom value. A small logo enlarged above 100 percent has no extra detail to reveal. Replace it with a larger raster export and scale down in Resolve. Also inspect whether the timeline or Viewer is using a reduced working resolution before judging final sharpness.
The logo is in the timeline but not visible
Confirm that the track is enabled, the playhead is inside the logo clip, and the logo is above the footage. Then check that Composite Opacity is not zero and Position has not moved the graphic outside the frame. Reset one parameter at a time so you can identify the cause.
The logo blocks titles or subtitles
Move the logo to another corner, trim it around the title, or place the title on a higher track. Do not solve every collision by shrinking the mark; a tiny logo can remain technically present while becoming useless.
The fade starts at the wrong time
Select the logo and inspect its keyframes. Trimming the start of an animated clip can leave stored points outside the visible range or change where the fade is perceived. Move or recreate the keyframes relative to the final edit.
The exported logo differs from the Viewer
Render a short section that includes a bright shot, a dark shot, the entrance, and the exit. Review that file at normal size. If transparency changes only after export, verify that you are exporting an ordinary flattened video and not expecting alpha in the final codec. This workflow intentionally burns the logo into the picture.
Logo and watermark check before delivery
- Scrub the first and last frame where the logo should appear.
- Check at least one bright and one dark shot.
- Confirm the mark does not cover subtitles, names, score graphics, or important interface details.
- Inspect edges for black or white halos.
- Review the final aspect ratio, not only the editing timeline.
- Render a short proof and inspect size, opacity, animation, and sharpness.
- After the final edit changes, verify that the logo still reaches the intended end frame.
The dependable setup is simple: one clean transparent asset, one dedicated upper track, linked Zoom, deliberate Position, and Normal compositing. Add opacity or keyframes only when the delivery calls for them. That keeps the logo easy to inspect and easy to fix before export.
