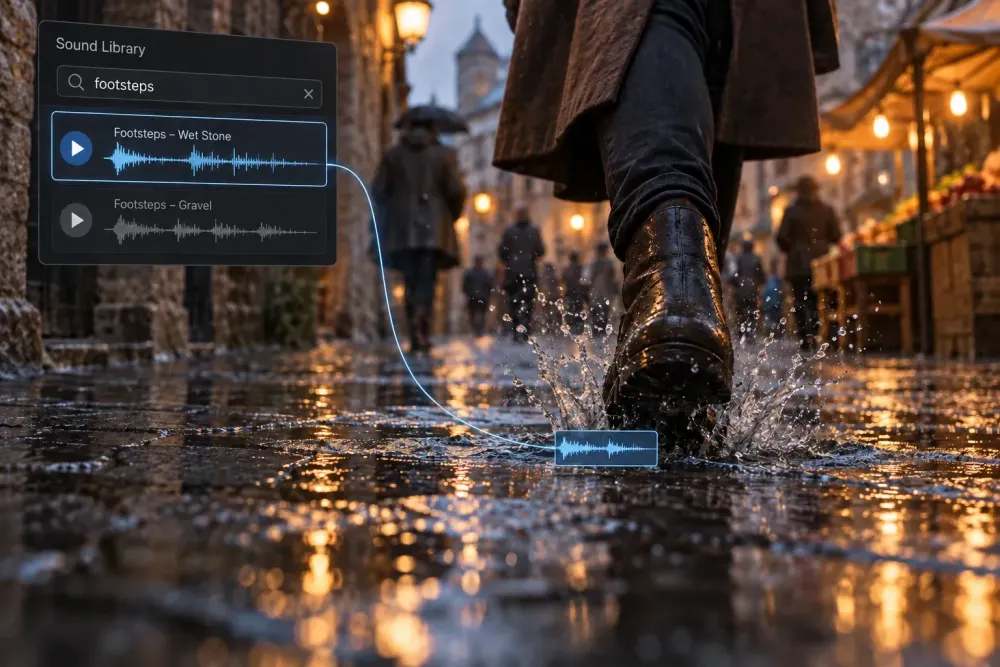
Quick answer: open Sound Library on the Edit or Fairlight page, choose the Project Library that should hold your catalog, then either install Blackmagic’s free Fairlight pack or use Add Library to index your own sound-effects folder. Run a search before judging the panel: Resolve intentionally leaves the results area empty until you enter a query, and *** displays every indexed file. To hear an effect in context, select a destination audio track, position the timeline playhead, then use Audition. The clip stays temporary until you click Confirm.
The part that causes most confusion is the catalog model. Resolve does not treat Sound Library as a normal folder browser. It builds a searchable index inside a selected Project Library and points that index at audio files stored elsewhere.
The chain is:
source folder → selected Project Library catalog → search → preview → selected timeline track → Audition
When the panel looks empty, one link in that chain is usually missing. Reinstalling the sound pack without checking the catalog and search state can leave the real problem untouched.
Open Sound Library and Choose the Right Catalog
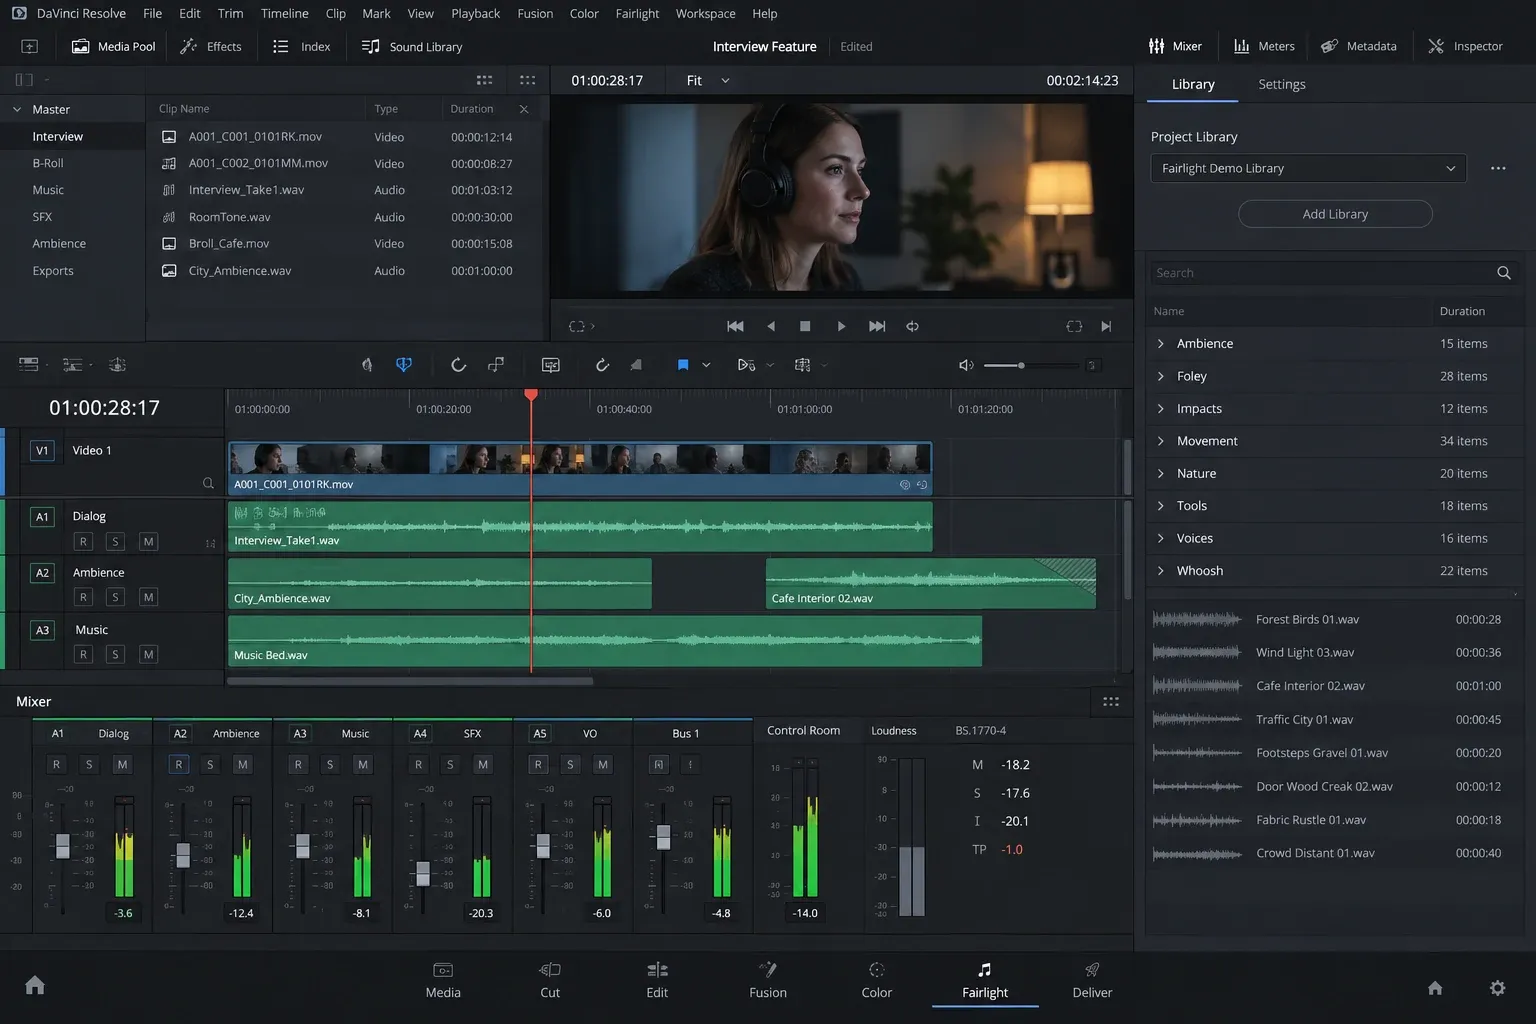
The Sound Library panel is available on both the Edit and Fairlight pages. Open it from the interface toolbar. The Fairlight page gives you more room to audition, place and mix effects, but the underlying catalog is the same system.
Before adding files, look at the Library selector beside the search field. This chooses the Project Library used for both cataloging and searching. Resolve’s current manual states that the Sound Library stores its catalog data in the selected Project Library and that different network Project Libraries can maintain different catalogs. The behavior is documented in Blackmagic’s DaVinci Resolve 21 Reference Manual.
That distinction explains a common “my sounds disappeared” situation. The audio files may still be on the same drive, but Resolve is searching a different Project Library whose catalog does not contain them.
Use a dedicated Project Library for a shared effects catalog when several editors or systems need a consistent index. For a simpler single-machine setup, the current compatible local Project Library can hold the catalog. The catalog location and the audio-file location are separate decisions.
Install Blackmagic’s Pack or Add Your Own Folder
There are two different setup jobs that tutorials often combine.
Install the official Fairlight Sound Library
Blackmagic still lists Blackmagic Fairlight Sound Library 1.0 on its DaVinci Resolve and Fusion support page. The entry is dated 07 Dec 2020, is available for macOS, Windows and Linux, and describes more than 500 royalty-free sounds. The download requires registration and acceptance of Blackmagic’s terms.
This is an effects and foley collection. It is not a subscription music catalog. It includes material such as ambience, footsteps, hits and other production sounds, and Blackmagic also designed it to work with the Fairlight FX Foley Sampler.
If an empty Sound Library offers a download option, you can start there. Otherwise, find the named package in the support page’s downloads list, run the correct installer for your operating system, then return to Resolve.
Index an existing sound-effects folder
If you already have WAV, AIFF, MP3 or other supported audio organized on a local drive, NAS or shared volume, you do not need to copy it into every project.
- Open Sound Library.
- Use the Library selector to choose the Project Library that should own the catalog.
- If no collection is connected, click Add Library in the panel. If a catalog already exists, open the options menu and choose Add Library.
- Select the highest folder that contains the effects you want to index.
- Confirm the selection and allow Resolve to scan it.
Resolve examines subfolders beneath the selected top folder, so a structured collection can remain organized on disk. When scanning finishes, Resolve reports how many clips were added to the current catalog.
Adding a folder creates catalog entries. It does not make the underlying storage irrelevant. The source drive or network share must remain reachable when you search and use those sounds later.
Make the First Search Before Troubleshooting
A blank results pane immediately after setup does not prove that scanning failed. The Resolve manual explicitly says the results area remains empty until a search is made.
Type:
***
That query displays every file in the selected catalog and is the fastest first check. If results appear, the index is working. You can then replace *** with a useful term such as door, footstep, rain or part of a known filename.
Use the filter menu beside the search field to decide whether Resolve searches names, description metadata or all available fields. A carefully tagged collection becomes much more useful when description metadata is included. A folder full of opaque filenames will naturally produce weaker text matches.
If *** returns nothing, check the selected Project Library before adding the same folder again. A valid index in Library A will not appear while Library B is selected.
Search with AND, NOT, Quotes and Wildcards
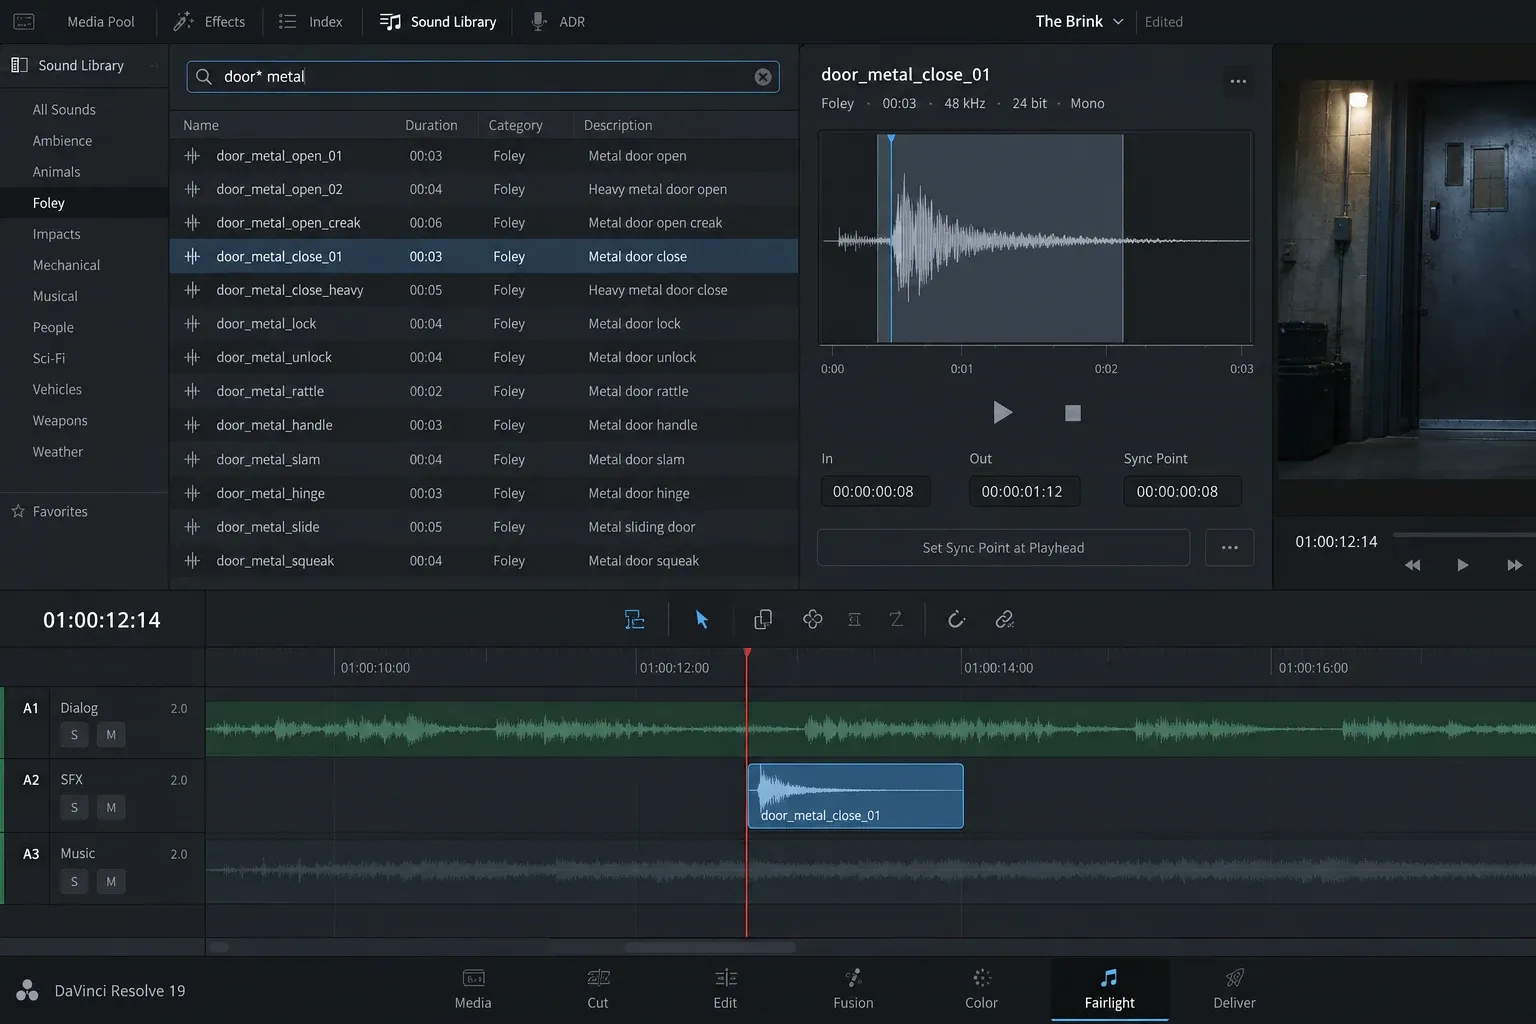
The Sound Library search field is more capable than a simple filename box, but its default behavior can surprise you.
Typing two words separated by a space acts like an OR search. These two queries are equivalent:
car door
car OR door
Either word can produce a match. If you need results containing both concepts, type the boolean operator in uppercase:
car AND door
To remove an unwanted branch of results, use uppercase NOT:
car NOT door
The capitalization matters. Lowercase and, or and not are treated as ordinary words rather than operators.
Quotation marks request a literal standalone term. A search for "cat" is narrower than an unquoted substring search and avoids matching every filename that merely contains those letters inside a longer word.
Wildcards help when naming conventions vary:
door*closematches any number of characters betweendoorandclose;door?closeallows one unknown character;- several question marks allow that exact number of unknown characters;
***remains the show-everything query.
Start broad, then tighten. For example, search impact, listen to the range of results, then try metal AND impact or impact NOT glass. Search syntax cannot repair weak metadata, but it can reduce false positives in a well-labeled catalog.
Preview the Useful Part of a Sound
Selecting a search result loads it into the Sound Library preview player. The panel includes an overview waveform, a zoomed waveform, transport controls, clip duration and a playhead position display.
Use the preview stage before placing a clip:
- Select a result and play it.
- Scrub to the event you care about.
- Set In and Out points when a long recording contains only one useful section.
- Set a Sync Point on the exact transient or event that should meet the timeline playhead.
The Sync Point is especially useful when a file contains lead-in sound before the moment that matters. A door recording may include a handle movement and squeak before the slam. Put the Sync Point on the slam peak, place the timeline playhead on the frame where the door closes, and Resolve can align those events during Audition.
In and Out points solve a different problem: they limit the range that will be edited into the timeline. Use both when you need a trimmed section with a precise internal alignment point.
Double-clicking a result plays the whole effect. That is useful for fast browsing, but it does not replace setting the range and sync position for timeline work.
Drag a Sound or Use Audition
For a straightforward placement, drag the selected result from Sound Library into the timeline. This is fast when the destination and timing are already clear.
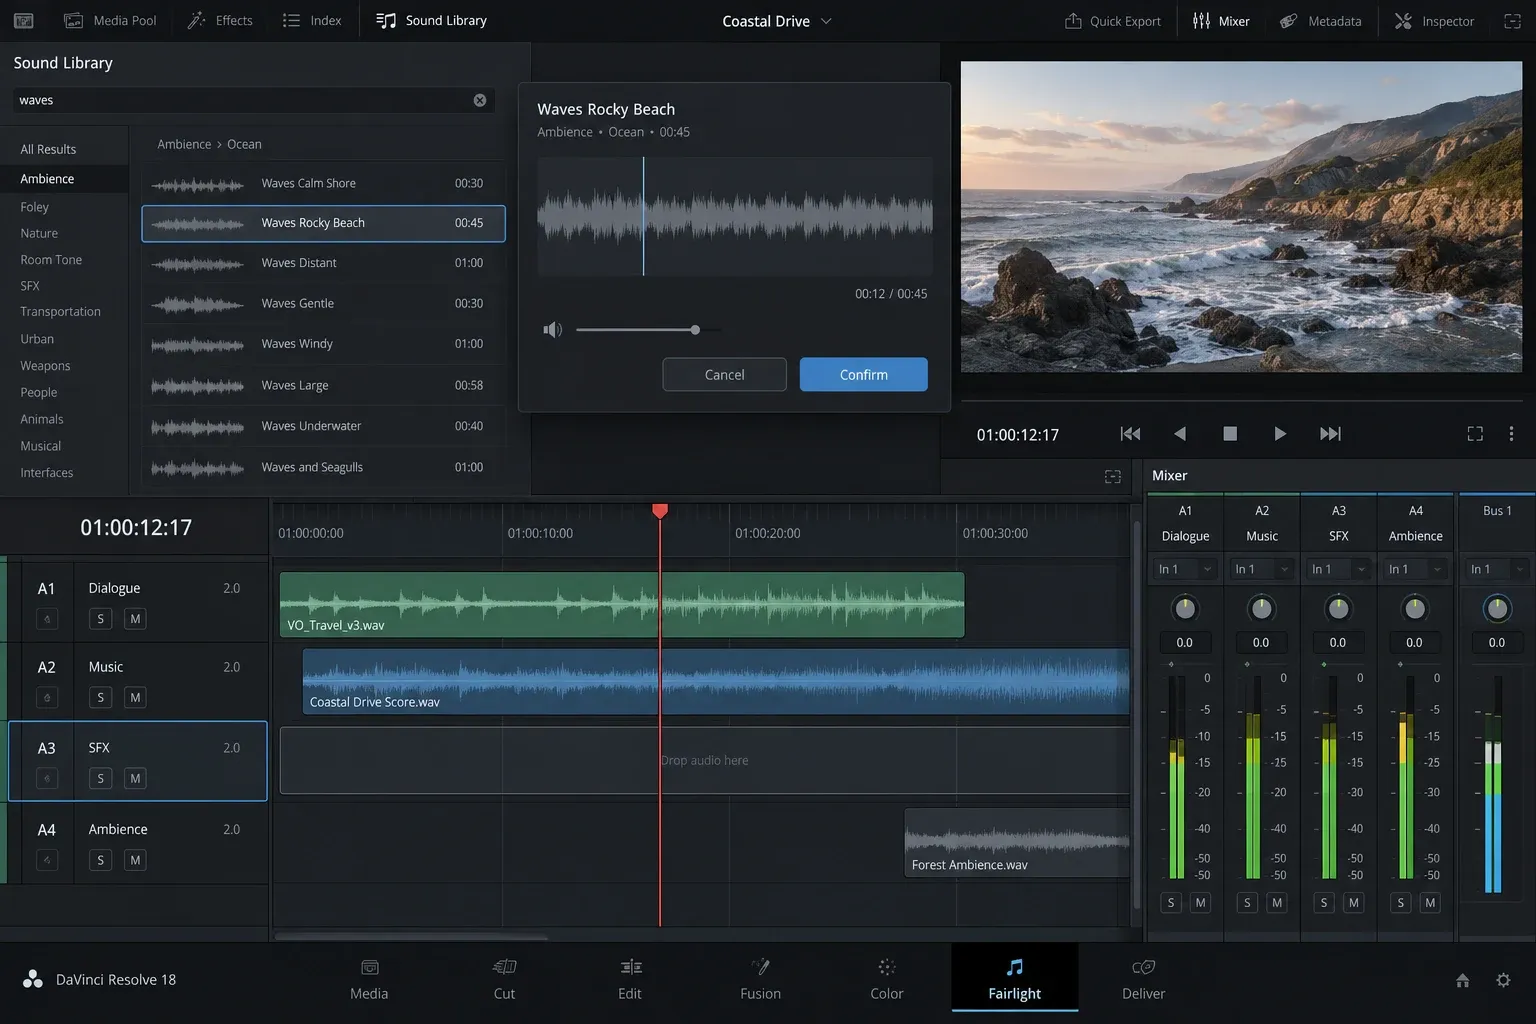
Use Audition when you want to judge the effect inside the current mix before committing it.
- Select the sound in the results list.
- Set In, Out and Sync Point if needed.
- Click the destination track header or its Mixer channel strip so that a timeline audio track is selected.
- Put the timeline playhead at the intended event.
- Click Audition.
- Play the surrounding timeline section.
- Click Confirm to keep the clip or Cancel to remove it.
The selected-track step is mandatory. If Audition appears unavailable or does nothing useful, confirm that an audio track is actually selected before changing anything else.
During Audition, Resolve places the effect temporarily at the playhead on that selected track. Choosing another sound before confirming the current one cancels the previous audition and removes its temporary clip. This behavior is useful for cycling through alternatives, but it can look like a clip vanished if you did not realize the first choice was still provisional.
Once the effect is committed, placement is only the start. Use the Fairlight bus routing guide when effects need their own bus, shared processing or a separate delivery path. Add audio fades in Resolve when clip edges need shaping rather than an abrupt cut.
Fix an Empty Sound Library in the Right Order
Use a fixed diagnosis order. It prevents duplicate catalogs and avoids reinstalling files that are already present.
1. Run a real search
Enter *** or a term from a known filename. An empty pane before a query is expected behavior.
2. Check the selected Project Library
Open the Library selector and choose the Project Library that originally held the catalog. This is the first check after an upgrade or when moving between local, network and cloud-oriented project setups.
3. Confirm the source storage is online
Make sure the drive, NAS share or remote volume containing the audio files is mounted and readable. A catalog entry cannot supply media from an unavailable path.
4. Check whether the folder moved
If the effects folder changed location, the old catalog path may no longer resolve. Add the folder from its current top-level location to the intended Project Library rather than assuming Resolve will discover the move automatically.
5. Separate the Blackmagic pack from other collections
The official package contains more than 500 effects. If you previously saw many more sounds, music cues or a custom collection, those files may have come from another indexed folder rather than the Blackmagic installer. Reinstalling only the official pack will not recreate a separate private catalog.
6. Check the destination track for Audition problems
If results appear and preview works but Audition fails, select a timeline audio track and position the playhead. That is a placement-state problem, not an indexing problem.
7. Separate library access from audio-output problems
If the sound is present on the timeline but you cannot hear it, continue with the DaVinci Resolve no-audio checklist. Bus assignment, track mute, patching, monitoring and device routing sit after the Sound Library stage.
Move or Share a Library Across Systems
A shared catalog has two layers that must travel together logically:
- the Project Library containing the searchable catalog;
- the audio storage path that every workstation can resolve.
Putting a catalog in a network Project Library does not make a disconnected sound-effects drive available. Likewise, mounting a shared SFX folder does not guarantee that the current Project Library contains an index for it.
For editors working across macOS, Windows and Linux, storage paths can differ even when they point to the same network location. Resolve’s Preferences → Media Storage settings include Mapped Mount, which maps equivalent path prefixes between operating systems. Blackmagic documents this path-substitution system in the Media Storage section of the Resolve reference manual.
Mapped Mount helps Resolve translate a valid shared path. It cannot repair an offline server, missing permissions or a folder that no longer exists. Verify the share first, then the path mapping, then the selected Project Library catalog.
For a durable team setup, keep the sound collection in a stable shared location, use consistent permissions, document the selected Project Library, and avoid casually renaming the top folder after it has been indexed.
Turn Found Effects into a Controlled Mix
The Sound Library solves discovery and first placement. The timeline and Fairlight mixer handle the rest.
After confirming an effect:
- trim and fade the clip against picture;
- route effects to the intended bus;
- use EQ or dynamics only when the sound and mix require them;
- check dialogue and effects balance rather than treating the inserted clip level as final;
- verify the delivery target with the Resolve loudness and LUFS guide.
The useful mental model remains simple: storage holds the audio, a selected Project Library holds its catalog, search reveals matches, preview prepares the range and sync point, and a selected timeline track gives Audition somewhere to place the temporary clip. Check that chain in order and most “missing Sound Library” problems become specific instead of mysterious.
