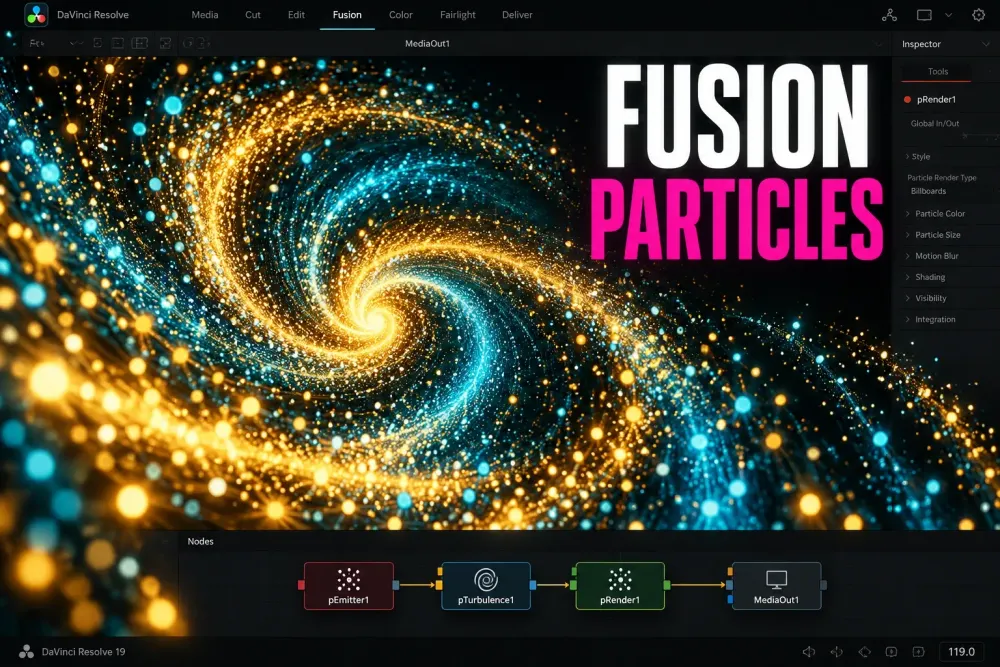
The shortest useful Fusion particle setup is pEmitter → pRender → Merge → MediaOut. pEmitter creates and updates the particle set, but it does not produce a normal image you can composite. pRender turns that particle data into a visible result. Set pRender to a 2D output, connect it to the green foreground input of a Merge, connect your footage to the orange background input, and send the Merge to MediaOut. Particles sit squarely inside the larger Fusion hub.
Start with a simple dot field before chasing smoke, sparks or magic trails. The particle system becomes much easier to diagnose when you change one class of control at a time: emission, lifespan, initial motion, forces, appearance, then compositing. If the node graph itself is new to you, read the Fusion beginner guide first. This article assumes you already know that connections, rather than node position on the canvas, determine the image flow.
Build the First Particle Node Chain
- Select a timeline clip and open the Fusion page. Confirm the existing MediaIn-to-MediaOut route before adding anything.
- Press Shift+Spacebar, search for pEmitter, and add it to an empty part of the flow.
- Add pRender and connect pEmitter to its particle input. Load pRender into a viewer with the 1 or 2 key. If the branch is still invisible, move the playhead later in the comp so emitted particles have time to exist.
- In pRender, choose its 2D image output when the goal is an ordinary overlay. A 3D particle output belongs in a 3D scene and will not behave like a flat foreground plugged directly into a standard Merge.
- Add a Merge. Connect MediaIn to the orange background input, pRender to the green foreground input, and the Merge output to MediaOut.
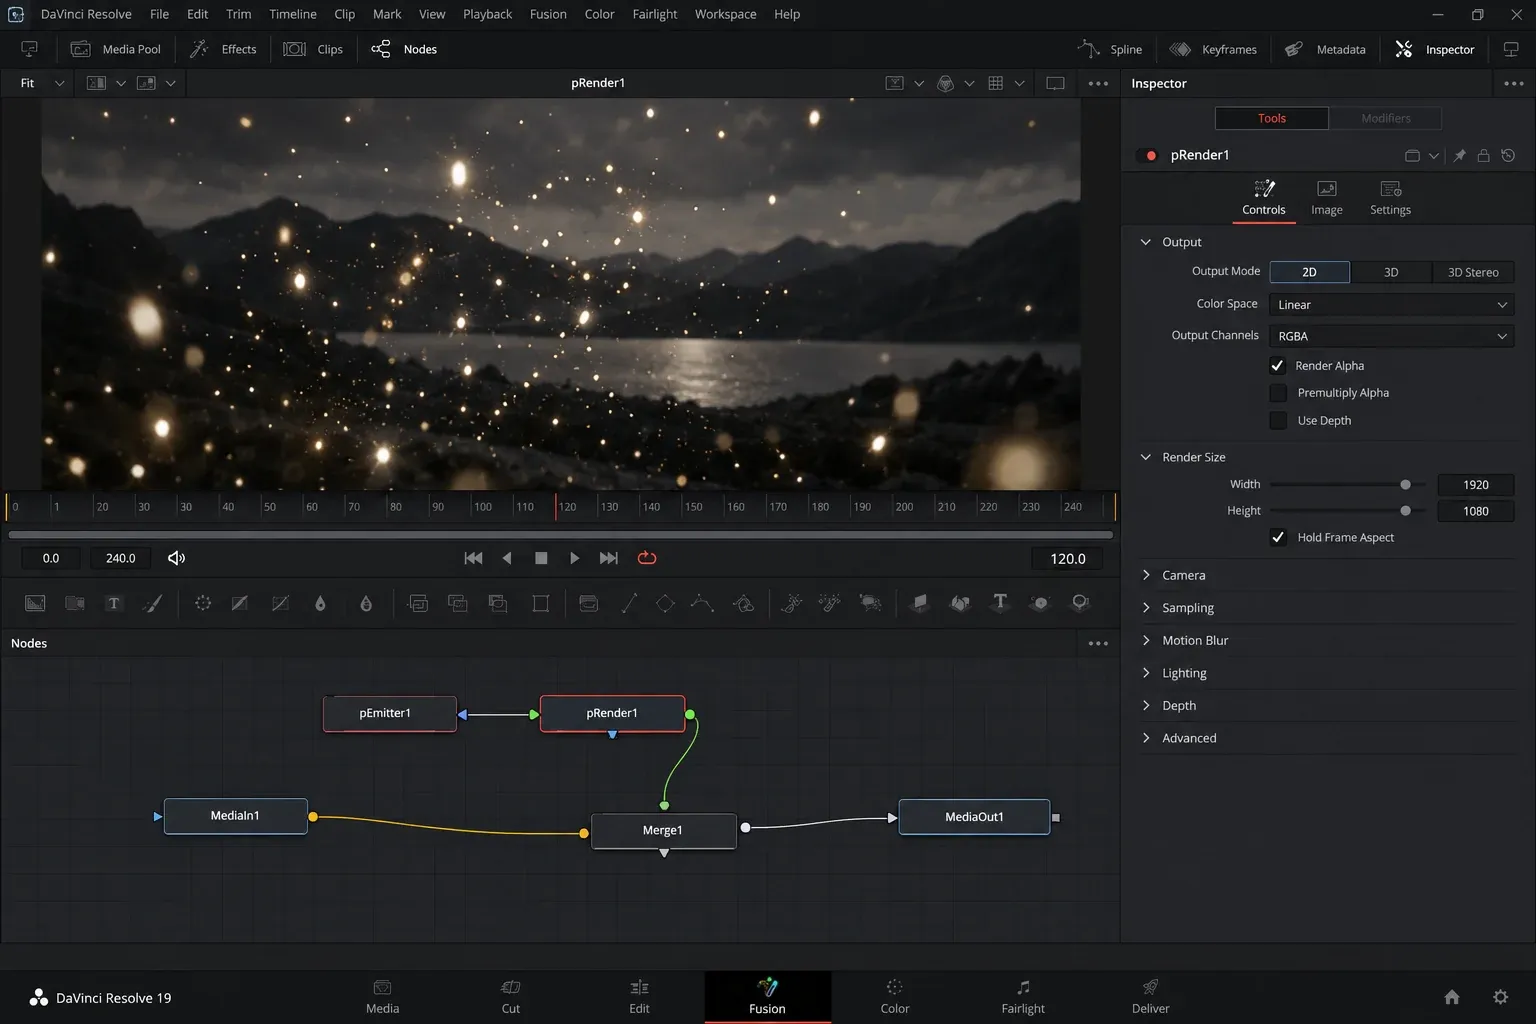
The distinction between the first two nodes matters. The pEmitter reference describes an output that contains particle data rather than a viewable image. The pRender reference places the renderer at the end of the particle branch and converts that set into something the rest of the comp can use. If selecting pEmitter and pressing 1 shows nothing, that is expected behavior; view pRender or the final Merge instead.
Shape Where Particles Are Born
Select pEmitter and begin with its Region controls. A point region gives you a compact source, useful for sparks or a fountain. A line, rectangle, circle or bitmap-shaped region spreads the birth positions across a larger area. The right choice follows the shot: falling snow wants a broad source above the frame, while a welding spark wants a tight source near the contact point.
Keep the initial region visible while you build. Place it clearly inside frame and use a moderate particle count. A source placed outside the frame can be correct for rain or drifting dust, but it creates an unnecessary mystery during setup. Move it beyond the edge only after the system is visible and predictable.
The Style setting controls how each particle is drawn. Begin with a simple point or blob-style particle so scale, speed and lifetime remain obvious. Switch to a bitmap or more elaborate appearance after the motion works. An ornate style can hide a bad emission path behind glow, blur and texture.
Control Count, Lifespan, Velocity and Spread
Four pEmitter controls do most of the early work:
- Number controls how many particles are introduced over time. Treat it as density, not brightness. More particles make the system heavier to calculate and can turn clean motion into a solid mass.
- Lifespan sets how long a particle remains alive. A lifespan that is too short makes particles vanish close to the emitter. A very long lifespan lets them accumulate through the shot and increases the number pRender must process.
- Velocity gives particles their initial speed. Raise it when particles need to clear the source quickly; lower it for dust, fog-like drift or a suspended field.
- Angle and spread controls determine the initial direction and how widely individual paths diverge. A narrow cone reads as a jet. A wider cone reads as a spray.
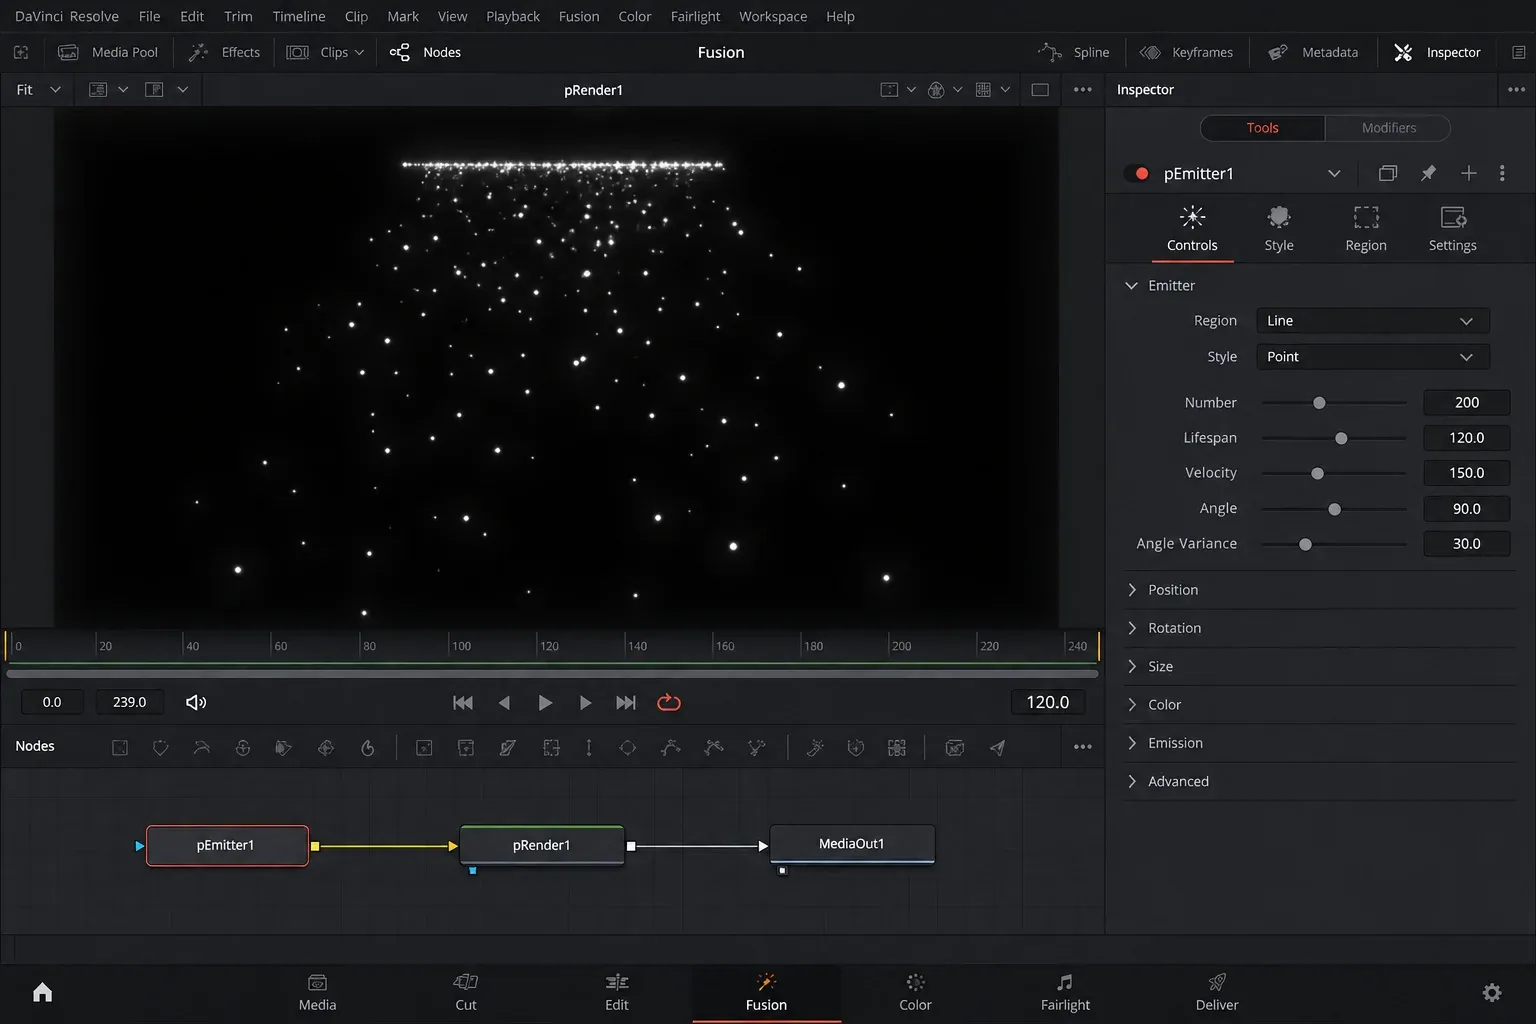
Adjust these controls in that order. First make enough particles to read the shape. Then give each particle enough life to travel through the intended part of frame. After that, tune speed and spread. If you increase all four at once, a blank frame can become a slow, overfilled comp without revealing which setting caused the change.
Particle values are tied to the comp’s timing and dimensions, so a useful setting from another tutorial is only a starting point. A fast 24-frame burst and a slow ten-second snowfall need different relationships between Number, Lifespan and Velocity. Judge the full path from birth to disappearance rather than copying a number in isolation.
Add Natural Motion With pTurbulence
Perfectly straight trajectories often look synthetic because every particle receives the same kind of motion. Add pTurbulence between pEmitter and pRender:
pEmitter → pTurbulence → pRender
pTurbulence adds uneven, frequency-based changes across the particle field. Its strength controls how strongly paths bend; density and frequency-related controls affect the scale and complexity of the variation. Small, slow changes work for drifting dust. Stronger, tighter variation can create agitated sparks or magical energy, but it can also turn the result into random noise.
Use the force as a correction to readable base motion, not as the only source of direction. Set pEmitter velocity first so the system has a clear general path, then introduce turbulence until neighboring particles stop traveling as one rigid cloud. The pTurbulence node reference confirms that it belongs inside the particle branch before pRender.
Create a Gravity-Like Fall With pDirectionalForce
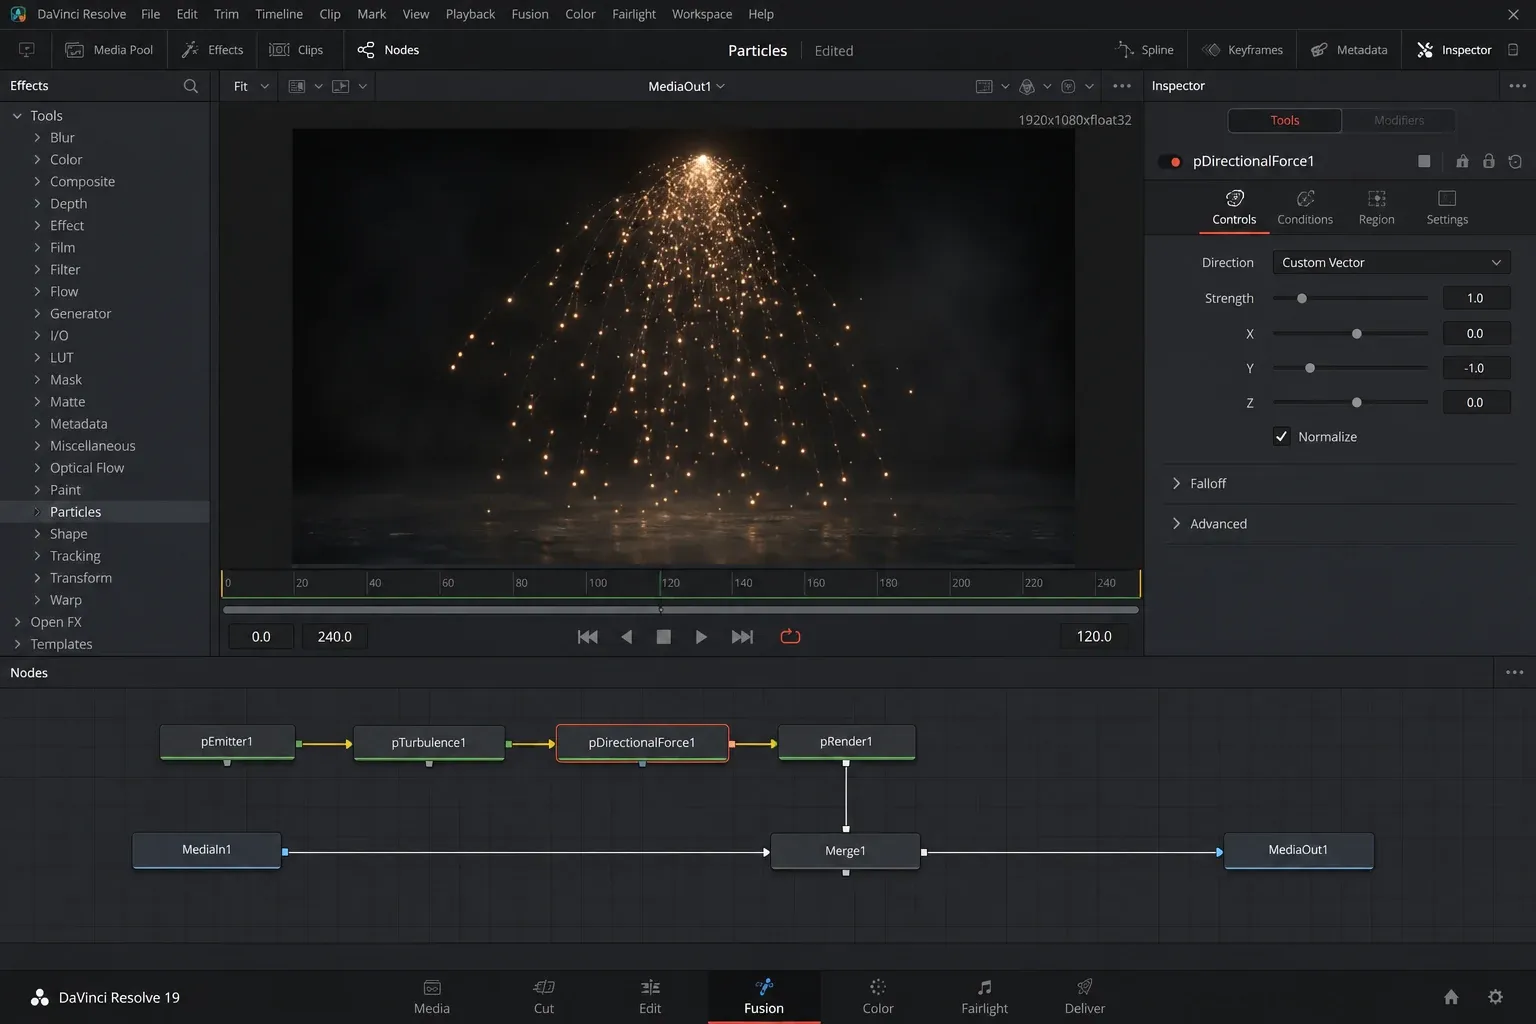
Fusion’s documented particle force for a uniform directional pull is pDirectionalForce. Insert it between the emitter and renderer, just like pTurbulence. Point the force downward to make sparks arc and fall or to accelerate rain. Point it sideways for wind.
A useful branch can contain both forces:
pEmitter → pTurbulence → pDirectionalForce → pRender
The order can change the feel because each node updates the particle set before handing it onward. For a beginner comp, keep the graph readable and compare one order against the other rather than stacking duplicate forces. The pDirectionalForce reference describes a downward setup as the familiar gravity-like use.
Composite Particles Over Footage
Once pRender produces a 2D image with transparency, treat that result as any other foreground. Send it to the green input of a Merge and keep the untouched footage on orange. This preserves a clean background branch and makes layer order obvious.
If the particles need to sit behind a title but in front of footage, use two Merge nodes. First merge particles over footage. Then merge the title over that result. If the emitter must follow a moving sign, hand, vehicle or other feature, solve that movement separately and apply it to the particle source or rendered branch. The Fusion tracking guide covers the point and planar tracking choices; a particle force does not track scene movement for you.
Inspect alpha as well as RGB. Particles that look correct over black may reveal hard squares, dark fringes or weak edges over a bright shot. Keep the particle branch transparent and composite it over the actual background before making final appearance decisions.
Animate a Short Particle Burst
Continuous emission is useful for snow, dust or rain. Sparks, impacts and transitions usually need a burst. Animate pEmitter’s Number control so it stays at zero before the event, rises for a short interval, then returns to zero. Particles that were already born continue moving until their lifespan ends; reducing Number stops new births rather than deleting existing particles.
- Move to the frame just before the event. Set Number to zero and enable its keyframe.
- Move to the burst frame and raise Number enough to create the required density.
- Move a few frames later and return Number to zero.
- Play beyond the last emission keyframe. Adjust Lifespan if the tail ends too early or hangs too long.
A narrow peak gives a sharp impact. A longer plateau creates a sustained spray. Use the Spline Editor only when the birth rate needs a shaped ramp; ordinary stepped or closely spaced keyframes are often cleaner for a sudden burst. The keyframes and Curve Editor guide explains interpolation without tying it to a specific effect.
Why Nothing Appears
Check the graph in this order:
- You are viewing pEmitter. It outputs particle data. Load pRender or the final Merge into a viewer.
- pRender is missing or disconnected. The particle branch must pass through a renderer before it becomes an image.
- The playhead is too early. Move later so particles have been born, especially when the emitter starts after the comp’s first frame.
- Number is zero. Inspect animated values at the current frame. A burst may have already ended or may not have started.
- Lifespan is too short. Particles can die before reaching the visible area.
- The region is outside frame and velocity points away. Temporarily move the source to the center and remove forces until the field is visible.
- The wrong branch reaches MediaOut. Trace the final Merge output all the way to MediaOut.
Fix a Black Frame or Wrong Layer Order
If the particle result replaces the footage with black, inspect the final composite rather than pRender alone. A particle viewer can show transparent areas against a black viewer background even when alpha is present. Connect pRender to the Merge foreground and footage to its background, then view the Merge.
If particles disappear behind the shot, the Merge inputs may be reversed or a later Merge may cover the result. Follow the branch from left to right and load each Merge into a viewer. Fusion’s green input is foreground and orange is background. If a full-frame Background node is placed over the particle result, it will hide everything beneath it unless it is masked or reordered.
Fix Rigid Motion and Early Disappearance
When the entire field moves like one object, widen the emitter’s directional spread and vary the initial motion. Then add restrained pTurbulence. A Transform node after pRender moves the already rendered particle image as a single layer; that is useful for repositioning the complete effect, but it does not create variation among particles.
When particles vanish too soon, raise Lifespan or reduce Velocity so they remain in frame longer. When they never seem to clear, shorten Lifespan or reduce continuous emission. Watch the oldest particles, not only the newest ones near the source.
Keep Particle Comps Responsive
Particle systems can become expensive because the renderer evaluates many changing elements across many frames. Start with a low Number while designing motion. Use a simple particle style, limit motion blur and glow, and preview at a reduced viewer resolution. Increase density and finishing effects after the path is approved.
Long lifespan plus continuous emission is a common performance trap: every frame can contain particles born across a large span of earlier frames. Shorten lifespan to what the shot actually needs. If the effect depends on motion that begins before the visible edit, give the comp enough pre-roll or move the emitter start earlier; otherwise the first visible frame may look unnaturally empty.
For reusable work, expose only the controls another editor needs after the comp is stable. The Fusion macros and templates guide covers publishing controls and saving an Edit-page template. Do not package a half-diagnosed graph with twenty similar sliders.
Particles vs Stock Overlays and Ordinary Animation
Use Fusion particles when the effect must react to the shot: the emitter needs a specific position, the motion needs forces, the density changes over time, or the result must be rebuilt at different sizes and durations. The procedural graph earns its complexity when those controls matter.
Use a stock overlay when speed matters more than customization and a suitable element already exists. A well-keyed spark or dust plate can be faster to place and easier to preview. Check its resolution, frame rate, alpha or blend-mode requirements, and license before relying on it.
Use ordinary keyframed graphics when you only need a handful of dots, stars or icons moving along known paths. Five controlled shapes do not need a simulation. Particle tools are most useful when the number of individual elements makes manual animation impractical.
Particle Workflow Checklist
- View pRender or the final Merge, not pEmitter.
- Use pRender’s 2D output for a standard Merge over footage.
- Make the basic field visible before moving the emitter outside frame.
- Tune Number, Lifespan, Velocity and spread before adding forces.
- Insert pTurbulence or pDirectionalForce before pRender.
- Keep footage on the Merge background and particles on the foreground.
- For a burst, animate emission and let existing particles finish their lifespan.
- Reduce particle count and expensive finishing effects while designing motion.
- Inspect the complete composite on both dark and bright frames.
- Render a short proof around the hardest section before committing to a long delivery.
The finished graph should remain easy to read: one emitter, only the forces that shape the motion, one renderer, and a deliberate composite into MediaOut. That simple structure is enough to build falling dust, sparks, snow, drifting particles and many stylized transitions without losing track of where the image actually comes from.
