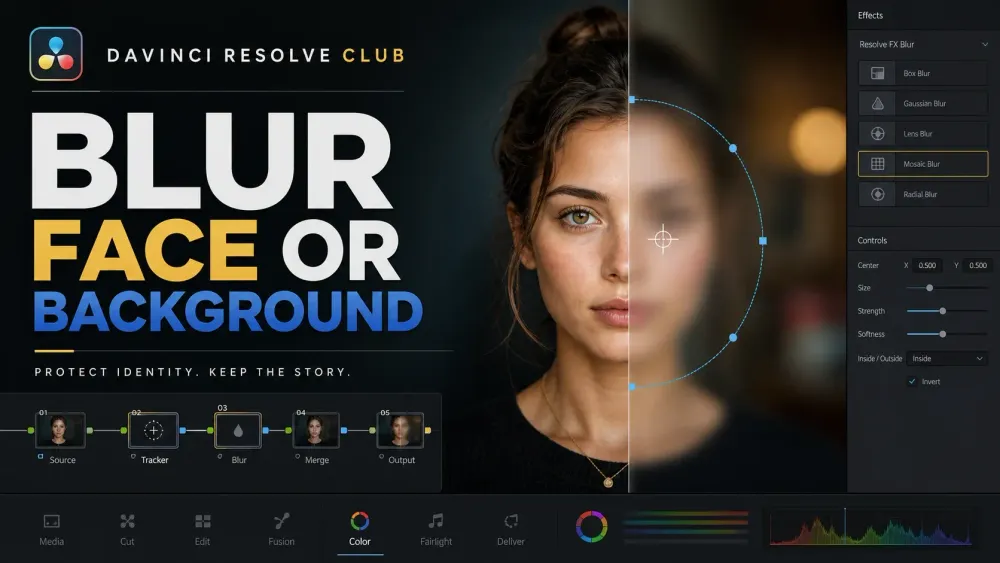
To blur a moving face in DaVinci Resolve, add a dedicated Color-page node, draw a soft Power Window around the entire recognizable area, track the window forward and backward, then increase Blur Radius or add Mosaic Blur.
Resolve Free can do that complete route. Resolve Studio adds Magic Mask 2 and depth-aware tools for difficult subject isolation, but they don't remove the need to inspect the final render frame by frame.
Background blur is a different job. It keeps the person sharp and softens the outside region, so it can't anonymize that person. Start by deciding what must be hidden or what must remain sharp; that choice determines the mask, tracker and review standard.
Choose the Blur Method by the Job
- Moving face, license plate or logo: tracked Power Window on a dedicated Color node; available in Free and Studio.
- Irregular object or a track that needs detailed occlusion repair: Polygon or B-spline mask with point or planar tracking in Fusion.
- Moving person with hair, hands and changing silhouette: Magic Mask 2 in Resolve Studio.
- Creative background blur with several depth planes: Depth Map or Lens Blur in Resolve Studio.
- Locked-off subject with a simple outline: custom Power Window plus an Outside node; available in Free and Studio.
Checked September 5, 2026, the current DaVinci Resolve 21 Reference Manual documents Power Windows, Window-mode tracking, the Color-page Blur palette, Outside nodes and Mosaic Blur. It marks Magic Mask v2 and Lens Blur as Studio-only. Blackmagic’s Studio feature page also lists Magic Mask, object isolation and tracking, Depth Map and Lens Blur among Studio features.
Blur a Moving Face with a Power Window
- Open the Color page and select the clip. Place the playhead on a frame where the face is clear, large enough to inspect and not covered by another object.
- Add a serial node with Option+S on macOS or Alt+S on Windows. Rename it Face Blur so the privacy correction is easy to isolate and audit.
- Open the Window palette, choose a circular window and fit it around the full recognizable area. Include forehead, chin, ears and enough margin for normal head motion.
- Increase window softness so the boundary doesn't look pasted on. Softness changes the transition, not the protected area, so don't feather away essential coverage.
- Open the Tracker palette in Window mode. From the clean reference frame, analyze to the end and then to the beginning of the clip.
- Open the Blur palette and increase the ganged Radius control until facial detail is no longer recognizable at final output size. Mosaic Blur is another documented option when an obvious pixelated treatment suits the job.
- Review the complete rendered section. Stop on profile turns, fast movement, frame edges, reflections, occlusions and every place where two people cross.
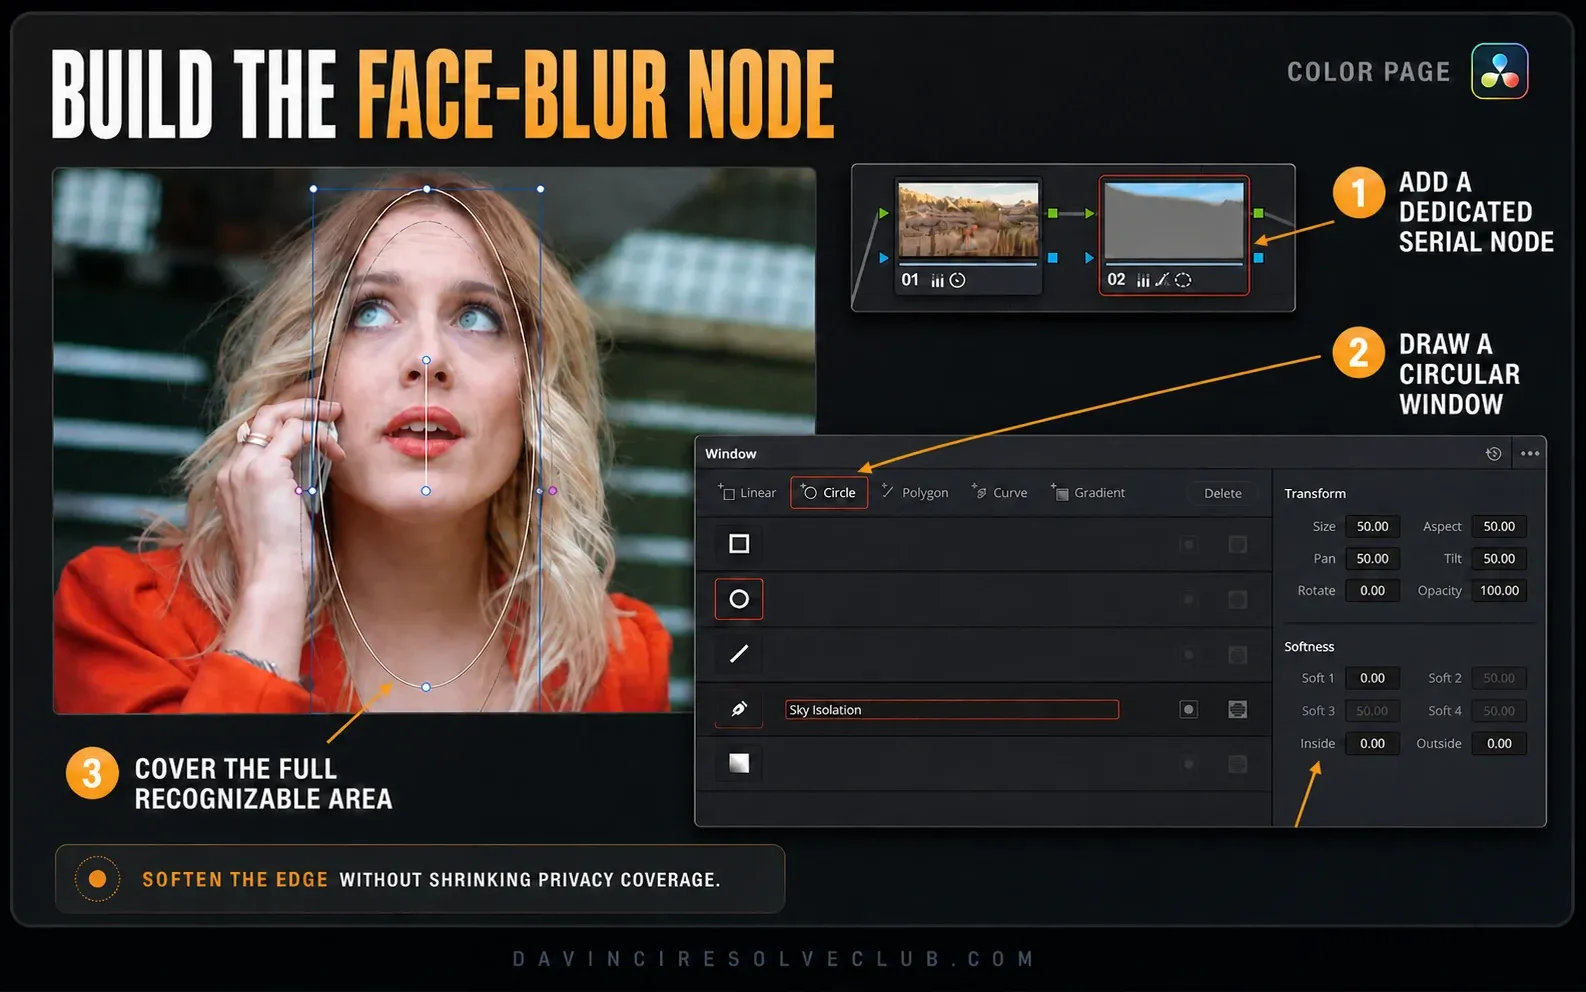
Tracking before or after applying the blur produces the same basic node structure: the node contains both the Power Window key and the correction.
Tracking the clean image makes the feature easier to see; applying a temporary visible blur first makes it obvious which node is active. What matters is that the window is analyzed from a useful reference frame and the final result is checked after rendering.
Make the Window Large Enough for Privacy
A flattering beauty blur isn't an anonymizing blur. Light softening can preserve eye spacing, profile shape, scars, hairline or a distinctive tattoo. Cover the full recognizable area, allow for motion beyond the reference frame, and judge the result at the exported resolution rather than in a small proxy viewer.
Look beyond the face. A reflection, name badge, license plate, house number, computer screen, clothing, voice or distinctive location can identify someone even when the face is hidden. Separate moving targets should normally get separate nodes so each has an independent track, blur strength and repair history.
Repair a Power Window That Drifts
The tracker analyzes image motion; it doesn't understand your privacy requirement. A completed analysis can still slide onto the wrong face, lag behind a fast turn or follow the object that caused an occlusion. Repair the track where it first becomes wrong, not several seconds later where the error was first noticed.
- Find the last correct frame and then the first frame where the window leaves the protected area.
- Reposition or resize the window on that first failed frame.
- Track only through the next clean segment instead of repeatedly analyzing the whole clip.
- When another object covers the face, use manual window keyframes through the occlusion.
- When the face becomes visible again, establish a clean window and resume automatic tracking from there.
- If the person leaves frame, keep the window away from other visible subjects until the intended face returns.
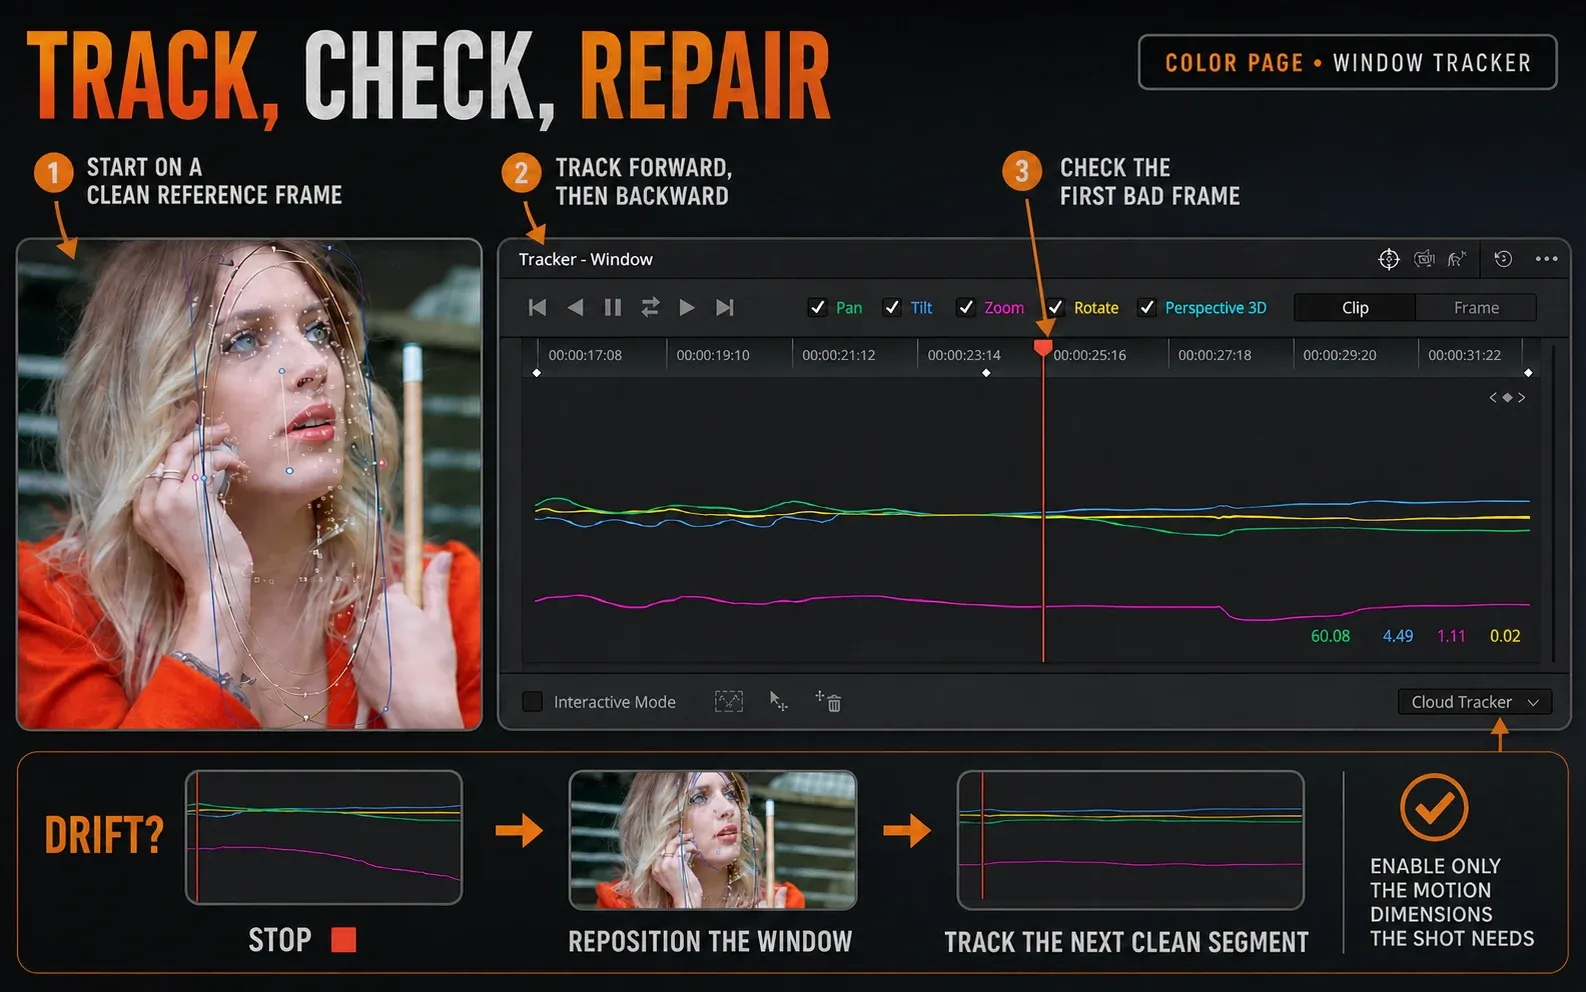
If crossings, changing perspective or a moving surface make the Color tracker unreliable, use the Fusion tracking guide to choose between a point track and a planar track. Neither tracker is a face detector, and the manual explicitly notes that no tracker is a 100% solution.
Soft Blur or Mosaic Blur?
Soft blur is visually quieter. Raise the Color-page Blur Radius and soften the window boundary, then pause on the sharpest source frame and check whether recognizable features remain. A gentle portrait-softening setting is rarely strong enough for privacy.
Mosaic Blur creates a visibly pixelated treatment. The final Resolve 21 manual lists it without a Studio-only label and specifically illustrates it as a way to hide a witness’s face.
Choose cells large enough to remove detail in the delivered file, not merely in the viewer. Neither mosaic nor soft blur creates a legal or technical guarantee of anonymity.
Blur Multiple Faces Without Losing Control
Use one serial node and one tracked window per moving face. A compact node graph with several windows on one node may look tidy, but independent tracks are easier to inspect and repair when people move at different speeds or cross each other.
Rename nodes Face 1, Face 2 and so on, and verify that each effect begins and ends with the correct person.
Static targets can share a node when the correction and timing are identical. Once targets move independently, separate nodes reduce the chance that fixing one mask silently breaks another. For a dense crowd or long privacy-critical sequence, budget time for a full-frame review; automation doesn't turn that requirement into a spot check.
Blur the Background and Keep the Person Sharp
For background blur, isolate the entire subject and apply blur to the outside region. A small inverted oval around the face leaves the head sharp but blurs hair, shoulders, hands and foreground objects inconsistently. It can work as a vignette, but it does not resemble shallow depth of field.
Resolve Studio: Magic Mask 2
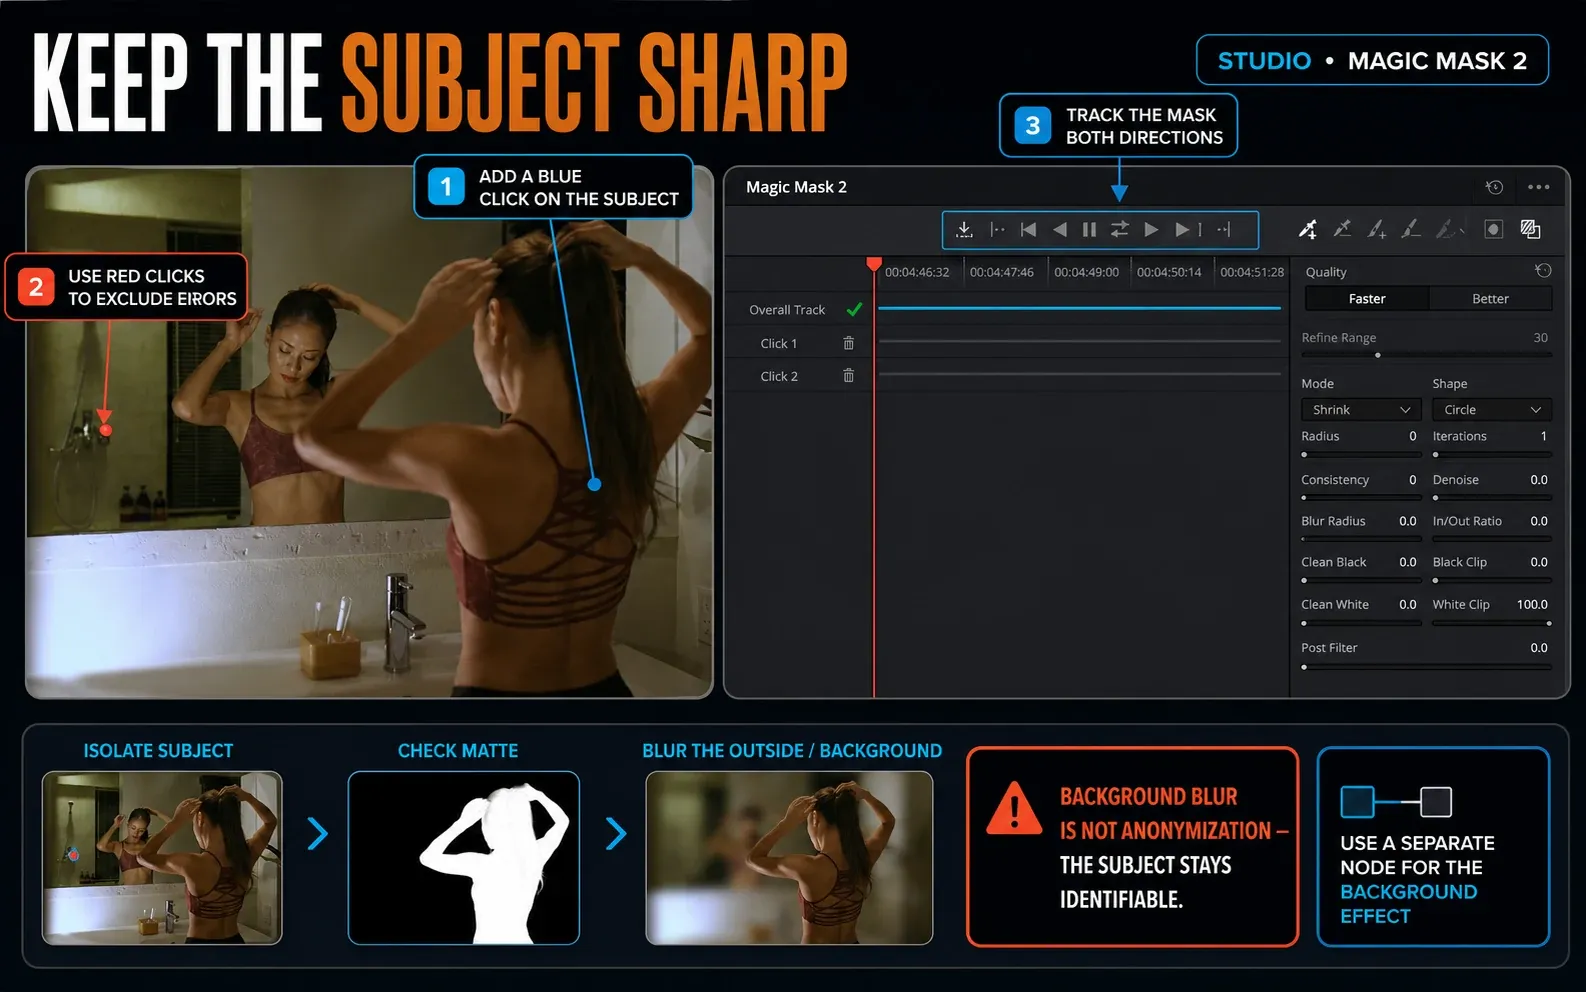
- Add a new Color node and open Magic Mask 2.
- On a clear reference frame, place an add click inside the subject. Resolve 21 Magic Mask v2 no longer has separate Person and Object modes.
- If the result includes a background object, place a subtract click on that object and verify the entries in the Click List.
- Track forward and backward, then inspect the matte overlay around hair, hands and gaps between limbs.
- Use an Outside node or invert the key so the correction affects the background rather than the selected subject.
- Apply moderate blur first, repair weak matte frames, then increase strength only if the edge remains convincing in motion.
The full Resolve 21 Magic Mask guide explains click tracking, first-failure repair and Render in Place. Magic Mask is best when the decision is “subject sharp, everything else softer.” It isn't the privacy route while that same subject remains sharp.
Resolve Studio: Depth Map and Lens Blur
Use Depth Map when the effect should vary across more than two depth regions. The depth matte estimates perceived distance, which can separate foreground, subject and far background more naturally than one outside mask. Inspect hair, glass, foliage, motion blur and overlapping objects because inferred depth can be wrong or unstable.
Lens Blur is a Studio-only Resolve FX simulation of optical lens blur. It can create more lens-like bokeh than the basic Blur palette, but it still depends on a sound isolation or depth decision. It doesn't recover real optical depth data that was never captured.
Background Blur in Resolve Free
Resolve Free can blur the outside of a custom Power Window. For a locked-off interview or a subject with a simple silhouette, draw a Curve window around the person, soften and track it, then add an Outside node to apply the blur to the inverse area.
The manual documents Option+O on macOS for Add Outside Node; the menu command is also available by right-clicking the source node.
Hair, moving hands and frequent occlusions require a maintained matte. In Fusion, animate Polygon or B-spline masks and use point or planar tracking where the motion supports it. The Fusion rotoscoping guide covers the manual route without pretending that one automatic selection can solve every frame.
When an Adjustment Clip Helps
An adjustment clip can carry a full-frame blur across several timeline clips, but it does not isolate or track a moving face by itself. It also affects every visible layer beneath it unless the effect is constrained.
Use a clip-level Color node for identity protection; use an adjustment clip only when its timeline coverage is intentional.
The adjustment clip guide explains stacking and scope. A timeline convenience should never make it harder to prove that every protected frame is covered.
Resolve Free vs Studio for Blur Work
- Tracked Power Window face blur: Free and Studio.
- Color-page Blur palette and Outside nodes: Free and Studio.
- Mosaic Blur: listed in the current manual without a Studio-only mark.
- Fusion Polygon/B-spline masks with point and planar tracking: core Free and Studio workflow.
- Magic Mask 2: Studio only.
- Depth Map and Lens Blur: Studio only.
Studio can shorten difficult isolation work; it doesn't replace quality control. For a conventional face blur, the Power Window route remains the clearest path because its coverage and tracking can be inspected directly.
Fix Common Blur Problems
The blur drifts off the face
Return to the first incorrect frame, reposition the window and analyze a shorter section. If rotation or perspective dimensions introduce motion the shot doesn't contain, disable those dimensions and retrack the segment.
The window edge is obvious
Slightly enlarge the window and increase softness. Judge the boundary after the main correction because contrast and sharpening can reveal an edge that looked acceptable earlier in the node tree.
The blur disappears during an occlusion
Keyframe through the covered frames and restart tracking from a clean frame after the face returns. Do not allow the tracker to jump onto the object crossing in front.
The face is still recognizable
Increase the protected area and blur strength, then check profile frames, reflections and the final output size. Hiding only the eyes or center of the face leaves other identifying structure visible.
The background matte flickers around hair
Repair weak frames, refine the edge and avoid an unnecessarily extreme blur that exaggerates every matte error. Depth discontinuities, fine hair and motion blur can expose a poor selection even when one paused frame looks clean.
Playback becomes too slow
Cache or render the effect for review, especially with several Studio masks or depth effects. Don't approve privacy coverage from skipped playback frames; inspect a full-quality render.
Final Privacy Review Before Export
- Watch once while looking only at mask boundaries and every entrance, exit and occlusion.
- Watch again while actively looking for identifying detail: profile, reflection, screen, plate, badge, tattoo, clothing and location.
- Check the first and last frame of every protected section at final delivery resolution.
- Listen for names or a distinctive voice and inspect metadata when anonymity matters.
- Keep the protected master separate from unblurred source and confirm the correct file is delivered.
For the wider node, qualifier and tracking context, continue with the DaVinci Resolve color-grading hub. The Resolve learning roadmap connects this skill to Edit, Color and Fusion workflows without duplicating the same blur intent.
DaVinci Resolve Blur FAQ
Can I blur a face in DaVinci Resolve Free?
Yes. Add a Color-page node, draw and track a Power Window, then increase Blur Radius or use the available Mosaic Blur effect. Magic Mask isn't required for a conventional moving-face blur.
How do I blur the background but keep a person sharp?
Isolate the full person, invert the key or add an Outside node, then apply blur to the background. A custom tracked mask works in Free; Magic Mask, Depth Map and Lens Blur are Studio options.
Is Magic Mask available in Resolve Free?
No. Magic Mask v2 is Studio-only in the current Resolve 21 Reference Manual. Power Windows and manual Fusion masks provide the Free alternatives.
Should I use soft blur or mosaic for anonymization?
Either can remove picture detail when the protected area, strength and track hold at final resolution. Soft blur is quieter; mosaic makes the treatment obvious. Neither guarantees anonymity, so check every frame and other contextual clues.
Why does the Power Window stop following the face?
Occlusion, fast movement, motion blur, leaving frame or a weak reference frame can break the analysis. Repair from the first failed frame and use manual keyframes through difficult sections.
Can I track more than one face?
Yes. Use separate nodes and windows so each moving face has independent tracking and blur strength. That makes crossings and failed segments easier to repair.
Does strong blur guarantee anonymity?
No. A missed frame, reflection, voice, location, clothing or metadata can still identify someone. Review the complete final render rather than only the mask overlay.
Is Lens Blur available in Resolve Free?
No. Lens Blur is marked Studio-only in the current Resolve 21 manual. The Color-page Blur palette remains the core Free route for softening a masked region.
