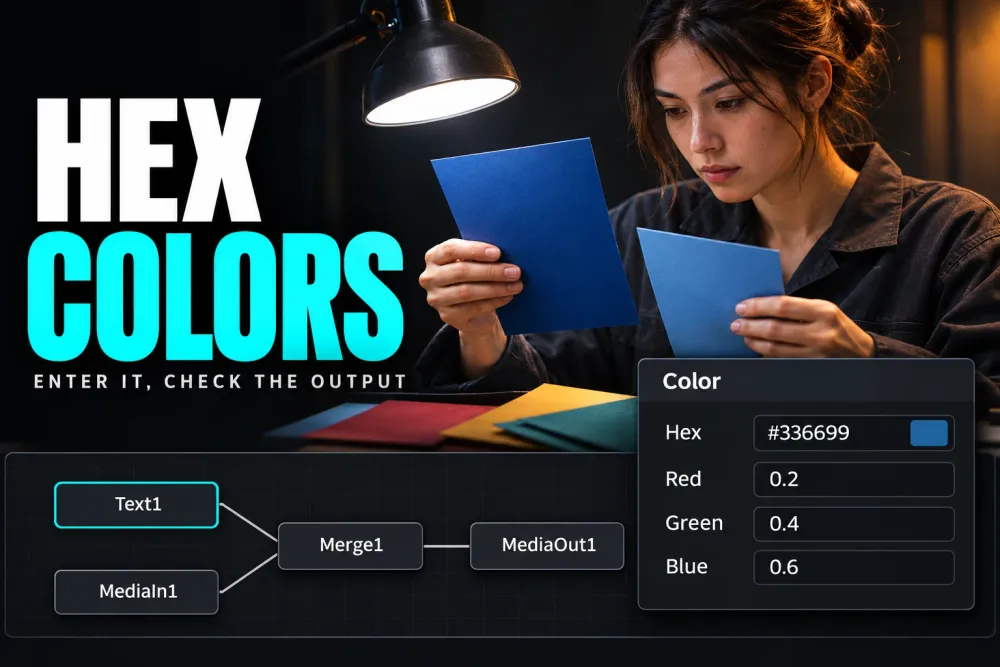
For a Fusion Background or Text+ color, open its color controls and enter the HEX value in the color dialog if it provides a HEX field. If it doesn't, convert the three HEX pairs to RGB and enter those channel values. When the code is correct but the picture looks wrong, check the color space and Fusion's color-managed pipeline before changing the brand color.
I'd keep the supplied color specification intact and fix its interpretation first. Changing the code until a title looks right in one viewer can leave it wrong in the final export or the next project.
Enter a HEX color in Background or Text+
For a flat color, select a Background node and open its color controls. For Text+, select the node, open Shading, choose the enabled fill element, normally Element 1, and set its color type to Solid. Change that element's color, rather than an outline or shadow.
Click the color swatch to open the color dialog. Its layout follows the operating system and control being used, so a HEX field isn't in the same place on every setup. If the dialog offers a profile selector, choose the supplied profile before entering the code. Where a HEX field is available, enter the six-digit code. Frame.io's HEX reference workflow shows this route for Resolve color generators.
Without a HEX field, use the RGB values directly. In #RRGGBB, the pairs represent red, green and blue. For example, #336699 means R 51, G 102, B 153. In Fusion fields using the 0–1 channel scale, those become 0.2, 0.4, 0.6, because each 8-bit value is divided by 255.
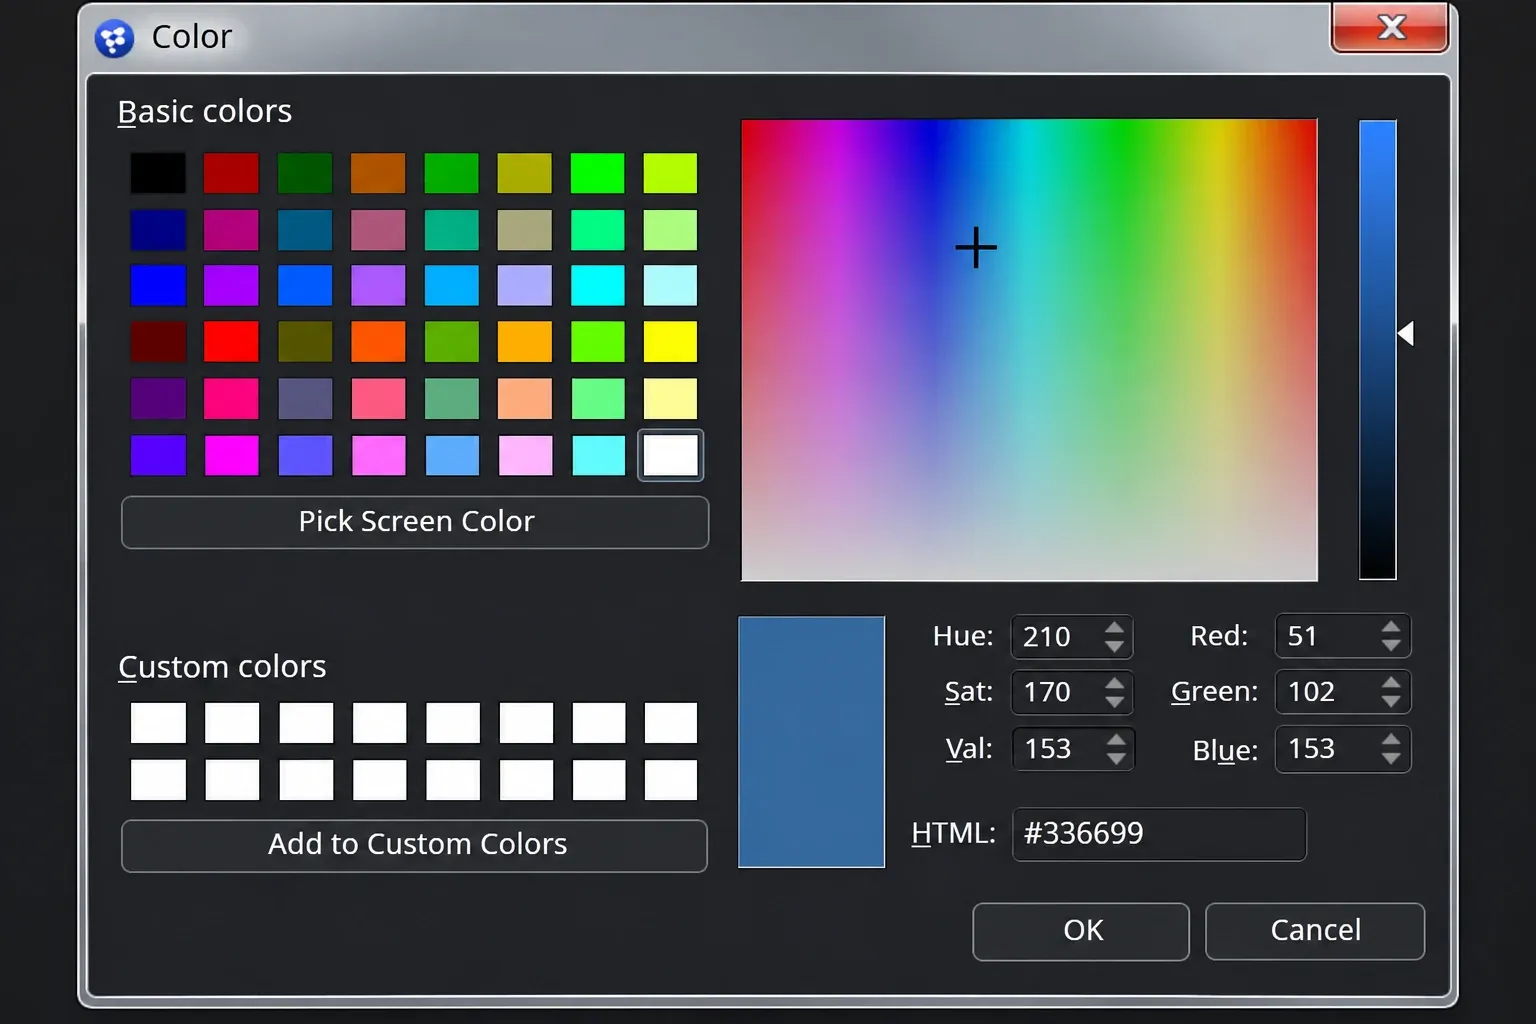
The CSS HEX specification defines these web colors in sRGB. A client's bare six-digit number still needs a color-space specification: a profile-tagged design file or brand guideline takes priority over an assumption about the numbers.
Separate a wrong code from a wrong transform
| What you see | Check first |
|---|---|
| The wrong part of a title changes | Text+ Shading element and Solid/Gradient/Image color type |
| The RGB values differ immediately after entry | Hex pair conversion, channel scale and the color dialog's selected profile |
| A generated color changes when RCM is enabled | The generated branch's color space versus Fusion's linear working space |
| Fusion and the timeline look different | Viewer LUT, downstream grade and output transform |
| The title has dark or colored fringes | Alpha interpretation and color conversion at semitransparent edges |
| The export matches Resolve but differs in a browser | The export's color tags, display management and reference viewing conditions |
A screenshot sampled from another app is a poor starting reference. Its pixels have already passed through that app's display path. Use the original profile-tagged asset or the specified RGB values and color space.
Why RCM can change a Fusion-generated color
With DaVinci YRGB Color Managed enabled, Resolve converts MediaIn images to linear gamma for Fusion and converts MediaOut back to the project's color-processing space. Blackmagic explains this in Managing Color for Visual Effects. A Background or Text+ node generates new RGB values inside that composition; it isn't an imported image with a Media Pool input-color-space assignment.
Typing encoded sRGB values into a generator doesn't make them linear working-space values. In a wide-gamut project, both the primaries and the transfer function matter. Dividing the code's channels by 255 handles neither conversion.
I'd leave an established project's color management in place and convert the generated graphic into the space the composition expects. Disabling RCM for the whole project changes how the footage is handled as well.
Convert an sRGB graphic into a managed Fusion composition
First read Project Settings > Color Management. Identify the project's color science, working color space and output. The example below is for an sRGB brand color in an RCM project using DaVinci Wide Gamut primaries, with Fusion working in linear light. It isn't a recipe for an unmanaged or ACES project.
For a transparent title, check whether its RGB is premultiplied by alpha. A nonlinear conversion needs straight RGB at the conversion stage and the correct premultiplication afterward. Use the node's alpha-aware controls where provided, or Alpha Divide → color conversion → Alpha Multiply for a premultiplied branch. Avoid applying premultiplication twice; it can create dark edges. Inspect the antialiased edges over both dark and light backgrounds before accepting it.
- Enter the supplied sRGB color in the Background or Text+ generator. For the controlled example, enter its RGB channel values directly using the matching numeric scale.
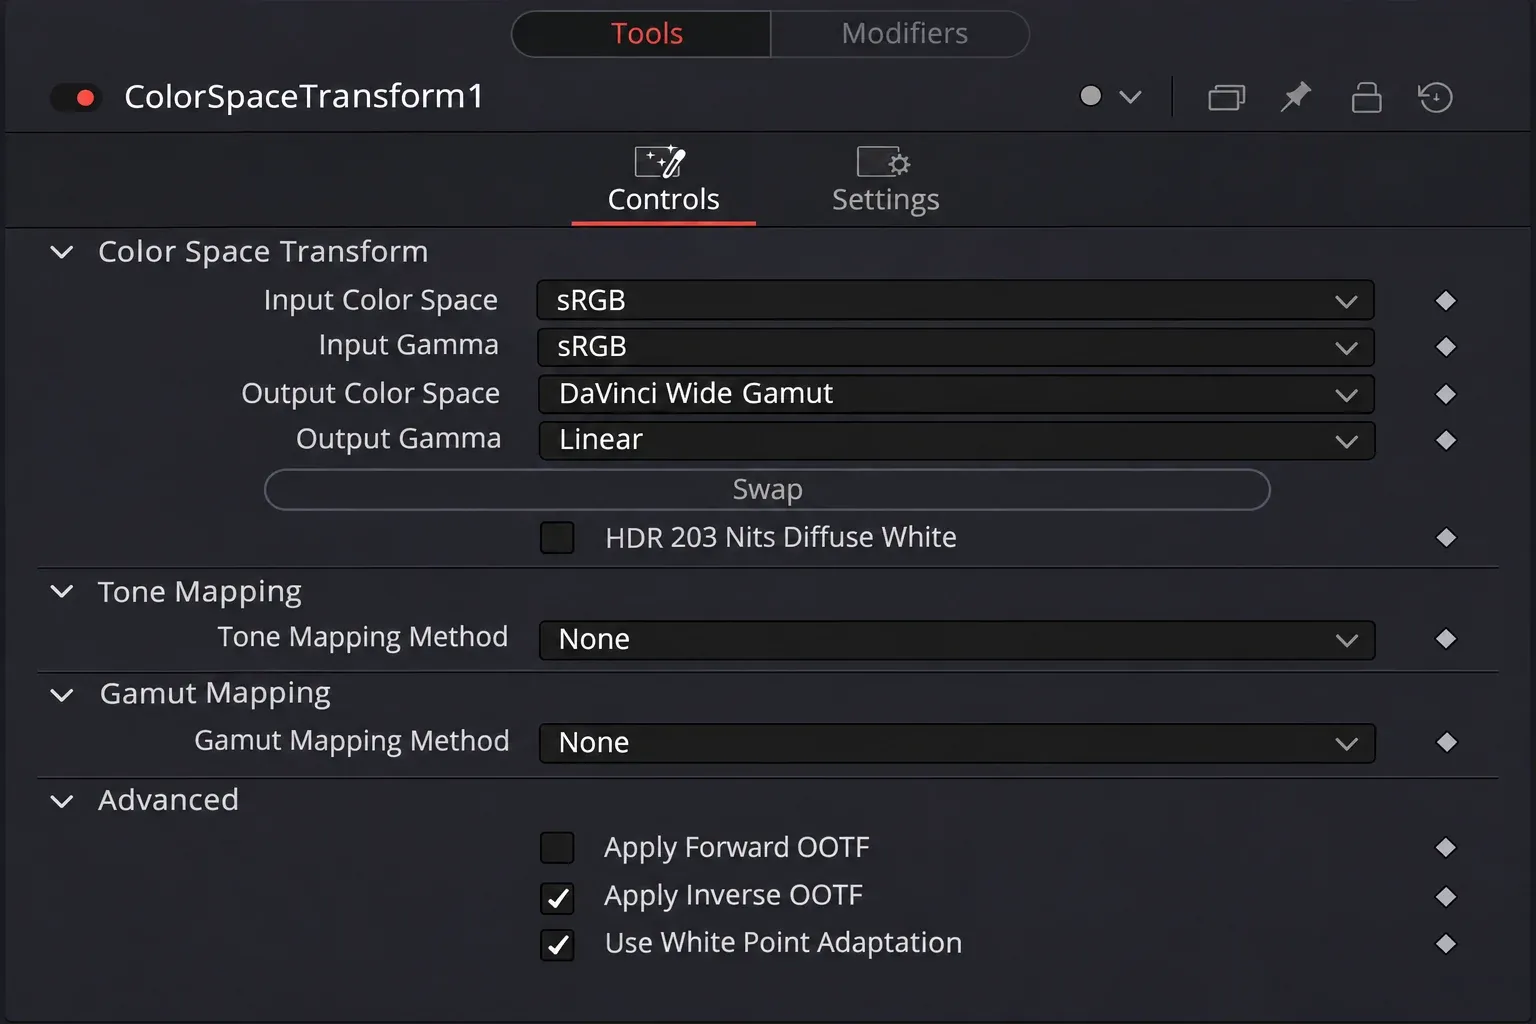
- Add a Color Space Transform after that generator and before its merge into the footage. Set Input Color Space: sRGB and Input Gamma: sRGB.
- Set Output Color Space: DaVinci Wide Gamut and Output Gamma: Linear. Fusion's working gamma is linear even when the timeline uses DaVinci Intermediate.
- For this display-referred sRGB-to-scene-referred route, enable Apply Inverse OOTF. Set the transform's Tone Mapping Method and Gamut Mapping Method to None so this node doesn't add a separate creative compression.
- Merge the converted graphic with the existing managed footage, then send that composite to MediaOut. Keep the viewer's managed display transform enabled for judging the picture.
Chadwick Shoults demonstrates the generated-color conversion in his color-managed brand colors tutorial. Blackmagic's Color Space Transform controls define the four space/gamma settings and Inverse OOTF's display-to-scene role. If the project's working primaries differ, use those primaries as the destination; don't reuse a DWG swatch unchanged.
Handle unmanaged projects and ACES separately
In an unmanaged DaVinci YRGB project, Fusion doesn't acquire the RCM route above merely because a timeline color space is selected. Map the actual source, compositing and output spaces before adding a transform. A simple unconverted graphic and a manually linearized composite need different node trees.
With ACES, use the appropriate ACES Transform or configured OCIO workflow. Blackmagic specifically recommends the ACES Transform for an ACES pipeline instead of using the CST node's colorimetric ACES settings. Shoults' example uses sRGB (Texture) → ACEScg; confirm that route against the project's ACES configuration and output transform before reusing it.
The RCM and CST workflow guide covers the project-level choice. The ACES versus RCM comparison explains when that choice changes the rest of the pipeline.
Verify the color through the delivery path
- Bring in a profile-tagged reference swatch and assign its actual input color space. Keep an untouched copy.
- Compare the reference with an opaque interior area of the generated graphic through the same output transform and viewing setup. Don't sample an antialiased text edge.
- Check for a grade, LUT or extra transform after the graphic. A viewer LUT changes the preview; it doesn't bake a correction into the node output.
- Export a short sample using the intended color tags and inspect it in the intended delivery environment. Separate an export mismatch from a difference confined to another viewer.
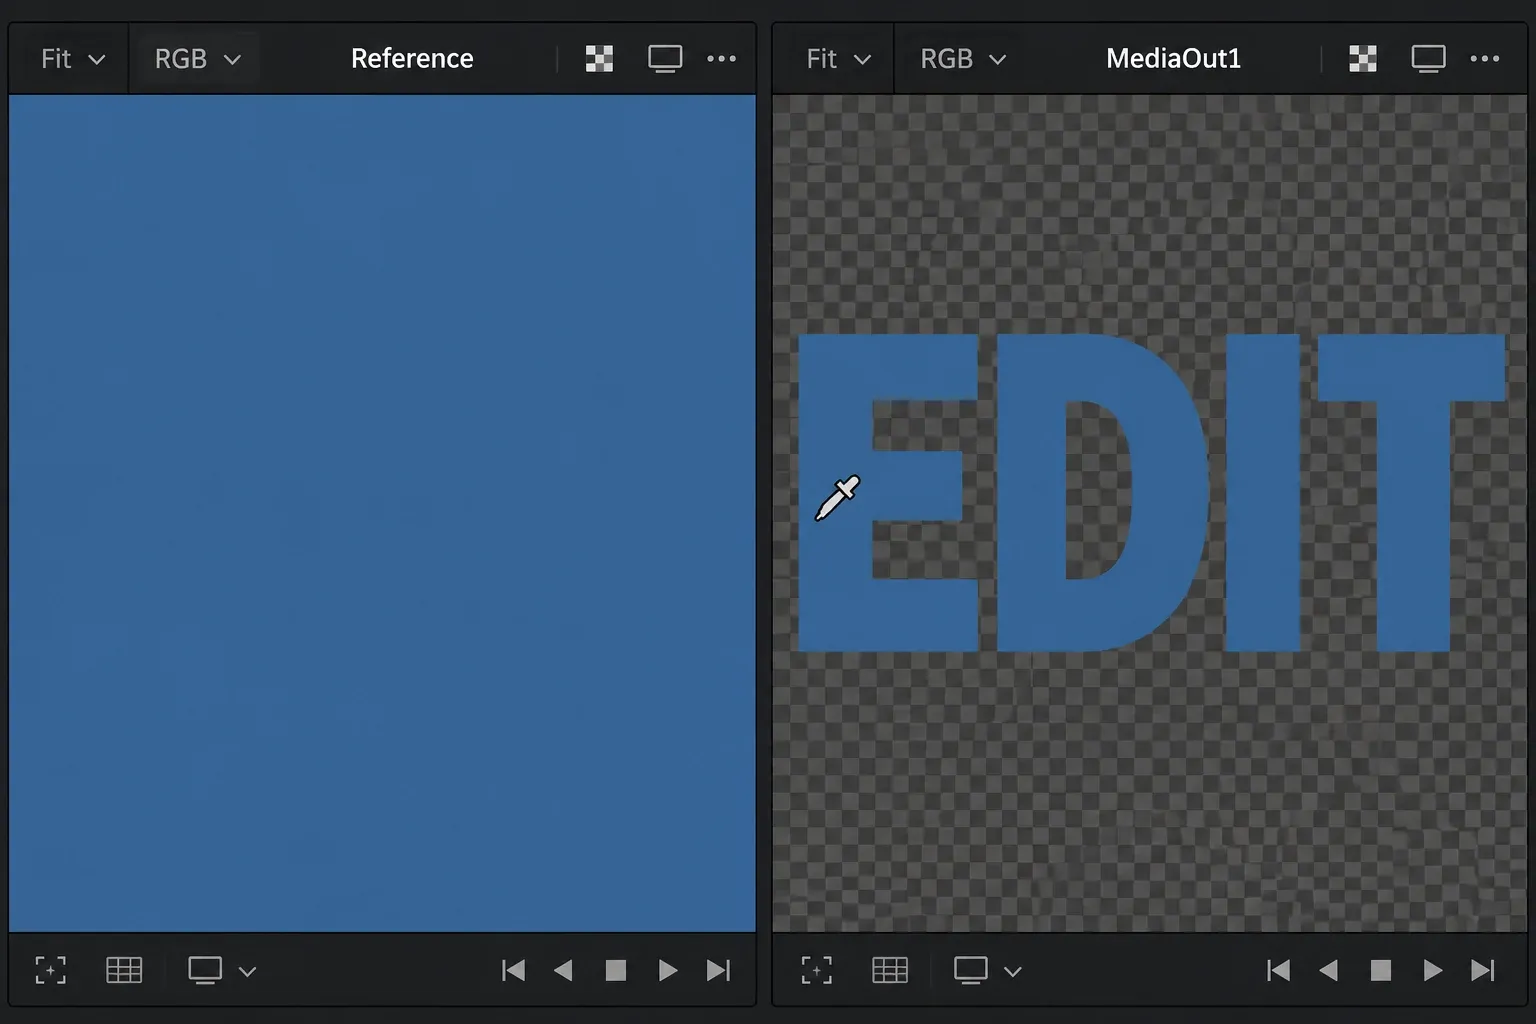
Don't require an sRGB web code and a Rec.709 video sample to retain identical RGB numbers after a color-space conversion. They use different encodings. The deliverable's agreed color space and viewing conditions determine the meaningful comparison; HDR and out-of-gamut brand colors need their own approval.