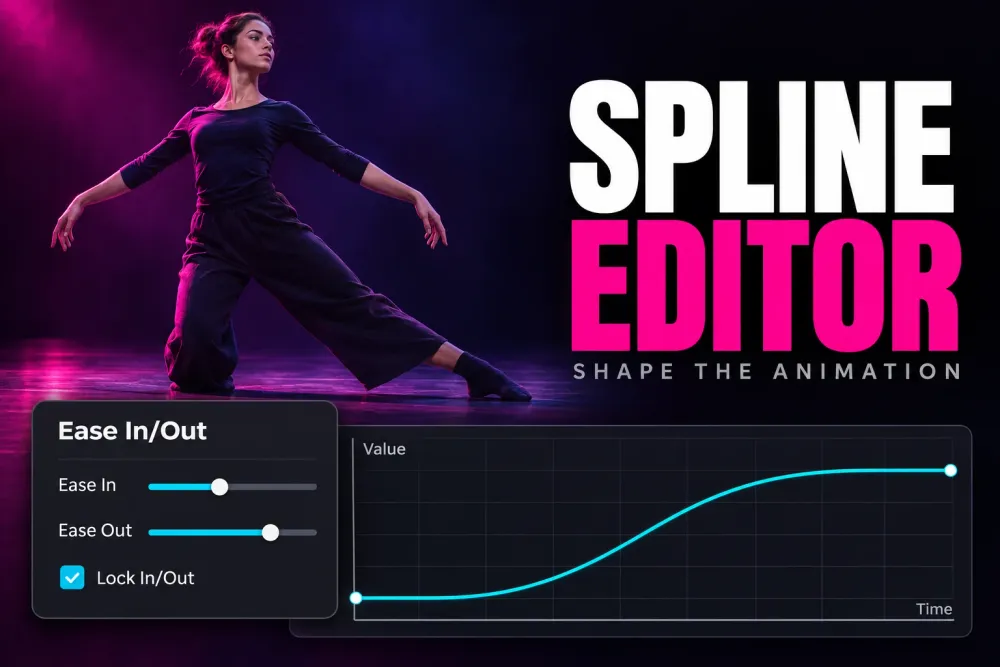
Open the Fusion page, click Spline, enable the animated parameter in the list on the left, then select its keyframes and press Shift+S to smooth them. Use Zoom to Fit if the curve is outside the graph. I'd start with one parameter because a screen full of overlapping curves makes a simple easing change harder to judge.
The Spline Editor changes how a value moves between keyframes. It works in Resolve Free, Resolve Studio and the standalone Fusion application. This walkthrough uses a title's Size parameter on the Fusion page; the same curve controls apply to other animated node parameters.
Show the right curve before editing it
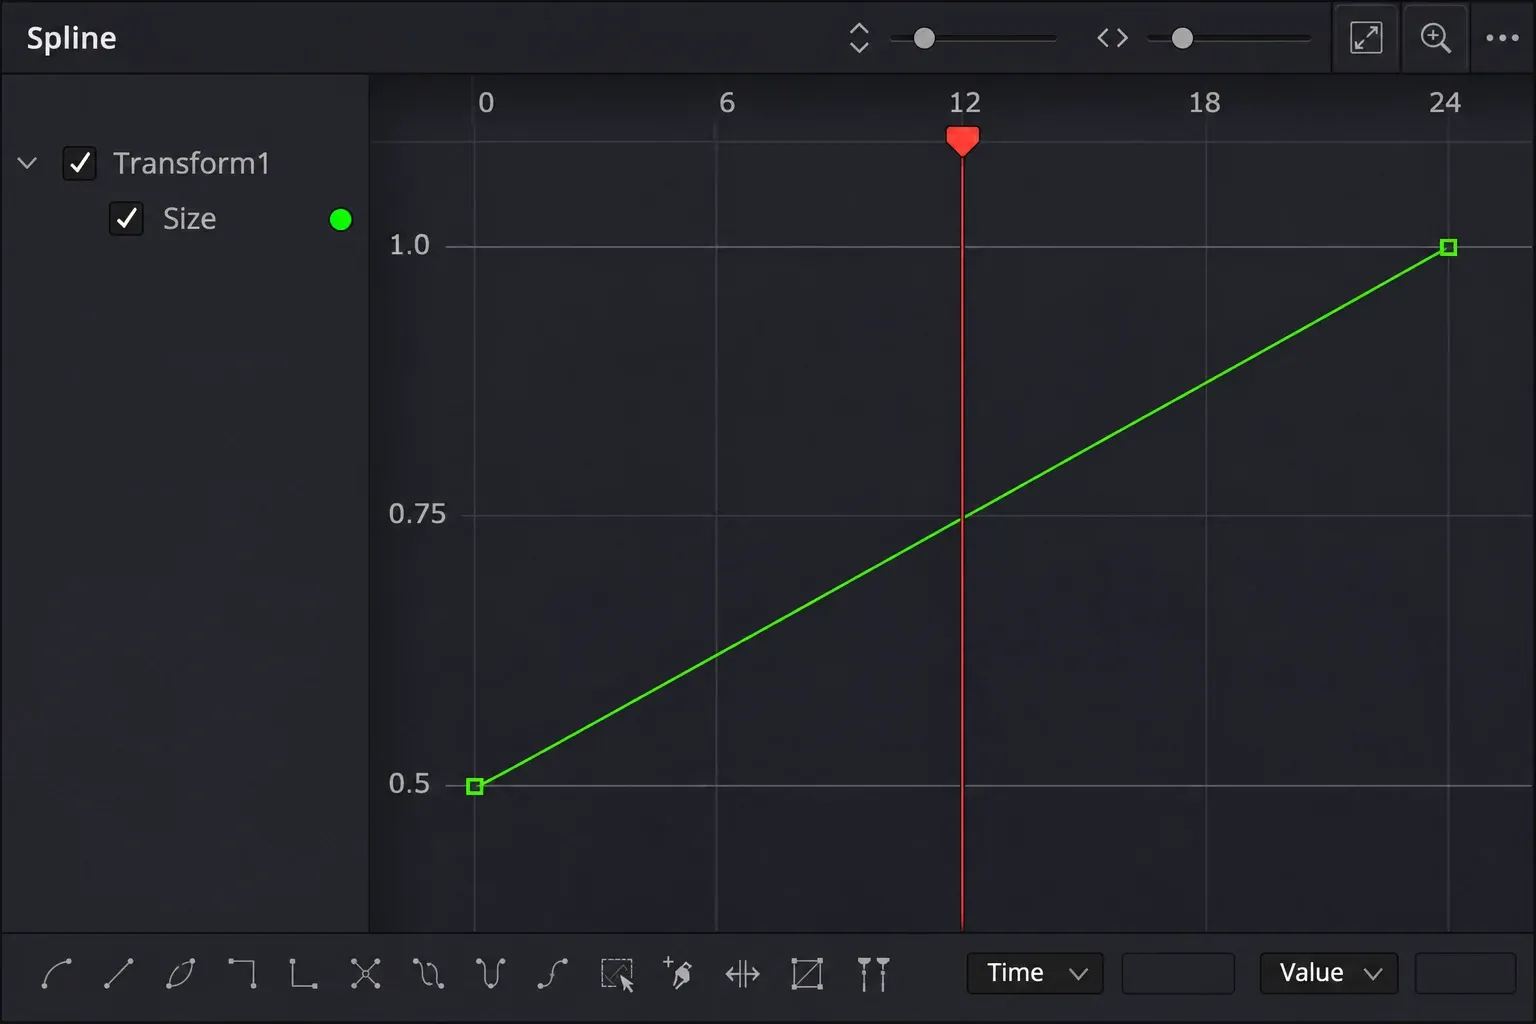
The Spline button is in the Fusion workspace toolbar. Opening the panel doesn't automatically display every animation. Expand the node in its parameter list and check the box beside the animated control, such as Transform1 > Size. Then click Zoom to Fit.
Blackmagic's Fusion manual's Spline Editor overview separates those jobs: the list chooses visible curves, the graph edits them, and the framing controls bring them into view. Unchecking a curve hides it; it doesn't remove its animation.
Build a two-keyframe easing example
Use a separate Fusion Composition for this exercise so the original shot stays intact. On the Edit page, drag Fusion Composition from the Effects Library's Effects category onto the timeline, give it at least 25 frames, and open it on the Fusion page.
- Add a Text+ node and enter a short title. Add a Transform node and connect Text1 → Transform1 → MediaOut1.
- Select Transform1. At composition frame 0, set Size to 0.5 and click its animation diamond. If the composition starts on a different frame, use that first frame instead.
- Move forward 24 frames and set Size to 1.0. With animation enabled, this creates the second keyframe.
- Open Spline, enable Transform1's Size curve and use Zoom to Fit. Drag a selection box around the two points in the graph.
- Press Shift+S, or click the graph toolbar's Smooth button. Select a point to expose its Bézier handles, then adjust the handle lengths to change the easing.
- View MediaOut and play the composition. Check the start, the middle and the final frame; the title should reach the intended final size without an unwanted bounce.
Those sizes and frame positions are an example, not a required animation preset. The move spans 24 frame intervals; its duration in seconds follows the timeline frame rate. For a slower move, spread the keyframes farther apart. To keep the duration and change only the acceleration, leave the keyframe positions in place and adjust the handles.
Read the value graph correctly
The horizontal axis is composition time. The vertical axis is the selected parameter's value. For Size, the graph shows scale changing over time; it isn't a speed graph. That curve controls Size alone, so it doesn't describe a separate position animation.
A straight segment gives a constant rate of change for that parameter. A flatter section changes more slowly, while a steeper section changes faster. A curve that rises above the final Size value creates an overshoot before settling back. That can suit a springy title, but it can also produce an accidental pulse.
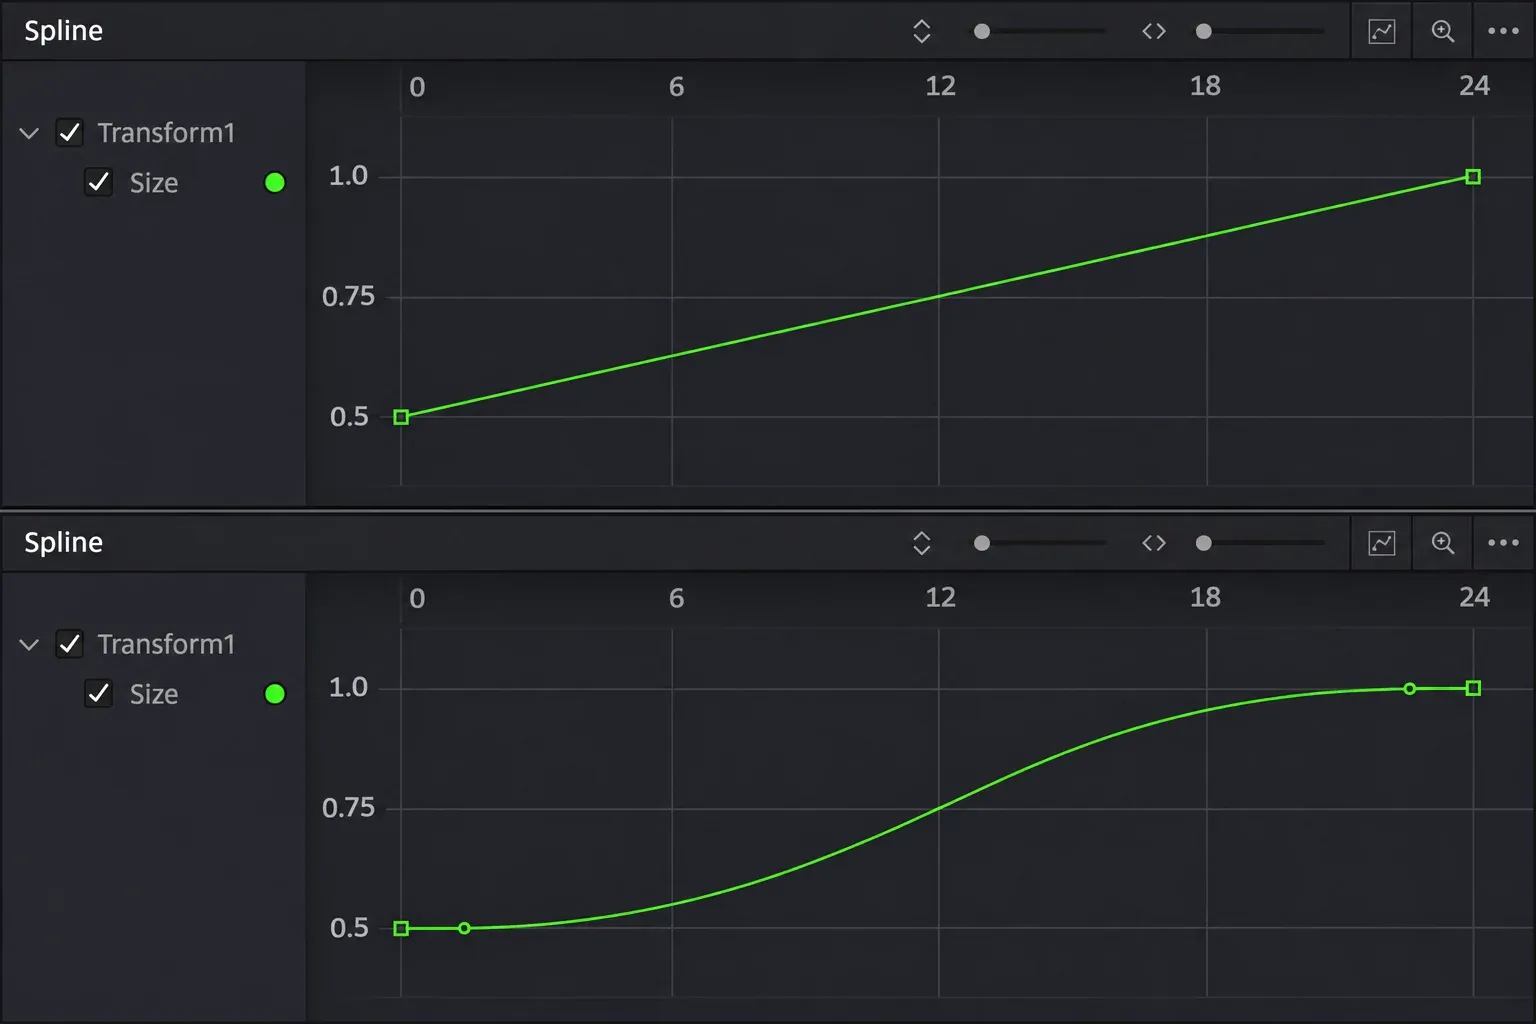
I'd keep the endpoint handles horizontal for a simple start-and-stop scale move, then watch the title at playback speed. The graph makes the cause visible; the moving image decides whether the timing feels right.
Use Smooth, Linear and the Ease controls deliberately
| Control | What it changes | Useful for |
|---|---|---|
| Smooth, Shift+S | Creates smoothly interpolating Bézier curves for selected keys | A softer start, arrival or transition through a key |
| Linear, Shift+L | Makes selected keyframe segments linear | A constant parameter change or a clean baseline before reshaping |
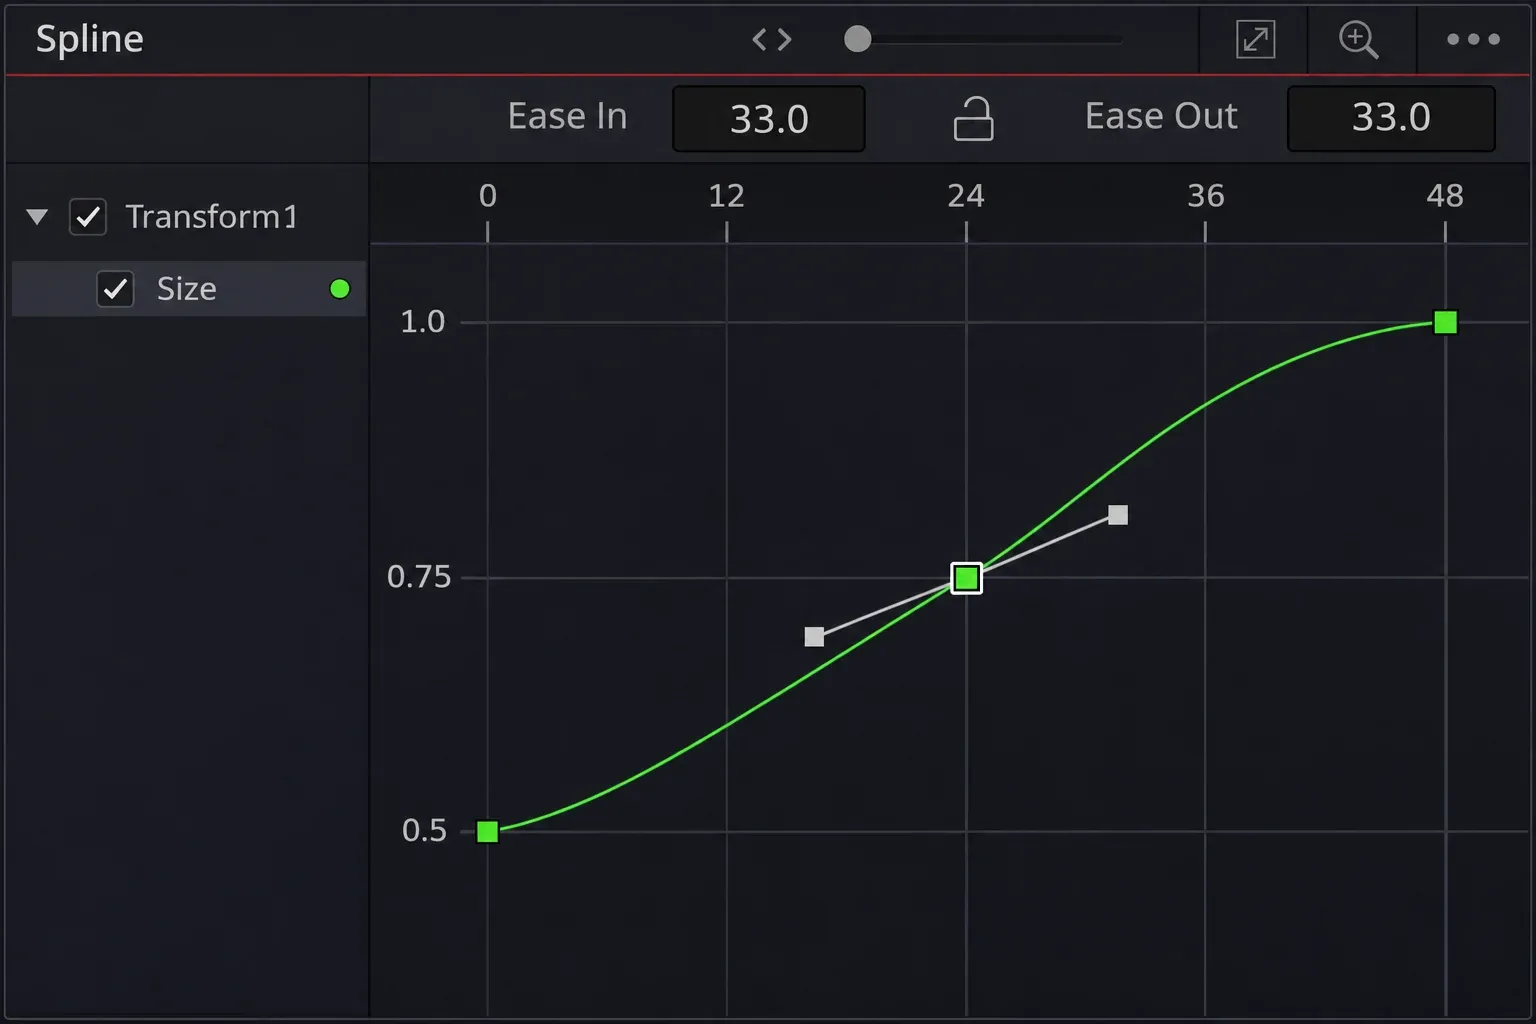
| Ease In/Out, T | Adjusts the lengths of selected keys' direction handles | More precise control over the incoming and outgoing curve |
Blackmagic documents these controls in Animating in Fusion's Spline Editor. To open the Ease controls, select a graph point and press T, or right-click inside the graph and choose Edit > Ease In/Out. Lock In/Out links the two handle adjustments.
Ease values adjust handle lengths. They're not a universal “make this professional” percentage, and applying the same number to every animation ignores its duration and distance. My default is to establish the keyframe timing first, then tune the arrival.
Fix a blank panel or a curve that won't change
- Confirm the page and node. A Transform animated on the Edit page doesn't automatically become a Transform node animation inside Fusion. Open the composition that owns the animation.
- Check that the parameter has keyframes. A static value has no two-keyframe transition to ease.
- Enable the curve in the list. Expand the correct node and check the parameter. If Show Only Selected Tool is enabled in the Spline options, select that node or turn the filter off.
- Use Zoom to Fit. An enabled curve can still be outside the current graph view.
- Select points inside the graph. Highlighting a node or enabling its curve isn't the same as selecting its keyframes. Give the graph keyboard focus before using Shift+S, Shift+L or T.
Don't press Delete to hide a busy curve. Delete or Backspace removes selected control points. Use the checkbox when the animation should stay in the composition.
Loop only the part that should repeat
Select the keyframes that define the pattern, then choose Set Loop to repeat it. Set Ping Pong alternates the reversed and forward pattern; Set Relative repeats while continuing the selected values' upward or downward trend. Check the seam and the composition's end after enabling a loop.
For a title that grows and shrinks, Ping Pong can be the useful starting point. A constant spin or pulsing opacity needs its own endpoint check; repeating keys doesn't guarantee an invisible join.
For drawing a line onto the screen, continue with the Fusion line animation workflow. For the first node connections and viewer controls, use the Fusion beginner tutorial. The curve editor refines those animations after their nodes and keyframes are in place.