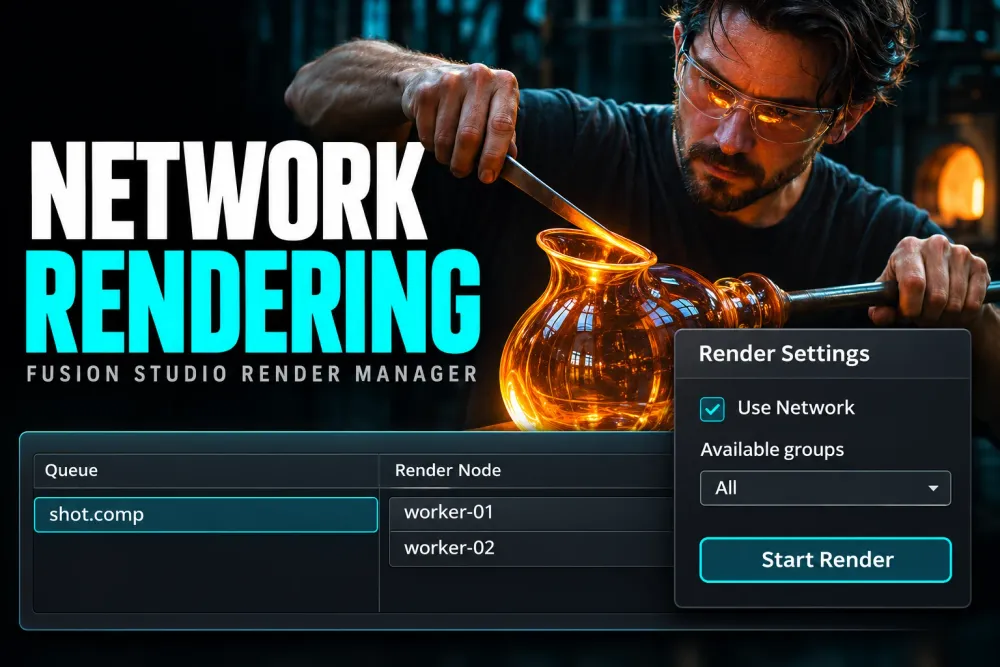
In standalone Fusion Studio, open File > Render Manager to queue compositions and distribute their frames to render nodes on your network. Configure a Render Master, give every worker access to the composition, media and output folder, then submit an image-sequence render with Use Network enabled. I'd prove the setup with a short range on one worker before adding the rest, because a discovered computer can still fail to read the shot.
This workflow renders Fusion compositions through Saver nodes. For a graded Resolve timeline exported on another workstation, use the separate Resolve Remote Rendering workflow.
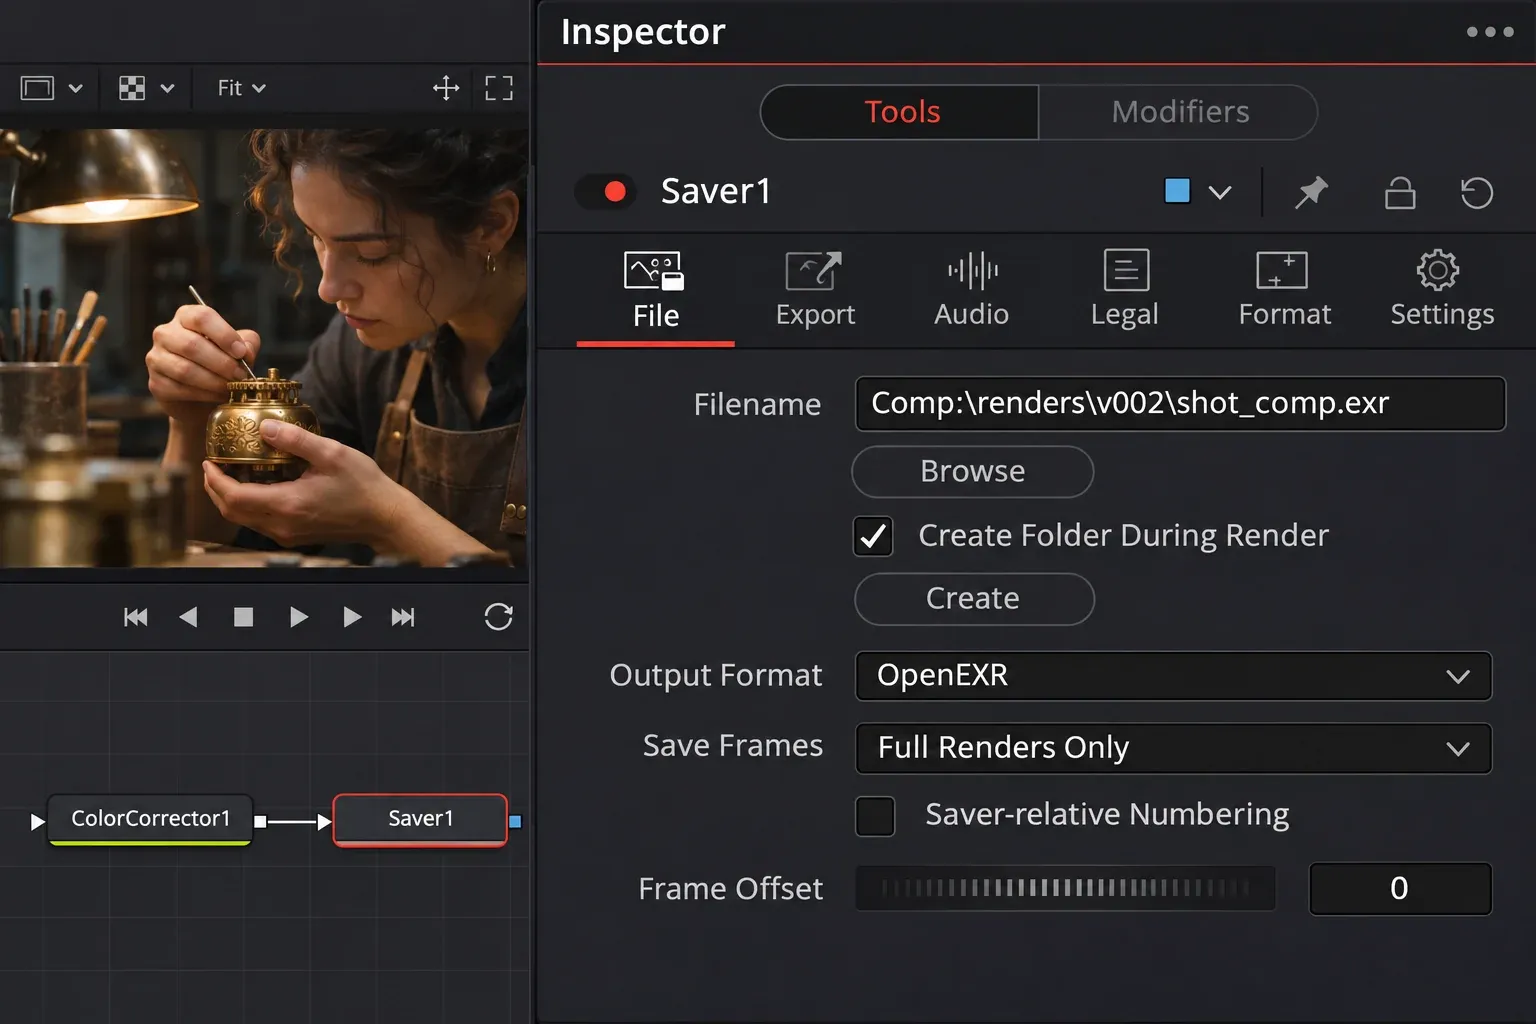
Choose an image-sequence output first
Blackmagic's network rendering instructions support distributed rendering to image sequences such as EXR, TIFF and DPX. They exclude QuickTime, H.264, ProRes and MXF movie outputs from this distributed route.
Set the Saver to the sequence format, channels, bit depth and compression required by the handoff. Render the sequence first, then assemble or encode the movie in the receiving application. A Render Manager queue doesn't turn an unsupported movie Saver into a distributed export.
Prepare the computers and shared files
The Render Master manages the queue and assigns frames. Render nodes process those frames. Blackmagic lists unlimited render nodes and Render Manager support for Fusion Studio; those worker licenses aren't additional interactive editing seats.
The Render Node installer is included in the Fusion Studio download archive, but installing Fusion Studio doesn't install the worker software automatically. Install and run the Render Node application on each intended worker. Keep the Fusion versions, required fonts and third-party plugins aligned, including any plugin licensing required on workers.
For the documented local setup, put the master and workers on the same network subnet. Use shared storage that every participating computer can read and write. A NAS or a shared drive can serve that role; a Blackmagic Cloud Pod isn't a requirement.
- Save the .comp file on storage accessible to the workers.
- Point each Loader at media the workers can resolve.
- Point each Saver at a writable output folder, separate from source plates and approved renders.
- Install the same required fonts and plugins on every worker. Check custom Path Maps and macro locations as well.
Start with a new output version folder. Otherwise, a successful test can overwrite files that belong to an approved render.
Make paths work on every worker
A path on the artist's local drive isn't automatically available elsewhere. Blackmagic's relative-path and mapped-drive examples show why the composition itself, its Loader paths and its Saver destinations must all resolve on the render nodes.
The Comp:\ Path Map points to the folder containing the saved composition. For example, Comp:\plates\plate_1001.exr refers to a plates subfolder beside the comp, while Comp:\renders\v002\shot.exr points into a separate render folder there. Create the output folder and verify permissions before submitting.
Relative paths don't mount the storage or grant access. On Windows, shared mapped drives must use the same drive letters on the participating computers. For mixed operating systems, configure and verify the Path Maps on each worker. The .. path segment moves up one folder; it doesn't mean two levels.
Configure the master and allow workers to render
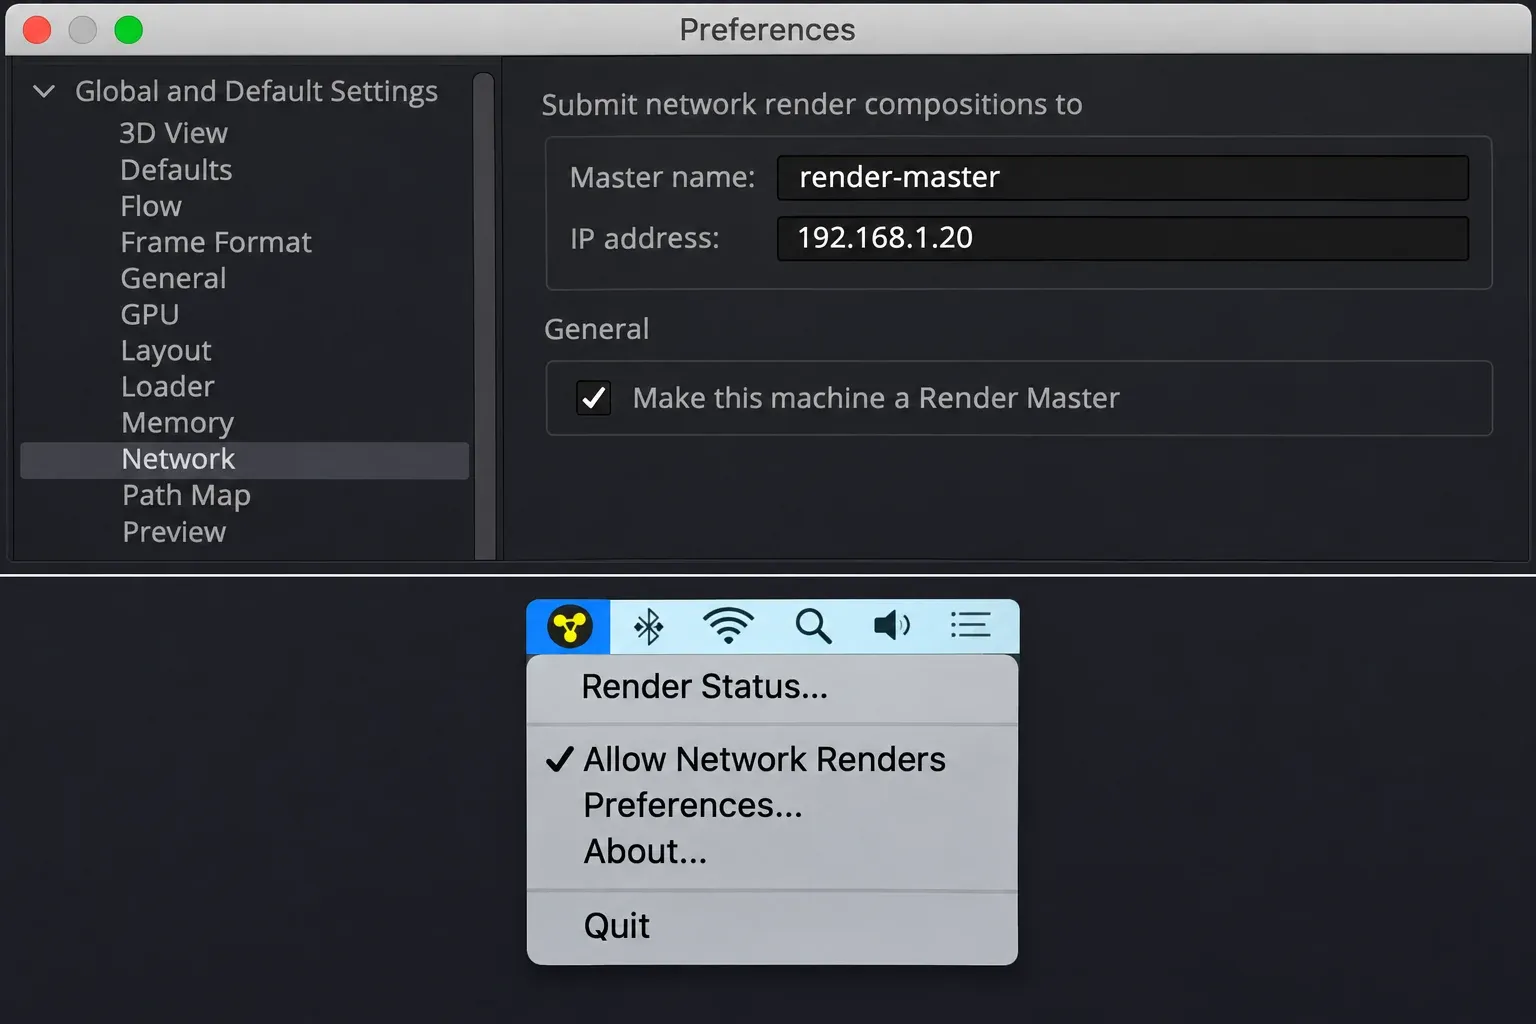
- On the master, open Fusion Studio > Preferences on macOS, or File > Preferences on Windows and Linux.
- Open Global > Network, enter the master's name and IP address, and enable Make This Machine a Render Master.
- If the master should process frames too, enable its option to be used as a render node.
- On a full Fusion Studio worker, enable File > Allow Network Renders. On a Render Node installation, choose Allow Network Renders from its macOS menu-bar icon, Windows notification-area icon, or Linux app-launcher icon.
- Open File > Render Manager on the master. Right-click the Render Node list and choose Scan for Render Nodes, or choose Add Render Node and enter the worker's name or IP address.
The worker application must be running to answer a scan. If a machine doesn't appear, check its subnet, network reachability, application permissions and firewall rules. Adding its IP manually won't repair a missing application or unreadable storage.
Use a working, activated Fusion Studio installation as the starting point. The manual's dongle and Fusion Server instructions describe that licensing arrangement; don't apply every dongle-server step to an activation-key installation.
Submit a short range and inspect the files
- Save the composition. Confirm that the intended Savers are connected, enabled and set to image-sequence output.
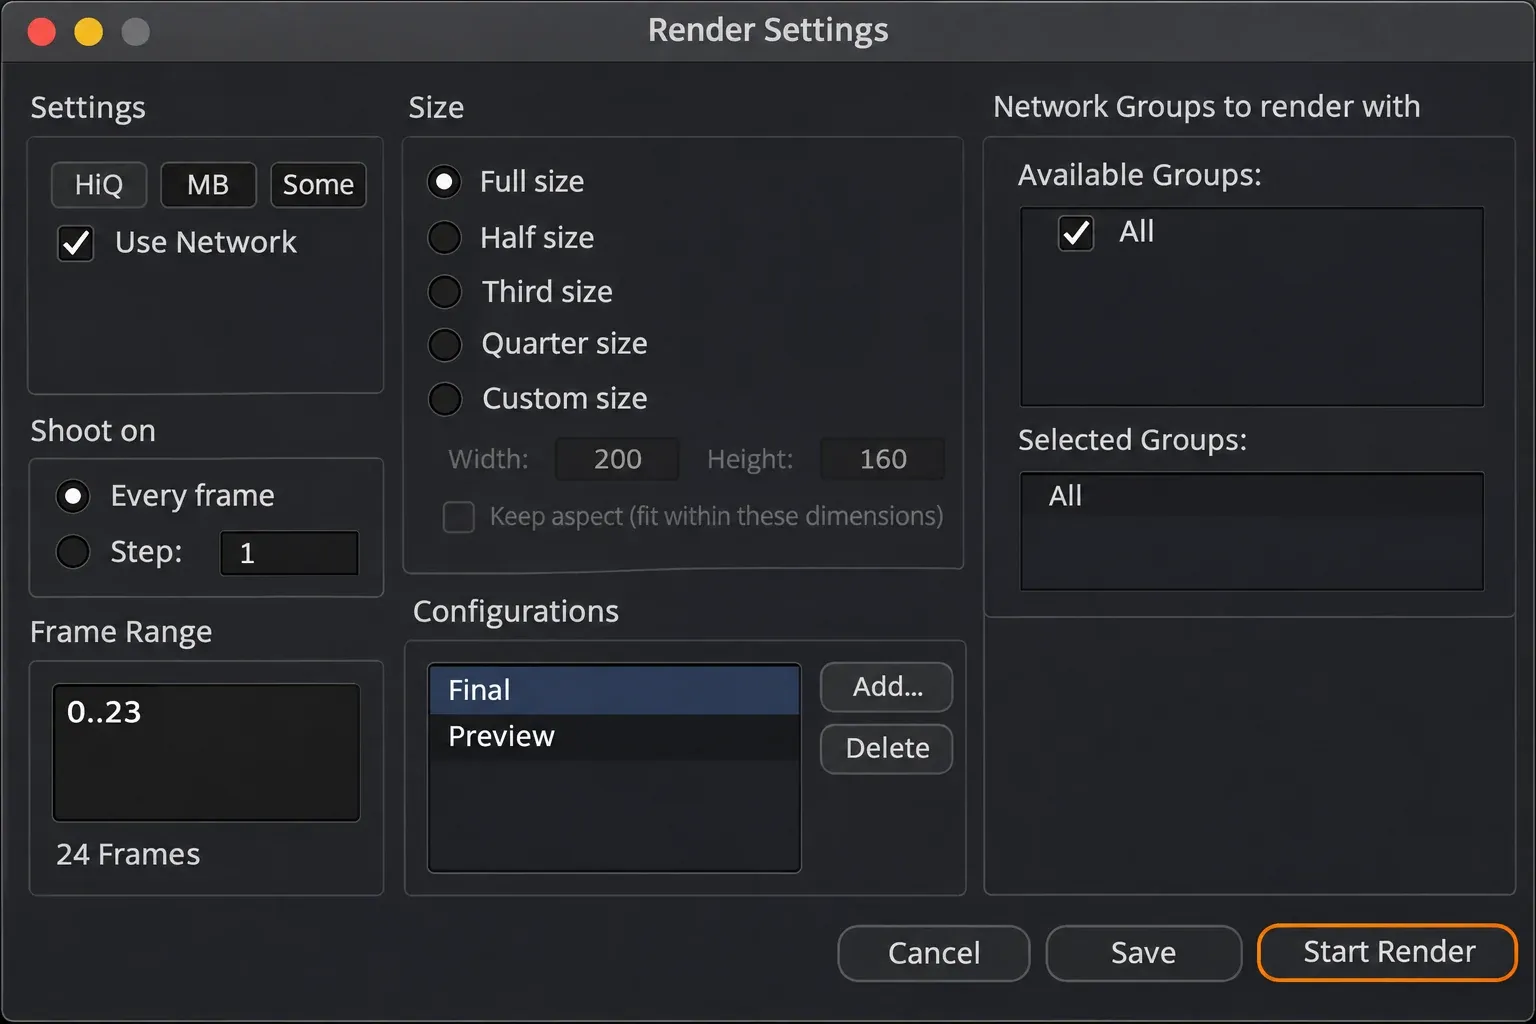
- Click Render to open Render Settings. Choose a short frame range and the intended quality settings.
- Enable Use Network. For the first test, allow just the intended worker to accept network renders. Choose All in the available groups, then click Start Render.
- Watch the Render Manager queue and log. Confirm which worker receives each frame and whether it completes successfully.
- Read the saved sequence back. Check its first and last frames, numbering, dimensions, color interpretation and alpha. Check for gaps in the file numbers; a unit-step range from frame 0 through 23 should contain 24 files. Repeat the short test with the other workers before sending the full range.
The initial single-worker check isolates file access and plugin problems. My next check would compare the same source frames rendered by different workers, because a substituted font or mismatched plugin can produce a visible change even when the queue completes.
Manage queued comps and rerenders
Use Add Comp in Render Manager to queue saved compositions, or drag a .comp file into its queue list. Drag entries to change their order. Node groups let a comp use a suitable subset of workers, such as machines with the required plugin or enough memory.
A comp marked Done doesn't render again merely because it moves lower in the queue. Blackmagic documents Clear Completed frames in the comp's right-click menu for rerendering. Before clearing completion state, save the accepted comp revision and set a new output version so the rerender has an intentional destination.
To inspect assignments and completion messages, open Misc > Show Render Log in Render Manager. Its verbose logging option provides more detail when a worker fails. Start with the first failing frame and its assigned worker instead of repeatedly restarting the entire queue.
Fix the failure at the stage where it occurs
| Symptom | First checks |
|---|---|
| No worker found | Render Node running, Allow Network Renders enabled, same subnet, name/IP reachable and applications permitted through the firewall. |
| Worker connects, then fails to load the comp | Shared comp path and permissions as seen by that worker; a local artist-workstation path won't suffice. |
| Missing plates or failed output | Loader resolution, Saver folder, mounted drive, Path Maps and read/write permissions on the worker. |
| Different text or effects between frames | Fonts, plugin versions, plugin licenses and required assets on the worker assigned to those frames. |
| Done comp won't render again | Completion state, intended output version and Clear Completed frames. |
| More workers give little benefit | Shared-storage throughput, worker memory, startup overhead and whether the comp contains enough costly frames to spread across machines. |
What the published speed example shows
In Chadwick Shoults' January 2025 render-farm demonstration, a spaceship preview composition took 5:57 on one M2 Max and 2:31 with four computers. The shared storage was a Blackmagic Cloud Pod with a Samsung T7 SSD.
| Computers | Published elapsed time | Speed relative to 5:57 |
|---|---|---|
| 1, M2 Max baseline | 5:57 | 1.00× |
| 2 | 3:48 | 1.57× |
| 3 | 2:51 | 2.09× |
| 4 | 2:31 | 2.36× |
The multipliers divide the single-machine 357 seconds by each published time. This is one demonstration using a mixed set described as a 2015 iMac and three Apple Silicon computers, with the complete hardware and software conditions unspecified. It shows useful scaling for that shot, with diminishing gains as more machines join.
I'd compare a representative full-quality range locally and over the network before committing spare computers to a long job. Keep the comp, range, output settings and storage fixed. A farm helps only when its completed frames arrive faster and remain consistent enough to use.